
Demystifying Loaders and Actions in React Router 6 (Part 1)

React Router 6 introduced a wide range of new features that revolutionized data fetching and submission in React applications. Learn how to use loaders and actions to create, update, delete and read users’ data in this two-part series.
React Router 6 introduced a number of new features in version 6.4. The two especially compelling features are Loaders and Actions that streamline data fetching and form submission in React applications. In this series, we will cover how to use Loaders to fetch a list of users and a specific user to populate an edit user form as well as Actions to create, edit and delete users. Besides that, we will dive into new React Router hooks and use them to show UI feedback during form submission.
Project Setup
To follow along with this article, run the commands below.
git clone git@github.com:ThomasFindlay/demystifying-loaders-and-actions-in-react-router-6.git
cd demystifying-loaders-and-actions-in-react-router-6
git checkout start
npm install
npm run dev
These commands will clone the GitHub repository for this project, switch the branch, install libraries and start the dev server. The project has a few libraries already installed. Besides the react-router-dom library (React Router), we also have Zod for validation, Tailwind CSS for styling and json-server, which will serve as a CRUD server.
You can also find an interactive example in the StackBlitz below.
Fetching a List of Users with a React Router Loader
Let’s start by adding the router to the project. We will do it in the main.tsx file, which is the entry point for the application.
main.tsx
import React from "react";
import ReactDOM from "react-dom/client";
import App from "./App.tsx";
import "./index.css";
import { createBrowserRouter, RouterProvider } from "react-router-dom";
import Users from "./views/user/Users.tsx";
import { usersLoader } from "./views/user/Users.loader.ts";

const router = createBrowserRouter([
  {
    path: "/",
    element: <App />,
    children: [
      {
        index: true,
        element: <Users />,
        loader: usersLoader,
      },
    ],
  },
]);

ReactDOM.createRoot(document.getElementById("root") as HTMLElement).render(
  <React.StrictMode>
    <RouterProvider router={router} />
  </React.StrictMode>
);
In the router, we specified that the App component will be rendered when the URL matches the / path. Currently, it has a one child route, which also will be rendered when the path is /, as it has the index property set to true. There will be more routes later on for creating and editing users.
Did you see the loader: usersLoader part in the route definition? That’s how we configure a loader for a specific route. Before React Router resolves and shows the <Users /> element, it will first execute the usersLoader loader and wait for it to finish. A big advantage of loaders is that they decouple data fetching from the component rendering, thus avoiding the waterfall problem.
The waterfall problem refers to the issue that arises when data is fetched synchronously in a sequential manner, causing delays and blocking the execution of subsequent tasks. It can become noticeable when fetching data in a component tree. For instance, if you have a parent component that needs to fetch data before rendering its child components. In such a scenario, the rendering of the entire component tree is blocked until the data is fetched, leading to slower rendering and a less responsive user interface. And that’s where the loaders shine, as the data fetching is done on the route level rather than the component level.
Now, let’s update the App component to render an Outlet, which is responsible for showing a route component that matches the current URL and the Suspense component to display a loader when data is being fetched.
App.tsx
import { Suspense } from "react";
import "./App.css";

import { Outlet } from "react-router-dom";

function App() {
  return (
    <div>
      <Suspense fallback={<div>loading...</div>}>
        <Outlet />
      </Suspense>
    </div>
  );
}

export default App;
In the usersLoader we will fetch a list of users. But before we get to it, let’s create a Zod schema for a user object.
src/schema/user.schema.ts
import { z } from "zod";

export const userSchema = z.object({
  id: z.union([z.string(), z.number()]),
  firstName: z.string(),
  lastName: z.string(),
});

export type User = z.infer<typeof userSchema>;
As you can see, a user object will consist of three properties—id, firstName and lastName. We will use Zod to validate the fetched data and to narrow down the response type.
Next, let’s create the usersLoader method.
src/views/user/Users.loader.ts
import { LoaderFunctionArgs } from "react-router-dom";
import { z } from "zod";
import { userSchema } from "../../schema/user.schema";

export const usersLoader = async ({ params }: LoaderFunctionArgs) => {
  const response = await fetch("http://localhost:4000/users");

  const users = await response.json();

  return {
    users: z.array(userSchema).parse(users),
  };
};

export type UsersLoaderResponse = Awaited<ReturnType<typeof usersLoader>>;
The first thing that happens in the usersLoader is an API request to fetch users data. Further, the userSchema is used to validate the response data. Lastly, an object is returned from the loader.
Note that the API endpoint we target here is the one provided by json-server. The json-server is running on port 4000. You can find and modify the data served by json-server in the server/db.json file. Besides the usersLoader function, we also have the UsersLoaderResponse type. Its type is inherited from the return type of the loader.
It’s time to create the Users component.
src/views/user/Users.tsx
import { useLoaderData, Link } from "react-router-dom";
import { UsersLoaderResponse } from "./Users.loader";

const Users = () => {
  const { users } = useLoaderData() as UsersLoaderResponse;
  return (
    <div className="max-w-sm mx-auto">
      <h1 className="text-semibold text-2xl mb-6">Users</h1>

      <ul className="space-y-2">
        {users.map(user => {
          return (
            <li key={user.id}>
              <Link to={`/user/${user.id}`} className="hover:underline">
                {user.firstName} {user.lastName}
              </Link>
            </li>
          );
        })}
      </ul>

      <Link
        to="/user/create"
        className="inline-block bg-sky-600 text-sky-50 px-4 py-3 font-semibold w-full mt-4"
      >
        Add User
      </Link>
    </div>
  );
};

export default Users;
React Router provides the useLoaderData hook to get access to the data returned from the loader assigned for the route. The return type of the useLoaderData is unknown by default, so we assert the returned value type to UsersLoaderResponse. It is derived from the usersLoader function in the Users.loader.tsx file.
export type UsersLoaderResponse = Awaited<ReturnType<typeof usersLoader>>;
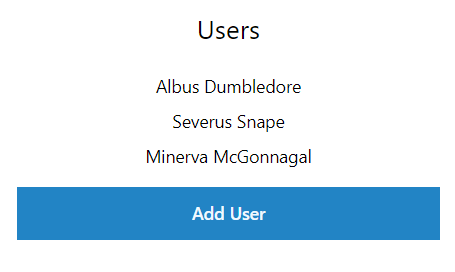
Furthermore, the Users component uses the array of users fetched by the loader to render a list of users with their names and surnames. Each user item is wrapped with a link which redirects to the edit user form. Moreover, there is also a link to the add user form. The image below shows what the final output looks like.
Next, let’s create functionality to add new users.
Creating a New User with a React Router Action
So far, we have used a loader to fetch the users data. Now, we will use an action to submit a user’s data. We will start by adding a new route in the main.tsx file.
src/main.tsx
import React from "react";
import ReactDOM from "react-dom/client";
import App from "./App.tsx";
import "./index.css";
import { createBrowserRouter, RouterProvider } from "react-router-dom";
import Users from "./views/user/Users.tsx";
import { usersLoader } from "./views/user/Users.loader.tsx";
import CreateUser from "./views/user/CreateUser.tsx";
import { createUserAction } from "./views/user/CreateUser.action.tsx";

const router = createBrowserRouter([
  {
    path: "/",
    element: <App />,
    children: [
      {
        index: true,
        element: <Users />,
        loader: usersLoader,
      },
      {
        path: "/user/create",
        element: <CreateUser />,
        action: createUserAction,
      },
    ],
  },
]);

ReactDOM.createRoot(document.getElementById("root") as HTMLElement).render(
  <React.StrictMode>
    <RouterProvider router={router} />
  </React.StrictMode>
);
The CreateUser component will be rendered when the URL matches the /user/create path. Instead of a loader property, we specify an action with the createUserAction function as a value. Let’s create it now.
src/view/user/CreateUser.action.ts
import { ActionFunctionArgs, redirect } from "react-router-dom";

export const createUserAction = async ({ request }: ActionFunctionArgs) => {
  // Get the form data from the request
  const formData = await request.formData();
  // Convert the form data to an object format
  const payload = Object.fromEntries(formData.entries());

  await fetch("http://localhost:4000/users", {
    method: "post",
    headers: {
      "Content-Type": "application/json",
    },
    body: JSON.stringify({
      ...payload,
      id: Date.now(),
    }),
  });

  return redirect("/");
};
React Router expects data to be passed to an action using FormData. However, as the server expects a JSON payload, we convert it from FormData to JSON. After the create user request is completed, a user will be redirected to the / path.
Next, let’s create the CreateUser component.
src/views/user/CreateUser.tsx
import UserForm from "./components/UserForm";

const CreateUser = () => {
  return (
    <div className="max-w-sm mx-auto">
      <UserForm action="/user/create" />
    </div>
  );
};

export default CreateUser;
The CreateUser component is only responsible for the layout and rendering of the UserForm component. The UserForm component receives the action prop, which needs to match the route path defined for the current route. React Router will use it to find the matching route action. Let’s create the UserForm component next. We put the form in a separate component, as we will re-use it for both creating and editing users.
src/views/user/components/UserForm.tsx
import { Form } from "react-router-dom";

type UserFormProps = {
  className?: string;
  user?: {
    id: string | number;
    firstName: string;
    lastName: string;
  } | null;
  action: string;
};

const UserForm = (props: UserFormProps) => {
  const { className, user, action } = props;
  return (
    <div className={className}>
      <Form className="space-y-4" method="post" action={action}>
        <input type="hidden" name="id" defaultValue={user?.id} />
        <div className="flex flex-col items-start gap-y-2">
          <label>First Name</label>
          <input
            type="text"
            className="w-full px-4 py-2 border border-gray-300 rounded-md shadow-sm"
            name="firstName"
            defaultValue={user?.firstName || ""}
          />
        </div>
        <div className="flex flex-col items-start gap-y-2">
          <label>Last Name</label>
          <input
            type="text"
            className="w-full px-4 py-2 border border-gray-300 rounded-md shadow-sm"
            name="lastName"
            defaultValue={user?.lastName || ""}
          />
        </div>

        <div>
          <button
            type="submit"
            className="w-full px-4 py-3 mt-4 font-semibold bg-sky-600 text-sky-50"
          >
            Save
          </button>
        </div>
      </Form>
    </div>
  );
};

export default UserForm;
The UserForm component accepts three props: className, user and action. The user prop will be used to prefill the form with the user’s data when editing. However, it’s optional, as there is no user data yet when we create one. The action prop is passed to the Form component and specifies what action the form is for. When using React Router, the action should match the route path of the action handler the form should trigger.
The UserForm component renders three inputs, of which only two are visible to the user. One is hidden, and it’s used to store the user’s id. If you’re wondering why there is no useState anywhere to store the form’s state, it’s because, in this example, we are using uncontrolled components. In a nutshell, the form’s state is controlled by the DOM rather than by React. We just provide a default value if there is any to the inputs.
Here’s what the functionality looks like.
After submitting the form, we are redirected to the users page, where we can see that a new user was added successfully.
Conclusion
In this part, we have learned how to use React Router Loaders to fetch a list of users and Actions to create a new user. In the next part, we will implement functionality to edit and delete users, how to handle multiple actions in the same route and add pending state feedback for an appropriate submit action when the form is being processed.

Thomas Findlay
Thomas Findlay is a 5-star rated mentor, full-stack developer, consultant, technical writer and the author of “React - The Road To Enterprise” and “Vue - The Road To Enterprise.” He works with many different technologies such as JavaScript, Vue, React, React Native, Node.js, Python, PHP and more. Thomas has worked with developers and teams from beginner to advanced and helped them build and scale their applications and products. Check out his Codementor page, and you can also find him on Twitter.
Related Posts
Comments
All articles
Topics

Latest Stories
in Your Inbox
Subscribe to be the first to get our expert-written articles and tutorials for developers!
All fields are required