<?xml version="1.0" encoding="UTF-8"?>
<?xml-stylesheet type="text/xsl" media="screen" href="/~files/atom-premium.xsl"?>
                                                                                                                                                                                                                                                                                                                                                                                                                                                                                                                                             
<feed xmlns="http://www.w3.org/2005/Atom" xmlns:feedpress="https://feed.press/xmlns" xmlns:media="http://search.yahoo.com/mrss/" xmlns:podcast="https://podcastindex.org/namespace/1.0">
  <feedpress:locale>en</feedpress:locale>
  <feedpress:newsletterId>telerik-blogs-desktop</feedpress:newsletterId>
  <link rel="hub" href="https://feedpress.superfeedr.com/"/>
  <logo>https://static.feedpress.com/logo/telerik-blogs-desktop-5ab52c3ad3ce5.jpg</logo>
  <title type="text">Telerik Blogs | Desktop</title>
  <subtitle type="text">The official blog of Progress Telerik - expert articles and tutorials for developers.</subtitle>
  <id>uuid:ddf39e3e-9956-4e70-adc5-679bb3eed0b8;id=1836</id>
  <updated>2026-06-20T04:15:38Z</updated>
  <link rel="alternate" href="https://www.telerik.com/"/>
  <link rel="self" type="application/atom+xml" href="https://feeds.telerik.com/blogs/desktop"/>
  <entry>
    <id>urn:uuid:edd3110a-7b4d-4f43-8db1-b9001b1e73be</id>
    <title type="text">Creating Localized .NET MAUI Applications</title>
    <summary type="text">Reach more people with your apps: Learn how to localize .NET MAUI applications, including XAML text elements, view models and prebuilt Telerik controls for .NET MAUI.</summary>
    <published>2026-06-17T20:17:33Z</published>
    <updated>2026-06-20T04:15:38Z</updated>
    <author>
      <name>Héctor Pérez </name>
    </author>
    <link rel="alternate" href="https://www.telerik.com/blogs/creating-localized-net-maui-applications?utm_medium=feed&amp;utm_source=feedpress.me&amp;utm_campaign=Feed%3A+telerik-blogs-desktop"/>
    <content type="text"><![CDATA[<p><span class="featured">Reach more people with your apps: Learn how to localize .NET MAUI applications, including XAML text elements, view models and prebuilt Telerik controls for .NET MAUI.</span></p><p>Making our mobile applications accessible to users who speak a different language than us can make a huge difference in their usage. Fortunately, .NET MAUI offers the power to deliver multi-language applications thanks to the use of resources files.</p><p>Likewise, prebuilt controls such as those from Progress <a href="https://www.telerik.com/maui-ui">Telerik UI for .NET MAUI</a> can be adapted to support localization, allowing you to build and deliver native language experiences quickly. Let&rsquo;s see how to do it!</p><h2 id="understanding-localization-in-.net-maui-apps">Understanding Localization in .NET MAUI Apps</h2><p>Localization is the process of enabling an application to support different languages and cultures; that is, it&rsquo;s not only about translating text strings to other languages, but also adapting date formats, numbers, etc.</p><p>There are some key elements for localizing applications, the first of which are the resource files <strong>.resx</strong>, which are XML files composed of key-value pairs for each language.</p><p>Likewise, we have the class <code>CultureInfo</code>, which represents the user&rsquo;s cultural information. Finally, the class <code>ResourceManager</code> is a class that allows us at runtime to retrieve localized strings according to the language selected on the user&rsquo;s device.</p><h2 id="creating-a-sample-app-to-localize">Creating a Sample App to Localize</h2><p>To show you in a practical way how to integrate localization into your own projects, let&rsquo;s create a test project. To do so, create a new .NET MAUI project without example content, and follow the <a href="https://www.telerik.com/maui-ui/documentation/get-started/first-steps-vs#step-1-set-up-your-net-maui-application">installation guide to add Telerik controls for .NET MAUI</a> to the project.</p><p>Also install the NuGet package <code>CommunityToolkit.Mvvm</code> to create viewmodels cleanly. Once the project has been configured, create a data model to represent a <code>Product</code>:</p><pre class=" language-csharp"><code class="prism  language-csharp"><span class="token keyword">public</span> <span class="token keyword">class</span> <span class="token class-name">Product</span>
<span class="token punctuation">{</span>
    <span class="token keyword">public</span> <span class="token keyword">string</span> Name <span class="token punctuation">{</span> <span class="token keyword">get</span><span class="token punctuation">;</span> <span class="token keyword">set</span><span class="token punctuation">;</span> <span class="token punctuation">}</span> <span class="token operator">=</span> <span class="token keyword">string</span><span class="token punctuation">.</span>Empty<span class="token punctuation">;</span>
    <span class="token keyword">public</span> <span class="token keyword">string</span> Category <span class="token punctuation">{</span> <span class="token keyword">get</span><span class="token punctuation">;</span> <span class="token keyword">set</span><span class="token punctuation">;</span> <span class="token punctuation">}</span> <span class="token operator">=</span> <span class="token keyword">string</span><span class="token punctuation">.</span>Empty<span class="token punctuation">;</span>
    <span class="token keyword">public</span> <span class="token keyword">decimal</span> Price <span class="token punctuation">{</span> <span class="token keyword">get</span><span class="token punctuation">;</span> <span class="token keyword">set</span><span class="token punctuation">;</span> <span class="token punctuation">}</span>
    <span class="token keyword">public</span> DateTime CreatedDate <span class="token punctuation">{</span> <span class="token keyword">get</span><span class="token punctuation">;</span> <span class="token keyword">set</span><span class="token punctuation">;</span> <span class="token punctuation">}</span>
<span class="token punctuation">}</span>
</code></pre><p>Next, let&rsquo;s create a viewmodel that will display information in the UI for a set of fictitious products:</p><pre class=" language-csharp"><code class="prism  language-csharp"><span class="token keyword">public</span> <span class="token keyword">partial</span> <span class="token keyword">class</span> <span class="token class-name">MainViewModel</span> <span class="token punctuation">:</span> ObservableObject
<span class="token punctuation">{</span>
    <span class="token punctuation">[</span>ObservableProperty<span class="token punctuation">]</span>
    <span class="token keyword">private</span> ObservableCollection<span class="token operator">&lt;</span>Product<span class="token operator">&gt;</span> products <span class="token operator">=</span> <span class="token punctuation">[</span><span class="token punctuation">]</span><span class="token punctuation">;</span>

    <span class="token punctuation">[</span>ObservableProperty<span class="token punctuation">]</span>
    <span class="token keyword">private</span> DateTime<span class="token operator">?</span> selectedDate<span class="token punctuation">;</span>

    <span class="token keyword">public</span> <span class="token function">MainViewModel</span><span class="token punctuation">(</span><span class="token punctuation">)</span>
    <span class="token punctuation">{</span>
        SelectedDate <span class="token operator">=</span> DateTime<span class="token punctuation">.</span>Now<span class="token punctuation">;</span>
        <span class="token function">LoadProducts</span><span class="token punctuation">(</span><span class="token punctuation">)</span><span class="token punctuation">;</span>
    <span class="token punctuation">}</span>

    <span class="token keyword">private</span> <span class="token keyword">void</span> <span class="token function">LoadProducts</span><span class="token punctuation">(</span><span class="token punctuation">)</span>
    <span class="token punctuation">{</span>
        Products <span class="token operator">=</span>
        <span class="token punctuation">[</span>
            <span class="token keyword">new</span> <span class="token class-name">Product</span>
            <span class="token punctuation">{</span>
                Name <span class="token operator">=</span> <span class="token string">"Laptop Pro 15"</span><span class="token punctuation">,</span>
                Category <span class="token operator">=</span> <span class="token string">"Electronics"</span><span class="token punctuation">,</span>
                Price <span class="token operator">=</span> <span class="token number">1299</span><span class="token punctuation">.</span>99m<span class="token punctuation">,</span>
                CreatedDate <span class="token operator">=</span> <span class="token keyword">new</span> <span class="token class-name">DateTime</span><span class="token punctuation">(</span><span class="token number">2026</span><span class="token punctuation">,</span> <span class="token number">1</span><span class="token punctuation">,</span> <span class="token number">15</span><span class="token punctuation">)</span>
            <span class="token punctuation">}</span><span class="token punctuation">,</span>
            <span class="token keyword">new</span> <span class="token class-name">Product</span>
            <span class="token punctuation">{</span>
                Name <span class="token operator">=</span> <span class="token string">"Running Shoes"</span><span class="token punctuation">,</span>
                Category <span class="token operator">=</span> <span class="token string">"Clothing"</span><span class="token punctuation">,</span>
                Price <span class="token operator">=</span> <span class="token number">89</span><span class="token punctuation">.</span>95m<span class="token punctuation">,</span>
                CreatedDate <span class="token operator">=</span> <span class="token keyword">new</span> <span class="token class-name">DateTime</span><span class="token punctuation">(</span><span class="token number">2026</span><span class="token punctuation">,</span> <span class="token number">2</span><span class="token punctuation">,</span> <span class="token number">20</span><span class="token punctuation">)</span>
            <span class="token punctuation">}</span><span class="token punctuation">,</span>
            <span class="token keyword">new</span> <span class="token class-name">Product</span>
            <span class="token punctuation">{</span>
                Name <span class="token operator">=</span> <span class="token string">"Organic Coffee Beans"</span><span class="token punctuation">,</span>
                Category <span class="token operator">=</span> <span class="token string">"Food"</span><span class="token punctuation">,</span>
                Price <span class="token operator">=</span> <span class="token number">24</span><span class="token punctuation">.</span>50m<span class="token punctuation">,</span>
                CreatedDate <span class="token operator">=</span> <span class="token keyword">new</span> <span class="token class-name">DateTime</span><span class="token punctuation">(</span><span class="token number">2026</span><span class="token punctuation">,</span> <span class="token number">3</span><span class="token punctuation">,</span> <span class="token number">10</span><span class="token punctuation">)</span>
            <span class="token punctuation">}</span><span class="token punctuation">,</span>
            <span class="token keyword">new</span> <span class="token class-name">Product</span>
            <span class="token punctuation">{</span>
                Name <span class="token operator">=</span> <span class="token string">"Wireless Mouse"</span><span class="token punctuation">,</span>
                Category <span class="token operator">=</span> <span class="token string">"Electronics"</span><span class="token punctuation">,</span>
                Price <span class="token operator">=</span> <span class="token number">45</span><span class="token punctuation">.</span>00m<span class="token punctuation">,</span>
                CreatedDate <span class="token operator">=</span> <span class="token keyword">new</span> <span class="token class-name">DateTime</span><span class="token punctuation">(</span><span class="token number">2025</span><span class="token punctuation">,</span> <span class="token number">12</span><span class="token punctuation">,</span> <span class="token number">5</span><span class="token punctuation">)</span>
            <span class="token punctuation">}</span><span class="token punctuation">,</span>
            <span class="token keyword">new</span> <span class="token class-name">Product</span>
            <span class="token punctuation">{</span>
                Name <span class="token operator">=</span> <span class="token string">"Winter Jacket"</span><span class="token punctuation">,</span>
                Category <span class="token operator">=</span> <span class="token string">"Clothing"</span><span class="token punctuation">,</span>
                Price <span class="token operator">=</span> <span class="token number">159</span><span class="token punctuation">.</span>99m<span class="token punctuation">,</span>
                CreatedDate <span class="token operator">=</span> <span class="token keyword">new</span> <span class="token class-name">DateTime</span><span class="token punctuation">(</span><span class="token number">2026</span><span class="token punctuation">,</span> <span class="token number">1</span><span class="token punctuation">,</span> <span class="token number">28</span><span class="token punctuation">)</span>
            <span class="token punctuation">}</span>
        <span class="token punctuation">]</span><span class="token punctuation">;</span>
    <span class="token punctuation">}</span>
<span class="token punctuation">}</span>
</code></pre><p>In the code above, you can notice that hard-coded strings in English are used to display information to users only in that language. Now, let&rsquo;s create an example UI, using a <a href="https://www.telerik.com/maui-ui/datepicker">.NET MAUI RadDatePicker</a> (which is an enhanced DatePicker) and a <a href="https://www.telerik.com/maui-ui/datagrid">MAUI RadDataGrid</a> to easily display data tables:</p><pre class=" language-xml"><code class="prism  language-xml"><span class="token tag"><span class="token tag"><span class="token punctuation">&lt;</span>Grid</span>
 <span class="token attr-name">Padding</span><span class="token attr-value"><span class="token punctuation">=</span><span class="token punctuation">"</span>16<span class="token punctuation">"</span></span>
 <span class="token attr-name">RowDefinitions</span><span class="token attr-value"><span class="token punctuation">=</span><span class="token punctuation">"</span>Auto,Auto,*<span class="token punctuation">"</span></span>
 <span class="token attr-name">RowSpacing</span><span class="token attr-value"><span class="token punctuation">=</span><span class="token punctuation">"</span>12<span class="token punctuation">"</span></span><span class="token punctuation">&gt;</span></span>
 <span class="token comment">&lt;!--  Welcome message  --&gt;</span>
 <span class="token tag"><span class="token tag"><span class="token punctuation">&lt;</span>Label</span>
     <span class="token attr-name">FontAttributes</span><span class="token attr-value"><span class="token punctuation">=</span><span class="token punctuation">"</span>Bold<span class="token punctuation">"</span></span>
     <span class="token attr-name">FontSize</span><span class="token attr-value"><span class="token punctuation">=</span><span class="token punctuation">"</span>20<span class="token punctuation">"</span></span>
     <span class="token attr-name">HorizontalOptions</span><span class="token attr-value"><span class="token punctuation">=</span><span class="token punctuation">"</span>Center<span class="token punctuation">"</span></span>
     <span class="token attr-name">Text</span><span class="token attr-value"><span class="token punctuation">=</span><span class="token punctuation">"</span>Welcome to the app<span class="token punctuation">"</span></span> <span class="token punctuation">/&gt;</span></span>
 <span class="token comment">&lt;!--  Date picker  --&gt;</span>
 <span class="token tag"><span class="token tag"><span class="token punctuation">&lt;</span>HorizontalStackLayout</span>
     <span class="token attr-name">Grid.Row</span><span class="token attr-value"><span class="token punctuation">=</span><span class="token punctuation">"</span>1<span class="token punctuation">"</span></span>
     <span class="token attr-name">HorizontalOptions</span><span class="token attr-value"><span class="token punctuation">=</span><span class="token punctuation">"</span>Center<span class="token punctuation">"</span></span>
     <span class="token attr-name">Spacing</span><span class="token attr-value"><span class="token punctuation">=</span><span class="token punctuation">"</span>10<span class="token punctuation">"</span></span><span class="token punctuation">&gt;</span></span>
     <span class="token tag"><span class="token tag"><span class="token punctuation">&lt;</span>Label</span>
         <span class="token attr-name">FontSize</span><span class="token attr-value"><span class="token punctuation">=</span><span class="token punctuation">"</span>16<span class="token punctuation">"</span></span>
         <span class="token attr-name">Text</span><span class="token attr-value"><span class="token punctuation">=</span><span class="token punctuation">"</span>Created Date<span class="token punctuation">"</span></span>
         <span class="token attr-name">VerticalOptions</span><span class="token attr-value"><span class="token punctuation">=</span><span class="token punctuation">"</span>Center<span class="token punctuation">"</span></span> <span class="token punctuation">/&gt;</span></span>
     <span class="token tag"><span class="token tag"><span class="token punctuation">&lt;</span><span class="token namespace">telerik:</span>RadDatePicker</span>
         <span class="token attr-name">Date</span><span class="token attr-value"><span class="token punctuation">=</span><span class="token punctuation">"</span>{Binding SelectedDate}<span class="token punctuation">"</span></span>         
         <span class="token attr-name">WidthRequest</span><span class="token attr-value"><span class="token punctuation">=</span><span class="token punctuation">"</span>250<span class="token punctuation">"</span></span> <span class="token punctuation">/&gt;</span></span>
 <span class="token tag"><span class="token tag"><span class="token punctuation">&lt;/</span>HorizontalStackLayout</span><span class="token punctuation">&gt;</span></span>
 <span class="token comment">&lt;!--  Product grid  --&gt;</span>
 <span class="token tag"><span class="token tag"><span class="token punctuation">&lt;</span><span class="token namespace">telerik:</span>RadDataGrid</span>
     <span class="token attr-name">Grid.Row</span><span class="token attr-value"><span class="token punctuation">=</span><span class="token punctuation">"</span>2<span class="token punctuation">"</span></span>
     <span class="token attr-name">AutoGenerateColumns</span><span class="token attr-value"><span class="token punctuation">=</span><span class="token punctuation">"</span>False<span class="token punctuation">"</span></span>
     <span class="token attr-name">ItemsSource</span><span class="token attr-value"><span class="token punctuation">=</span><span class="token punctuation">"</span>{Binding Products}<span class="token punctuation">"</span></span>
     <span class="token attr-name">UserFilterMode</span><span class="token attr-value"><span class="token punctuation">=</span><span class="token punctuation">"</span>Auto<span class="token punctuation">"</span></span>
     <span class="token attr-name">UserGroupMode</span><span class="token attr-value"><span class="token punctuation">=</span><span class="token punctuation">"</span>Auto<span class="token punctuation">"</span></span>
     <span class="token attr-name">UserSortMode</span><span class="token attr-value"><span class="token punctuation">=</span><span class="token punctuation">"</span>Auto<span class="token punctuation">"</span></span><span class="token punctuation">&gt;</span></span>
     <span class="token tag"><span class="token tag"><span class="token punctuation">&lt;</span><span class="token namespace">telerik:</span>RadDataGrid.Columns</span><span class="token punctuation">&gt;</span></span>
         <span class="token tag"><span class="token tag"><span class="token punctuation">&lt;</span><span class="token namespace">telerik:</span>DataGridTextColumn</span> <span class="token attr-name">HeaderText</span><span class="token attr-value"><span class="token punctuation">=</span><span class="token punctuation">"</span>Product Name<span class="token punctuation">"</span></span> <span class="token attr-name">PropertyName</span><span class="token attr-value"><span class="token punctuation">=</span><span class="token punctuation">"</span>Name<span class="token punctuation">"</span></span> <span class="token punctuation">/&gt;</span></span>
         <span class="token tag"><span class="token tag"><span class="token punctuation">&lt;</span><span class="token namespace">telerik:</span>DataGridTextColumn</span> <span class="token attr-name">HeaderText</span><span class="token attr-value"><span class="token punctuation">=</span><span class="token punctuation">"</span>Category<span class="token punctuation">"</span></span> <span class="token attr-name">PropertyName</span><span class="token attr-value"><span class="token punctuation">=</span><span class="token punctuation">"</span>Category<span class="token punctuation">"</span></span> <span class="token punctuation">/&gt;</span></span>
         <span class="token tag"><span class="token tag"><span class="token punctuation">&lt;</span><span class="token namespace">telerik:</span>DataGridNumericalColumn</span>
             <span class="token attr-name">CellContentFormat</span><span class="token attr-value"><span class="token punctuation">=</span><span class="token punctuation">"</span>{}{0:C}<span class="token punctuation">"</span></span>
             <span class="token attr-name">HeaderText</span><span class="token attr-value"><span class="token punctuation">=</span><span class="token punctuation">"</span>Price<span class="token punctuation">"</span></span>
             <span class="token attr-name">PropertyName</span><span class="token attr-value"><span class="token punctuation">=</span><span class="token punctuation">"</span>Price<span class="token punctuation">"</span></span> <span class="token punctuation">/&gt;</span></span>
         <span class="token tag"><span class="token tag"><span class="token punctuation">&lt;</span><span class="token namespace">telerik:</span>DataGridDateColumn</span>
             <span class="token attr-name">CellContentFormat</span><span class="token attr-value"><span class="token punctuation">=</span><span class="token punctuation">"</span>{}{0:d}<span class="token punctuation">"</span></span>
             <span class="token attr-name">HeaderText</span><span class="token attr-value"><span class="token punctuation">=</span><span class="token punctuation">"</span>Created Date<span class="token punctuation">"</span></span>
             <span class="token attr-name">PropertyName</span><span class="token attr-value"><span class="token punctuation">=</span><span class="token punctuation">"</span>CreatedDate<span class="token punctuation">"</span></span> <span class="token punctuation">/&gt;</span></span>
     <span class="token tag"><span class="token tag"><span class="token punctuation">&lt;/</span><span class="token namespace">telerik:</span>RadDataGrid.Columns</span><span class="token punctuation">&gt;</span></span>
 <span class="token tag"><span class="token tag"><span class="token punctuation">&lt;/</span><span class="token namespace">telerik:</span>RadDataGrid</span><span class="token punctuation">&gt;</span></span>
<span class="token tag"><span class="token tag"><span class="token punctuation">&lt;/</span>Grid</span><span class="token punctuation">&gt;</span></span>
</code></pre><p>Don&rsquo;t forget to register both <code>MainPage</code> and <code>MainPageViewModel</code> in the dependency container:</p><pre class=" language-csharp"><code class="prism  language-csharp"><span class="token keyword">public</span> <span class="token keyword">static</span> <span class="token keyword">class</span> <span class="token class-name">MauiProgram</span>
<span class="token punctuation">{</span>
    <span class="token keyword">public</span> <span class="token keyword">static</span> MauiApp <span class="token function">CreateMauiApp</span><span class="token punctuation">(</span><span class="token punctuation">)</span>
    <span class="token punctuation">{</span>
        <span class="token keyword">var</span> builder <span class="token operator">=</span> MauiApp<span class="token punctuation">.</span><span class="token function">CreateBuilder</span><span class="token punctuation">(</span><span class="token punctuation">)</span><span class="token punctuation">;</span>       
        <span class="token punctuation">.</span><span class="token punctuation">.</span><span class="token punctuation">.</span>
        builder<span class="token punctuation">.</span>Services<span class="token punctuation">.</span><span class="token generic-method function">AddTransient<span class="token punctuation">&lt;</span>MainPage<span class="token punctuation">&gt;</span></span><span class="token punctuation">(</span><span class="token punctuation">)</span><span class="token punctuation">;</span>
        builder<span class="token punctuation">.</span>Services<span class="token punctuation">.</span><span class="token generic-method function">AddTransient<span class="token punctuation">&lt;</span>MainViewModel<span class="token punctuation">&gt;</span></span><span class="token punctuation">(</span><span class="token punctuation">)</span><span class="token punctuation">;</span>
<span class="token punctuation">.</span><span class="token punctuation">.</span><span class="token punctuation">.</span>
        <span class="token keyword">return</span> builder<span class="token punctuation">.</span><span class="token function">Build</span><span class="token punctuation">(</span><span class="token punctuation">)</span><span class="token punctuation">;</span>
    <span class="token punctuation">}</span>
<span class="token punctuation">}</span>
</code></pre><p>Finally, let&rsquo;s inject the view model into the page&rsquo;s code-behind, while assigning the injected reference to <code>BindingContext</code>:</p><pre class=" language-csharp"><code class="prism  language-csharp"><span class="token keyword">public</span> <span class="token keyword">partial</span> <span class="token keyword">class</span> <span class="token class-name">MainPage</span> <span class="token punctuation">:</span> ContentPage
<span class="token punctuation">{</span>
    <span class="token keyword">public</span> <span class="token function">MainPage</span><span class="token punctuation">(</span>MainViewModel viewModel<span class="token punctuation">)</span>
    <span class="token punctuation">{</span>
        <span class="token function">InitializeComponent</span><span class="token punctuation">(</span><span class="token punctuation">)</span><span class="token punctuation">;</span>
        BindingContext <span class="token operator">=</span> viewModel<span class="token punctuation">;</span>
    <span class="token punctuation">}</span>
<span class="token punctuation">}</span>
</code></pre><p>After implementing the above changes, we will have a UI like the following:</p><p><img src="https://d585tldpucybw.cloudfront.net/sfimages/default-source/blogs/2026/2026-06/base-app-product-grid-english.png?sfvrsn=287ffbd9_2" alt="Product grid in base app with English labels" /></p><p>As we anticipated, all the UI content is in English. Some text chunks we might want to internationalize could be the page title, the welcome message, column headers, product categories, etc. Let&rsquo;s see how to achieve it.</p><h2 id="creating-resource-files-to-localize-a-.net-maui-app">Creating Resource Files to Localize a .NET MAUI App</h2><p>Localization of .NET applications is based on resource files. To create these files, you must start by creating a file with the extension <code>.resx</code>, which will contain the strings in the original language.</p><p>In our example, we are going to create a new folder <code>Resources/Strings</code>, and inside create a file named <code>AppStrings.resx</code>. You can achieve this using the context menu on the created folder, selecting <strong>Add</strong> | <strong>New Item</strong>. Then, in the search box enter the term <strong>resources</strong>, which will filter the template for the resource file:</p><p><img src="https://d585tldpucybw.cloudfront.net/sfimages/default-source/blogs/2026/2026-06/selecting-resource-template.png?sfvrsn=943723e7_2" alt="Selecting the appropriate template for a resource file" /></p><p>Once you have created the file, you can open it and start adding the application&rsquo;s strings in their original language, using the <strong>+</strong> button. This will open a new window where you can enter information such as the string key, the data type, the value and optionally comments:</p><p><img src="https://d585tldpucybw.cloudfront.net/sfimages/default-source/blogs/2026/2026-06/adding-localization-string.png?sfvrsn=68f8fbaf_2" alt="Developer adding a new localization string in editor" /></p><p>Another way to add strings more quickly is to paste them in the format: <strong>Key name</strong> + <strong>tab</strong> + <strong>value</strong>. For example, you can copy and paste the following content, and paste it directly into the resource editor, which will create a series of rows in the file:</p><pre class=" language-text"><code class="prism  language-text">LanguageLabelLanguage
ProductNameProduct Name
CategoryCategory
PricePrice
CreatedDateCreated Date
SelectLanguageSelect a language
ElectronicsElectronics
ClothingClothing
FoodFood
FilterProductsFilter Products
WelcomeWelcome to the localized app
</code></pre><p>After having the base file, the next step is to create an additional resource file for each translation you want to perform. For the example, I will create a new file in <code>Resources/Strings</code> called <code>AppStrings.es.resx</code>. You can notice that each new file must be named the same as the main one, adding the ISO code of the language you want to translate to.</p><p>When you open the file, you will see that a new column has been added, where you can enter the information of the file, as in the following example:</p><p><img src="https://d585tldpucybw.cloudfront.net/sfimages/default-source/blogs/2026/2026-06/resx-translation-strings.png?sfvrsn=9ced7f57_2" alt="Resx files showing original and translated string values" /></p><p>With the resource files created, it is time to connect the strings with the UI.</p><h2 id="localizing-elements-in-the-ui">Localizing Elements in the UI</h2><p>With the strings correctly localized, let&rsquo;s go to the UI page. There, you need to add a namespace for the path where the localized files are located, similar to this:</p><pre class=" language-xml"><code class="prism  language-xml"><span class="token tag"><span class="token tag"><span class="token punctuation">&lt;</span>ContentPage</span>
    <span class="token attr-name">...</span>
    <span class="token attr-name"><span class="token namespace">xmlns:</span>resx</span><span class="token attr-value"><span class="token punctuation">=</span><span class="token punctuation">"</span>clr-namespace:MauiLocalizedApps.Resources.Strings<span class="token punctuation">"</span></span><span class="token punctuation">&gt;</span></span>
</code></pre><p>Then, on each element you want to localize you must use the markup extension <code>x:Static</code>, using the key of the resource you want to replace. This is an example of the Label control corresponding to the localized welcome message:</p><pre class=" language-xml"><code class="prism  language-xml"><span class="token tag"><span class="token tag"><span class="token punctuation">&lt;</span>Label</span>
<span class="token attr-name">...</span>
    <span class="token attr-name">Text</span><span class="token attr-value"><span class="token punctuation">=</span><span class="token punctuation">"</span>{x:Static resx:AppStrings.Welcome}<span class="token punctuation">"</span></span> <span class="token punctuation">/&gt;</span></span>
</code></pre><p>Other strings we will replace will be the creation date and the welcome one, as shown below:</p><pre class=" language-xml"><code class="prism  language-xml"><span class="token tag"><span class="token tag"><span class="token punctuation">&lt;</span>ContentPage</span> <span class="token attr-name">...</span>
    <span class="token attr-name">Title</span><span class="token attr-value"><span class="token punctuation">=</span><span class="token punctuation">"</span>{x:Static resx:AppStrings.AppTitle}<span class="token punctuation">"</span></span><span class="token punctuation">&gt;</span></span>

 <span class="token tag"><span class="token tag"><span class="token punctuation">&lt;</span>Grid</span>
     <span class="token attr-name">Padding</span><span class="token attr-value"><span class="token punctuation">=</span><span class="token punctuation">"</span>16<span class="token punctuation">"</span></span>
     <span class="token attr-name">RowDefinitions</span><span class="token attr-value"><span class="token punctuation">=</span><span class="token punctuation">"</span>Auto,Auto,*<span class="token punctuation">"</span></span>
     <span class="token attr-name">RowSpacing</span><span class="token attr-value"><span class="token punctuation">=</span><span class="token punctuation">"</span>12<span class="token punctuation">"</span></span><span class="token punctuation">&gt;</span></span>
     <span class="token comment">&lt;!--  Welcome message  --&gt;</span>
     <span class="token tag"><span class="token tag"><span class="token punctuation">&lt;</span>Label</span>
         <span class="token attr-name">FontAttributes</span><span class="token attr-value"><span class="token punctuation">=</span><span class="token punctuation">"</span>Bold<span class="token punctuation">"</span></span>
         <span class="token attr-name">FontSize</span><span class="token attr-value"><span class="token punctuation">=</span><span class="token punctuation">"</span>20<span class="token punctuation">"</span></span>
         <span class="token attr-name">HorizontalOptions</span><span class="token attr-value"><span class="token punctuation">=</span><span class="token punctuation">"</span>Center<span class="token punctuation">"</span></span>
         <span class="token attr-name">Text</span><span class="token attr-value"><span class="token punctuation">=</span><span class="token punctuation">"</span>{x:Static resx:AppStrings.Welcome}<span class="token punctuation">"</span></span> <span class="token punctuation">/&gt;</span></span>
     <span class="token comment">&lt;!--  Date picker  --&gt;</span>
     <span class="token tag"><span class="token tag"><span class="token punctuation">&lt;</span>HorizontalStackLayout</span>
         <span class="token attr-name">Grid.Row</span><span class="token attr-value"><span class="token punctuation">=</span><span class="token punctuation">"</span>1<span class="token punctuation">"</span></span>
         <span class="token attr-name">HorizontalOptions</span><span class="token attr-value"><span class="token punctuation">=</span><span class="token punctuation">"</span>Center<span class="token punctuation">"</span></span>
         <span class="token attr-name">Spacing</span><span class="token attr-value"><span class="token punctuation">=</span><span class="token punctuation">"</span>10<span class="token punctuation">"</span></span><span class="token punctuation">&gt;</span></span>
         <span class="token tag"><span class="token tag"><span class="token punctuation">&lt;</span>Label</span>
             <span class="token attr-name">FontSize</span><span class="token attr-value"><span class="token punctuation">=</span><span class="token punctuation">"</span>16<span class="token punctuation">"</span></span>
             <span class="token attr-name">Text</span><span class="token attr-value"><span class="token punctuation">=</span><span class="token punctuation">"</span>{x:Static resx:AppStrings.CreatedDate}<span class="token punctuation">"</span></span>
             <span class="token attr-name">VerticalOptions</span><span class="token attr-value"><span class="token punctuation">=</span><span class="token punctuation">"</span>Center<span class="token punctuation">"</span></span> <span class="token punctuation">/&gt;</span></span>
         <span class="token tag"><span class="token tag"><span class="token punctuation">&lt;</span><span class="token namespace">telerik:</span>RadDatePicker</span> <span class="token attr-name">Date</span><span class="token attr-value"><span class="token punctuation">=</span><span class="token punctuation">"</span>{Binding SelectedDate}<span class="token punctuation">"</span></span> <span class="token attr-name">WidthRequest</span><span class="token attr-value"><span class="token punctuation">=</span><span class="token punctuation">"</span>250<span class="token punctuation">"</span></span> <span class="token punctuation">/&gt;</span></span>
     <span class="token tag"><span class="token tag"><span class="token punctuation">&lt;/</span>HorizontalStackLayout</span><span class="token punctuation">&gt;</span></span>
     ...
<span class="token tag"><span class="token tag"><span class="token punctuation">&lt;/</span>Grid</span><span class="token punctuation">&gt;</span></span>     
</code></pre><p>After applying the changes and changing the device language to Spanish, we get the following result:</p><p><img src="https://d585tldpucybw.cloudfront.net/sfimages/default-source/blogs/2026/2026-06/xaml-spanish-localized-strings.png?sfvrsn=7b00648d_2" alt="Screenshot of XAML file with Spanish localized strings" /></p><p>Now, let&rsquo;s see how to localize the view model strings.</p><h2 id="localizing-data-strings-from-the-viewmodel">Localizing Data Strings from the viewmodel</h2><p>In addition to localizing elements in the XAML file, we can also load translated strings that are found in the view model. For example, suppose we want to translate the names of the categories shown in the DataGrid.</p><p>To achieve this, we can use the static class that is created when we create a resource file, which takes the same name as the created file. In our case it is called <code>AppStrings</code>, and we will use it as follows:</p><pre class=" language-csharp"><code class="prism  language-csharp"><span class="token keyword">private</span> <span class="token keyword">void</span> <span class="token function">LoadProducts</span><span class="token punctuation">(</span><span class="token punctuation">)</span>
<span class="token punctuation">{</span>
    Products <span class="token operator">=</span>
    <span class="token punctuation">[</span>
        <span class="token keyword">new</span> <span class="token class-name">Product</span>
        <span class="token punctuation">{</span>
            <span class="token punctuation">.</span><span class="token punctuation">.</span><span class="token punctuation">.</span>
            Category <span class="token operator">=</span> AppStrings<span class="token punctuation">.</span>Electronics
        <span class="token punctuation">}</span><span class="token punctuation">,</span>
        <span class="token keyword">new</span> <span class="token class-name">Product</span>
        <span class="token punctuation">{</span>
            <span class="token punctuation">.</span><span class="token punctuation">.</span><span class="token punctuation">.</span>
            Category <span class="token operator">=</span> AppStrings<span class="token punctuation">.</span>Clothing<span class="token punctuation">,</span>
        <span class="token punctuation">}</span><span class="token punctuation">,</span>
        <span class="token punctuation">.</span><span class="token punctuation">.</span><span class="token punctuation">.</span>
    <span class="token punctuation">]</span><span class="token punctuation">;</span>
<span class="token punctuation">}</span>
</code></pre><p>With the previous changes, we have seen how to display translated strings to the user found in XAML files and view models:</p><p><img src="https://d585tldpucybw.cloudfront.net/sfimages/default-source/blogs/2026/2026-06/localized-viewmodel-text.png?sfvrsn=f3f493dc_2" alt="Localized text rendered from view models in interface" /></p><p>However, we still have strings in the graphical controls that have not been localized. Let&rsquo;s see how to translate them.</p><h2 id="localizing-internal-strings-of-telerik-controls-for-.net-maui">Localizing Internal Strings of Telerik Controls for .NET MAUI</h2><p>In case you also want to localize the strings of Telerik controls, such as those that show options in the DataGrid, you can see all the keys used in the controls on the <a href="https://www.telerik.com/maui-ui/documentation/globalization-localization">.NET MAUI globalization and localization</a> page. On that page you will find links for each control and their respective strings.</p><p>For example, to localize the .NET MAUI DataGrid, we must copy a series of keys that start with <code>DataGrid_...</code>, such as <code>DataGrid_DistinctValues_SelectAll</code>, <code>DataGrid_Filter_ApplyFilter</code>, <code>DataGrid_Filter_ResetFilter</code>, etc. These are the keys that I will add to the file <code>AppStrings.resx</code>.</p><p>After doing this, you must create a class that inherits from <code>TelerikLocalizationManager</code>, like the one shown below:</p><pre class=" language-csharp"><code class="prism  language-csharp"><span class="token keyword">internal</span> <span class="token keyword">class</span> <span class="token class-name">CustomLocalizationManager</span> <span class="token punctuation">:</span> TelerikLocalizationManager
<span class="token punctuation">{</span>
    <span class="token keyword">public</span> <span class="token keyword">override</span> <span class="token keyword">string</span> <span class="token function">GetString</span><span class="token punctuation">(</span><span class="token keyword">string</span> key<span class="token punctuation">)</span>
    <span class="token punctuation">{</span>
        <span class="token keyword">string</span><span class="token operator">?</span> localizedValue <span class="token operator">=</span> AppStrings<span class="token punctuation">.</span>ResourceManager<span class="token punctuation">.</span><span class="token function">GetString</span><span class="token punctuation">(</span>
            key<span class="token punctuation">,</span> CultureInfo<span class="token punctuation">.</span>CurrentUICulture<span class="token punctuation">)</span><span class="token punctuation">;</span>

        <span class="token keyword">if</span> <span class="token punctuation">(</span><span class="token operator">!</span><span class="token keyword">string</span><span class="token punctuation">.</span><span class="token function">IsNullOrEmpty</span><span class="token punctuation">(</span>localizedValue<span class="token punctuation">)</span><span class="token punctuation">)</span>
        <span class="token punctuation">{</span>
            <span class="token keyword">return</span> localizedValue<span class="token punctuation">;</span>
        <span class="token punctuation">}</span>

        <span class="token keyword">return</span> <span class="token keyword">base</span><span class="token punctuation">.</span><span class="token function">GetString</span><span class="token punctuation">(</span>key<span class="token punctuation">)</span><span class="token punctuation">;</span>
    <span class="token punctuation">}</span>
<span class="token punctuation">}</span>
</code></pre><p>In the code above, we use the <code>GetString</code> method to attempt to retrieve a key and its translated value in the device&rsquo;s language. If a translated string is found it is returned; otherwise the original value is returned.</p><p>Finally, you must register the created manager in <code>MauiProgram.cs</code> as follows:</p><pre class=" language-csharp"><code class="prism  language-csharp"><span class="token keyword">public</span> <span class="token keyword">static</span> MauiApp <span class="token function">CreateMauiApp</span><span class="token punctuation">(</span><span class="token punctuation">)</span>
<span class="token punctuation">{</span>
    <span class="token keyword">var</span> builder <span class="token operator">=</span> MauiApp<span class="token punctuation">.</span><span class="token function">CreateBuilder</span><span class="token punctuation">(</span><span class="token punctuation">)</span><span class="token punctuation">;</span>
    <span class="token punctuation">.</span><span class="token punctuation">.</span><span class="token punctuation">.</span>
    TelerikLocalizationManager<span class="token punctuation">.</span>Manager <span class="token operator">=</span> <span class="token keyword">new</span> <span class="token class-name">CustomLocalizationManager</span><span class="token punctuation">(</span><span class="token punctuation">)</span><span class="token punctuation">;</span>
    <span class="token punctuation">.</span><span class="token punctuation">.</span><span class="token punctuation">.</span>
    <span class="token keyword">return</span> builder<span class="token punctuation">.</span><span class="token function">Build</span><span class="token punctuation">(</span><span class="token punctuation">)</span><span class="token punctuation">;</span>
<span class="token punctuation">}</span>
</code></pre><p>When running the app, we will get the following result:</p><p><img src="https://d585tldpucybw.cloudfront.net/sfimages/default-source/blogs/2026/2026-06/telerik-datagrid-spanish-strings.gif?sfvrsn=cd4718ff_2" alt="Telerik DataGrid displaying Spanish localization strings" /></p><p>In the image above you can see how the DataGrid options are displayed translated into Spanish. With this, we have finished localizing the strings in our application.</p><h2 id="conclusion">Conclusion</h2><p>Throughout this article you&rsquo;ve seen how to localize .NET MAUI applications. You&rsquo;ve seen how to translate text elements found in XAML files, view models and even prebuilt Telerik controls for .NET MAUI. Now it&rsquo;s your time to reach more people with your apps by using localization through resource files.</p><blockquote><p>Try out Telerik UI for .NET MAUI free for 30 days.</p><p>&nbsp;</p><p><a target="_blank" href="https://www.telerik.com/try/ui-for-maui" class="Btn">Try Now</a></p></blockquote>]]></content>
  </entry>
  <entry>
    <id>urn:uuid:9c42fac5-42a2-417f-b5a6-e359bcaadc44</id>
    <title type="text">SCIM Provisioning for DevCraft Subscriptions: Automating License Management for Your Teams</title>
    <summary type="text">Progress DevCraft Complete and DevCraft Ultimate subscription licenses just got a whole lot easier to manage across your team with SCIM provisioning.</summary>
    <published>2026-06-10T18:13:57Z</published>
    <updated>2026-06-20T04:15:38Z</updated>
    <author>
      <name>Dragan Grigorov </name>
    </author>
    <link rel="alternate" href="https://www.telerik.com/blogs/scim-provisioning-telerik-kendo-ui-licenses?utm_medium=feed&amp;utm_source=feedpress.me&amp;utm_campaign=Feed%3A+telerik-blogs-desktop"/>
    <content type="text"><![CDATA[<p><span class="featured">Progress DevCraft Complete and DevCraft Ultimate subscription licenses just got a whole lot easier to manage across your team with SCIM provisioning.</span></p><p>Managing access across growing development teams can quickly become time-consuming when done manually.</p><p>That&rsquo;s why we&rsquo;re introducing <strong>System for Cross-domain Identity Management (SCIM)</strong> for Progress DevCraft Complete and DevCraft Ultimate subscription licenses, along with Fiddler and ThemeBuilder Enterprise licenses&mdash;bringing automated license seat management directly into your organization&rsquo;s Identity Provider.</p><p>If <strong>SSO simplified how your team signs in</strong>, SCIM extends that experience by <strong>automating how access is assigned and maintained</strong>.</p><p> If you haven&rsquo;t set up SSO yet, follow the steps in our <a target="_blank" href="https://www.telerik.com/blogs/sso-telerik-kendo-ui-simpler-more-secure-access-account">SSO guide</a>.</p><h2 id="what-is-scim-and-why-it-matters">What Is SCIM and Why It Matters</h2><p>For customers using <strong>DevCraft Complete and Ultimate subscription licenses</strong>, as well as <strong>Fiddler</strong> and <strong>ThemeBuilder Enterprise licenses</strong>, SCIM allows license access to be managed directly through your organization&rsquo;s Identity Provider (IdP), such as Microsoft Entra ID or Okta.</p><p>Instead of managing users separately in Telerik, access becomes part of your existing internal processes. When developers are assigned to the right group in your IdP, they automatically receive access to their DevCraft subscription. When they are removed, their access is updated accordingly.</p><p>This helps organizations:</p><ul><li>Keep license access aligned with internal systems</li><li>Eliminate manual seat management</li><li>Reduce the risk of unused or outdated assignments</li></ul><p> Your Identity Provider becomes the <strong>single place to manage access</strong> to your licenses.</p><h2 id="how-to-set-it-up">How to Set It Up</h2><p>SCIM builds on top of SSO and is designed to be quick to configure.</p><h3 id="enable-sso">1. Enable SSO</h3><p>SCIM requires SSO to be already configured for your domain.</p><p>If you haven&rsquo;t enabled it yet, follow the steps in our <a target="_blank" href="https://www.telerik.com/blogs/sso-telerik-kendo-ui-simpler-more-secure-access-account">SSO guide</a>.</p><h3 id="open-scim-setup-in-your-telerik-account">2. Open SCIM Setup in Your Telerik Account</h3><ul><li>Go to <a target="_blank" href="https://www.telerik.com/account/sso-management"><strong>Manage SSO and SCIM</strong></a> in your Telerik account.</li><li>Click on <strong>SCIM Setup</strong>.</li></ul><p><img src="https://d585tldpucybw.cloudfront.net/sfimages/default-source/blogs/2026/2026-06/scim-setup.png?sfvrsn=5f9e7cc_2" alt="Configure SSO & SCIM: SCIM Setup" /></p><h3 id="generate-your-scim-key">3. Generate Your SCIM Key</h3><p>In the SCIM Setup screen:</p><ul><li>Copy the SCIM URL and use it when configuring your Identity Provider.</li><li>Add a Key Note that should help differentiate your keys in the future.</li><li>Generate and copy the <strong>SCIM API key</strong> and <strong>Finish Setup</strong></li></ul><p><img src="https://d585tldpucybw.cloudfront.net/sfimages/default-source/blogs/2026/2026-06/generate-scim-key.png?sfvrsn=8870d1e8_2" alt="SCIM URL, Key Note, Key" /></p><blockquote><p>⚠️ <strong>Important:</strong> Please copy the key, as once the setup is complete, you will no longer have access to the full key.</p></blockquote><p>The generated SCIM API Key will be used as a Bearer authentication token in your IdP.</p><h3 id="configure-scim-in-your-identity-provider">4. Configure SCIM in Your Identity Provider</h3><p>This step connects your Identity Provider with Telerik, allowing it to send user and group updates automatically.</p><p>In your Identity Provider (for example, Okta):</p><ul><li>Add the Telerik SCIM URL.</li><li>Use the generated API key for authentication.</li></ul><p><img src="https://d585tldpucybw.cloudfront.net/sfimages/default-source/blogs/2026/2026-06/scim-provision-integration.png?sfvrsn=7651526f_2" alt="Okta window for Telerik SCIM Test App. Provisioning, Integration tab. SCIM 2.0 Base Url, OAuth Bearer Token" /></p><ul><li>Enable provisioning&mdash;verify the Create, Update and Deactivate are enabled.</li></ul><p><img src="https://d585tldpucybw.cloudfront.net/sfimages/default-source/blogs/2026/2026-06/okta-scim-provision.png?sfvrsn=59e4ccad_2" alt="Okta window for Telerik SCIM Test App. Provisioning, To App tab. Okta to SCIM. Create users, update user attributes, deactivate users are enabled" /></p><h3 id="map-your-devcraft-license-to-your-idp-group">5. Map Your DevCraft License to Your IdP Group</h3><p>In <a target="_blank" href="https://www.telerik.com/account/sso-management">Manage SSO &amp; SCIM</a> in Your Account:</p><ul><li>Identify your DevCraft Complete or Ultimate subscription license that you want to enable the SCIM feature, and click on <strong>Configure</strong>.</li><li><strong>Enable SCIM Provisioning</strong>.</li><li>Copy the <strong>IdP Group Identifier</strong> and <strong>Apply</strong>.</li></ul><p><img src="https://d585tldpucybw.cloudfront.net/sfimages/default-source/blogs/2026/2026-06/configure-sso-scim-provisioning.png?sfvrsn=73394aee_2" alt="Configure SSO & SCIM Provisioning for License Name" /></p><p> From this point on, access is controlled through group membership.</p><ul><li>Use the IdP Group Identifier to <strong>create a group with the same name in your IdP Provider</strong> and assign that group to the SCIM App. Optionally, add a group description as a human-readable name in the IdP.</li></ul><p><img src="https://d585tldpucybw.cloudfront.net/sfimages/default-source/blogs/2026/2026-06/okta-group-idp-provider.png?sfvrsn=4af0484b_2" alt="Okta window for Telerik SCIM Test App. Assignments, Groups. Subscription key." /></p><ul><li>You can start adding users to the IdP group. For a start, if there are already seated users on the Telerik side, add those users to the IdP group as well. From there on, any IdP group change will be reflected on the Telerik side.</li></ul><h3 id="verify-user-synchronization">6. Verify User Synchronization</h3><p>After completing the setup, you can verify that the configuration is correct and that users are syncing as expected from the <a target="_blank" href="https://www.telerik.com/account/manage-licensed-users/product-list">Licensed Users</a> view.</p><ul><li>Users added to the mapped IdP group will start appearing automatically.</li><li>Existing users (with Telerik accounts) should show as <strong>Assigned</strong>, and can continue signing in via SSO as before.</li><li>New users (without a Telerik account) will appear with an <strong>Invited</strong> status. They will receive an email invitation. They need to complete their account setup on their first login.</li></ul><p><img src="https://d585tldpucybw.cloudfront.net/sfimages/default-source/blogs/2026/2026-06/devcraft-complete-subscription-developer-list.png?sfvrsn=b22a1a8e_2" alt="Licensed Users page. DevCraft Complete Subscriptions. List of developers with states invited or assigned." /></p><p> This handles both new and existing users seamlessly.</p><h2 id="what-happens-after-scim-is-enabled">What Happens After SCIM Is Enabled?</h2><p>Once SCIM is enabled for your license, access management becomes fully automated.</p><p>User access is driven entirely by group membership in your Identity Provider, while Telerik reflects those changes automatically. New users are guided through a simple onboarding experience at login, and the Licensed Users view becomes read-only for visibility and reporting.</p><p> There&rsquo;s no need to manually manage seats in Telerik.-Your Identity Provider handles all updates.</p><h2 id="bring-automated-access-to-your-telerik-licenses">Bring Automated Access to Your Telerik Licenses</h2><p>SCIM makes it easier to manage access to your licenses by extending your existing identity management into license management.</p><p>Once combined with SSO, it provides a smooth experience where both authentication and access are handled together&mdash;directly from your Identity Provider.</p><p>Whether you&rsquo;re looking to reduce manual work, keep access aligned with your organization or scale more efficiently as your team grows, SCIM is designed to help you get there!</p><p>Head to the <a target="_blank" href="https://www.telerik.com/account/sso-management">Manage SSO and SCIM</a> page now to get started.</p>]]></content>
  </entry>
  <entry>
    <id>urn:uuid:95c1b59f-0f37-46a9-a08b-2560c179c4bf</id>
    <title type="text">Getting Contact Information with .NET MAUI</title>
    <summary type="text">Let users easily pull contact info (like name, number, email) from one app and save it to their device’s contact list in .NET MAUI.</summary>
    <published>2026-06-08T17:06:18Z</published>
    <updated>2026-06-20T04:15:38Z</updated>
    <author>
      <name>Leomaris Reyes </name>
    </author>
    <link rel="alternate" href="https://www.telerik.com/blogs/getting-contact-information-net-maui?utm_medium=feed&amp;utm_source=feedpress.me&amp;utm_campaign=Feed%3A+telerik-blogs-desktop"/>
    <content type="text"><![CDATA[<p><span class="featured">Let users easily pull contact info (like name, number, email) from one app and save it to their device&rsquo;s contact list in .NET MAUI.</span></p><p>Let&rsquo;s be honest, the only &ldquo;accessory&rdquo; you take with you everywhere&mdash;no matter the activity you&rsquo;re doing or the type of event it is, and something that never bothers you to carry&mdash;is your mobile device. </p><p>OK &hellip; and what does this mean? It means that a large part of the things you need to do in your day-to-day life are covered by your phone: from super basic operations like calculating amounts and saving contacts, to talking with your friends or even ordering food.</p><p>Now, think about this: imagine you have an application with a form where you need to enter contact information&mdash;the same information you already saved on your phone when creating that contact. Having to type everything again can feel tedious, right?</p><p>This is where things get interesting. A simple action like saving a contact opens the door for multiple applications to obtain that information and work together with the data that already exists on the device. If your app could &ldquo;pull&rdquo; that information directly, without the user having to type it again, that would be a win! </p><p>So get excited, because in this article I&rsquo;ll show you how to obtain that contact information to use it in your .NET MAUI apps. </p><h2 id="what-do-i-need-before-i-start">What Do I Need Before I Start?</h2><p>Before we begin, it&rsquo;s important to configure a few platform-specific steps. Let&rsquo;s go through each one, step by step:</p><h3 id="android">Android</h3><p>To be able to read contacts, you must explicitly request the <code>READ_CONTACTS</code> permission. There are three different ways to add this permission on Android:</p><p><strong>Option 1: Add the permission directly in the AndroidManifest.xml</strong></p><p>Go to Platforms &rarr; Android, open the AndroidManifest.xml file, and add the following node:</p><pre class=" language-xml"><code class="prism  language-xml">&lt;uses-permission android:name="android.permission.READ_CONTACTS" /&gt;
</code></pre><p><strong>Option 2: Use the Android Manifest graphical editor</strong></p><p>Go to <strong>Platforms &rarr; Android,</strong> double-click the <strong>AndroidManifest.xml</strong> file, and locate the <strong>Required permissions</strong> section. Find the permission labeled <strong>READ_CONTACTS</strong> and simply check the option, as shown below.</p><p><img src="https://d585tldpucybw.cloudfront.net/sfimages/default-source/blogs/2026/2026-05/01_readcontacts.png?sfvrsn=6ec6edc6_2" title="Read Contacts Permissions" alt="" /></p><p><strong>Option 3: Add the assembly-based permission</strong></p><p>Go to <strong>Platforms &rarr; Android &rarr; MainApplication.cs</strong> and add the permission as follows:</p><pre class=" language-csharp"><code class="prism  language-csharp">[assembly: UsesPermission(Android.Manifest.Permission.ReadContacts)]
</code></pre><h3 id="iosmac-catalyst">iOS/Mac Catalyst</h3><p>On <strong>iOS</strong> and <strong>Mac Catalyst</strong>, we also need a very similar configuration to be able to access contacts. Follow these steps:</p><p><strong>Step 1:</strong><br />Right-click on <strong>Platforms &rarr; iOS &rarr; Info.plist</strong> and on <strong>Platforms &rarr; MacCatalyst &rarr; Info.plist</strong> (yes, each configuration is done per platform) and open the file with the editor.</p><p><strong>Step 2:</strong><br />Once the file is open, add the <strong>NSContactsUsageDescription</strong> key along with its description. This step is mandatory to comply with Apple&rsquo;s guidelines. Keep in mind that this text must be very precise, as it will be the message shown to the user when the app requests permission to access their contacts.</p><pre class=" language-xml"><code class="prism  language-xml">&lt;key&gt;NSContactsUsageDescription&lt;/key&gt;
&lt;string&gt;This app needs access to your contacts to select a contact and retrieve its information.&lt;/string&gt;
</code></pre><h3 id="windows">Windows</h3><p>Contact picking is not supported on Windows.</p><h2 id="let’s-start">Let&rsquo;s Start!</h2><p>All set! We&rsquo;ve prepared the initial configuration to get started! </p><p>.NET MAUI provides the IContacts interface, which allows us to select and retrieve information from the contacts stored on the device.</p><p>This interface is part of the Microsoft.Maui.ApplicationModel.Communication namespace and is available through the Default property, which gives us access to the ready-to-use implementation provided by .NET MAUI.</p><h3 id="important-considerations-for-ios-and-macos">Important Considerations for iOS and macOS</h3><p>There is a namespace conflict because multiple classes named Contacts exist. As a result, if you write only <code>Contacts</code>, .NET doesn&rsquo;t know exactly which one you are referring to, and you might think there is an issue with your code when in reality you are just using the wrong class.</p><p><strong>What&rsquo;s the Solution?</strong></p><p>To avoid this conflict, you must tell .NET exactly where the class you want to use comes from. This is done by using the fully qualified name:</p><pre class=" language-csharp"><code class="prism  language-csharp">Microsoft.Maui.ApplicationModel.Communication.Contacts
</code></pre><p><strong>A Cleaner Solution</strong></p><p>There is also a cleaner way to handle this. Instead of writing the full name every time you use it, you can create an alias with a using directive, like this:</p><pre class=" language-csharp"><code class="prism  language-csharp">using Communication = Microsoft.Maui.ApplicationModel.Communication;
</code></pre><p>This gives the namespace a shorter name. Then, you can use that alias directly in your code:</p><pre class=" language-csharp"><code class="prism  language-csharp">var contact = await Communication.Contacts.Default.PickContactAsync();
</code></pre><h2 id="what-contact-information-can-we-retrieve-exactly">What Contact Information Can We Retrieve Exactly?</h2><p><img src="https://d585tldpucybw.cloudfront.net/sfimages/default-source/blogs/2026/2026-05/02_contact.png?sfvrsn=23e5e456_2" title="Contacts" alt="" /></p><p>Let&rsquo;s take a look at the data that can be retrieved from a contact. The following are the available fields:</p><ul><li><strong>Id:</strong> The internal identifier of the contact on the device.</li><li><strong>NamePrefix:</strong> The name prefix (Mr., Mrs., Eng., Dr., etc.)</li><li><strong>GivenName:</strong> The contact&rsquo;s first name.</li><li><strong>MiddleName:</strong> The contact&rsquo;s middle name.</li><li><strong>FamilyName:</strong> The contact&rsquo;s last name.</li><li><strong>NameSuffix:</strong> The name suffix (if any), for example, Jr.</li><li><strong>Phones:</strong> The list of phone numbers associated with the contact.</li><li><strong>Emails:</strong> The list of email addresses associated with the contact.</li><li><strong>DisplayName:</strong> The full name displayed on the phone. For example: Eng. Maris Lopez.</li></ul><h2 id="getting-your-device-contact-list">Getting Your Device Contact List</h2><p>To retrieve the full list of contacts stored on your device, you can use the <code>GetAllAsync()</code> method. This method returns a collection containing all available contacts.</p><p>Below is an example showing how to retrieve them:</p><pre class=" language-csharp"><code class="prism  language-csharp">public async IAsyncEnumerable&lt;string&gt; GetContactNames() 
{ 
    var contacts = await Contacts.Default.GetAllAsync(); 
// No contacts 
if (contacts == null) 
    yield break;
 
foreach (var contact in contacts) 
    yield return contact.DisplayName; 
}
</code></pre><h3 id="but-how-can-i-select-a-specific-contact-">But How Can I Select a Specific Contact? </h3><p>To ask the user to select a specific contact from their device, we use the <code>PickContactAsync()</code> method. This method opens the system&rsquo;s contact list, where the user can simply choose a contact.</p><blockquote><p>⚠️ If the user does not select any contact or cancels the action, the method returns null.</p></blockquote><p>In the following example, you can see how to retrieve the different pieces of information from the selected contact:</p><pre class=" language-csharp"><code class="prism  language-csharp">private async void SelectContactButton_Clicked(object sender, EventArgs e) 
{ 
    try 
    { 
    var contact = await Contacts.Default.PickContactAsync(); 
    
    if (contact == null) 
    return; 
    string id = contact.Id; 
    string namePrefix = contact.NamePrefix; 
    string givenName = contact.GivenName; 
    string middleName = contact.MiddleName; 
    string familyName = contact.FamilyName; 
    string nameSuffix = contact.NameSuffix; 
    string displayName = contact.DisplayName; 
    List&lt;ContactPhone&gt; phones = contact.Phones; 
    List&lt;ContactEmail&gt; emails = contact.Emails; 
    }
    
    catch (Exception ex) 
    { 
    // Most likely permission denied 
    } 
}
</code></pre><h2 id="✍️-platform-differences-you-should-know">✍️ Platform Differences You Should Know</h2><h3 id="android-1">Android</h3><ul><li><code>GetAllAsync</code> does not support the <code>cancellationToken</code> parameter.</li></ul><h3 id="ios--mac-catalyst">iOS / Mac Catalyst</h3><ul><li><code>GetAllAsync</code> does not support the <code>cancellationToken</code> parameter.</li><li>The <code>DisplayName</code> property is not supported natively. Instead, its value is constructed using <code>GivenName FamilyName</code>.</li></ul><h2 id="conclusion">Conclusion</h2><p>And that&rsquo;s it!  In this article, you learned how to work with device contacts in .NET MAUI, from selecting a specific contact to retrieving the full contact list. You also explored key platform differences and important considerations to keep in mind when targeting Windows, Android, iOS and Mac Catalyst.</p><p>With this knowledge, you can now integrate contact access into your apps in a clear and reliable way, improving the user experience while handling platform-specific behaviors correctly.</p><p>See you in the next article! &zwj;♀️✨</p><h3 id="reference">Reference</h3><p>Code samples and explanations were based on the official documentation.</p><ul><li><a target="_blank" href="https://learn.microsoft.com/en-us/dotnet/maui/platform-integration/communication/contacts?view=net-maui-10.0&amp;tabs=macios">https://learn.microsoft.com/en-us/dotnet/maui/platform-integration/communication/contacts?view=net-maui-10.0&amp;tabs=macios</a></li></ul><aside><hr data-sf-ec-immutable="" /><div class="row"><div class="col-4 u-normal-full u-small-mb0"><h4 class="u-fs20 u-fw5 u-lh125 u-mb0">Share Functionality in Your .NET MAUI Apps</h4></div><div class="col-8"><p class="u-fs16 u-mb0"><a target="_blank" href="https://www.telerik.com https://www.telerik.com/blogs/share-functionality-net-maui-apps">Learn how to add share functionality to your .NET MAUI app</a> whether in iOS, Android or Windows.</p></div></div></aside>]]></content>
  </entry>
  <entry>
    <id>urn:uuid:9de19443-4354-4fcc-a3a2-b2f1b2c55cc7</id>
    <title type="text">From Classic WinForms to Telerik in Minutes: Meet the AI-Powered Converter</title>
    <summary type="text">Transform your MS WinForms application to use the Telerik UI for WinForms controls reliably and within minutes using the new WinForms Converter in the MCP Server.</summary>
    <published>2026-06-04T14:07:53Z</published>
    <updated>2026-06-20T04:15:38Z</updated>
    <author>
      <name>Hristo Merdjanov </name>
    </author>
    <link rel="alternate" href="https://www.telerik.com/blogs/classic-winforms-telerik-minutes-meet-ai-powered-converter?utm_medium=feed&amp;utm_source=feedpress.me&amp;utm_campaign=Feed%3A+telerik-blogs-desktop"/>
    <content type="text"><![CDATA[<p><span class="featured">Transform your MS WinForms application to use the Telerik UI for WinForms controls reliably and within minutes using the new WinForms Converter in the MCP Server.</span></p><p>If you&rsquo;ve ever faced the task of migrating a WinForms application from standard Microsoft controls to Progress <a target="_blank" href="https://www.telerik.com/products/winforms.aspx">Telerik UI for WinForms</a>, you know the drill. Open a form, find a button, replace it with RadButton, update the namespace, rename a handful of properties, hope you didn&rsquo;t miss anything in the designer file, build, fix errors; repeat. For a simple form with a dozen controls, that&rsquo;s manageable. For an application with multiple forms, user controls and hundreds of control instances, it&rsquo;s a time-sink that nobody looks forward to.</p><p>Imagine that you have an existing application built with the Microsoft controls&mdash;even a very simple one, like the one below&mdash;but the manual effort and domain expertise it requires converting it to Telerik UI kept it out of reach. Well, that changes now.</p><p><img src="https://d585tldpucybw.cloudfront.net/sfimages/default-source/blogs/2026/2026-06/order-management-system.png?sfvrsn=5bc5f96f_2" alt="Order Management System. A demo application for managing products and orders. Built with Windows Forms and .NET Framework 4.8" /></p><p>What if you could let AI handle the heavy lifting? That&rsquo;s exactly what we built. The <a target="_blank" href="https://www.telerik.com/products/winforms/documentation/ai-coding-assistant/converter/converter">Telerik WinForms Converter</a> is a new tool integrated into our MCP Server that automates WinForms-to-Telerik migration. It handles Microsoft WinForms control types, runs right inside your IDE and uses Roslyn for surgical, deterministic code transformations. In this post, I&rsquo;ll walk you through why we built it, how it works and the value it brings.</p><aside><hr data-sf-ec-immutable="" /><div class="row"><div class="col-4 u-normal-full u-small-mb0"><h4 class="u-fs20 u-fw5 u-lh125 u-mb0">Meet WinForms Converter</h4></div><div class="col-8"><p class="u-fs16 u-mb0">Join the <a target="_blank" href="https://www.telerik.com/campaigns/telerik-and-kendo-ui-2026-q2-release-webinar">Telerik and Kendo UI 2026 Q2 Release Webinar</a> on June 16 to see fast and deterministic conversion of standard WinForms apps to modern Telerik UI.</p></div></div><hr class="u-mb3" /></aside><h2 id="why-can’t-i-just-ask-an-llm">Why: Can&rsquo;t I Just Ask an LLM?</h2><p>Fair question. AI coding assistants are excellent at many tasks, so the first thing we explored was: can an LLM just do this migration from scratch?</p><p>We tested all leading LLM models on real WinForms migration scenarios. The results were consistent, and consistently problematic. Almost all models got the Telerik references wrong on multiple attempts.</p><p>But wrong packages were just the beginning. The lack of structured guidance was a big problem. Some models decided to stop the conversion mid-process, leaving the application in a non-stable state. Others created stub classes&mdash;empty wrappers like <code>public class RadButton : Button { }</code>&mdash;that compiled successfully but had zero Telerik functionality.</p><p>Quality was also an issue. Many models missed the non-obvious patterns inside <code>.Designer.cs</code> files, where serialized control declarations follow conventions that aren&rsquo;t documented in typical training data.</p><p>The takeaway? LLMs are great at coding, but WinForms migration requires domain-specific knowledge that pure language models simply don&rsquo;t have. The control mappings, property translations, designer serialization patterns and container-aware type resolution&mdash;these need to be encoded deterministically as expert tooling, and not left to probabilistic generation.</p><h2 id="how-the-converter-in-action">How: The Converter in Action</h2><p>The Telerik WinForms Converter is a Roslyn-based engine integrated into the Telerik <a target="_blank" href="https://www.telerik.com/products/winforms/documentation/ai-coding-assistant/mcp-server">WinForms MCP Server</a>. It works in Visual Studio, VS Code with GitHub Copilot in Agent mode, Copilot CLI or any other MCP-compatible AI host application. You configure the MCP server, open Copilot Chat, select a migration prompt, and the AI agent takes care of the rest.</p><p>We have tools that return a strict migration plan, do a project analysis, help add Telerik references and also set up a modern theme. As for our star, the converter tool itself, under the hood, it parses your C# or VB.NET source code into an Abstract Syntax Tree using Roslyn, then walks the tree and applies precise, rule-driven transformations. It knows that a <code>DataGridView</code> becomes a <code>RadGridView</code>, that <code>DataPropertyName</code> maps to <code>FieldName</code> and that <code>DataGridViewAutoSizeColumnsMode</code> translates to <code>GridViewAutoSizeColumnsMode</code>.</p><p>Here&rsquo;s what a typical conversion looks like:</p><p><strong>Before:</strong></p><pre class=" language-csharp"><code class="prism  language-csharp"><span class="token keyword">private</span> System<span class="token punctuation">.</span>Windows<span class="token punctuation">.</span>Forms<span class="token punctuation">.</span>DataGridView productsGrid<span class="token punctuation">;</span>  
  
<span class="token keyword">this</span><span class="token punctuation">.</span>productsGrid<span class="token punctuation">.</span>AutoSizeColumnsMode <span class="token operator">=</span> DataGridViewAutoSizeColumnsMode<span class="token punctuation">.</span>Fill<span class="token punctuation">;</span>  
<span class="token keyword">this</span><span class="token punctuation">.</span>productsGrid<span class="token punctuation">.</span>Columns<span class="token punctuation">.</span><span class="token function">AddRange</span><span class="token punctuation">(</span><span class="token keyword">new</span> <span class="token class-name">DataGridViewColumn</span><span class="token punctuation">[</span><span class="token punctuation">]</span> <span class="token punctuation">{</span>  
<span class="token keyword">this</span><span class="token punctuation">.</span>nameColumn<span class="token punctuation">,</span>  
<span class="token keyword">this</span><span class="token punctuation">.</span>priceColumn  
<span class="token punctuation">}</span><span class="token punctuation">)</span><span class="token punctuation">;</span>
</code></pre><p><strong>After:</strong></p><pre class=" language-csharp"><code class="prism  language-csharp"><span class="token keyword">private</span> Telerik<span class="token punctuation">.</span>WinControls<span class="token punctuation">.</span>UI<span class="token punctuation">.</span>RadGridView productsGrid<span class="token punctuation">;</span>  
  
<span class="token keyword">this</span><span class="token punctuation">.</span>productsGrid<span class="token punctuation">.</span>AutoSizeColumnsMode <span class="token operator">=</span> GridViewAutoSizeColumnsMode<span class="token punctuation">.</span>Fill<span class="token punctuation">;</span>  
<span class="token keyword">this</span><span class="token punctuation">.</span>productsGrid<span class="token punctuation">.</span>Columns<span class="token punctuation">.</span><span class="token function">AddRange</span><span class="token punctuation">(</span><span class="token keyword">new</span> <span class="token class-name">GridViewDataColumn</span><span class="token punctuation">[</span><span class="token punctuation">]</span> <span class="token punctuation">{</span>  
<span class="token keyword">this</span><span class="token punctuation">.</span>nameColumn<span class="token punctuation">,</span>  
<span class="token keyword">this</span><span class="token punctuation">.</span>priceColumn  
<span class="token punctuation">}</span><span class="token punctuation">)</span><span class="token punctuation">;</span>
</code></pre><p>Notice how the converter handles not just the type rename, but also the column array type, the enum type and the property mappings&mdash;all in one pass. The converter is also context-aware: a <code>ToolStripButton</code> inside a <code>MenuStrip</code> maps to <code>RadMenuItem</code>, but the same <code>ToolStripButton</code> inside a <code>ToolStrip</code> becomes a <code>CommandBarButton</code>. This kind of parent-child awareness is something LLMs consistently get wrong.</p><p>The migration follows a divide-and-conquer strategy. The AI agent converts one form at a time&mdash;the Designer file first, then the corresponding source file&mdash;builds after each pair and fixes any compilation errors before moving on. This keeps the error surface small and helps prevent issues from cascading across the project.</p><p><img src="https://d585tldpucybw.cloudfront.net/sfimages/default-source/blogs/2026/2026-06/run-telerik-convert-file-winforms.png?sfvrsn=85999964_2" alt="GitHub Copilot Chat window. Migrate this Winforms application to Telerik UI for WinForms. … Run Telerik_convert_file. This is a tool from Telerik.WinForms.MCP" /></p><p>The converter supports various Microsoft WinForms control types including Form, Button, TextBox, ComboBox, DataGridView, TreeView, MenuStrip, ToolStrip, TabControl, SplitContainer and many more. It handles both C# and VB.NET, supports .NET Framework and modern .NET, and offers a dry-run mode so you can preview all changes before they&rsquo;re applied. Backups (.bak files) are created automatically before any file is modified.</p><h2 id="the-numbers">The Numbers</h2><p>We ran benchmarks with multiple AI models against various applications. Very simple ones and also complex real-world line-of-business apps. The data below shows the results after converting the simple Orders Management application consisting of two screens and several views and screenshotted at the beginning of the blog. ⬆️⬆️⬆️</p><p>We did the test harness with Opus 4.6, Sonnet 4.6 and Haiku 4.5. Each tested with and without our MCP tooling on the same sample Orders Management WinForms application.</p><p>A few things stand out here.</p><p><strong>Output tokens tell the real story.</strong> Output tokens are the expensive ones. They cost significantly more than input tokens across all major providers. With MCP and the sample app in question, models generate only ~10K output tokens versus ~48K without. That&rsquo;s a 4.6x reduction. The reason is straightforward: our converter handles the bulk of the transformation deterministically. The LLM doesn&rsquo;t need to generate conversion code token-by-token; it just calls our tools and orchestrates the workflow.</p><p><strong>Less capable models become fully capable.</strong> This is perhaps the most exciting finding. Haiku 4.5&mdash;a lightweight, cost-efficient model&mdash;can achieve full conversions with our MCP tooling. The same quality as Opus. Without MCP? It managed only 22%, converting just 4 out of 18 controls. Our tooling can level the playing field: you don&rsquo;t need the most powerful (and expensive) model to get excellent results.</p><p><strong>More complete conversions, every time.</strong> With MCP, all 18 controls were converted across every model we tested. Without MCP, coverage was variable: models would skip controls, miss designer serialization patterns or leave standard WinForms types untouched. The deterministic nature of our converter means you get consistent, complete results regardless of which model you&rsquo;re using. Time is also a factor, and our MCP tooling significantly reduces the conversion time.</p><p>Below is the result after converting the simple Orders Management app. It is fully functional, has the Telerik Fluent theme applied and the whole process only took just couple of minutes.</p><p><img src="https://d585tldpucybw.cloudfront.net/sfimages/default-source/blogs/2026/2026-06/order-management-system-converted-winforms-telerik.png?sfvrsn=c9e363ba_2" alt="The Order Management System converted from WinForms to Telerik controls" /></p><h2 id="deterministic--ai-the-best-of-both-worlds">Deterministic + AI: The Best of Both Worlds</h2><p>This is where the real value proposition becomes clear. The conversion engine is deterministic&mdash;the same input always produces the same output. No hallucinations, no randomness, no guessing. The MCP tools handle the bulk mechanical transformation with great accuracy: type mappings, property translations, enum conversions, namespace additions, designer serialization patterns.</p><p>The AI agent&rsquo;s responsibility is to orchestrate&mdash;call the converter tools in the right order, analyze the project structure and then handle what remains. After the converter does its work, the LLM steps in to fix edge cases, resolve compilation errors and adapt to project-specific quirks. For finding Telerik alternatives to removed properties, the agent can also use the <code>telerik_winforms_assistant</code> coding assistant tool that ships with the same MCP Server.</p><p>This separation of concerns is key. Our tooling does what tooling does best: deterministic, repeatable, accurate transformations. While the LLM does what LLMs do best: reasoning about context, adapting to the unexpected, making judgment calls. The combination is more reliable than <strong>either approach alone</strong>.</p><p>And it works incrementally. You can migrate your entire project in one go or convert a single form to test the waters. Either way, only the UI layer changes. Your business logic, data access, and service code stay untouched. The Fluent theme is auto-configured, and both .NET Framework 4.8 and modern .NET are fully supported.</p><h2 id="getting-started">Getting Started</h2><p>Getting up and running takes just a few steps. Add a .mcp.json configuration to your project with the Telerik.WinForms.MCP server enabled. Then open Copilot Chat in Agent mode and pick one of three pre-built prompts:</p><ul><li>Migrate WinForms Project to Telerik &ndash; full project migration</li><li>Migrate WinForms Project to Telerik (Dry Run) &ndash; preview changes before applying</li><li>Convert Single File to Telerik &ndash; convert one file at a time</li></ul><p><img src="https://d585tldpucybw.cloudfront.net/sfimages/default-source/blogs/2026/2026-06/mcp-prompts.png?sfvrsn=574f5f36_2" alt="Copilot Chat in Agent mode – MCP prompts" /></p><p>For the full setup guide and detailed documentation, head to our <a target="_blank" href="https://www.telerik.com/products/winforms/documentation/ai-coding-assistant/converter/converter">WinForms converter documentation</a>.</p><h2 id="try-it-out">Try It Out</h2><p>The WinForms Converter is available now as part of the Telerik WinForms MCP Server. <a target="_blank" href="https://www.telerik.com/download-trial-file/v2-b/ui-for-winforms">Download and try the latest version of Telerik UI for WinForms</a> to explore the converter and all the other features our MCP Server offers.</p><p>We&rsquo;d love to hear how this works for you, so please let us know your thoughts by visiting our <a target="_blank" href="https://feedback.telerik.com/winforms">Feedback Portal</a> or by leaving a comment below.</p>]]></content>
  </entry>
  <entry>
    <id>urn:uuid:862be530-d5bf-4f83-a53d-21c09f5f4a84</id>
    <title type="text">5 Heart Animations Using .NET MAUI</title>
    <summary type="text">Try your hand at some simple, engaging animations in .NET MAUI. Here are five heart animations you can master today!</summary>
    <published>2026-06-02T16:28:18Z</published>
    <updated>2026-06-20T04:15:38Z</updated>
    <author>
      <name>Leomaris Reyes </name>
    </author>
    <link rel="alternate" href="https://www.telerik.com/blogs/5-heart-animations-using-net-maui?utm_medium=feed&amp;utm_source=feedpress.me&amp;utm_campaign=Feed%3A+telerik-blogs-desktop"/>
    <content type="text"><![CDATA[<p><span class="featured">Try your hand at some simple, engaging animations in .NET MAUI. Here are five heart animations you can master today!</span></p><p>I&rsquo;m a big fan of animations that capture the user&rsquo;s attention&mdash;the kind that don&rsquo;t just make an app look pretty, but also have the ability to guide users and clearly communicate what&rsquo;s happening. When used correctly, animations become a key part of design and usability. ✨</p><p>In .NET MAUI, we have simple yet very powerful animations that allow us to add that dynamic touch without unnecessary complexity. With just a few lines of code, we can transform common interactions into more natural and enjoyable experiences.</p><p>I genuinely love this article, because in it we&rsquo;ll learn how to create five super-creative animations that elevate our application and showcase the beautiful and powerful things we can achieve using the basic animations available in .NET MAUI </p><h2 id="heart-ecg-monitor">1. Heart ECG Monitor</h2><p><img src="https://d585tldpucybw.cloudfront.net/sfimages/default-source/blogs/2026/2026-04/01-heartecgmonitor.gif?sfvrsn=fd1f81d3_2" title="Heart ECG Monitor Demo" alt="Heart ECG Monitor Demo" /></p><p><strong>OMG, can we do this in .NET MAUI??</strong> Yess!!!  (This is my favorite animation, hahaha).</p><p>Let&rsquo;s create an ECG monitor&ndash;style animation, where we can see the movement of the line. To achieve this, we&rsquo;ll work with both XAML and code-behind.</p><p><strong>Let&rsquo;s start with the XAML. </strong></p><p>The design includes a heart and some lines that simulate the monitor&rsquo;s movement. Both elements will be vertically aligned, so the layout that will contain our design is a <strong>VerticalStackLayout.</strong></p><p>Inside this layout, we&rsquo;ll add:</p><p>➖ An Image for the heart<br />➖ And a GraphicsView to draw and animate the monitor lines</p><pre class=" language-xml"><code class="prism  language-xml">&lt;VerticalStackLayout Padding="24" Spacing="16"
   
    &lt;!-- Heart --&gt; 
    &lt;Image x:Name="Heart" 
    Source="redheart" 
    WidthRequest="35" 
    HeightRequest="35" 
    HorizontalOptions="Center" /&gt;
    
    &lt;!-- ECG --&gt; 
    &lt;GraphicsView x:Name="Ecg" 
    HeightRequest="120" /&gt;

&lt;/VerticalStackLayout&gt;
</code></pre><p>Perfect! Now we&rsquo;ll continue with the code that brings the monitor and the heart to life. For the purpose of this example, we&rsquo;ll add everything directly in the code-behind. And how do we locate the code-behind?  For example, if your XAML file is called MainPage.xaml, the code-behind is in MainPage.xaml.cs.</p><h3 id="variable-declaration">Variable Declaration</h3><p>➖ <strong>WindowSize:</strong> This variable allows us to control how many heartbeats can be displayed on the screen at the same time. The higher this value is, the more heartbeats will be visible before they move out of view. As a result, a larger WindowSize makes the heartbeat appear slower on the monitor.</p><p>➖ <strong>Beat:</strong> We define an array to represent a complete heartbeat. Values close to zero represent the baseline, while higher values represent the peaks.</p><p>➖ <strong>_samples:</strong> This variable represents what should be displayed on the screen. Initially, we fill it with zeros to display a flat line.</p><p>➖ <strong>EcgDrawable:</strong> This holds the object responsible for drawing the monitor signal.</p><p>➖ <strong>_i:</strong> Finally, we have the index that will be used to iterate through the Beat array.</p><pre class=" language-csharp"><code class="prism  language-csharp">// Variables
 
const int WindowSize = 140; 
static readonly float[] Beat = 
    { 
    0,0,0, .12f,.25f,.12f, 0, -.25f,1f,-.35f, 0,0, .20f,.35f,.20f, 0,0,0,0 
};

readonly List&lt;float&gt; _samples = Enumerable.Repeat(0f, WindowSize).ToList(); 
readonly EcgDrawable _drawable; 
int _i;
</code></pre><h3 id="continuing-with-the-constructor">Continuing with the Constructor</h3><p>Once we have all the required variables defined, the next step is to connect the components and start the animation inside the constructor.</p><p>First, we create an instance of <code>EcgDrawable</code> and assign it to the <code>GraphicsView</code>. This allows the view to know how to render the ECG signal based on the provided samples.</p><p>Next, we configure a timer using the Dispatcher. This timer is responsible for updating the signal at a regular interval, which helps us achieve a smooth and continuous animation.</p><p>On each timer tick:</p><ul><li>The next value from the heartbeat pattern is added to the samples list.</li><li>The window size is preserved by removing the oldest value.</li><li>The <code>GraphicsView</code> is invalidated to force a redraw.</li></ul><p>Finally, we start the timer, and the heart monitor animation begins automatically.</p><p>In code, it looks like this:</p><pre class=" language-csharp"><code class="prism  language-csharp">public HeartAnimations() 
{ 
    InitializeComponent(); 
    _drawable = new EcgDrawable(_samples); 
    Ecg.Drawable = _drawable; 
    var t = Dispatcher.CreateTimer(); 
    t.Interval = TimeSpan.FromMilliseconds(16); 
    t.Tick += (_, __) =&gt; 
    { 
    _samples.Add(Beat[_i++ % Beat.Length]); 
    if (_samples.Count &gt; WindowSize) _samples.RemoveAt(0); 
    Ecg.Invalidate(); 
    }; 
    t.Start(); 
}
</code></pre><p>Finally, let&rsquo;s add the <code>EcgDrawable</code> class.</p><p>This class is responsible for <strong>visually rendering the ECG signal</strong> inside the GraphicsView component. It takes the list of values that represent the heart signal and transforms them into a continuous line, automatically calculating:</p><ul><li>The vertical position of the signal</li><li>The horizontal distribution of each point</li></ul><p>In code, this translates to the following:</p><pre class=" language-csharp"><code class="prism  language-csharp">class EcgDrawable(IReadOnlyList&lt;float&gt; samples) : IDrawable 
{ 
    public void Draw(ICanvas c, RectF r) 
    { 
    if (samples.Count &lt; 2) return; 
    c.StrokeColor = Colors.Red; 
    c.StrokeSize = 2; 
    var baseline = r.Top + r.Height * .55f; 
    var amp = r.Height * .35f; 
    var dx = r.Width / (samples.Count - 1); 
    var p = new PathF(); 
    p.MoveTo(r.Left, baseline - samples[0] * amp);  
    for (int i = 1; i &lt; samples.Count; i++) 
    p.LineTo(r.Left + i * dx, baseline - samples[i] * amp);
     
    c.DrawPath(p); 
    } 
}
</code></pre><p>And that&rsquo;s it!  We&rsquo;ve just finished building the Heart ECG Monitor animation. See? It wasn&rsquo;t that hard! I encourage you to try it out and experiment with it on your own.</p><p>Now, let&rsquo;s move on to the next animation! </p><h2 id="heart-ripple-pulse">2. Heart Ripple Pulse</h2><p><img src="https://d585tldpucybw.cloudfront.net/sfimages/default-source/blogs/2026/2026-04/02-heartripple.gif?sfvrsn=bc351843_2" title="Heart Ripple Pulse" alt="Heart Ripple Pulse" /></p><p>This animation represents the heartbeat and the waves generated by that pulse.</p><p>Here, we combine several simple animations and use a Grid as the main container to overlay all the elements in the same space, making them feel like a single, unified animation.</p><p>We&rsquo;ll start with the XAML, where we will define:</p><p>➖ Two Border components in red color, representing the ripple waves.</p><p>➖ A heart image, which will act as the main element at the center.</p><pre class=" language-xml"><code class="prism  language-xml">&lt;Grid HorizontalOptions="Center" 
    VerticalOptions="Start" 
    Margin="0,100" 
    WidthRequest="140" 
    HeightRequest="140"&gt;
    
    &lt;Border x:Name="Ripple1" 
    Stroke="Red" 
    StrokeThickness="3" 
    Opacity="0" 
    Scale="0.2" 
    StrokeShape="RoundRectangle 999" /&gt;
     
    &lt;Border x:Name="Ripple2" 
    Stroke="Red" 
    StrokeThickness="3" 
    Opacity="0" 
    Scale="0.2" 
    StrokeShape="RoundRectangle 999" /&gt;
     
    &lt;Image x:Name="Heart" 
    Source="redheart.png" 
    WidthRequest="48" 
    HeightRequest="48" 
    HorizontalOptions="Center" 
    VerticalOptions="Center" /&gt;

&lt;/Grid&gt;
</code></pre><p>To bring our animation to life, we&rsquo;ll work with the OnAppearing and in a method called Loop.</p><p>➖ <strong>OnAppearing:</strong> To explore something different, this time we&rsquo;ll work with the <code>OnAppearing</code> method (✍️ please make sure to declare the <code>_running</code> bool variable).</p><p>When the screen appears, we call the <code>Loop</code> method, which is responsible for running the animation cycle.</p><pre class=" language-csharp"><code class="prism  language-csharp">protected override void OnAppearing() 
{ 
    base.OnAppearing(); 
    _running = true; 
    _ = Loop(); 
}
</code></pre><p>➖ <strong>Loop():</strong> This is where the magic happens. ✨ Inside this method:</p><ul><li>We trigger the <strong>heart pop,</strong> a subtle scale effect on the heart</li><li>We animate the <strong>two circular lines</strong> to create the ripple effect</li><li>We use a <strong>delay</strong> to give each animation enough time and make them clearly distinguishable</li></ul><p>Thanks to this approach, we achieve a smooth, easy-to-follow and well-synchronized animation.</p><p>In code, this would look like the following:</p><pre class=" language-csharp"><code class="prism  language-csharp">async Task Loop() 
{ 
    while (_running) 
    { 
    // Reset 
    Ripple1.Opacity = Ripple2.Opacity = 0; 
    Ripple1.Scale = Ripple2.Scale = 0.2; 
    Heart.Scale = 1;
     
    // Heart pop 
    _ = Heart.ScaleTo(1.12, 90, Easing.CubicOut)
    
    .ContinueWith(_ =&gt; MainThread.InvokeOnMainThreadAsync( 
    () =&gt; Heart.ScaleTo(1.0, 120, Easing.CubicInOut)));
    
    // Ripple 1 
    _ = Task.WhenAll( 
    Ripple1.FadeTo(0.45, 60, Easing.CubicOut), 
    Ripple1.ScaleTo(1.8, 700, Easing.CubicOut) 
    ).ContinueWith(_ =&gt; MainThread.InvokeOnMainThreadAsync( 
    () =&gt; Ripple1.FadeTo(0, 250, Easing.CubicIn)));

    // Ripple 2 
    await Task.Delay(120); 
    _ = Task.WhenAll( 
    Ripple2.FadeTo(0.35, 60, Easing.CubicOut), 
    Ripple2.ScaleTo(1.8, 700, Easing.CubicOut) 
    ).ContinueWith(_ =&gt; MainThread.InvokeOnMainThreadAsync( 
    () =&gt; Ripple2.FadeTo(0, 250, Easing.CubicIn)));
     
    await Task.Delay(650); 
    } 
}
</code></pre><p>And that&rsquo;s it! Let&rsquo;s keep going and jump into the next animation! </p><h2 id="blinking-heart">3. Blinking Heart</h2><p><img src="https://d585tldpucybw.cloudfront.net/sfimages/default-source/blogs/2026/2026-04/03-blinkingheart.gif?sfvrsn=12221562_2" title="Blinking Heart" alt="Blinking Heart" /></p><p>In this animation, we&rsquo;ll make a heart blink in a subtle and elegant way. We&rsquo;ll start with the XAML. In this case, the structure is very simple, since we only need a single heart image, centered on the screen. From this single element, we&rsquo;ll build the entire animation.</p><pre class=" language-xml"><code class="prism  language-xml">&lt;Image x:Name="Heart"  
    Source="redheart.png"  
    WidthRequest="56"  
    HeightRequest="56"  
    HorizontalOptions="Center"  
    VerticalOptions="Center" /&gt;
</code></pre><p>We&rsquo;ll continue working with <code>OnAppearing</code> to start the animation, and additionally we&rsquo;ll create a method called <code>BlinkLoop()</code> to handle the animation logic. This one is composed of <code>FadeTo</code> and <code>ScaleTo</code> animations, which allow us to play with the icon&rsquo;s opacity and size, creating the blinking effect.</p><p>In code, it would look like the following:</p><pre class=" language-csharp"><code class="prism  language-csharp">protected override void OnAppearing() 
{ 
    base.OnAppearing(); 
    _running = true; 
    _ = BlinkLoop(); 
} 
async Task BlinkLoop() 
{

    while (_running) 
    { 
    await Task.WhenAll( 
    Heart.FadeTo(0.35, 220, Easing.CubicInOut), 
    Heart.ScaleTo(0.95, 220, Easing.CubicInOut) 
    ); 
    
    await Task.WhenAll( 
    Heart.FadeTo(1, 220, Easing.CubicInOut), 
    Heart.ScaleTo(1, 220, Easing.CubicInOut) 
    ); 
    } 
}
</code></pre><p>All set! Ready to move on to the next animation ✨</p><h2 id="rotating-heart">4. Rotating Heart</h2><p><img src="https://d585tldpucybw.cloudfront.net/sfimages/default-source/blogs/2026/2026-04/04-rotateheart.gif?sfvrsn=59e48923_2" title="Rotate Heart" alt="Rotate Heart" /></p><p>Now we&rsquo;ll create an animation where our heart rotates. ❤️ This type of animation is very useful, for example, as a loading indicator in your screens.</p><p>To get started with the implementation, we&rsquo;ll begin by adding the Image in XAML, as shown below:</p><pre class=" language-xml"><code class="prism  language-xml">&lt;Image x:Name="Heart" 
    Source="redheart.png" 
    WidthRequest="64" 
    HeightRequest="64" 
    HorizontalOptions="Center" 
    VerticalOptions="Center" /&gt;
</code></pre><p>And in the code-behind, it&rsquo;s time to bring the heart to life! ❤️</p><p>We&rsquo;ll use the <code>OnAppearing</code> method, and for the animation (✍️ please make sure to declare the <code>_isRunning</code> bool variable), we&rsquo;ll rely on <code>RotateTo()</code>, as shown below:</p><pre class=" language-csharp"><code class="prism  language-csharp">protected override async void OnAppearing() 
{ 
    base.OnAppearing(); 
    _isRunning = true; 
    
    while (_isRunning) 
    { 
    await Heart.RotateTo(360, 4000, Easing.Linear); 
    Heart.Rotation = 0; 
    } 
}
</code></pre><p>Done! Let&rsquo;s bring the next animation to life ✨</p><h2 id="jumping-heart">5. Jumping Heart</h2><p><img src="https://d585tldpucybw.cloudfront.net/sfimages/default-source/blogs/2026/2026-04/05-heartjumping.gif?sfvrsn=5be8d95b_2" title="Heart Jumping" alt="Heart Jumping" /></p><p>For our final animation, we&rsquo;ll make the heart jump up and down in a continuous loop.</p><p>This animation also works great as a loading indicator, adding a playful touch to your screen.</p><p>Let&rsquo;s start by adding the Image to the XAML:</p><pre class=" language-xml"><code class="prism  language-xml">&lt;Image x:Name="Heart" 
    Source="redheart.png" 
    WidthRequest="64" 
    HeightRequest="64" 
    HorizontalOptions="Center" 
    VerticalOptions="Center" /&gt;
</code></pre><p>In the code-behind, we&rsquo;ll create the animation by working with <code>TranslationTo</code> and the <code>TranslationY</code> methods, as shown below:</p><pre class=" language-csharp"><code class="prism  language-csharp">protected override async void OnAppearing() 
{ 
    base.OnAppearing(); 
    _isRunning = true; 
    Heart.TranslationY = -120;
 
    while (_isRunning)
    
    { 
    await Heart.TranslateTo(0, 0, 600, Easing.CubicOut); 
    await Heart.TranslateTo(0, -12, 120, Easing.CubicInOut); 
    await Heart.TranslateTo(0, 0, 120, Easing.CubicInOut); 
    await Heart.TranslateTo(0, -120, 450, Easing.CubicIn); 
    } 
}
</code></pre><p>And that&rsquo;s all&mdash;thanks for building this with me! </p><h2 id="conclusion">Conclusion</h2><p>And that&rsquo;s it!  We&rsquo;ve successfully created <strong>five awesome, ready-to-use animations</strong> with .NET MAUI. Each one was designed to be easy to implement, demonstrating just how powerful even the most basic animations can be when used correctly.</p><p>I hope this article has inspired you and sparked <strong>new ideas</strong> for incorporating animations into your current and future <strong>.NET MAUI projects ✨</strong></p><p>As always, if you have any questions or would like me to explore any of these animations in more detail, feel free to leave a comment &mdash; I&rsquo;d be happy to help! </p><p>See you in the next article! &zwj;♀️</p><aside><hr data-sf-ec-immutable="" /><div class="row"><div class="col-4 u-normal-full u-small-mb0"><h4 class="u-fs20 u-fw5 u-lh125 u-mb0">Building an Instagram-Style Like Animation in .NET MAUI</h4></div><div class="col-8"><p class="u-fs16 u-mb0">Learn how to make your .NET MAUI app a little more engaging with interactive animations. We&rsquo;ll see how to <a target="_blank" href="https://www.telerik.com/blogs/building-instagram-style-like-animation-net-maui">animate a heart for a like action</a>.</p></div></div></aside>]]></content>
  </entry>
  <entry>
    <id>urn:uuid:6808d742-f423-4697-ad7b-0da3008181c4</id>
    <title type="text">Share Functionality in Your .NET MAUI Apps</title>
    <summary type="text">Learn how to add share functionality to your .NET MAUI app whether in iOS, Android or Windows.</summary>
    <published>2026-05-26T13:50:18Z</published>
    <updated>2026-06-20T04:15:38Z</updated>
    <author>
      <name>Leomaris Reyes </name>
    </author>
    <link rel="alternate" href="https://www.telerik.com/blogs/share-functionality-net-maui-apps?utm_medium=feed&amp;utm_source=feedpress.me&amp;utm_campaign=Feed%3A+telerik-blogs-desktop"/>
    <content type="text"><![CDATA[<p><span class="featured">Learn how to add share functionality to your .NET MAUI app whether in iOS, Android or Windows.</span></p><p>In recent years, many large companies have decided to rely on technology and move a big part&mdash;or even all&mdash;of their processes to mobile applications.</p><p>For example, not long ago, sending money from one bank account to another meant physically going to the bank and spending hours waiting in line. Today, that same process can be completed in just a few seconds using a mobile app. </p><p><strong>But&hellip; What happens next? </strong></p><p>How do we send a confirmation or receipt to the account owner so they can validate the transfer?</p><p>To solve this, applications usually include a <strong>share</strong> functionality, which allows users to send information through the familiar share sheet we all know&mdash;via WhatsApp, email, social media and more.</p><p>It&rsquo;s important to design the user experience from start to finish. It&rsquo;s not just about completing an action, but also about enabling users to easily share or confirm the result of that action.</p><p>In this article, you&rsquo;ll learn how to open the share sheet in your .NET MAUI apps, so you can share information quickly and effortlessly.</p><h2 id="what-is-ishare">What Is IShare?</h2><p>IShare is an interface that provides an API that allows you to share data such as links, files or text using the system&rsquo;s share functionality. When invoked, it opens a button sheet where the user can choose how and with whom they want to share that information.</p><p>The IShare interface is already available through the <code>Share.Default</code> property and is located in the Microsoft.Maui.ApplicationModel.DataTransfer namespace.</p><p>When the user interacts with this feature, they will see something like the following:</p><p><img sf-image-responsive="true" src="https://d585tldpucybw.cloudfront.net/sfimages/default-source/blogs/2026/2026-05/share.png?sfvrsn=a83f43eb_2" height="500" style="max-width:100%;height:auto;" title=".NET MAUI share" width="1136" alt=".NET MAUI share in Android, iOS, Windows" sf-size="113426" /></p><p><span style="font-size:11px;">Image obtained from the official documentation.</span></p><h3 id="platform-settings">Platform Settings</h3><p>To implement the share functionality, some platforms require additional configuration. These are the supported platforms and their requirements:</p><ul><li><strong>Android and Windows:</strong> No setup is required.</li><li><strong>iOS / Mac Catalyst:</strong> To be able to access photos and videos, you need to add the appropriate permissions. To do this, go to:
        <ul><li>Platforms/iOS/Info.plist</li><li>And Platforms/MacCatalyst/Info.plist</li></ul></li></ul><p>Then add the permission keys along with their descriptions. Keep in mind that this description will be shown to the user when requesting permission, so it&rsquo;s important to use clear and user-friendly text. Below is an example of how the configuration should look:</p><pre><code>&lt;key&gt;NSPhotoLibraryAddUsageDescription&lt;/key&gt; 
&lt;string&gt;This app needs access to the photo gallery to save photos and videos.&lt;/string&gt; 

&lt;key&gt;NSPhotoLibraryUsageDescription&lt;/key&gt; 
&lt;string&gt;This app needs access to the photo gallery to save photos and videos.&lt;/string&gt;
</code></pre><h2 id="what-information-can-i-share-">What Information Can I Share? </h2><p>You can share text, links, files or even multiple files at the same time, depending on your needs. .NET MAUI provides different request types to handle each scenario.</p><p>Below are the most common use cases and how to implement them.</p><h3 id="-text"> Text</h3><p>To share plain text, you can use the <code>ShareTextRequest</code> class. This allows you to pass the text you want to share along with a title.</p><pre><code>public async Task ShareText(string text) 
{ 
    await Share.Default.RequestAsync(new ShareTextRequest 
    { 
    Text = text, 
    Title = "I&rsquo;m the title" 
    }); 
}
</code></pre><h3 id="-links"> Links</h3><p>You can also share a link by using the <code>Uri</code> property of <code>ShareTextRequest</code>. Simply provide the URI and a title.</p><pre><code>public async Task ShareUri(string uri, IShare share) 
{ 
    await share.RequestAsync(new ShareTextRequest 
    { 
    Uri = uri, 
    Title = "I&rsquo;m the title" 
    }); 
}
</code></pre><h3 id="-files"> Files</h3><p>.NET MAUI automatically detects the file type (MIME) and handles the sharing process accordingly. However, keep in mind that each operating system may decide whether a specific file type can be shared or not, depending on platform restrictions.</p><p>To share a single file, use the <code>ShareFileRequest</code> type, as shown below:</p><pre><code>public async Task ShareFile() 
{ 
    string fn = "MyFile.txt"; 
    string file = Path.Combine(FileSystem.CacheDirectory, fn); 
    File.WriteAllText(file, "This is a file"); 
    await Share.Default.RequestAsync(new ShareFileRequest 
    { 
    Title = "Share text file", 
    File = new ShareFile(file) 
    }); 
}
</code></pre><h3 id="️-multiple-files">️ Multiple Files</h3><p>Oh yeah!!  We also have the option to share multiple files using the <code>ShareFileRequest</code> type. Let&rsquo;s look at the following example:</p><pre><code>public async Task ShareMultipleFiles() 
{ 
    string file1 = Path.Combine(FileSystem.CacheDirectory, "File1.txt"); 
    string file2 = Path.Combine(FileSystem.CacheDirectory, "File2.txt");  
    File.WriteAllText(file1, "Hello 1"); 
    File.WriteAllText(file2, "Hello 2");
     
    await Share.Default.RequestAsync(new ShareMultipleFilesRequest 
    { 
    Title = "I&rsquo;m sharing multiple files", 
    Files = new List&lt;ShareFile&gt; { new ShareFile(file1), new ShareFile(file2) } 
    }); 
}
</code></pre><h2 id="android-control-file-locations">Android Control File Locations</h2><p>On Android, there are scenarios where a file is located in the app&rsquo;s private storage. In these cases, Android temporarily copies the file to the app cache and shares it using a FileProvider.</p><p>This behavior is very useful, but it&rsquo;s important to be careful. If it&rsquo;s not configured correctly, it can expose more information than intended, including data that should not be publicly accessible.</p><p>The good news is that this can be prevented by following the steps below.</p><h3 id="step-1-add-the-fileprovider-path-file">Step 1: Add the FileProvider Path File</h3><p>Inside the following folder:</p><pre><code>Platforms/Android/Resources/xml
</code></pre><p>And add a file with the exact name:</p><p><code>microsoft_maui_essentials_fileprovider_file_paths.xml</code></p><h3 id="step-2-what-will-this-file-contain">Step 2: What Will This File Contain?</h3><p>This file defines the allowed locations from which files can be shared.</p><p>Example configuration:</p><pre><code>&lt;?xml version="1.0" encoding="UTF-8" ?&gt; 
&lt;paths&gt; 
    &lt;external-path name="external_files" path="sharing-root" /&gt; 
    &lt;cache-path name="internal_cache" path="sharing-root" /&gt; 
    &lt;external-cache-path name="external_cache" path="sharing-root" /&gt; 
&lt;/paths&gt;
</code></pre><p><strong>What does each line mean?</strong></p><ul><li><strong><code>&lt;external-path&gt;:</code></strong> Allows sharing files from external storage. Useful when the file is stored in a location accessible to the user.</li><li><strong><code>&lt;cache-path&gt;:</code></strong> Allows sharing files from the app&rsquo;s internal cache. This is the most common and safest option, ideal for temporary files such as PDFs, images, or receipts.</li><li><strong><code>&lt;external-cache-path&gt;:</code></strong> Allows sharing files from the external cache. It is still a temporary location, but outside the internal storage.</li><li><strong>sharing-root:</strong> Is a folder that you define and that acts as a <strong>secure area for sharing files.</strong> Only files located inside this folder can be shared.</li></ul><h2 id="ipados-presentation-location">iPadOS Presentation Location</h2><p>When requesting a share or opening launcher on iPadOS, the system displays the action as a popover. To control where this popover appears on the screen and where its arrow points, you must specify a position using the <code>PresentationSourceBounds</code> property.</p><p>You can do it in the following way:</p><p><strong>Share</strong></p><pre><code>await Share.RequestAsync(new ShareFileRequest 
{ 
    Title = Title, 
    File = new ShareFile(file), 
    PresentationSourceBounds = 
    DeviceInfo.Platform == DevicePlatform.iOS &amp;&amp; 
    DeviceInfo.Idiom == DeviceIdiom.Tablet 
    ? new Rect(0, 20, 0, 0) 
    : Rect.Zero 
});
</code></pre><p><strong>Launcher</strong></p><pre><code>await Launcher.OpenAsync(new OpenFileRequest 
{ 
    File = new ReadOnlyFile(file), 
    PresentationSourceBounds = 
    DeviceInfo.Platform == DevicePlatform.iOS &amp;&amp; 
    DeviceInfo.Idiom == DeviceIdiom.Tablet 
    ? new Rect(0, 20, 0, 0) 
    : Rect.Zero 
})
</code></pre><h2 id="conclusion">Conclusion</h2><p>And that&rsquo;s it!  In this article, you learned how to implement share functionality in your .NET MAUI apps, allowing users to easily share text, links, files and even multiple files across platforms.</p><p>You also explored important platform-specific considerations, such as additional permissions on iOS and Mac Catalyst, secure file sharing on Android using FileProvider, and how to properly handle popover presentation on iPadOS to avoid unexpected issues.</p><p>With these concepts in mind, you now have a clearer understanding of how to create a complete and secure sharing experience, taking care of both user experience and platform requirements.</p><p>If you have any questions or would like me to cover more .NET MAUI topics, feel free to leave a comment&mdash;I&rsquo;d be happy to help! </p><p>See you in the next article! &zwj;♀️✨</p><h3 id="reference">Reference</h3><p>Sample codes and explanation was based on the official documentation:</p><ul><li><a target="_blank" href="https://learn.microsoft.com/en-us/dotnet/maui/platform-integration/data/share?view=net-maui-10.0&amp;tabs=android">https://learn.microsoft.com/en-us/dotnet/maui/platform-integration/data/share?view=net-maui-10.0&amp;tabs=android</a></li></ul><aside><hr data-sf-ec-immutable="" /><div class="row"><div class="col-4 u-normal-full u-small-mb0"><h4 class="u-fs20 u-fw5 u-lh125 u-mb0">Get Your .NET MAUI App Up More Quickly</h4></div><div class="col-8"><p class="u-fs16 u-mb0">Deliver native apps for every platform in half the time with 70+ customizable UI components, an AI Coding Assistant and unmatched productivity tools. <a href="https://www.telerik.com/maui-ui" target="_blank">Check out Progress Telerik UI for .NET MAUI</a>.</p></div></div></aside>]]></content>
  </entry>
  <entry>
    <id>urn:uuid:b761f26f-90ec-497a-8858-043a53dedcdd</id>
    <title type="text">Installing and Basics of Telerik UI for .NET MAUI AI Coding Assistant</title>
    <summary type="text">Check out the Telerik UI for .NET MAUI AI Coding Assistant, the MCP server native to Telerik controls and MAUI.</summary>
    <published>2026-05-18T14:25:07Z</published>
    <updated>2026-06-20T04:15:38Z</updated>
    <author>
      <name>Héctor Pérez </name>
    </author>
    <link rel="alternate" href="https://www.telerik.com/blogs/installing-basics-telerik-ui-net-maui-ai-coding-assistant?utm_medium=feed&amp;utm_source=feedpress.me&amp;utm_campaign=Feed%3A+telerik-blogs-desktop"/>
    <content type="text"><![CDATA[<p><span class="featured">Check out the Telerik UI for .NET MAUI AI Coding Assistant, the MCP server native to Telerik controls and MAUI.</span></p><p>Code generation using artificial intelligence has improved impressively over the past few months. One of the features that has helped this growth are MCP servers, which allow connecting an AI to information sources quickly. From consulting Microsoft Learn documentation, to those that perform actions on a calendar, to MCP servers for retrieving information from databases, these servers help improve the accuracy of results by obtaining up-to-date and reliable information.</p><p>The team at Progress has released an <a target="_blank" href="https://www.telerik.com/maui-ui/documentation/ai/mcp-server">AI Coding Assistant for .NET MAUI</a>, which helps create and improve graphical interfaces, using the latest features of its UI controls reliably. Let&rsquo;s see it in action.</p><h2 id="what-is-telerik-ui-for-.net-maui-ai-coding-assistant-mcp-server">What Is Telerik UI for .NET MAUI AI Coding Assistant (MCP Server)?</h2><p>Telerik AI Coding Assistant for .NET MAUI is an MCP server that allows retrieving information provided directly by Progress, with the purpose of letting users learn about the use of a specific component or, alternatively, create high-quality graphical interfaces using the latest features and capabilities of the controls in the Telerik suite. Some available features are:</p><ul><li><strong>Prompt handling</strong>: Handles complex prompts</li><li><strong>Client compatibility</strong>: You can use it in different clients, such as VS Code, Cursor, etc.</li><li><strong>Code suggestions</strong>: It can suggest code and perform automatic rebuilds to check for errors</li><li><strong>Response focus</strong>: Focused on code generation</li></ul><p>The above features enable a variety of use cases, including:</p><ul><li><strong>Generation of complex interfaces</strong>: You can rely on the MCP server to generate dashboards, specific pages, etc., requesting the use of specific controls to be used</li><li><strong>Advanced Grid configuration</strong>: Specify which features you need to include in a DataGrid</li><li><strong>Better testing using mock data</strong>: Get a more robust preview by entering test data before connecting to a data source</li><li><strong>Modernization of graphical interfaces</strong>: Refactor your UI, improving it for modern times and better user experiences</li></ul><p>Let&rsquo;s see how to use it.</p><h2 id="installing-telerik-ui-for-.net-maui-ai-coding-assistant-mcp-server">Installing Telerik UI for .NET MAUI AI Coding Assistant (MCP Server)</h2><p>To be able to use Telerik MCP server for .NET MAUI, you must meet some prerequisites:</p><ol><li>A version of .NET equal or greater than 9</li><li>A client compatible with the MCP protocol, such as VS Code, Visual Studio 2026, Cursor, etc.</li><li>A Telerik account</li><li>An active Telerik license (including a trial account)</li><li>A .NET MAUI app that includes the Telerik UI for .NET MAUI controls</li></ol><h2 id="installing-a-license-key">Installing a License Key</h2><p>Before running any command, I recommend that you obtain a <strong>License Key</strong> so your account can be verified and you can use the MCP server. There are several ways to do this. For example, you can go to your <a target="_blank" href="https://www.telerik.com/account">Progress account</a>, where you select the <strong>License Keys</strong> option:</p><p><img src="https://d585tldpucybw.cloudfront.net/sfimages/default-source/blogs/2026/2026-05/progress-dashboard-license-keys.png?sfvrsn=bf495214_2" alt="User dashboard showing download area for license keys." /></p><p>On the <strong>License Keys</strong> page, click the <strong>Download License Key</strong> button:</p><p><img src="https://d585tldpucybw.cloudfront.net/sfimages/default-source/blogs/2026/2026-05/download-license-key-button.png?sfvrsn=de79abe1_2" alt="Download license key button on settings page" /></p><p>The downloaded file <strong>telerik-license.txt</strong> should be placed in <code>%AppData%\Telerik\telerik-license.txt</code> if you&rsquo;re using Windows, as in my case, or in <code>~/.telerik/telerik-license.txt</code> if you&rsquo;re on Linux. Now, it&rsquo;s time to install the MCP server.</p><h2 id="installing-the-mcp-server">Installing the MCP Server</h2><p>With a License Key on your machine, installing the server is quite simple. In my case I will run the command for <strong>.NET 10</strong>:</p><pre class=" language-text"><code class="prism  language-text">dnx Telerik.MAUI.MCP
</code></pre><p>Once the Telerik MCP for MAUI is installed, the next step is to configure your preferred editor. In the case of VS Code, you should first open the folder containing the .NET MAUI project you&rsquo;ll be working on.</p><p>Then, create a folder at the root named <code>.vscode</code>, inside which you should create a file <code>mcp.json</code>. This file must be replaced or adapted (if you already have previous MCP servers), adding the following entry valid for .NET 10:</p><pre class=" language-json"><code class="prism  language-json"><span class="token punctuation">{</span>
  <span class="token string">"servers"</span><span class="token punctuation">:</span> <span class="token punctuation">{</span>
    <span class="token string">"telerik-maui-assistant"</span><span class="token punctuation">:</span> <span class="token punctuation">{</span>
      <span class="token string">"type"</span><span class="token punctuation">:</span> <span class="token string">"stdio"</span><span class="token punctuation">,</span>
      <span class="token string">"command"</span><span class="token punctuation">:</span> <span class="token string">"dnx"</span><span class="token punctuation">,</span>
      <span class="token string">"args"</span><span class="token punctuation">:</span> <span class="token punctuation">[</span><span class="token string">"Telerik.MAUI.MCP"</span><span class="token punctuation">,</span> <span class="token string">"--yes"</span><span class="token punctuation">]</span><span class="token punctuation">,</span>
    <span class="token punctuation">}</span>
  <span class="token punctuation">}</span>
<span class="token punctuation">}</span>
</code></pre><p>Alternatively, to use it in Visual Studio, you must create the file <code>.mcp.json</code> at the solution level and add the following content inside:</p><pre class=" language-json"><code class="prism  language-json"><span class="token punctuation">{</span>
  <span class="token string">"servers"</span><span class="token punctuation">:</span> <span class="token punctuation">{</span>
    <span class="token string">"telerik-maui-assistant"</span><span class="token punctuation">:</span> <span class="token punctuation">{</span>
      <span class="token string">"type"</span><span class="token punctuation">:</span> <span class="token string">"stdio"</span><span class="token punctuation">,</span>
      <span class="token string">"command"</span><span class="token punctuation">:</span> <span class="token string">"dnx"</span><span class="token punctuation">,</span>
      <span class="token string">"args"</span><span class="token punctuation">:</span> <span class="token punctuation">[</span><span class="token string">"Telerik.MAUI.MCP"</span><span class="token punctuation">,</span> <span class="token string">"--yes"</span><span class="token punctuation">]</span><span class="token punctuation">,</span>
    <span class="token punctuation">}</span>
  <span class="token punctuation">}</span>
<span class="token punctuation">}</span>
</code></pre><p>Once done, you will be able to find the new MCP server as part of the tools in both VS Code and Visual Studio 2026:</p><p><strong>VS Code</strong></p><p><img src="https://d585tldpucybw.cloudfront.net/sfimages/default-source/blogs/2026/2026-05/telerik-mcp-server-net-maui-vscode.png?sfvrsn=35a1a02c_2" alt="Telerik MCP server running for .NET MAUI in VS Code" /></p><p><strong>Visual Studio 2026</strong></p><p><img src="https://d585tldpucybw.cloudfront.net/sfimages/default-source/blogs/2026/2026-05/telerik-mcp-setup-maui-vs2026.png?sfvrsn=32760bb7_2" alt="Telerik MCP server setup for .NET MAUI project" /></p><p>With the MCP server configured, we&rsquo;re ready to continue.</p><h2 id="testing-the-telerik-mcp-server-to-create-.net-maui-apps">Testing the Telerik MCP Server to Create .NET MAUI Apps</h2><p>As I mentioned before, the Telerik MCP server can help us perform different tasks.</p><p>For example, suppose you have a page you made using standard .NET MAUI controls, using code similar to the following:</p><pre class=" language-xml"><code class="prism  language-xml"><span class="token tag"><span class="token tag"><span class="token punctuation">&lt;</span>Grid</span> <span class="token attr-name">RowDefinitions</span><span class="token attr-value"><span class="token punctuation">=</span><span class="token punctuation">"</span>Auto,*<span class="token punctuation">"</span></span> <span class="token attr-name">Padding</span><span class="token attr-value"><span class="token punctuation">=</span><span class="token punctuation">"</span>16<span class="token punctuation">"</span></span><span class="token punctuation">&gt;</span></span>

    <span class="token comment">&lt;!-- Header --&gt;</span>
    <span class="token tag"><span class="token tag"><span class="token punctuation">&lt;</span>Label</span>
        <span class="token attr-name">Grid.Row</span><span class="token attr-value"><span class="token punctuation">=</span><span class="token punctuation">"</span>0<span class="token punctuation">"</span></span>
        <span class="token attr-name">Text</span><span class="token attr-value"><span class="token punctuation">=</span><span class="token punctuation">"</span>Product List<span class="token punctuation">"</span></span>
        <span class="token attr-name">FontSize</span><span class="token attr-value"><span class="token punctuation">=</span><span class="token punctuation">"</span>22<span class="token punctuation">"</span></span>
        <span class="token attr-name">FontAttributes</span><span class="token attr-value"><span class="token punctuation">=</span><span class="token punctuation">"</span>Bold<span class="token punctuation">"</span></span>
        <span class="token attr-name">Margin</span><span class="token attr-value"><span class="token punctuation">=</span><span class="token punctuation">"</span>0,0,0,12<span class="token punctuation">"</span></span> <span class="token punctuation">/&gt;</span></span>

    <span class="token comment">&lt;!-- Loading indicator --&gt;</span>
    <span class="token tag"><span class="token tag"><span class="token punctuation">&lt;</span>ActivityIndicator</span>
        <span class="token attr-name">Grid.Row</span><span class="token attr-value"><span class="token punctuation">=</span><span class="token punctuation">"</span>1<span class="token punctuation">"</span></span>
        <span class="token attr-name">IsRunning</span><span class="token attr-value"><span class="token punctuation">=</span><span class="token punctuation">"</span>{Binding IsBusy}<span class="token punctuation">"</span></span>
        <span class="token attr-name">IsVisible</span><span class="token attr-value"><span class="token punctuation">=</span><span class="token punctuation">"</span>{Binding IsBusy}<span class="token punctuation">"</span></span>
        <span class="token attr-name">HorizontalOptions</span><span class="token attr-value"><span class="token punctuation">=</span><span class="token punctuation">"</span>Center<span class="token punctuation">"</span></span>
        <span class="token attr-name">VerticalOptions</span><span class="token attr-value"><span class="token punctuation">=</span><span class="token punctuation">"</span>Center<span class="token punctuation">"</span></span> <span class="token punctuation">/&gt;</span></span>

    <span class="token comment">&lt;!-- CollectionView --&gt;</span>
    <span class="token tag"><span class="token tag"><span class="token punctuation">&lt;</span>CollectionView</span>
        <span class="token attr-name">Grid.Row</span><span class="token attr-value"><span class="token punctuation">=</span><span class="token punctuation">"</span>1<span class="token punctuation">"</span></span>
        <span class="token attr-name">ItemsSource</span><span class="token attr-value"><span class="token punctuation">=</span><span class="token punctuation">"</span>{Binding Products}<span class="token punctuation">"</span></span>
        <span class="token attr-name">SelectedItem</span><span class="token attr-value"><span class="token punctuation">=</span><span class="token punctuation">"</span>{Binding SelectedProduct}<span class="token punctuation">"</span></span>
        <span class="token attr-name">SelectionMode</span><span class="token attr-value"><span class="token punctuation">=</span><span class="token punctuation">"</span>Single<span class="token punctuation">"</span></span><span class="token punctuation">&gt;</span></span>

        <span class="token tag"><span class="token tag"><span class="token punctuation">&lt;</span>CollectionView.ItemTemplate</span><span class="token punctuation">&gt;</span></span>
            <span class="token tag"><span class="token tag"><span class="token punctuation">&lt;</span>DataTemplate</span> <span class="token attr-name"><span class="token namespace">x:</span>DataType</span><span class="token attr-value"><span class="token punctuation">=</span><span class="token punctuation">"</span>models:ProductModel<span class="token punctuation">"</span></span><span class="token punctuation">&gt;</span></span>
                <span class="token tag"><span class="token tag"><span class="token punctuation">&lt;</span>Border</span>
                    <span class="token attr-name">Margin</span><span class="token attr-value"><span class="token punctuation">=</span><span class="token punctuation">"</span>0,4<span class="token punctuation">"</span></span>
                    <span class="token attr-name">Padding</span><span class="token attr-value"><span class="token punctuation">=</span><span class="token punctuation">"</span>12<span class="token punctuation">"</span></span>
                    <span class="token attr-name">BackgroundColor</span><span class="token attr-value"><span class="token punctuation">=</span><span class="token punctuation">"</span>{AppThemeBinding Light=White, Dark=#1E1E1E}<span class="token punctuation">"</span></span>
                    <span class="token attr-name">StrokeShape</span><span class="token attr-value"><span class="token punctuation">=</span><span class="token punctuation">"</span>RoundRectangle 8<span class="token punctuation">"</span></span>
                    <span class="token attr-name">Stroke</span><span class="token attr-value"><span class="token punctuation">=</span><span class="token punctuation">"</span>#E0E0E0<span class="token punctuation">"</span></span><span class="token punctuation">&gt;</span></span>

                    <span class="token tag"><span class="token tag"><span class="token punctuation">&lt;</span>Grid</span> <span class="token attr-name">ColumnDefinitions</span><span class="token attr-value"><span class="token punctuation">=</span><span class="token punctuation">"</span>*,Auto<span class="token punctuation">"</span></span> <span class="token attr-name">RowDefinitions</span><span class="token attr-value"><span class="token punctuation">=</span><span class="token punctuation">"</span>Auto,Auto<span class="token punctuation">"</span></span><span class="token punctuation">&gt;</span></span>

                        <span class="token comment">&lt;!-- Product name --&gt;</span>
                        <span class="token tag"><span class="token tag"><span class="token punctuation">&lt;</span>Label</span>
                            <span class="token attr-name">Grid.Row</span><span class="token attr-value"><span class="token punctuation">=</span><span class="token punctuation">"</span>0<span class="token punctuation">"</span></span> <span class="token attr-name">Grid.Column</span><span class="token attr-value"><span class="token punctuation">=</span><span class="token punctuation">"</span>0<span class="token punctuation">"</span></span>
                            <span class="token attr-name">Text</span><span class="token attr-value"><span class="token punctuation">=</span><span class="token punctuation">"</span>{Binding Name}<span class="token punctuation">"</span></span>
                            <span class="token attr-name">FontSize</span><span class="token attr-value"><span class="token punctuation">=</span><span class="token punctuation">"</span>16<span class="token punctuation">"</span></span>
                            <span class="token attr-name">FontAttributes</span><span class="token attr-value"><span class="token punctuation">=</span><span class="token punctuation">"</span>Bold<span class="token punctuation">"</span></span> <span class="token punctuation">/&gt;</span></span>

                        <span class="token comment">&lt;!-- Price --&gt;</span>
                        <span class="token tag"><span class="token tag"><span class="token punctuation">&lt;</span>Label</span>
                            <span class="token attr-name">Grid.Row</span><span class="token attr-value"><span class="token punctuation">=</span><span class="token punctuation">"</span>0<span class="token punctuation">"</span></span> <span class="token attr-name">Grid.Column</span><span class="token attr-value"><span class="token punctuation">=</span><span class="token punctuation">"</span>1<span class="token punctuation">"</span></span>
                            <span class="token attr-name">Text</span><span class="token attr-value"><span class="token punctuation">=</span><span class="token punctuation">"</span>{Binding Price, StringFormat=<span class="token punctuation">'</span>${0:F2}<span class="token punctuation">'</span>}<span class="token punctuation">"</span></span>
                            <span class="token attr-name">FontSize</span><span class="token attr-value"><span class="token punctuation">=</span><span class="token punctuation">"</span>16<span class="token punctuation">"</span></span>
                            <span class="token attr-name">FontAttributes</span><span class="token attr-value"><span class="token punctuation">=</span><span class="token punctuation">"</span>Bold<span class="token punctuation">"</span></span>
                            <span class="token attr-name">TextColor</span><span class="token attr-value"><span class="token punctuation">=</span><span class="token punctuation">"</span>#512BD4<span class="token punctuation">"</span></span>
                            <span class="token attr-name">HorizontalOptions</span><span class="token attr-value"><span class="token punctuation">=</span><span class="token punctuation">"</span>End<span class="token punctuation">"</span></span> <span class="token punctuation">/&gt;</span></span>

                        <span class="token comment">&lt;!-- Category --&gt;</span>
                        <span class="token tag"><span class="token tag"><span class="token punctuation">&lt;</span>Label</span>
                            <span class="token attr-name">Grid.Row</span><span class="token attr-value"><span class="token punctuation">=</span><span class="token punctuation">"</span>1<span class="token punctuation">"</span></span> <span class="token attr-name">Grid.Column</span><span class="token attr-value"><span class="token punctuation">=</span><span class="token punctuation">"</span>0<span class="token punctuation">"</span></span>
                            <span class="token attr-name">Text</span><span class="token attr-value"><span class="token punctuation">=</span><span class="token punctuation">"</span>{Binding Category}<span class="token punctuation">"</span></span>
                            <span class="token attr-name">FontSize</span><span class="token attr-value"><span class="token punctuation">=</span><span class="token punctuation">"</span>13<span class="token punctuation">"</span></span>
                            <span class="token attr-name">TextColor</span><span class="token attr-value"><span class="token punctuation">=</span><span class="token punctuation">"</span>Gray<span class="token punctuation">"</span></span> <span class="token punctuation">/&gt;</span></span>

                        <span class="token comment">&lt;!-- In Stock badge --&gt;</span>
                        <span class="token tag"><span class="token tag"><span class="token punctuation">&lt;</span>Label</span>
                            <span class="token attr-name">Grid.Row</span><span class="token attr-value"><span class="token punctuation">=</span><span class="token punctuation">"</span>1<span class="token punctuation">"</span></span> <span class="token attr-name">Grid.Column</span><span class="token attr-value"><span class="token punctuation">=</span><span class="token punctuation">"</span>1<span class="token punctuation">"</span></span>
                            <span class="token attr-name">Text</span><span class="token attr-value"><span class="token punctuation">=</span><span class="token punctuation">"</span>{Binding InStock, Converter={StaticResource BoolToStockConverter}}<span class="token punctuation">"</span></span>
                            <span class="token attr-name">FontSize</span><span class="token attr-value"><span class="token punctuation">=</span><span class="token punctuation">"</span>12<span class="token punctuation">"</span></span>
                            <span class="token attr-name">TextColor</span><span class="token attr-value"><span class="token punctuation">=</span><span class="token punctuation">"</span>{Binding InStock, Converter={StaticResource BoolToStockColorConverter}}<span class="token punctuation">"</span></span>
                            <span class="token attr-name">HorizontalOptions</span><span class="token attr-value"><span class="token punctuation">=</span><span class="token punctuation">"</span>End<span class="token punctuation">"</span></span> <span class="token punctuation">/&gt;</span></span>
                    <span class="token tag"><span class="token tag"><span class="token punctuation">&lt;/</span>Grid</span><span class="token punctuation">&gt;</span></span>
                <span class="token tag"><span class="token tag"><span class="token punctuation">&lt;/</span>Border</span><span class="token punctuation">&gt;</span></span>
            <span class="token tag"><span class="token tag"><span class="token punctuation">&lt;/</span>DataTemplate</span><span class="token punctuation">&gt;</span></span>
        <span class="token tag"><span class="token tag"><span class="token punctuation">&lt;/</span>CollectionView.ItemTemplate</span><span class="token punctuation">&gt;</span></span>

    <span class="token tag"><span class="token tag"><span class="token punctuation">&lt;/</span>CollectionView</span><span class="token punctuation">&gt;</span></span>
<span class="token tag"><span class="token tag"><span class="token punctuation">&lt;/</span>Grid</span><span class="token punctuation">&gt;</span></span>
</code></pre><p>In the previous code there isn&rsquo;t much customization, because an unmodified <code>CollectionView</code> is being used:</p><p><img src="https://d585tldpucybw.cloudfront.net/sfimages/default-source/blogs/2026/2026-05/dotnet-maui-collectionview-vertical-list.png?sfvrsn=95310cd6_2" alt="Native .NET MAUI CollectionView displaying a vertical list" /></p><p>Although it&rsquo;s true that we could customize it manually through a <code>DataTemplate</code>, most of the time what is required is a quick but robust implementation. Let&rsquo;s use the MCP server to modify the look and feel by giving the following instruction:</p><pre class=" language-text"><code class="prism  language-text">#telerik-maui-assistant  I need you to improve the ProductsPageTelerik page. Replace the CollectionView with a DataGrid. I need the page and its controls to look modern and interactive.
</code></pre><p>When running the instruction and having the Telerik MCP server selected, we will receive a request to run tools, whose information is obtained automatically based on the query made:</p><p><img src="https://d585tldpucybw.cloudfront.net/sfimages/default-source/blogs/2026/2026-05/telerik-mcp-maui-permission-prompt.png?sfvrsn=2d8aa7cf_2" alt="Telerik MCP server permission dialog requesting tool execution" /></p><p>With the evolution of AI models, we can achieve that in a single call our instruction is executed, with the GitHub Copilot agent responsible for modifying the code, compiling and testing that everything works correctly. In just a few minutes, the replacement is very precise:</p><p><img src="https://d585tldpucybw.cloudfront.net/sfimages/default-source/blogs/2026/2026-05/maui-datagrid-table.png?sfvrsn=ae2254d8_2" alt="Converted DataGrid showing tabular data with columns" /></p><p>Another thing we can do is use the Telerik <a target="_blank" href="https://www.telerik.com/maui-ui/documentation/ai/prompt-library">Prompt Library</a>, which contains a list of prompts for different use cases.</p><p>For example, suppose you&rsquo;d like to add paging to the component. To accomplish this, you can take the prompt <strong>DataGrid with Paging</strong> and adapt it to your use case, as follows:</p><pre class=" language-text"><code class="prism  language-text">#telerik-maui-assistant Modify the DataGrid to include pagination of 20 records per page.
</code></pre><p>Again, after a few calls to the MCP tool, the change is implemented in just a few minutes:</p><p><img src="https://d585tldpucybw.cloudfront.net/sfimages/default-source/blogs/2026/2026-05/pagination-added-with-mcp.png?sfvrsn=d786983d_2" alt="Pagination feature added quickly using the MCP server" /></p><p>With the previous exercises, you have been able to verify the power of using the Telerik MCP server for .NET MAUI to create robust graphical interfaces in much less time.</p><h2 id="conclusion">Conclusion</h2><p>In this article you learned about the Telerik UI for .NET MAUI AI Coding Assistant, a powerful MCP server specialized in using Telerik controls to guide you and implement complex graphical interfaces using artificial intelligence.</p><p>Undoubtedly, having this assistant provides a competitive advantage by helping you reduce the time required to create graphical interfaces, while also allowing you to explore design alternatives.</p><hr /><p><strong>Remember:</strong> Telerik UI for .NET MAUI comes with a free 30-day trial. </p><p><a href="https://www.telerik.com/try/ui-for-maui" target="_blank" class="Btn">Try Now</a></p>]]></content>
  </entry>
  <entry>
    <id>urn:uuid:6226fc64-e8ab-4f7f-9a05-3dfe380b4d93</id>
    <title type="text">How to Verify Network Connectivity in .NET MAUI</title>
    <summary type="text">Learn the key steps to checking network connectivity in the various platforms available to your .NET MAUI app.</summary>
    <published>2026-05-11T13:22:15Z</published>
    <updated>2026-06-20T04:15:38Z</updated>
    <author>
      <name>Leomaris Reyes </name>
    </author>
    <link rel="alternate" href="https://www.telerik.com/blogs/how-to-verify-network-connectivity-net-maui?utm_medium=feed&amp;utm_source=feedpress.me&amp;utm_campaign=Feed%3A+telerik-blogs-desktop"/>
    <content type="text"><![CDATA[<p><span class="featured">Learn the key steps to checking network connectivity in the various platforms available to your .NET MAUI app.</span></p><p>Identifying the connectivity of the devices running our mobile applications allows us to have much more precise control over the decisions we need to make within the app. From knowing whether the device has internet access, if the connection is limited, and if <strong>connection types such as Bluetooth, WiFi or Ethernet</strong> are active, all this information helps us provide a better user experience.</p><p>For example, we can decide whether to show an empty state when there is no internet connection, prevent certain actions or clearly inform the user about what is happening. This is especially important because, in many cases, the user loses connectivity and assumes the problem is with the application, when in reality it is a network issue.</p><p>Additionally, we can display different scenarios or behaviors depending on the type of connection available, such as when the device only has Bluetooth active or does not have internet access. That&rsquo;s why it&rsquo;s essential to know how to detect these connectivity states. The good news is that in .NET MAUI, we have the ability to do this in a very simple way. Let&rsquo;s take a look! </p><h2 id="first-platform-configuration">First, Platform Configuration</h2><p>Before starting with any implementation, it&rsquo;s important to verify whether you need to apply any platform-specific configuration. Some platforms may require additional setup, while others work out of the box.</p><p>For this, <strong>iOS/Mac Catalyst</strong> and <strong>Windows</strong> require no additional configuration.</p><p>For <strong>Android</strong>, to access connectivity information, you must add the <code>ACCESS_NETWORK_STATE</code> permission. There are three different ways to add this permission on Android:</p><h3 id="android-option-1-add-the-permission-directly-in-the-androidmanifest.xml">Android Option 1: Add the Permission Directly in the AndroidManifest.xml</h3><p>Go to Platforms &rarr; Android, open the AndroidManifest.xml file, and add the following node:</p><pre class=" language-xml"><code class="prism  language-xml">&lt;uses-permission android:name="android.permission.ACCESS_NETWORK_STATE" /&gt;
</code></pre><h3 id="android-option-2-use-the-android-manifest-graphical-editor">Android Option 2: Use the Android Manifest Graphical Editor</h3><p>Go to Platforms &rarr; Android, double-click the AndroidManifest.xml file, and locate the Required permissions section. Find the permission labeled <strong>ACCESS_NETWORK_STATE</strong> and simply check the option, as shown below.</p><p><img src="https://d585tldpucybw.cloudfront.net/sfimages/default-source/blogs/2026/2026-05/02_permissions.png?sfvrsn=70ef6bff_2" title="Required permissions" alt="" /></p><h3 id="android-option-3-add-the-assembly-based-permission">Android Option 3: Add the Assembly-based Permission</h3><p>Go to Platforms &rarr; Android &rarr; MainApplication.cs and add the permission as follows:</p><pre class=" language-csharp"><code class="prism  language-csharp">[assembly: UsesPermission(Android.Manifest.Permission.AccessNetworkState)]
</code></pre><h2 id="network-accessibility-in-.net-maui">Network Accessibility in .NET MAUI</h2><p>To inspect the network accessibility on a device, .NET MAUI provides the IConnectivity interface. This is part of the Microsoft.Maui.Networking namespace and is available through the <code>Connectivity.Current</code> property.</p><p>One thing I really like about this API is that it doesn&rsquo;t simply return a boolean value indicating whether there is internet access or not. Instead, it provides much more detailed information, such as the scope of the current network (for example, Internet, ConstrainedInternet and others), as well as details about active connection profiles like Bluetooth, Cellular, WiFi and others. It also exposes an event that allows you to monitor changes in the device&rsquo;s connectivity state in real time.</p><p>Next, we&rsquo;ll take a closer look at each of these values to better understand what they mean and how you can use them in your applications.</p><h2 id="how-to-inspect-the-current-network-scope-">How to Inspect the Current Network Scope? </h2><p>Thanks to the .NET MAUI team, we can determine the scope of the current network in a much more precise way through the <code>NetworkAccess</code> property. This property provides different values that we can evaluate to obtain more detailed information about the device&rsquo;s connectivity state. These values are the following:</p><p><img src="https://d585tldpucybw.cloudfront.net/sfimages/default-source/blogs/2026/2026-05/01_internet_connection.png?sfvrsn=f3b0f0be_2" title="Internet connection" alt="" /></p><p>➖ <strong>Internet:</strong> Indicates that the device has access to both the local network and the internet. This is the ideal state for making API calls or performing any action that requires a full internet connection.</p><p>➖ <strong>Local:</strong> The device has access only to the local network.</p><p>➖ <strong>None:</strong> No type of connectivity is available. In this state, it&rsquo;s ideal to inform the user that all or some actions within the app will not work correctly due to the lack of connectivity. This can be done through an empty state, an alert or any other approach that best fits the scenario you&rsquo;re working on.</p><p>➖ <strong>Unknown:</strong> It&rsquo;s not possible to determine the connectivity state. If this happens, while the correct information is being retrieved, it&rsquo;s recommended to inform the user in the same way as in the None state.</p><p>➖ <strong>ConstrainedInternet:</strong> Indicates that the device has limited internet access. This state usually appears when the device is connected to a network with a captive portal, meaning networks that require accepting terms or entering information before granting full internet access. This is common in places like airports, universities or hotels.</p><p>Thanks to all these states, as developers we can be much more specific in how we communicate connectivity issues to our users and better adapt the behavior of our applications.</p><p>For the code implementation, you can do something like what I show below:</p><pre class=" language-csharp"><code class="prism  language-csharp">NetworkAccess accessType = Connectivity.Current.NetworkAccess; 

if (accessType == NetworkAccess.Internet) 
{ 
    // Add the code that you need here 
}
</code></pre><h2 id="checking-active-connection-profiles">Checking Active Connection Profiles</h2><p>While NetworkAccess tells us how accessible the network is (internet, local, none, etc.), ConnectionProfiles allows us to know which type of connection the device is actively using at a given moment.</p><p>The types of connections we can detect are the following:</p><ul><li><strong>WiFi</strong></li><li><strong>Cellular</strong> (mobile data)</li><li><strong>Bluetooth</strong></li><li><strong>Ethernet</strong></li></ul><p>This information is extremely useful for making decisions within your application. For example:</p><ul><li>You can limit your app to download files <strong>only when the device is connected to a WiFi network</strong>.</li><li>Enable local features <strong>when only a Bluetooth connection is available</strong>.</li></ul><p>It&rsquo;s important to keep in mind that <strong>Connectivity.Current.ConnectionProfiles</strong> returns a collection (<code>IEnumerable&lt;ConnectionProfile&gt;</code>), because a device can have multiple connection types active at the same time. For instance, the device may be connected to WiFi while Bluetooth is enabled simultaneously.</p><p>In code, the implementation would look like the following:</p><pre class=" language-csharp"><code class="prism  language-csharp">IEnumerable&lt;ConnectionProfile&gt; profiles = Connectivity.Current.ConnectionProfiles;

if (profiles.Contains(ConnectionProfile.WiFi)) 
{ 
    // Add the code that you need here. 
}
</code></pre><h2 id="reacting-to-connectivity-changes">Reacting to Connectivity Changes</h2><p>We know that network conditions can change at any moment. For this reason, .NET MAUI provides the <code>ConnectivityChanged</code> event, which allows us to detect when network access or active connection profiles change. This makes it possible for our applications to react immediately to these changes, without breaking the app experience.</p><p>Let&rsquo;s take a look at an example based on the official documentation:</p><pre class=" language-csharp"><code class="prism  language-csharp">public class ConnectivityListener 
{ 
    public ConnectivityListener() 
    { 
    Connectivity.ConnectivityChanged += OnConnectivityChanged; 
    }
     
    void OnConnectivityChanged(object sender, ConnectivityChangedEventArgs e) 
    { 
    if (e.NetworkAccess != NetworkAccess.Internet) 
    { 
    Console.WriteLine("No internet connection available."); 
    return; 
    }
     
    if (e.ConnectionProfiles.Contains(ConnectionProfile.WiFi)) 
    { 
    Console.WriteLine("Connected via Wi-Fi."); 
    } 
    else if (e.ConnectionProfiles.Contains(ConnectionProfile.Cellular)) 
    { 
    Console.WriteLine("Using mobile data."); 
    } 
    } 
}
</code></pre><h2 id="⚠️-important-considerations">⚠️ Important Considerations</h2><p><strong>NetworkAccess.Internet:</strong> Due to how connectivity detection works on each platform, .NET MAUI can only detect that a network connection is available. It does not guarantee that the connection has real internet access. For example, a device may be connected to a WiFi network, but the router itself may not have an internet connection.</p><h2 id="conclusion">Conclusion</h2><p>And that&rsquo;s it!  In this article, you explored how to work with network connectivity in .NET MAUI using Connectivity. You learned how to determine the scope of the current network, detect active connection profiles such as WiFi, Cellular, Bluetooth and Ethernet, and react to connectivity changes in real time using the <code>ConnectivityChanged</code> event.</p><p>With this knowledge, you can now make better decisions in your apps, provide clearer feedback to users and build more resilient experiences that adapt to changing network conditions.</p><p>See you in the next article! &zwj;♀️✨</p><h3 id="references">References</h3><p>Code samples and explanations were based on the official documentation:</p><ul><li><a target="_blank" href="https://learn.microsoft.com/en-us/dotnet/maui/platform-integration/communication/networking?view=net-maui-10.0&amp;tabs=android">https://learn.microsoft.com/en-us/dotnet/maui/platform-integration/communication/networking?view=net-maui-10.0&amp;tabs=android</a></li></ul><aside><hr data-sf-ec-immutable="" /><div class="row"><div class="col-4 u-normal-full u-small-mb0"><h4 class="u-fs20 u-fw5 u-lh125 u-mb0">Get Your .NET MAUI App Up More Quickly</h4></div><div class="col-8"><p class="u-fs16 u-mb0">Deliver native apps for every platform in half the time with 70+ customizable UI components, an AI Coding Assistant and unmatched productivity tools. <a href="https://www.telerik.com/maui-ui" target="_blank">Check out Progress Telerik UI for .NET MAUI</a>.</p></div></div></aside>]]></content>
  </entry>
  <entry>
    <id>urn:uuid:3ff0a7d1-e5ec-4f1e-8409-1e23c12969cd</id>
    <title type="text">Integrating Haptic Feedback in .NET MAUI</title>
    <summary type="text">Learn how to give your users interactive feedback with long or short haptic vibration in your .NET MAUI application.</summary>
    <published>2026-05-04T17:04:07Z</published>
    <updated>2026-06-20T04:15:38Z</updated>
    <author>
      <name>Leomaris Reyes </name>
    </author>
    <link rel="alternate" href="https://www.telerik.com/blogs/integrating-haptic-feedback-net-maui?utm_medium=feed&amp;utm_source=feedpress.me&amp;utm_campaign=Feed%3A+telerik-blogs-desktop"/>
    <content type="text"><![CDATA[<p><span class="featured">Learn how to give your users interactive feedback with long or short haptic vibration in your .NET MAUI application.</span></p><p>From my experience, keeping users continuously informed about in-app activity is one of the most important retention strategies.</p><p>This feedback can take different forms. For example:</p><ul><li>A message indicating that a record could not be created because the email format isn&rsquo;t valid</li><li>An empty state that informs the user that the app is not working due to a loss of internet connection</li><li>Sound feedback that confirms an action such as a successful transaction</li></ul><p>However, there is another type of feedback that goes beyond visuals or sound: <strong>feedback that can be felt.</strong> This is where haptic feedback comes into play. This type of feedback is usually expressed through a device vibration to notify the user that an action has occurred.</p><p>Common examples include banking applications that vibrate when a transaction is completed successfully, or gaming apps that use vibrations to indicate a collision or an important in-game event. This type of interaction can help create a closer and more natural communication between the user and the application.</p><p>The good news is that today you will learn how to integrate <strong>haptic feedback</strong> into your .NET MAUI applications in a simple and very fast way! </p><h2 id="what-exactly-is-ihapticfeedback-">What Exactly Is IHapticFeedback? </h2><p>IHapticFeedback is an interface in the Microsoft.Maui.Devices namespace that allows you to trigger device vibrations and can be accessed through the HapticFeedback.Default property.</p><p>Haptic feedback provides two different sensation modes that we can trigger in our application:</p><h3 id="click">Click</h3><p>This refers to a short and subtle vibration. It&rsquo;s a great option when we want to provide feedback for simple interactions, such as tapping a button, selecting an item from a list or performing quick actions.</p><h3 id="longpress">LongPress</h3><p>This produces a longer vibration compared to Click. It&rsquo;s mainly used for actions that require more attention or have greater importance, such as confirming a transaction or notifying the user about a relevant event.</p><p>Through HapticFeedback, we can specify which type of sensation we want to trigger. Let&rsquo;s see how to get it implemented.</p><h2 id="initial-setup">Initial Setup</h2><p>For <strong>Android</strong>, we need authorization in our application in order to vibrate the device. This permission can be added in three different ways, which we&rsquo;ll look at below.</p><p>For <strong>iOS / Mac Catalyst</strong> and <strong>Windows</strong>, no initial setup is required.</p><h3 id="android-option-1-add-it-directly-to-the-android-manifest">Android Option 1: Add It Directly to the Android Manifest</h3><p>You can find this file at Platforms ➖ Android ➖ AndroidManifest.xml. Open it and add the following line:</p><pre class=" language-xml"><code class="prism  language-xml">&lt;uses-permission android:name="android.permission.VIBRATE" /&gt;
</code></pre><h3 id="android-option-2-using-the-android-manifest-editor">Android Option 2: Using the Android Manifest Editor</h3><p>Go to <strong>Platforms ➖ Android</strong>, double-click the <strong>AndroidManifest.xml</strong> file and locate the <strong>Required permissions</strong> section. Find the permission labeled <strong>VIBRATE</strong> and simply check the option, as shown below.</p><p><img src="https://d585tldpucybw.cloudfront.net/sfimages/default-source/blogs/2026/2026-04/01_permissions.png?sfvrsn=1942c2a0_2" title="Required permissions" alt="" /></p><p>This automatically adds the same line we saw in the first option, but through a graphical interface.</p><h3 id="android-option-3-adding-the-assembly-based-permission">Android Option 3: Adding the Assembly-based Permission</h3><p>Go to the file Platforms ➖Android ➖ MainApplication.cs and add the permission as follows:</p><pre class=" language-csharp"><code class="prism  language-csharp">[assembly: UsesPermission(Android.Manifest.Permission.Vibrate)]
</code></pre><h2 id="how-to-implement-haptic-feedback">How to Implement Haptic Feedback?</h2><p>Once we understand what haptic feedback is and have the correct platform configuration in place, adding it to our project is very easy.</p><h3 id="click-short-haptic">Click (Short Haptic)</h3><pre class=" language-csharp"><code class="prism  language-csharp">private void HapticShortButton_Clicked(object sender, EventArgs e) =&gt;

HapticFeedback.Default.Perform(HapticFeedbackType.Click);
</code></pre><p>Taking a closer look, this code represents an event handler that contains the following:</p><ul><li><p><strong>HapticFeedback.Default:</strong> retrieves the default system implementation for the current device.</p></li><li><p><strong>.Perform(HapticFeedbackType.Click):</strong> tells the system to execute a Click haptic feedback immediately.</p></li></ul><h3 id="longpress-longer-haptic">LongPress (Longer Haptic)</h3><pre class=" language-csharp"><code class="prism  language-csharp">private void HapticLongButton_Clicked(object sender, EventArgs e) =&gt;

HapticFeedback.Default.Perform(HapticFeedbackType.LongPress);
</code></pre><p>This works exactly the same way as the previous example, but changes the feedback type to <strong>LongPress</strong>, resulting in a stronger and longer tactile response.</p><h3 id="connecting-haptic-feedback-to-a-button">Connecting Haptic Feedback to a Button</h3><p>Let&rsquo;s look at a simple example using buttons in XAML:</p><pre class=" language-xml"><code class="prism  language-xml">&lt;Button Text="Short Haptic" Clicked="HapticShortButton_Clicked"/&gt;

&lt;Button Text="Long Haptic" Clicked="HapticLongButton_Clicked"/&gt;
</code></pre><p>With this setup, each button triggers a different type of haptic feedback when clicked, allowing the user to feel the interaction directly through the device.</p><h3 id="-platform-considerations"> Platform Considerations</h3><ul><li>On Apple, haptic feedback must be triggered from the UI thread.</li></ul><h2 id="conclusion">Conclusion</h2><p>And that&rsquo;s it!  In this article, you learned what <strong>haptic feedback</strong> is and how it can significantly improve user experience by providing tactile confirmation for user interactions in your .NET MAUI applications.</p><p>You also explored the different types of haptic feedback available&mdash;<strong>Click</strong> and <strong>LongPress</strong>&mdash;and when to use each one, as well as the platform-specific setup required, especially on Android, to enable the feature to work correctly across devices.</p><p>With these concepts in mind, you now have a clear understanding of how to integrate haptic feedback in a simple and effective way, enhancing interaction, usability, and overall app retention without adding unnecessary complexity to your code.</p><p>If you have any questions or would like me to cover more .NET MAUI topics, feel free to leave a comment&mdash;I&rsquo;d be happy to help! </p><p>See you in the next article! &zwj;♀️✨</p><h3 id="references">References</h3><p>The explanation was based on the official documentation:</p><ul><li><a target="_blank" href="https://learn.microsoft.com/en-us/dotnet/maui/platform-integration/device/haptic-feedback?view=net-maui-10.0&amp;tabs=android">https://learn.microsoft.com/en-us/dotnet/maui/platform-integration/device/haptic-feedback?view=net-maui-10.0&amp;tabs=android</a></li></ul><aside><hr data-sf-ec-immutable="" /><div class="row"><div class="col-4 u-normal-full u-small-mb0"><h4 class="u-fs20 u-fw5 u-lh125 u-mb0">Building Chat Applications with the .NET MAUI Chat (Conversational UI) Control</h4></div><div class="col-8"><p class="u-fs16 u-mb0">The <a target="_blank" href="https://www.telerik.com/blogs/building-chat-applications-net-maui-chat-conversational-ui-control">.NET MAUI Conversational UI (Chat) component allows integrating chat experiences</a> into your mobile and desktop applications. Learn how to work with this chat component, use cases and how to integrate LLM models.</p></div></div></aside>]]></content>
  </entry>
  <entry>
    <id>urn:uuid:3f5e3e2c-0528-4522-a2c8-b3c294e5861d</id>
    <title type="text">Building Chat Applications with the .NET MAUI Chat (Conversational UI) Control</title>
    <summary type="text">The .NET MAUI Conversational UI (Chat) component allows integrating chat experiences into your mobile and desktop applications. Learn how to work with this chat component, use cases and how to integrate LLM models.</summary>
    <published>2026-04-27T19:45:10Z</published>
    <updated>2026-06-20T04:15:38Z</updated>
    <author>
      <name>Héctor Pérez </name>
    </author>
    <link rel="alternate" href="https://www.telerik.com/blogs/building-chat-applications-net-maui-chat-conversational-ui-control?utm_medium=feed&amp;utm_source=feedpress.me&amp;utm_campaign=Feed%3A+telerik-blogs-desktop"/>
    <content type="text"><![CDATA[<p><span class="featured">The .NET MAUI Conversational UI (Chat) component allows integrating chat experiences into your mobile and desktop applications. Learn how to work with this chat component, use cases and how to integrate LLM models.</span></p><p>One of the best ways to connect with a customer is through conversations, whether with a real person or through an AI agent that provides information about the company or solves problems using a knowledge base.</p><p>If you are creating .NET MAUI applications, you should know that in the Progress Telerik suite you can find the <a target="_blank" href="https://www.telerik.com/maui-ui">.NET MAUI Conversational UI (Chat)</a> component, featuring several characteristics that will allow you to create chat-based applications quickly.</p><p>Throughout this post, we will create an app that uses AI models to provide tips on healthy eating. Let&rsquo;s see how to do it!</p><h2 id="understanding-the-radchat-control-from-telerik-for-.net-maui">Understanding the RadChat Control from Telerik for .NET MAUI</h2><p>The <code>RadChat</code> control from Telerik for .NET MAUI is a component that allows users to interact through a conversational interface, production-ready, capable of handling text messages, attachments, voice-to-text integration and full customization so you can adapt it to your own style, among many other features.</p><p>
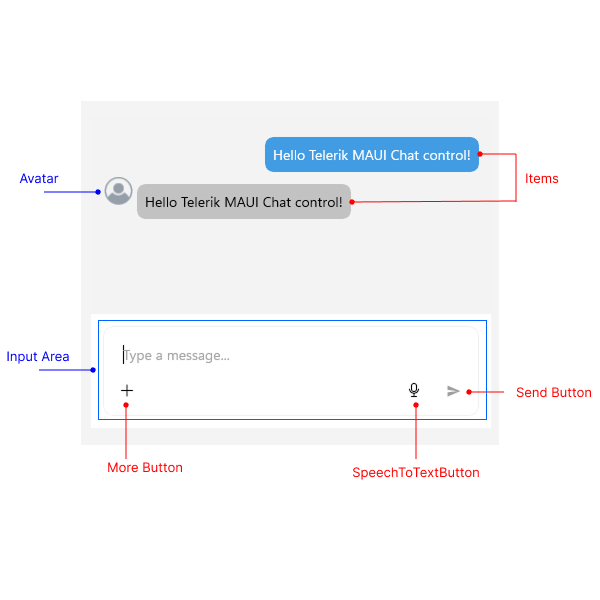
The control is composed of different graphical elements that we can control and modify through code, as shown in the following image:</p><p><img src="https://www.telerik.com/maui-ui/documentation/assets/898f7480b0af1c2627c39907f618d733/chat-visualstructure.png" alt="RadChat Component Visual Structure" /></p><p>Some typical use cases for the control include:</p><ul><li>AI chatbots</li><li>Real-time customer support</li><li>Messaging applications</li><li>Virtual assistants</li><li>Image analysis with vision AI models</li><li>Among many others</li></ul><p>Let&rsquo;s see how to implement the control in a real application.</p><h2 id="setting-up-a-.net-maui-project-to-integrate-chat-conversations">Setting Up a .NET MAUI Project to Integrate Chat Conversations</h2><p>
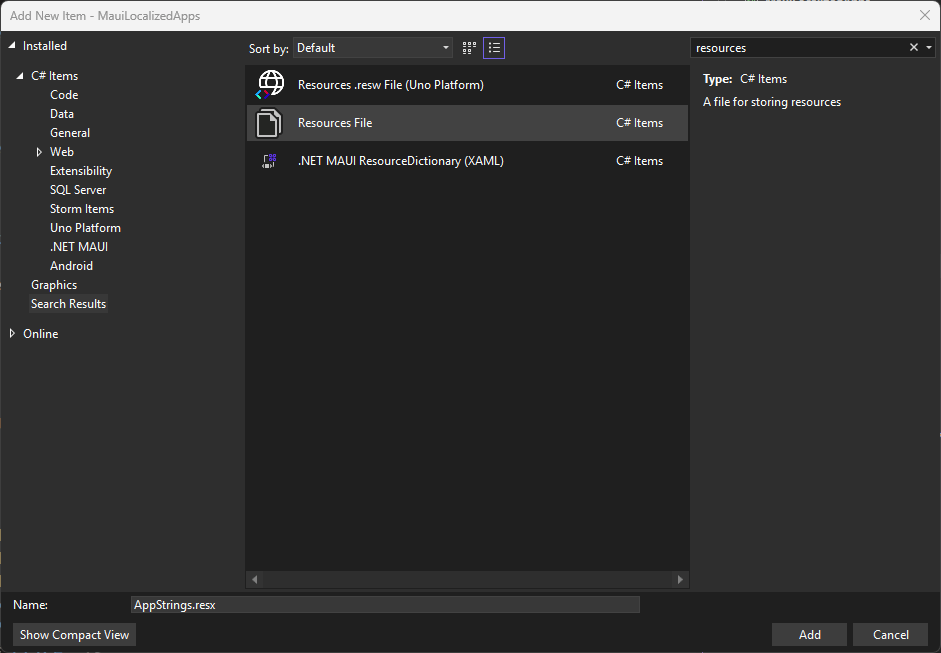
The first and most important thing when using the chat component in our applications is to follow the <a target="_blank" href="https://www.telerik.com/maui-ui/documentation/get-started/first-steps-vs">official installation guide</a>, which shows different ways to set up your environment.</p><p>Additionally, if you want to use any AI model, you need to set up the project by installing the corresponding NuGet packages. As a personal preference, I always like to use <code>Microsoft.Extensions.AI</code>, as it greatly simplifies handling requests to both <strong>OpenAI</strong> and <strong>Azure OpenAI</strong>. For this, install the following packages:</p><ul><li><code>Azure.AI.OpenAI</code></li><li><code>Microsoft.Extensions.AI</code></li><li><code>Microsoft.Extensions.AI.OpenAI</code></li></ul><p>Finally, to facilitate handling with the MVVM pattern, I recommend installing the community toolkit through the following package:</p><ul><li><code>CommunityToolkit.Mvvm</code></li></ul><p>With the packages installed, let&rsquo;s implement the control.</p><h2 id="integrating-chat-functionality-into-a-.net-maui-project">Integrating Chat Functionality into a .NET MAUI Project</h2><p>To use the <code>RadChat</code> control in a .NET MAUI application, you need to do this using the <code>RadChat</code> tag as shown in the following example:</p><pre class=" language-xml"><code class="prism  language-xml"><span class="token tag"><span class="token tag"><span class="token punctuation">&lt;</span>ContentPage</span> <span class="token attr-name">...</span>
    <span class="token attr-name"><span class="token namespace">xmlns:</span>telerik</span><span class="token attr-value"><span class="token punctuation">=</span><span class="token punctuation">"</span>http://schemas.telerik.com/2022/xaml/maui<span class="token punctuation">"</span></span><span class="token punctuation">&gt;</span></span>

    <span class="token tag"><span class="token tag"><span class="token punctuation">&lt;</span><span class="token namespace">telerik:</span>RadChat</span> <span class="token attr-name"><span class="token namespace">x:</span>Name</span><span class="token attr-value"><span class="token punctuation">=</span><span class="token punctuation">"</span>chat<span class="token punctuation">"</span></span> <span class="token punctuation">/&gt;</span></span>

<span class="token tag"><span class="token tag"><span class="token punctuation">&lt;/</span>ContentPage</span><span class="token punctuation">&gt;</span></span>
</code></pre><p>
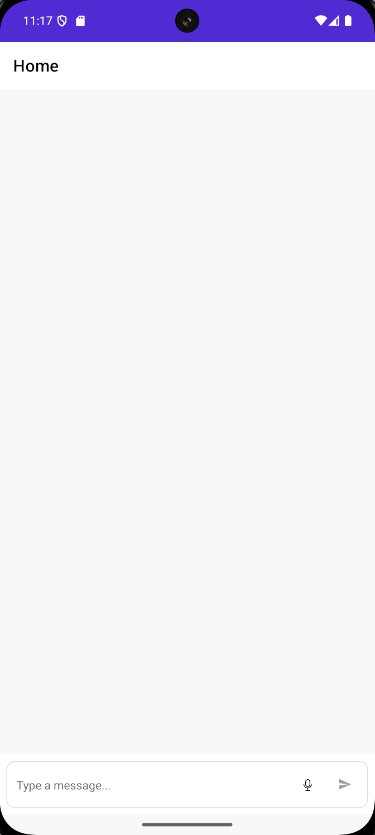
By including the above code, we will immediately see the chat control in the emulator:</p><p><img src="https://d585tldpucybw.cloudfront.net/sfimages/default-source/blogs/2026/2026-04/basic-radchat-interface.png?sfvrsn=e2cb5709_2" alt="Basic RadChat Interface" /></p><h2 id="interacting-with-chat-messages-in-a-.net-maui-app">Interacting with Chat Messages in a .NET MAUI App</h2><p>To work with chat messages, you should know that the class <code>ChatMessage</code> is the basic class for handling messages, which contains the property <code>Author</code>, used to define the information of a participant that will appear in the UI. <code>Author</code> contains data such as <code>Name</code>, <code>Avatar</code> and <code>Data</code>.</p><p>It is possible to extend this class as the control itself does through <code>TextMessage</code>, which inherits from <code>ChatMessage</code> by adding the property <code>Text</code>.</p><p>Knowing this, we will create a list of <code>TextMessage</code> to maintain the conversation history, as well as define the different roles of type <code>Author</code> that will be used in the conversation. For the example, I have created the class <code>ChatViewModel</code>, which looks as follows:</p><pre class=" language-csharp"><code class="prism  language-csharp"><span class="token keyword">public</span> <span class="token keyword">partial</span> <span class="token keyword">class</span> <span class="token class-name">ChatViewModel</span> <span class="token punctuation">:</span> ObservableObject
<span class="token punctuation">{</span>
    <span class="token punctuation">[</span>ObservableProperty<span class="token punctuation">]</span>
    <span class="token keyword">private</span> ObservableCollection<span class="token operator">&lt;</span>TextMessage<span class="token operator">&gt;</span> items <span class="token operator">=</span> <span class="token punctuation">[</span><span class="token punctuation">]</span><span class="token punctuation">;</span>

    <span class="token keyword">public</span> Author Me <span class="token punctuation">{</span> <span class="token keyword">get</span><span class="token punctuation">;</span> <span class="token punctuation">}</span>
    <span class="token keyword">public</span> Author Bot <span class="token punctuation">{</span> <span class="token keyword">get</span><span class="token punctuation">;</span> <span class="token punctuation">}</span>

    <span class="token keyword">public</span> <span class="token function">ChatViewModel</span><span class="token punctuation">(</span><span class="token punctuation">)</span>
    <span class="token punctuation">{</span>
        Me <span class="token operator">=</span> <span class="token keyword">new</span> <span class="token class-name">Author</span> <span class="token punctuation">{</span> Name <span class="token operator">=</span> <span class="token string">"You"</span> <span class="token punctuation">}</span><span class="token punctuation">;</span>
        Bot <span class="token operator">=</span> <span class="token keyword">new</span> <span class="token class-name">Author</span> <span class="token punctuation">{</span> Name <span class="token operator">=</span> <span class="token string">"NutriBot"</span> <span class="token punctuation">}</span><span class="token punctuation">;</span>

        Items<span class="token punctuation">.</span><span class="token function">Add</span><span class="token punctuation">(</span><span class="token keyword">new</span> <span class="token class-name">TextMessage</span>
        <span class="token punctuation">{</span>
            Author <span class="token operator">=</span> Bot<span class="token punctuation">,</span>
            Text <span class="token operator">=</span> <span class="token string">"Hello!  I'm NutriBot, your AI-powered nutrition assistant.\n\n"</span> <span class="token operator">+</span>
                    <span class="token string">"I can help you with:\n"</span> <span class="token operator">+</span>
                    <span class="token string">"Analyzing how healthy a food is\n"</span> <span class="token operator">+</span>
                    <span class="token string">"Analyzing photos of food or nutrition labels\n"</span> <span class="token operator">+</span>
                    <span class="token string">"Providing recommendations for a healthy diet\n"</span> <span class="token operator">+</span>
                    <span class="token string">"Evaluating recipes\n\n"</span> <span class="token operator">+</span>
                    <span class="token string">"Send me a message or a photo to get started!"</span>
        <span class="token punctuation">}</span><span class="token punctuation">)</span><span class="token punctuation">;</span>            
    <span class="token punctuation">}</span>
<span class="token punctuation">}</span>
</code></pre><p>On the other hand, the RadChat control has the properties <code>Author</code>, which allows specifying who is interacting, in addition to <code>Items</code>, responsible for managing the message history:</p><pre class=" language-xml"><code class="prism  language-xml"><span class="token tag"><span class="token tag"><span class="token punctuation">&lt;</span><span class="token namespace">telerik:</span>RadChat</span>
    <span class="token attr-name"><span class="token namespace">x:</span>Name</span><span class="token attr-value"><span class="token punctuation">=</span><span class="token punctuation">"</span>chat<span class="token punctuation">"</span></span>
    <span class="token attr-name">Author</span><span class="token attr-value"><span class="token punctuation">=</span><span class="token punctuation">"</span>{Binding Me}<span class="token punctuation">"</span></span>
    <span class="token attr-name">ItemsSource</span><span class="token attr-value"><span class="token punctuation">=</span><span class="token punctuation">"</span>{Binding Items}<span class="token punctuation">"</span></span> <span class="token punctuation">/&gt;</span></span>
</code></pre><p>For the previous viewmodel to work correctly, remember to configure both the code-behind of your page and the dependency injection as follows:</p><p><strong>MauiProgram.cs</strong></p><pre class=" language-csharp"><code class="prism  language-csharp"><span class="token keyword">public</span> <span class="token keyword">static</span> <span class="token keyword">class</span> <span class="token class-name">MauiProgram</span>
<span class="token punctuation">{</span>
    <span class="token keyword">public</span> <span class="token keyword">static</span> MauiApp <span class="token function">CreateMauiApp</span><span class="token punctuation">(</span><span class="token punctuation">)</span>
    <span class="token punctuation">{</span>
        <span class="token keyword">var</span> builder <span class="token operator">=</span> MauiApp<span class="token punctuation">.</span><span class="token function">CreateBuilder</span><span class="token punctuation">(</span><span class="token punctuation">)</span><span class="token punctuation">;</span>
        <span class="token punctuation">.</span><span class="token punctuation">.</span><span class="token punctuation">.</span>
        builder<span class="token punctuation">.</span>Services<span class="token punctuation">.</span><span class="token generic-method function">AddTransient<span class="token punctuation">&lt;</span>ChatViewModel<span class="token punctuation">&gt;</span></span><span class="token punctuation">(</span><span class="token punctuation">)</span><span class="token punctuation">;</span>            
        <span class="token punctuation">.</span><span class="token punctuation">.</span><span class="token punctuation">.</span>
        <span class="token keyword">return</span> builder<span class="token punctuation">.</span><span class="token function">Build</span><span class="token punctuation">(</span><span class="token punctuation">)</span><span class="token punctuation">;</span>
    <span class="token punctuation">}</span>
<span class="token punctuation">}</span>
</code></pre><p><strong>MainPage.xaml.cs</strong></p><pre class=" language-csharp"><code class="prism  language-csharp"><span class="token keyword">public</span> <span class="token function">MainPage</span><span class="token punctuation">(</span>ChatViewModel viewModel<span class="token punctuation">)</span>
<span class="token punctuation">{</span>
    <span class="token function">InitializeComponent</span><span class="token punctuation">(</span><span class="token punctuation">)</span><span class="token punctuation">;</span>
    BindingContext <span class="token operator">=</span> viewModel<span class="token punctuation">;</span>
<span class="token punctuation">}</span>
</code></pre><p>
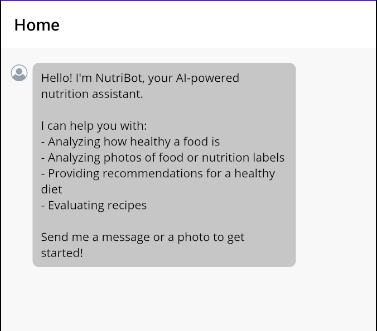
Executing the previous code allows you to see the welcome message in the chat history:</p><p><img src="https://d585tldpucybw.cloudfront.net/sfimages/default-source/blogs/2026/2026-04/displaying-chat-app-welcome-message.png?sfvrsn=88610ef7_2" alt="Displaying chat app welcome message" /></p><h2 id="receiving-and-returning-chat-messages">Receiving and Returning Chat Messages</h2><p>So far, we have a list of messages in the application; however, there is no real interaction, meaning that messages are not sent or received back. The control has some commands by default that can help us with this task:</p><ul><li><code>SendMessageCommand</code>: executes when a message is sent</li><li><code>PickFileCommand</code>: executes when attempting to attach a file</li><li><code>PickPhotoCommand</code>: executes when wanting to attach a photo</li><li><code>TakePhotoCommand</code>: executes when the camera opens to take a photo</li></ul><p>There are other <a target="_blank" href="https://www.telerik.com/maui-ui/documentation/controls/chat/commands#commands-related-to-attachments">commands for working with attachments</a>, but the main ones are the above.</p><p>Let&rsquo;s implement the functionality to send and receive messages in the viewmodel, creating a property <code>Message</code> that allows binding the user&rsquo;s message, in addition to a method <code>SendMessage</code>, which will be linked to <code>SendMessageCommand</code> as follows:</p><pre class=" language-csharp"><code class="prism  language-csharp"><span class="token keyword">public</span> <span class="token keyword">partial</span> <span class="token keyword">class</span> <span class="token class-name">ChatViewModel</span> <span class="token punctuation">:</span> ObservableObject
<span class="token punctuation">{</span>
    <span class="token punctuation">.</span><span class="token punctuation">.</span><span class="token punctuation">.</span>
    <span class="token punctuation">[</span>ObservableProperty<span class="token punctuation">]</span>
    <span class="token keyword">private</span> <span class="token keyword">string</span> message <span class="token operator">=</span> <span class="token keyword">string</span><span class="token punctuation">.</span>Empty<span class="token punctuation">;</span>
    <span class="token punctuation">.</span><span class="token punctuation">.</span><span class="token punctuation">.</span>
    
    <span class="token punctuation">[</span>RelayCommand<span class="token punctuation">]</span>
    <span class="token keyword">private</span> <span class="token keyword">async</span> Task <span class="token function">SendMessage</span><span class="token punctuation">(</span><span class="token punctuation">)</span>
    <span class="token punctuation">{</span>
        <span class="token keyword">var</span> messageText <span class="token operator">=</span> Message<span class="token punctuation">;</span>
        Message <span class="token operator">=</span> <span class="token keyword">string</span><span class="token punctuation">.</span>Empty<span class="token punctuation">;</span>

        Items<span class="token punctuation">.</span><span class="token function">Add</span><span class="token punctuation">(</span><span class="token keyword">new</span> <span class="token class-name">TextMessage</span> <span class="token punctuation">{</span> Author <span class="token operator">=</span> Me<span class="token punctuation">,</span> Text <span class="token operator">=</span> messageText <span class="token punctuation">}</span><span class="token punctuation">)</span><span class="token punctuation">;</span>            

        Items<span class="token punctuation">.</span><span class="token function">Add</span><span class="token punctuation">(</span><span class="token keyword">new</span> <span class="token class-name">TextMessage</span> <span class="token punctuation">{</span> Author <span class="token operator">=</span> Bot<span class="token punctuation">,</span> Text <span class="token operator">=</span> <span class="token string">"Message received!"</span> <span class="token punctuation">}</span><span class="token punctuation">)</span><span class="token punctuation">;</span>
    <span class="token punctuation">}</span>
<span class="token punctuation">}</span>
</code></pre><p>In the UI page, you need to bind this pair of elements using <code>Message</code> and <code>SendMessageCommand</code>:</p><pre class=" language-xml"><code class="prism  language-xml"><span class="token tag"><span class="token tag"><span class="token punctuation">&lt;</span><span class="token namespace">telerik:</span>RadChat</span> <span class="token attr-name">...</span>
    <span class="token attr-name">Message</span><span class="token attr-value"><span class="token punctuation">=</span><span class="token punctuation">"</span>{Binding Message}<span class="token punctuation">"</span></span>
    <span class="token attr-name">SendMessageCommand</span><span class="token attr-value"><span class="token punctuation">=</span><span class="token punctuation">"</span>{Binding SendMessageCommand}<span class="token punctuation">"</span></span> <span class="token punctuation">/&gt;</span></span>
</code></pre><p>
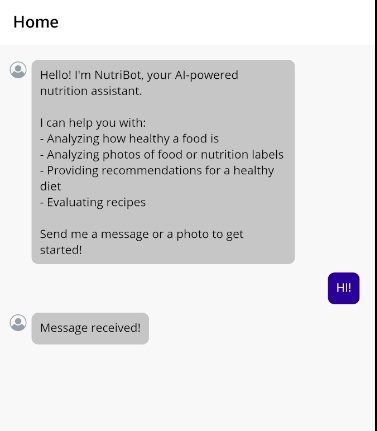
With these new changes, we can see that there is a response in the chat window after an interaction:</p><p><img src="https://d585tldpucybw.cloudfront.net/sfimages/default-source/blogs/2026/2026-04/sending-and-receiving-messages.png?sfvrsn=f503a7ef_2" alt="Sending and receiving messages using predefined commands" /></p><p>Now let&rsquo;s see how to connect an AI model so that we can have more realistic conversations.</p><h2 id="connecting-an-llm-model-to-a-chat-app-in-.net-maui">Connecting an LLM Model to a Chat App in .NET MAUI</h2><p>To use AI in our application, I have created a service-like class that manages the prompt, model information and methods related to obtaining results from the LLM.</p><p>It is worth noting that I have created some variables to store the connection data with the model, solely for demonstration purposes. Ideally, these data should be stored securely on the device, create an external service to handle it, etc.</p><p>The class looks like this:</p><pre class=" language-csharp"><code class="prism  language-csharp"><span class="token keyword">public</span> <span class="token keyword">class</span> <span class="token class-name">ChatService</span>
<span class="token punctuation">{</span>
    <span class="token keyword">private</span> <span class="token keyword">const</span> <span class="token keyword">string</span> Endpoint <span class="token operator">=</span> <span class="token string">"your-endpoint"</span><span class="token punctuation">;</span>
    <span class="token keyword">private</span> <span class="token keyword">const</span> <span class="token keyword">string</span> DeploymentName <span class="token operator">=</span> <span class="token string">"your-deployment-name"</span><span class="token punctuation">;</span>
    <span class="token keyword">private</span> <span class="token keyword">const</span> <span class="token keyword">string</span> ApiKey <span class="token operator">=</span> <span class="token string">"your-api-key"</span><span class="token punctuation">;</span>

    <span class="token keyword">private</span> <span class="token keyword">readonly</span> IChatClient _chatClient<span class="token punctuation">;</span>
    <span class="token keyword">private</span> <span class="token keyword">readonly</span> List<span class="token operator">&lt;</span>ChatMessage<span class="token operator">&gt;</span> _history<span class="token punctuation">;</span>

    <span class="token keyword">private</span> <span class="token keyword">const</span> <span class="token keyword">string</span> SystemPrompt <span class="token operator">=</span> <span class="token string">""</span>"
        You are an expert and friendly nutritionist<span class="token punctuation">.</span> Your role <span class="token keyword">is</span> to<span class="token punctuation">:</span>
        <span class="token operator">-</span> Analyze food photographs and nutrition <span class="token function">labels</span> <span class="token punctuation">(</span>nutrition facts<span class="token punctuation">)</span>
        <span class="token operator">-</span> Evaluate how healthy a food <span class="token keyword">is</span> <span class="token keyword">for</span> a balanced diet
        <span class="token operator">-</span> Provide healthy eating recommendations
        <span class="token operator">-</span> Suggest healthier alternatives when necessary
        <span class="token operator">-</span> Analyze recipes and give your professional opinion
        <span class="token operator">-</span> Answer questions about nutrition<span class="token punctuation">,</span> diets<span class="token punctuation">,</span> and food wellness
        
        When analyzing an image<span class="token punctuation">:</span>
        <span class="token number">1</span><span class="token punctuation">.</span> Identify the food or nutrition label
        <span class="token number">2</span><span class="token punctuation">.</span> Give a rating <span class="token keyword">from</span> <span class="token number">1</span><span class="token operator">-</span><span class="token number">10</span> on how healthy it <span class="token keyword">is</span>
        <span class="token number">3</span><span class="token punctuation">.</span> Explain the nutritional pros and cons
        <span class="token number">4</span><span class="token punctuation">.</span> Suggest improvements or alternatives
        
        Always respond <span class="token keyword">in</span> a concise but informative manner<span class="token punctuation">.</span>
        Don't use emojis<span class="token punctuation">.</span>
        <span class="token string">""</span>"<span class="token punctuation">;</span>

    <span class="token keyword">public</span> <span class="token function">ChatService</span><span class="token punctuation">(</span><span class="token punctuation">)</span>
    <span class="token punctuation">{</span>
        _chatClient <span class="token operator">=</span> <span class="token keyword">new</span> <span class="token class-name">AzureOpenAIClient</span><span class="token punctuation">(</span>
                <span class="token keyword">new</span> <span class="token class-name">Uri</span><span class="token punctuation">(</span>Endpoint<span class="token punctuation">)</span><span class="token punctuation">,</span>
                <span class="token keyword">new</span> <span class="token class-name">ApiKeyCredential</span><span class="token punctuation">(</span>ApiKey<span class="token punctuation">)</span><span class="token punctuation">)</span>
            <span class="token punctuation">.</span><span class="token function">GetChatClient</span><span class="token punctuation">(</span>DeploymentName<span class="token punctuation">)</span>
            <span class="token punctuation">.</span><span class="token function">AsIChatClient</span><span class="token punctuation">(</span><span class="token punctuation">)</span><span class="token punctuation">;</span>

        _history <span class="token operator">=</span>
        <span class="token punctuation">[</span>
            <span class="token keyword">new</span><span class="token punctuation">(</span>ChatRole<span class="token punctuation">.</span>System<span class="token punctuation">,</span> SystemPrompt<span class="token punctuation">)</span>
        <span class="token punctuation">]</span><span class="token punctuation">;</span>
    <span class="token punctuation">}</span>

    <span class="token comment">/// &lt;summary&gt;</span>
    <span class="token comment">/// Sends a text-only message and returns the AI response.</span>
    <span class="token comment">/// &lt;/summary&gt;</span>
    <span class="token keyword">public</span> <span class="token keyword">async</span> Task<span class="token operator">&lt;</span><span class="token keyword">string</span><span class="token operator">&gt;</span> <span class="token function">SendMessageAsync</span><span class="token punctuation">(</span><span class="token keyword">string</span> userMessage<span class="token punctuation">)</span>
    <span class="token punctuation">{</span>
        _history<span class="token punctuation">.</span><span class="token function">Add</span><span class="token punctuation">(</span><span class="token keyword">new</span><span class="token punctuation">(</span>ChatRole<span class="token punctuation">.</span>User<span class="token punctuation">,</span> userMessage<span class="token punctuation">)</span><span class="token punctuation">)</span><span class="token punctuation">;</span>

        <span class="token keyword">var</span> response <span class="token operator">=</span> <span class="token keyword">await</span> _chatClient<span class="token punctuation">.</span><span class="token function">GetResponseAsync</span><span class="token punctuation">(</span>_history<span class="token punctuation">)</span><span class="token punctuation">;</span>
        <span class="token keyword">var</span> assistantMessage <span class="token operator">=</span> response<span class="token punctuation">.</span>Text <span class="token operator">?</span><span class="token operator">?</span> <span class="token keyword">string</span><span class="token punctuation">.</span>Empty<span class="token punctuation">;</span>

        _history<span class="token punctuation">.</span><span class="token function">AddMessages</span><span class="token punctuation">(</span>response<span class="token punctuation">)</span><span class="token punctuation">;</span>

        <span class="token keyword">return</span> assistantMessage<span class="token punctuation">;</span>
    <span class="token punctuation">}</span>

    <span class="token comment">/// &lt;summary&gt;</span>
    <span class="token comment">/// Sends a message with an image for vision analysis and returns the AI response.</span>
    <span class="token comment">/// &lt;/summary&gt;</span>
    <span class="token keyword">public</span> <span class="token keyword">async</span> Task<span class="token operator">&lt;</span><span class="token keyword">string</span><span class="token operator">&gt;</span> <span class="token function">SendMessageWithImageAsync</span><span class="token punctuation">(</span><span class="token keyword">string</span> userMessage<span class="token punctuation">,</span> <span class="token keyword">byte</span><span class="token punctuation">[</span><span class="token punctuation">]</span> imageBytes<span class="token punctuation">,</span> <span class="token keyword">string</span> mimeType<span class="token punctuation">)</span>
    <span class="token punctuation">{</span>        
        <span class="token keyword">var</span> contents <span class="token operator">=</span> <span class="token keyword">new</span> <span class="token class-name">List</span><span class="token operator">&lt;</span>AIContent<span class="token operator">&gt;</span>
        <span class="token punctuation">{</span>
            <span class="token keyword">new</span> <span class="token class-name">TextContent</span><span class="token punctuation">(</span><span class="token keyword">string</span><span class="token punctuation">.</span><span class="token function">IsNullOrWhiteSpace</span><span class="token punctuation">(</span>userMessage<span class="token punctuation">)</span>
                <span class="token operator">?</span> <span class="token string">"Analyze this image from a nutritional perspective. How healthy is it?"</span>
                <span class="token punctuation">:</span> userMessage<span class="token punctuation">)</span><span class="token punctuation">,</span>
            <span class="token keyword">new</span> <span class="token class-name">DataContent</span><span class="token punctuation">(</span>imageBytes<span class="token punctuation">,</span> mimeType<span class="token punctuation">)</span>
        <span class="token punctuation">}</span><span class="token punctuation">;</span>

        <span class="token keyword">var</span> message <span class="token operator">=</span> <span class="token keyword">new</span> <span class="token class-name">ChatMessage</span><span class="token punctuation">(</span>ChatRole<span class="token punctuation">.</span>User<span class="token punctuation">,</span> contents<span class="token punctuation">)</span><span class="token punctuation">;</span>
        _history<span class="token punctuation">.</span><span class="token function">Add</span><span class="token punctuation">(</span>message<span class="token punctuation">)</span><span class="token punctuation">;</span>

        <span class="token keyword">var</span> response <span class="token operator">=</span> <span class="token keyword">await</span> _chatClient<span class="token punctuation">.</span><span class="token function">GetResponseAsync</span><span class="token punctuation">(</span>_history<span class="token punctuation">)</span><span class="token punctuation">;</span>
        <span class="token keyword">var</span> assistantMessage <span class="token operator">=</span> response<span class="token punctuation">.</span>Text <span class="token operator">?</span><span class="token operator">?</span> <span class="token keyword">string</span><span class="token punctuation">.</span>Empty<span class="token punctuation">;</span>

        _history<span class="token punctuation">.</span><span class="token function">AddMessages</span><span class="token punctuation">(</span>response<span class="token punctuation">)</span><span class="token punctuation">;</span>

        <span class="token keyword">return</span> assistantMessage<span class="token punctuation">;</span>
    <span class="token punctuation">}</span>
<span class="token punctuation">}</span>
</code></pre><p>In the code above, you can see that the methods <code>SendMessageAsync</code> are defined to send only text messages, and <code>SendMessageWithImageAsync</code> to send text along with images, which prepares us for the following sections.</p><p>To use it, we must update the viewmodel code to receive the instance of the new service:</p><pre class=" language-csharp"><code class="prism  language-csharp"><span class="token keyword">public</span> <span class="token keyword">partial</span> <span class="token keyword">class</span> <span class="token class-name">ChatViewModel</span> <span class="token punctuation">:</span> ObservableObject
<span class="token punctuation">{</span>
    <span class="token keyword">private</span> <span class="token keyword">readonly</span> ChatService _chatService<span class="token punctuation">;</span>
    <span class="token punctuation">.</span><span class="token punctuation">.</span><span class="token punctuation">.</span>
    <span class="token keyword">public</span> <span class="token function">ChatViewModel</span><span class="token punctuation">(</span>ChatService chatService<span class="token punctuation">)</span>
    <span class="token punctuation">{</span>
        _chatService <span class="token operator">=</span> chatService<span class="token punctuation">;</span>
        <span class="token punctuation">.</span><span class="token punctuation">.</span><span class="token punctuation">.</span>
    <span class="token punctuation">}</span>
    <span class="token punctuation">[</span>RelayCommand<span class="token punctuation">]</span>

    <span class="token keyword">private</span> <span class="token keyword">async</span> Task <span class="token function">SendMessage</span><span class="token punctuation">(</span><span class="token punctuation">)</span>
    <span class="token punctuation">{</span>
        <span class="token punctuation">.</span><span class="token punctuation">.</span><span class="token punctuation">.</span>
        <span class="token keyword">try</span>
        <span class="token punctuation">{</span>
            Items<span class="token punctuation">.</span><span class="token function">Add</span><span class="token punctuation">(</span><span class="token keyword">new</span> <span class="token class-name">TextMessage</span> <span class="token punctuation">{</span> Author <span class="token operator">=</span> Me<span class="token punctuation">,</span> Text <span class="token operator">=</span> messageText <span class="token punctuation">}</span><span class="token punctuation">)</span><span class="token punctuation">;</span>

            <span class="token keyword">var</span> response <span class="token operator">=</span> <span class="token keyword">await</span> _chatService<span class="token punctuation">.</span><span class="token function">SendMessageAsync</span><span class="token punctuation">(</span>messageText<span class="token punctuation">)</span><span class="token punctuation">;</span>

            Items<span class="token punctuation">.</span><span class="token function">Add</span><span class="token punctuation">(</span><span class="token keyword">new</span> <span class="token class-name">TextMessage</span> <span class="token punctuation">{</span> Author <span class="token operator">=</span> Bot<span class="token punctuation">,</span> Text <span class="token operator">=</span> response <span class="token punctuation">}</span><span class="token punctuation">)</span><span class="token punctuation">;</span>
        <span class="token punctuation">}</span>
        <span class="token keyword">catch</span> <span class="token punctuation">(</span><span class="token class-name">Exception</span> ex<span class="token punctuation">)</span>
        <span class="token punctuation">{</span>
            Items<span class="token punctuation">.</span><span class="token function">Add</span><span class="token punctuation">(</span><span class="token keyword">new</span> <span class="token class-name">TextMessage</span>
            <span class="token punctuation">{</span>
                Author <span class="token operator">=</span> Bot<span class="token punctuation">,</span>
                Text <span class="token operator">=</span> $<span class="token string">"⚠️ Error processing your message: {ex.Message}"</span>
            <span class="token punctuation">}</span><span class="token punctuation">)</span><span class="token punctuation">;</span>
        <span class="token punctuation">}</span>
    <span class="token punctuation">}</span>
<span class="token punctuation">}</span>
</code></pre><p>In the previous update, you can also see that I have changed the method <code>SendMessage</code>, adding an <code>try-catch</code> for any error that might occur, in addition to using the service to obtain a response from the LLM model. You should also add the new service to the dependency container in <code>MauiProgram.cs</code>:</p><pre class=" language-csharp"><code class="prism  language-csharp">builder<span class="token punctuation">.</span>Services<span class="token punctuation">.</span><span class="token generic-method function">AddSingleton<span class="token punctuation">&lt;</span>ChatService<span class="token punctuation">&gt;</span></span><span class="token punctuation">(</span><span class="token punctuation">)</span><span class="token punctuation">;</span>
</code></pre><p>
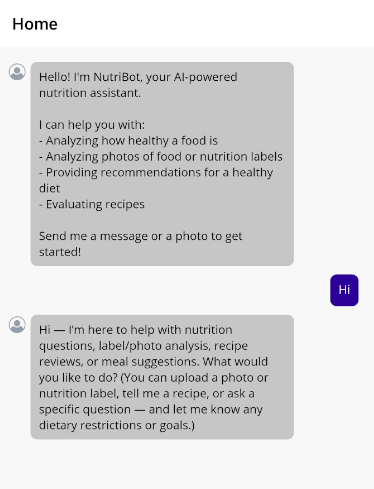
With the previous changes, we will see a more realistic response created thanks to an LLM model:</p><p><img src="https://d585tldpucybw.cloudfront.net/sfimages/default-source/blogs/2026/2026-04/interacting-with-an-llm-model.png?sfvrsn=83fa7495_2" alt="Interacting with an llm model" /></p><h2 id="attaching-elements-to-the-conversation">Attaching Elements to the Conversation</h2><p>Next, we will see how we can attach images to the conversation, with the purpose of querying the AI model for information about them. The first thing we will do is create a model that represents the attachments:</p><pre class=" language-csharp"><code class="prism  language-csharp"><span class="token keyword">public</span> <span class="token keyword">partial</span> <span class="token keyword">class</span> <span class="token class-name">AttachedFileData</span> <span class="token punctuation">:</span> ObservableObject
<span class="token punctuation">{</span>
    <span class="token punctuation">[</span>ObservableProperty<span class="token punctuation">]</span>
    <span class="token keyword">private</span> <span class="token keyword">string</span> name <span class="token operator">=</span> <span class="token keyword">string</span><span class="token punctuation">.</span>Empty<span class="token punctuation">;</span>

    <span class="token punctuation">[</span>ObservableProperty<span class="token punctuation">]</span>
    <span class="token keyword">private</span> <span class="token keyword">long</span> size<span class="token punctuation">;</span>

    <span class="token punctuation">[</span>ObservableProperty<span class="token punctuation">]</span>
    <span class="token keyword">private</span> Func<span class="token operator">&lt;</span>Task<span class="token operator">&lt;</span>Stream<span class="token operator">&gt;</span><span class="token operator">&gt;</span> getStream <span class="token operator">=</span> <span class="token punctuation">(</span><span class="token punctuation">)</span> <span class="token operator">=</span><span class="token operator">&gt;</span> Task<span class="token punctuation">.</span><span class="token generic-method function">FromResult<span class="token punctuation">&lt;</span>Stream<span class="token punctuation">&gt;</span></span><span class="token punctuation">(</span>Stream<span class="token punctuation">.</span>Null<span class="token punctuation">)</span><span class="token punctuation">;</span>

    <span class="token punctuation">[</span>ObservableProperty<span class="token punctuation">]</span>
    <span class="token keyword">private</span> <span class="token keyword">byte</span><span class="token punctuation">[</span><span class="token punctuation">]</span><span class="token operator">?</span> imageBytes<span class="token punctuation">;</span>

    <span class="token punctuation">[</span>ObservableProperty<span class="token punctuation">]</span>
    <span class="token keyword">private</span> <span class="token keyword">string</span><span class="token operator">?</span> mimeType<span class="token punctuation">;</span>
<span class="token punctuation">}</span>
</code></pre><p>With the class that defines an attachment ready, we can create a list with a generic <code>AttachedFileData</code>, which will allow us to display them in a special section in the chat window.</p><pre class=" language-csharp"><code class="prism  language-csharp"><span class="token keyword">public</span> <span class="token keyword">partial</span> <span class="token keyword">class</span> <span class="token class-name">ChatViewModel</span> <span class="token punctuation">:</span> ObservableObject
<span class="token punctuation">{</span>
    <span class="token punctuation">.</span><span class="token punctuation">.</span><span class="token punctuation">.</span>
    <span class="token punctuation">[</span>ObservableProperty<span class="token punctuation">]</span>
    <span class="token keyword">private</span> ObservableCollection<span class="token operator">&lt;</span>AttachedFileData<span class="token operator">&gt;</span> attachedFiles <span class="token operator">=</span> <span class="token punctuation">[</span><span class="token punctuation">]</span><span class="token punctuation">;</span>
    <span class="token punctuation">.</span><span class="token punctuation">.</span><span class="token punctuation">.</span>
    <span class="token punctuation">[</span>RelayCommand<span class="token punctuation">]</span>
    <span class="token keyword">private</span> <span class="token keyword">async</span> Task <span class="token function">AttachFile</span><span class="token punctuation">(</span>IList<span class="token operator">&lt;</span>AttachedFileData<span class="token operator">&gt;</span><span class="token operator">?</span> filesToAttach<span class="token punctuation">)</span>
    <span class="token punctuation">{</span>
        <span class="token keyword">if</span> <span class="token punctuation">(</span>filesToAttach <span class="token keyword">is</span> <span class="token keyword">null</span><span class="token punctuation">)</span> <span class="token keyword">return</span><span class="token punctuation">;</span>
        
        <span class="token keyword">foreach</span> <span class="token punctuation">(</span><span class="token keyword">var</span> file <span class="token keyword">in</span> filesToAttach<span class="token punctuation">)</span>
        <span class="token punctuation">{</span>
            AttachedFiles<span class="token punctuation">.</span><span class="token function">Add</span><span class="token punctuation">(</span>file<span class="token punctuation">)</span><span class="token punctuation">;</span>                
        <span class="token punctuation">}</span>
        
        filesToAttach<span class="token punctuation">.</span><span class="token function">Clear</span><span class="token punctuation">(</span><span class="token punctuation">)</span><span class="token punctuation">;</span>
    <span class="token punctuation">}</span>
</code></pre><p>In the code above, we have also defined a method called <code>AttachFile</code>, which will allow us to attach the attachments to the list. In the graphic control, we need to perform two operations.</p><ol><li>Activate the button to attach files via <code>IsMoreButtonVisible</code></li><li>Bind <code>AttachFilesCommand</code> to the viewmodel method</li><li>Bind <code>AttachedFilesSource</code> to <code>AttachedFiles</code></li></ol><p>We can see this below:</p><pre class=" language-xml"><code class="prism  language-xml"><span class="token tag"><span class="token tag"><span class="token punctuation">&lt;</span><span class="token namespace">telerik:</span>RadChat</span> <span class="token attr-name">...</span>
    <span class="token attr-name">AttachFilesCommand</span><span class="token attr-value"><span class="token punctuation">=</span><span class="token punctuation">"</span>{Binding AttachFilesCommand}<span class="token punctuation">"</span></span>
    <span class="token attr-name">AttachedFilesSource</span><span class="token attr-value"><span class="token punctuation">=</span><span class="token punctuation">"</span>{Binding AttachedFiles}<span class="token punctuation">"</span></span>
    <span class="token attr-name">IsMoreButtonVisible</span><span class="token attr-value"><span class="token punctuation">=</span><span class="token punctuation">"</span>True<span class="token punctuation">"</span></span> <span class="token punctuation">/&gt;</span></span>
</code></pre><p>With the previous modifications, we will see a new button to attach attachments. Although we might think that the above is enough for the LLM to respond correctly to messages with images, if we try to query something with an attached image, we will get a response regarding the LLM model&rsquo;s unawareness of the attached file:</p><p><img src="https://d585tldpucybw.cloudfront.net/sfimages/default-source/blogs/2026/2026-04/attaching-files-without-favorable-llm-responses.png?sfvrsn=cabb71e0_2" alt="Attaching files without successful llm response" /></p><p>
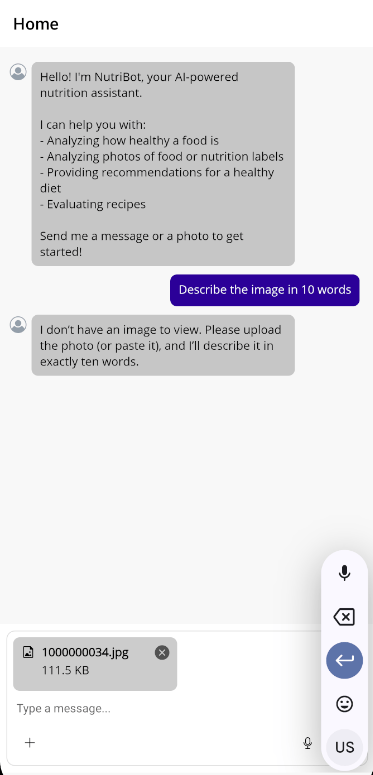
This happens because we have not added the attached file to the message list. To achieve this, several steps need to be followed:</p><ol><li>Detect when the collection of files changes:</li></ol><pre class=" language-csharp"><code class="prism  language-csharp"><span class="token keyword">public</span> <span class="token function">ChatViewModel</span><span class="token punctuation">(</span>ChatService chatService<span class="token punctuation">)</span>
<span class="token punctuation">{</span>
   <span class="token punctuation">.</span><span class="token punctuation">.</span><span class="token punctuation">.</span>    
    AttachedFiles<span class="token punctuation">.</span>CollectionChanged <span class="token operator">+</span><span class="token operator">=</span> OnAttachedFilesChanged<span class="token punctuation">;</span>
<span class="token punctuation">}</span>
</code></pre><ol start="2"><li>Create the event handler for when the collection changes. This will allow adding the corresponding information according to the type of file:</li></ol><pre class=" language-csharp"><code class="prism  language-csharp"><span class="token keyword">private</span> <span class="token keyword">async</span> <span class="token keyword">void</span> <span class="token function">OnAttachedFilesChanged</span><span class="token punctuation">(</span><span class="token keyword">object</span><span class="token operator">?</span> sender<span class="token punctuation">,</span> NotifyCollectionChangedEventArgs e<span class="token punctuation">)</span>
<span class="token punctuation">{</span>
    <span class="token keyword">if</span> <span class="token punctuation">(</span>e<span class="token punctuation">.</span>Action <span class="token operator">==</span> NotifyCollectionChangedAction<span class="token punctuation">.</span>Add <span class="token operator">&amp;&amp;</span> e<span class="token punctuation">.</span>NewItems <span class="token operator">!=</span> <span class="token keyword">null</span><span class="token punctuation">)</span>
    <span class="token punctuation">{</span>
        <span class="token keyword">foreach</span> <span class="token punctuation">(</span>AttachedFileData file <span class="token keyword">in</span> e<span class="token punctuation">.</span>NewItems<span class="token punctuation">)</span>
        <span class="token punctuation">{</span>
            <span class="token keyword">await</span> <span class="token function">LoadFileData</span><span class="token punctuation">(</span>file<span class="token punctuation">)</span><span class="token punctuation">;</span>
        <span class="token punctuation">}</span>
    <span class="token punctuation">}</span>
<span class="token punctuation">}</span>

<span class="token keyword">private</span> <span class="token keyword">async</span> Task <span class="token function">LoadFileData</span><span class="token punctuation">(</span>AttachedFileData file<span class="token punctuation">)</span>
<span class="token punctuation">{</span>
    <span class="token keyword">try</span>
    <span class="token punctuation">{</span>
        <span class="token comment">// Load the image bytes from the stream</span>
        <span class="token keyword">using</span> <span class="token keyword">var</span> stream <span class="token operator">=</span> <span class="token keyword">await</span> file<span class="token punctuation">.</span><span class="token function">GetStream</span><span class="token punctuation">(</span><span class="token punctuation">)</span><span class="token punctuation">;</span>
        <span class="token keyword">using</span> <span class="token keyword">var</span> ms <span class="token operator">=</span> <span class="token keyword">new</span> <span class="token class-name">MemoryStream</span><span class="token punctuation">(</span><span class="token punctuation">)</span><span class="token punctuation">;</span>
        <span class="token keyword">await</span> stream<span class="token punctuation">.</span><span class="token function">CopyToAsync</span><span class="token punctuation">(</span>ms<span class="token punctuation">)</span><span class="token punctuation">;</span>
        file<span class="token punctuation">.</span>ImageBytes <span class="token operator">=</span> ms<span class="token punctuation">.</span><span class="token function">ToArray</span><span class="token punctuation">(</span><span class="token punctuation">)</span><span class="token punctuation">;</span>

        <span class="token comment">// Try to determine MIME type from file extension</span>
        <span class="token keyword">var</span> extension <span class="token operator">=</span> Path<span class="token punctuation">.</span><span class="token function">GetExtension</span><span class="token punctuation">(</span>file<span class="token punctuation">.</span>Name<span class="token punctuation">)</span><span class="token punctuation">.</span><span class="token function">ToLowerInvariant</span><span class="token punctuation">(</span><span class="token punctuation">)</span><span class="token punctuation">;</span>
        file<span class="token punctuation">.</span>MimeType <span class="token operator">=</span> extension <span class="token keyword">switch</span>
        <span class="token punctuation">{</span>
            <span class="token string">".jpg"</span> or <span class="token string">".jpeg"</span> <span class="token operator">=</span><span class="token operator">&gt;</span> <span class="token string">"image/jpeg"</span><span class="token punctuation">,</span>
            <span class="token string">".png"</span> <span class="token operator">=</span><span class="token operator">&gt;</span> <span class="token string">"image/png"</span><span class="token punctuation">,</span>
            <span class="token string">".gif"</span> <span class="token operator">=</span><span class="token operator">&gt;</span> <span class="token string">"image/gif"</span><span class="token punctuation">,</span>
            <span class="token string">".webp"</span> <span class="token operator">=</span><span class="token operator">&gt;</span> <span class="token string">"image/webp"</span><span class="token punctuation">,</span>
            _ <span class="token operator">=</span><span class="token operator">&gt;</span> <span class="token string">"image/jpeg"</span>
        <span class="token punctuation">}</span><span class="token punctuation">;</span>
                        
    <span class="token punctuation">}</span>
    <span class="token keyword">catch</span> <span class="token punctuation">(</span><span class="token class-name">Exception</span> ex<span class="token punctuation">)</span>
    <span class="token punctuation">{</span>
        Items<span class="token punctuation">.</span><span class="token function">Add</span><span class="token punctuation">(</span><span class="token keyword">new</span> <span class="token class-name">TextMessage</span>
        <span class="token punctuation">{</span>
            Author <span class="token operator">=</span> Bot<span class="token punctuation">,</span>
            Text <span class="token operator">=</span> $<span class="token string">"⚠️ Error loading file {file.Name}: {ex.Message}"</span>
        <span class="token punctuation">}</span><span class="token punctuation">)</span><span class="token punctuation">;</span>
    <span class="token punctuation">}</span>
<span class="token punctuation">}</span>
</code></pre><ol start="3"><li>In addition to the above, we need to modify the method for sending messages. Before doing that, to display the new messages in the history, we need to create a new class to handle the image information. In our case, it is as follows:</li></ol><pre class=" language-csharp"><code class="prism  language-csharp"><span class="token keyword">public</span> <span class="token keyword">partial</span> <span class="token keyword">class</span> <span class="token class-name">ChatMessageItem</span> <span class="token punctuation">:</span> ObservableObject
<span class="token punctuation">{</span>
    <span class="token punctuation">[</span>ObservableProperty<span class="token punctuation">]</span>
    <span class="token keyword">private</span> <span class="token keyword">object</span><span class="token operator">?</span> author<span class="token punctuation">;</span>

    <span class="token punctuation">[</span>ObservableProperty<span class="token punctuation">]</span>
    <span class="token keyword">private</span> <span class="token keyword">string</span> text <span class="token operator">=</span> <span class="token keyword">string</span><span class="token punctuation">.</span>Empty<span class="token punctuation">;</span>

    <span class="token punctuation">[</span>ObservableProperty<span class="token punctuation">]</span>
    <span class="token keyword">private</span> <span class="token keyword">byte</span><span class="token punctuation">[</span><span class="token punctuation">]</span><span class="token operator">?</span> imageData<span class="token punctuation">;</span>

    <span class="token punctuation">[</span>ObservableProperty<span class="token punctuation">]</span>
    <span class="token keyword">private</span> <span class="token keyword">string</span><span class="token operator">?</span> imageMimeType<span class="token punctuation">;</span>

    <span class="token punctuation">[</span>ObservableProperty<span class="token punctuation">]</span>
    <span class="token keyword">private</span> <span class="token keyword">string</span><span class="token operator">?</span> imageFileName<span class="token punctuation">;</span>
<span class="token punctuation">}</span>
</code></pre><p>With this change, we can now update the method that sends the messages, adding the necessary code for a message to contain information about the image. Make sure to change all references from <code>TextMessage</code> to <code>ChatMessageItem</code>:</p><pre class=" language-csharp"><code class="prism  language-csharp"><span class="token punctuation">[</span>RelayCommand<span class="token punctuation">]</span>
<span class="token keyword">private</span> <span class="token keyword">async</span> Task <span class="token function">SendMessage</span><span class="token punctuation">(</span><span class="token punctuation">)</span>
<span class="token punctuation">{</span>
    <span class="token keyword">var</span> messageText <span class="token operator">=</span> Message<span class="token punctuation">;</span>
    <span class="token keyword">var</span> filesToSend <span class="token operator">=</span> AttachedFiles<span class="token punctuation">.</span><span class="token function">ToList</span><span class="token punctuation">(</span><span class="token punctuation">)</span><span class="token punctuation">;</span>
    Message <span class="token operator">=</span> <span class="token keyword">string</span><span class="token punctuation">.</span>Empty<span class="token punctuation">;</span>

    <span class="token keyword">try</span>
    <span class="token punctuation">{</span>        
        <span class="token keyword">if</span> <span class="token punctuation">(</span>filesToSend<span class="token punctuation">.</span>Count <span class="token operator">&gt;</span> <span class="token number">0</span><span class="token punctuation">)</span>
        <span class="token punctuation">{</span>
            <span class="token keyword">var</span> file <span class="token operator">=</span> filesToSend<span class="token punctuation">[</span><span class="token number">0</span><span class="token punctuation">]</span><span class="token punctuation">;</span>
            
            Items<span class="token punctuation">.</span><span class="token function">Add</span><span class="token punctuation">(</span><span class="token keyword">new</span> <span class="token class-name">ChatMessageItem</span>
            <span class="token punctuation">{</span>
                Author <span class="token operator">=</span> Me<span class="token punctuation">,</span>
                Text <span class="token operator">=</span> <span class="token keyword">string</span><span class="token punctuation">.</span><span class="token function">IsNullOrWhiteSpace</span><span class="token punctuation">(</span>messageText<span class="token punctuation">)</span>
                    <span class="token operator">?</span> <span class="token string">" Analyzing this image..."</span>
                    <span class="token punctuation">:</span> messageText<span class="token punctuation">,</span>
                ImageData <span class="token operator">=</span> file<span class="token punctuation">.</span>ImageBytes<span class="token punctuation">,</span>
                ImageMimeType <span class="token operator">=</span> file<span class="token punctuation">.</span>MimeType<span class="token punctuation">,</span>
                ImageFileName <span class="token operator">=</span> file<span class="token punctuation">.</span>Name
            <span class="token punctuation">}</span><span class="token punctuation">)</span><span class="token punctuation">;</span>
            
            <span class="token keyword">var</span> response <span class="token operator">=</span> <span class="token keyword">await</span> _chatService<span class="token punctuation">.</span><span class="token function">SendMessageWithImageAsync</span><span class="token punctuation">(</span>
                <span class="token keyword">string</span><span class="token punctuation">.</span><span class="token function">IsNullOrWhiteSpace</span><span class="token punctuation">(</span>messageText<span class="token punctuation">)</span>
                    <span class="token operator">?</span> <span class="token string">"Analyze this image from a nutritional perspective."</span>
                    <span class="token punctuation">:</span> messageText<span class="token punctuation">,</span>
                file<span class="token punctuation">.</span>ImageBytes<span class="token operator">!</span><span class="token punctuation">,</span>
                file<span class="token punctuation">.</span>MimeType <span class="token operator">?</span><span class="token operator">?</span> <span class="token string">"image/jpeg"</span><span class="token punctuation">)</span><span class="token punctuation">;</span>

            Items<span class="token punctuation">.</span><span class="token function">Add</span><span class="token punctuation">(</span><span class="token keyword">new</span> <span class="token class-name">ChatMessageItem</span> <span class="token punctuation">{</span> Author <span class="token operator">=</span> Bot<span class="token punctuation">,</span> Text <span class="token operator">=</span> response <span class="token punctuation">}</span><span class="token punctuation">)</span><span class="token punctuation">;</span>
        <span class="token punctuation">}</span>
        <span class="token keyword">else</span>
        <span class="token punctuation">{</span>
           <span class="token punctuation">.</span><span class="token punctuation">.</span><span class="token punctuation">.</span>
        <span class="token punctuation">}</span>
    <span class="token punctuation">}</span>
    <span class="token punctuation">.</span><span class="token punctuation">.</span><span class="token punctuation">.</span>
<span class="token punctuation">}</span>
</code></pre><p>If you try to run the application at this moment, you will encounter an exception like the following:</p><pre class=" language-text"><code class="prism  language-text">`Unable to convert item of type MauiRadChatTests.ChatMessageItem to Telerik.Maui.Controls.Chat.ChatItem. You need to set the ItemConverter of the RadChat`.
</code></pre><p>The message is very descriptive about what we need to do: assign a value to <code>ItemConverter</code>. Let&rsquo;s do that next.</p><h2 id="displaying-attachments-in-the-conversation-history">Displaying Attachments in the Conversation History</h2><p>To understand this section, you should know that the control <code>RadChat</code> works internally with its own types, such as <code>ChatItem</code>, <code>ChatAttachedFile</code>, etc. However, in an MVVM architecture, the viewmodel should not know or depend on specific types in the UI. This is why the control mandates the use of some converters to perform a conversion between business objects and graphical control elements.</p><p><code>ItemConverter</code> is a property we need to assign through a class that inherits from <code>IChatItemConverter</code>. Its purpose is to convert a data model <code>ChatMessageItem</code> (or the type you have defined) into a Telerik UI type <code>ChatItem</code>, so that binding to the property <code>ItemsSource</code> can be done correctly.</p><p>The method <code>ConvertToChatItem</code> is used every time <code>RadChat</code> needs to render an element of the collection <code>ItemSource</code>, while <code>ConvertToDataItem</code> is used when RadChat wants to create a new item automatically, such as when the user presses Send. We will use null because we will handle everything from the viewmodel.</p><p>In the following example, you can see how we compare whether it is a text message or an image, and based on that we return either <code>ChatAttachmentsMessage</code> or <code>TextMessage</code>:</p><pre class=" language-csharp"><code class="prism  language-csharp"><span class="token keyword">public</span> <span class="token keyword">class</span> <span class="token class-name">ChatItemConverter</span> <span class="token punctuation">:</span> IChatItemConverter
<span class="token punctuation">{</span>
    <span class="token keyword">public</span> ChatItem <span class="token function">ConvertToChatItem</span><span class="token punctuation">(</span><span class="token keyword">object</span> dataItem<span class="token punctuation">,</span> ChatItemConverterContext context<span class="token punctuation">)</span>
    <span class="token punctuation">{</span>
        <span class="token keyword">var</span> item <span class="token operator">=</span> <span class="token punctuation">(</span>ChatMessageItem<span class="token punctuation">)</span>dataItem<span class="token punctuation">;</span>

        <span class="token keyword">var</span> vm <span class="token operator">=</span> <span class="token punctuation">(</span>ChatViewModel<span class="token punctuation">)</span>context<span class="token punctuation">.</span>Chat<span class="token punctuation">.</span>BindingContext<span class="token punctuation">;</span>
        <span class="token keyword">var</span> author <span class="token operator">=</span> item<span class="token punctuation">.</span>Author <span class="token operator">==</span> vm<span class="token punctuation">.</span>Bot <span class="token operator">?</span> vm<span class="token punctuation">.</span>Bot <span class="token punctuation">:</span> context<span class="token punctuation">.</span>Chat<span class="token punctuation">.</span>Author<span class="token punctuation">;</span>
        
        <span class="token keyword">if</span> <span class="token punctuation">(</span>item<span class="token punctuation">.</span>ImageData <span class="token operator">!=</span> <span class="token keyword">null</span> <span class="token operator">&amp;&amp;</span> item<span class="token punctuation">.</span>ImageData<span class="token punctuation">.</span>Length <span class="token operator">&gt;</span> <span class="token number">0</span><span class="token punctuation">)</span>
        <span class="token punctuation">{</span>            
            <span class="token keyword">var</span> imageSource <span class="token operator">=</span> ImageSource<span class="token punctuation">.</span><span class="token function">FromStream</span><span class="token punctuation">(</span><span class="token punctuation">(</span><span class="token punctuation">)</span> <span class="token operator">=</span><span class="token operator">&gt;</span> <span class="token keyword">new</span> <span class="token class-name">MemoryStream</span><span class="token punctuation">(</span>item<span class="token punctuation">.</span>ImageData<span class="token punctuation">)</span><span class="token punctuation">)</span><span class="token punctuation">;</span>
            
            <span class="token keyword">var</span> attachment <span class="token operator">=</span> <span class="token keyword">new</span> <span class="token class-name">ChatAttachment</span>
            <span class="token punctuation">{</span>
                FileName <span class="token operator">=</span> item<span class="token punctuation">.</span>ImageFileName <span class="token operator">?</span><span class="token operator">?</span> <span class="token string">"image.jpg"</span><span class="token punctuation">,</span>
                FileSize <span class="token operator">=</span> item<span class="token punctuation">.</span>ImageData<span class="token punctuation">.</span>Length<span class="token punctuation">,</span>
                Data <span class="token operator">=</span> imageSource<span class="token punctuation">,</span>
                GetFileStream <span class="token operator">=</span> <span class="token punctuation">(</span><span class="token punctuation">)</span> <span class="token operator">=</span><span class="token operator">&gt;</span> Task<span class="token punctuation">.</span><span class="token generic-method function">FromResult<span class="token punctuation">&lt;</span>Stream<span class="token punctuation">&gt;</span></span><span class="token punctuation">(</span><span class="token keyword">new</span> <span class="token class-name">MemoryStream</span><span class="token punctuation">(</span>item<span class="token punctuation">.</span>ImageData<span class="token punctuation">)</span><span class="token punctuation">)</span>
            <span class="token punctuation">}</span><span class="token punctuation">;</span>

            <span class="token keyword">var</span> attachmentMessage <span class="token operator">=</span> <span class="token keyword">new</span> <span class="token class-name">ChatAttachmentsMessage</span>
            <span class="token punctuation">{</span>
                Data <span class="token operator">=</span> dataItem<span class="token punctuation">,</span>
                Author <span class="token operator">=</span> author<span class="token punctuation">,</span>
                Text <span class="token operator">=</span> item<span class="token punctuation">.</span>Text<span class="token punctuation">,</span>
                Attachments <span class="token operator">=</span> <span class="token keyword">new</span> <span class="token class-name">List</span><span class="token operator">&lt;</span>ChatAttachment<span class="token operator">&gt;</span> <span class="token punctuation">{</span> attachment <span class="token punctuation">}</span>
            <span class="token punctuation">}</span><span class="token punctuation">;</span>

            <span class="token keyword">return</span> attachmentMessage<span class="token punctuation">;</span>
        <span class="token punctuation">}</span>
        
        <span class="token keyword">var</span> textMessage <span class="token operator">=</span> <span class="token keyword">new</span> <span class="token class-name">TextMessage</span>
        <span class="token punctuation">{</span>
            Data <span class="token operator">=</span> dataItem<span class="token punctuation">,</span>
            Author <span class="token operator">=</span> author<span class="token punctuation">,</span>
            Text <span class="token operator">=</span> item<span class="token punctuation">.</span>Text
        <span class="token punctuation">}</span><span class="token punctuation">;</span>

        <span class="token keyword">return</span> textMessage<span class="token punctuation">;</span>
    <span class="token punctuation">}</span>

    <span class="token keyword">public</span> <span class="token keyword">object</span><span class="token operator">?</span> <span class="token function">ConvertToDataItem</span><span class="token punctuation">(</span><span class="token keyword">object</span> message<span class="token punctuation">,</span> ChatItemConverterContext context<span class="token punctuation">)</span>
    <span class="token punctuation">{</span>        
        <span class="token keyword">return</span> <span class="token keyword">null</span><span class="token punctuation">;</span>
    <span class="token punctuation">}</span>
<span class="token punctuation">}</span>
</code></pre><p>In the above code, you can see that we are very specific in loading the image through the use of <code>ImageSource.FromStream</code>, necessary to bind a <code>Image</code> control to an image. This converter needs to be bound to the property <code>ItemConverter</code> as we saw in the exception description:</p><pre class=" language-xml"><code class="prism  language-xml"><span class="token tag"><span class="token tag"><span class="token punctuation">&lt;</span>ContentPage</span>
    <span class="token attr-name">...</span>
    <span class="token attr-name"><span class="token namespace">xmlns:</span>converters</span><span class="token attr-value"><span class="token punctuation">=</span><span class="token punctuation">"</span>clr-namespace:MauiRadChatTests<span class="token punctuation">"</span></span><span class="token punctuation">&gt;</span></span>


    <span class="token tag"><span class="token tag"><span class="token punctuation">&lt;</span>ContentPage.Resources</span><span class="token punctuation">&gt;</span></span>
        <span class="token tag"><span class="token tag"><span class="token punctuation">&lt;</span><span class="token namespace">converters:</span>ChatItemConverter</span> <span class="token attr-name"><span class="token namespace">x:</span>Key</span><span class="token attr-value"><span class="token punctuation">=</span><span class="token punctuation">"</span>ChatItemConverter<span class="token punctuation">"</span></span> <span class="token punctuation">/&gt;</span></span>
    <span class="token tag"><span class="token tag"><span class="token punctuation">&lt;/</span>ContentPage.Resources</span><span class="token punctuation">&gt;</span></span>

    <span class="token tag"><span class="token tag"><span class="token punctuation">&lt;</span><span class="token namespace">telerik:</span>RadChat</span> <span class="token attr-name">...</span>       
        <span class="token attr-name">ItemConverter</span><span class="token attr-value"><span class="token punctuation">=</span><span class="token punctuation">"</span>{StaticResource ChatItemConverter}<span class="token punctuation">"</span></span> <span class="token punctuation">/&gt;</span></span>
<span class="token tag"><span class="token tag"><span class="token punctuation">&lt;/</span>ContentPage</span><span class="token punctuation">&gt;</span></span>

</code></pre><p>Now, if we tried to run the application again, we would receive the following error:</p><pre class=" language-text"><code class="prism  language-text">The AttachedFileConverter is null. This converter must be set, so that the RadChat can automatically convert IFileInfo instances to a business object that represents an attached file, and add them to the AttachedFilesSource collection. Alternatively, you can add attachments objects in your view model via the AttachFilesCommand or AttachFiles event.
</code></pre><p>The previous error tells us that we need to implement a second converter, necessary to convert a business object and add it to the collection of attachments. This means we need to implement a class that implements the <code>IChatAttachedFileConverter</code> interface, which will be responsible for translating our file model <code>AttachedFileData</code> to a <code>ChatAttachedFile</code> from Telerik.</p><p>In our case, the converter looks like this:</p><pre class=" language-csharp"><code class="prism  language-csharp"><span class="token keyword">public</span> <span class="token keyword">class</span> <span class="token class-name">AttachedFileConverter</span> <span class="token punctuation">:</span> IChatAttachedFileConverter
<span class="token punctuation">{</span>
    <span class="token keyword">private</span> <span class="token keyword">static</span> AttachedFileConverter<span class="token operator">?</span> _instance<span class="token punctuation">;</span>
    <span class="token keyword">public</span> <span class="token keyword">static</span> AttachedFileConverter Instance <span class="token operator">=</span><span class="token operator">&gt;</span> _instance <span class="token operator">?</span><span class="token operator">?</span><span class="token operator">=</span> <span class="token keyword">new</span> <span class="token class-name">AttachedFileConverter</span><span class="token punctuation">(</span><span class="token punctuation">)</span><span class="token punctuation">;</span>

    <span class="token keyword">public</span> ChatAttachedFile <span class="token function">ConvertToChatAttachedFile</span><span class="token punctuation">(</span><span class="token keyword">object</span> dataItem<span class="token punctuation">,</span> ChatAttachedFileConverterContext context<span class="token punctuation">)</span>
    <span class="token punctuation">{</span>
        <span class="token keyword">var</span> data <span class="token operator">=</span> <span class="token punctuation">(</span>AttachedFileData<span class="token punctuation">)</span>dataItem<span class="token punctuation">;</span>
        <span class="token keyword">var</span> chatAttachedFile <span class="token operator">=</span> <span class="token keyword">new</span> <span class="token class-name">ChatAttachedFile</span>
        <span class="token punctuation">{</span>
            Data <span class="token operator">=</span> data<span class="token punctuation">,</span>
            FileName <span class="token operator">=</span> data<span class="token punctuation">.</span>Name<span class="token punctuation">,</span>
            FileSize <span class="token operator">=</span> data<span class="token punctuation">.</span>Size
        <span class="token punctuation">}</span><span class="token punctuation">;</span>
        <span class="token keyword">return</span> chatAttachedFile<span class="token punctuation">;</span>
    <span class="token punctuation">}</span>

    <span class="token keyword">public</span> <span class="token keyword">object</span> <span class="token function">ConvertToDataItem</span><span class="token punctuation">(</span>Telerik<span class="token punctuation">.</span>Maui<span class="token punctuation">.</span>Controls<span class="token punctuation">.</span>IFileInfo fileToAttach<span class="token punctuation">,</span> ChatAttachedFileConverterContext context<span class="token punctuation">)</span>
    <span class="token punctuation">{</span>
        <span class="token keyword">return</span> <span class="token function">CreateAttachedFileData</span><span class="token punctuation">(</span>fileToAttach<span class="token punctuation">)</span><span class="token punctuation">;</span>
    <span class="token punctuation">}</span>

    <span class="token keyword">internal</span> <span class="token keyword">static</span> AttachedFileData <span class="token function">CreateAttachedFileData</span><span class="token punctuation">(</span>Telerik<span class="token punctuation">.</span>Maui<span class="token punctuation">.</span>Controls<span class="token punctuation">.</span>IFileInfo file<span class="token punctuation">)</span>
    <span class="token punctuation">{</span>
        <span class="token keyword">return</span> <span class="token keyword">new</span> <span class="token class-name">AttachedFileData</span>
        <span class="token punctuation">{</span>
            Name <span class="token operator">=</span> file<span class="token punctuation">.</span>FileName<span class="token punctuation">,</span>
            Size <span class="token operator">=</span> file<span class="token punctuation">.</span>FileSize<span class="token punctuation">,</span>
            GetStream <span class="token operator">=</span> file<span class="token punctuation">.</span>OpenReadAsync<span class="token punctuation">,</span>
        <span class="token punctuation">}</span><span class="token punctuation">;</span>
    <span class="token punctuation">}</span>
<span class="token punctuation">}</span>
</code></pre><p>In the control, we must assign the instance of the class to <code>AttachedFileConverter</code>, preferably allowing a single instance through the use of <code>x:Static</code>:</p><pre class=" language-xml"><code class="prism  language-xml"><span class="token tag"><span class="token tag"><span class="token punctuation">&lt;</span><span class="token namespace">telerik:</span>RadChat</span> <span class="token attr-name">...</span>
    <span class="token attr-name">AttachedFileConverter</span><span class="token attr-value"><span class="token punctuation">=</span><span class="token punctuation">"</span>{x:Static converters:AttachedFileConverter.Instance}<span class="token punctuation">"</span></span><span class="token punctuation">/&gt;</span></span>
</code></pre><p>With the implementation of the previous changes, it is now possible to run the application, which returns information on a query of type image + text:</p><p><img src="https://d585tldpucybw.cloudfront.net/sfimages/default-source/blogs/2026/2026-04/radchat-control-in-action-receiving-text-and-images.gif?sfvrsn=7c266654_2" alt="RadChat control in action receiving text and images" /></p><p>With this, we have created a useful and real application based on a chat component, which we developed quickly and easily thanks to the controls from the Telerik suite for .NET MAUI.</p><h2 id="conclusion">Conclusion</h2><p>Throughout this post, we have explored the .NET MAUI Conversational UI (Chat) component, which allows integrating chat experiences into your applications. We have seen how to configure it, the parts that make it up, use cases, how to integrate LLM models for its usage, among other topics.</p><p>This is just the beginning, as in the official documentation you can find other relevant topics about customizing the control. See you in the next post.</p><h3 id="want-to-try-it-yourself">Want to Try It Yourself?</h3><p>The Telerik UI for .NET MAUI component library comes with a free 30-day trial. So go ahead!</p><p><a target="_blank" href="https://www.telerik.com/try/ui-for-maui" class="Btn">Try Now</a></p>]]></content>
  </entry>
  <entry>
    <id>urn:uuid:89e0e3fc-f615-4718-b937-f4de1ceba07a</id>
    <title type="text">Introducing the Progress Agentic RAG .NET SDK</title>
    <summary type="text">The .NET SDK for Progress Agentic RAG provides Retrieval-Augmented Generation (RAG) capabilities to .NET development with knowledge base management, AI-powered search and resource operations.</summary>
    <published>2026-04-23T15:33:21Z</published>
    <updated>2026-06-20T04:15:38Z</updated>
    <author>
      <name>Ed Charbeneau </name>
    </author>
    <link rel="alternate" href="https://www.telerik.com/blogs/introducing-progress-agentic-rag-net-sdk?utm_medium=feed&amp;utm_source=feedpress.me&amp;utm_campaign=Feed%3A+telerik-blogs-desktop"/>
    <content type="text"><![CDATA[<p><span class="featured">The .NET SDK for Progress Agentic RAG provides Retrieval-Augmented Generation (RAG) capabilities to .NET development with knowledge base management, AI-powered search and resource operations.</span></p><h2>What Is Progress Agentic RAG?</h2><p>Progress Agentic RAG is a RAG-as-a-Service that makes it dramatically easier to build AI systems grounded in real, trusted content. Rather than wiring together vector databases, embedding pipelines and retrieval logic yourself, Progress Agentic RAG provides an end-to-end platform for indexing, understanding and retrieving multimodal data.</p><p>It enables intelligent, agent-driven workflows that combine structured knowledge, contextual search and LLM orchestration into a unified experience.</p><p>With the introduction of the .NET SDK for Progress Agentic RAG, .NET developers can integrate this capability directly into their applications with just a few lines of code, leveraging modern .NET architecture patterns such as dependency injection, async workflows and strongly typed APIs.</p><h3>From Retrieval to Agentic Intelligence</h3><p>Progress Agentic RAG offers a fully capable AI Search Dashboard solution that allows you to get started in a matter of minutes. Simply connect or upload your data to a Knowledge Box, wait for NucliaDB&rsquo;s blazing-fast indexing engine to process it, and you&rsquo;re ready to explore grounded, contextual AI responses.</p><p>That immediate productivity is powerful. But modern enterprise development requires more than a dashboard.</p><p>Enterprise environments demand typed APIs, strong tooling and predictable behavior. Many RAG solutions are Python-first, leaving .NET teams stitching together REST calls manually and building custom abstractions just to regain the ergonomics they expect from their platform.</p><p>The new .NET SDK changes that.</p><p>It provides:</p><ul style="margin-top:0in;" type="disc"><li>Strongly typed APIs</li><li>Async-first patterns</li><li>Native .NET integration</li><li>Simplified knowledge base interaction</li></ul><p>With these capabilities, you can move beyond simple retrieval and begin composing intelligent, agent-driven experiences directly inside your application architecture. As powerful as it is convenient, the .NET SDK makes a great choice for new AI-enabled .NET applications.</p><h2>Getting Started</h2><p>Once a Knowledge Box has been established, you can begin interacting with Progress Agentic RAG through the .NET SDK.</p><p>The SDK is distributed as a <a target="_blank" href="https://www.nuget.org/packages/Progress.Nuclia">NuGet package</a> and covers the complete NucliaDB REST API. That includes strongly typed models, structured output helpers, dependency injection extensions and more than 200 APIs that expose the full surface area of the platform. See the <a target="_blank" href="https://docs.rag.progress.cloud/docs/develop/dotnet-sdk/">SDK documentation page </a>for a comprehensive list of service providers available.</p><h3>Install the NuGet Package</h3><pre><code class="language-csharp">dotnet add package Progress.Nuclia</code></pre><p>With the package installed, you can register the INucliaDb interface using modern dependency injection patterns. The SDK supports everything from basic configuration to advanced multi-tenant scenarios using keyed services.</p><h3>Register the Client</h3><pre><code class="language-csharp">using Progress.Nuclia.Extensions;

// Create configuration
var config = new NucliaDbConfig(
    ZoneId: "aws-us-east-2-1",
    KnowledgeBoxId: "your-knowledge-box-id",
    ApiKey: "your-api-key"
);

// Register with logging
builder.Services.AddNucliaDb(config).UseLogging();</code></pre><p>This approach aligns naturally with ASP.NET Core&rsquo;s architecture. You configure once, inject where needed, and keep your AI integration cleanly separated from business logic.</p><h2>Ask Questions with Agentic RAG</h2><p>With configuration complete, you can begin querying your Knowledge Box using AskAsync or AskStreamingAsync.</p><pre><code class="language-csharp">// Make request
AskRequest askRequest = new("What issues are driving the most customer escalations this quarter?");
var response = await client.Search.AskAsync(askRequest);

// Display answer
Console.WriteLine(response.Data.Answer);</code></pre><p>In just a few lines of code, you&rsquo;re executing a grounded, agent-driven query against indexed enterprise data.</p><p>The Ask functionality is only the beginning. With more than 200 APIs available in the SDK, you can ingest and manage resources, create conversational interactions and perform search, all using strongly typed, async-first C# patterns.</p><p>With structured configuration and native .NET integration in place, you can move from experimentation to production-ready AI systems with confidence.</p><h2>Explore the Examples: Blazor and .NET MAUI</h2><p>The fastest way to understand what Progress Agentic RAG can do in a real application is to see it running inside the frameworks you already use.</p><p>We&rsquo;ve published hands-on examples built with:</p><ul style="margin-top:0in;" type="disc"><li><a target="_blank" href="https://github.com/telerik/telerik-blazor-progress-rag-demo">Blazor &mdash; showcasing grounded AI experiences in modern web applications</a></li><li><a target="_blank" href="https://github.com/telerik/telerik-maui-progress-rag-demo">NET MAUI &mdash; demonstrating cross-platform, AI-powered mobile and desktop apps</a></li></ul><p>These samples go beyond simple API calls. They show how to:</p><ul style="margin-top:0in;" type="disc"><li>Register the SDK using dependency injection</li><li>Execute agentic queries with structured output</li><li>Stream responses into interactive UI components</li><li>Keep AI concerns cleanly separated from presentation logic</li></ul><p>If you&rsquo;re building internal tools, customer-facing dashboards or cross-platform AI assistants, these examples provide a production-oriented starting point.</p><p>Clone the samples, wire up your Knowledge Box and see how quickly you can integrate grounded, agent-driven intelligence into your existing .NET architecture.</p><h2>Additional Media</h2><p>Learn more about Progress Agentic RAG and the .NET SDK from video tutorials and podcasts:</p><ul><li>The Progress Agentic RAG .NET SDK was featured on episode 1997 of .NET Rocks:&nbsp;<a target="_blank" href="https://www.dotnetrocks.com/details/1997">.NET Rocks! Agentic RAG with Ed Charbeneau</a></li><li>Getting started videos by Jeff (Csharp) Fritz</li></ul><div sf-youtube-url="https://youtu.be/ilJpB9Y7waA?si=nIm6nTg2HLc0Bvkf"><iframe frameborder="0" allow="accelerometer; autoplay; clipboard-write; encrypted-media; gyroscope; picture-in-picture; web-share" title="Build Your First AI Search in .NET with Progress Agentic RAG" width="640" height="360" src="https://www.youtube.com/embed/ilJpB9Y7waA?si=nIm6nTg2HLc0Bvkf&amp;enablejsapi=1&amp;origin=https%3A%2F%2Fwww.telerik.com&amp;widgetid=3&amp;forigin=https%3A%2F%2Fwww.telerik.com%2FSitefinity%2Fadminapp%2Fcontent%2Fblogs%2Fc2c9ae54-03a9-4243-86cc-9c50fcc0a754%2Fblogposts%2F89e0e3fc-f615-4718-b937-f4de1ceba07a%2Fedit%3Fsf_provider%3DOpenAccessDataProvider%26sf_culture%3Den&amp;aoriginsup=1&amp;vf=1"></iframe></div><div sf-youtube-url="https://youtu.be/qE6zy75btLo?si=ZferEV00m-sRamDA"><iframe frameborder="0" allow="accelerometer; autoplay; clipboard-write; encrypted-media; gyroscope; picture-in-picture; web-share" title="Build Your First AI Search in .NET with Progress Agentic RAG Part 2" width="640" height="360" src="https://www.youtube.com/embed/qE6zy75btLo?si=ZferEV00m-sRamDA&amp;enablejsapi=1&amp;origin=https%3A%2F%2Fwww.telerik.com&amp;widgetid=2&amp;forigin=https%3A%2F%2Fwww.telerik.com%2FSitefinity%2Fadminapp%2Fcontent%2Fblogs%2Fc2c9ae54-03a9-4243-86cc-9c50fcc0a754%2Fblogposts%2F89e0e3fc-f615-4718-b937-f4de1ceba07a%2Fedit%3Fsf_provider%3DOpenAccessDataProvider%26sf_culture%3Den&amp;aoriginsup=1&amp;vf=1"></iframe></div>]]></content>
  </entry>
  <entry>
    <id>urn:uuid:e7198ac4-e43c-42a1-8e88-88cfb9d9655c</id>
    <title type="text">Building an Instagram-Style Like Animation in .NET MAUI</title>
    <summary type="text">Learn how to make your .NET MAUI app a little more engaging with interactive animations. We’ll see how to animate a heart for a like action.</summary>
    <published>2026-04-13T15:56:16Z</published>
    <updated>2026-06-20T04:15:38Z</updated>
    <author>
      <name>Leomaris Reyes </name>
    </author>
    <link rel="alternate" href="https://www.telerik.com/blogs/building-instagram-style-like-animation-net-maui?utm_medium=feed&amp;utm_source=feedpress.me&amp;utm_campaign=Feed%3A+telerik-blogs-desktop"/>
    <content type="text"><![CDATA[<p><span class="featured">Learn how to make your .NET MAUI app a little more engaging with interactive animations. We&rsquo;ll see how to animate a heart for a like action.</span></p><p>One of the most rewarding aspects of software development is being able to replicate interfaces and behaviors from applications we use every day. Seeing a familiar interaction come to life in our own product&mdash;while respecting its essence and behavior&mdash;is undoubtedly very satisfying.</p><p>In this article, we&rsquo;ll explore some of the basic animations available in .NET MAUI and how we can combine them to recreate one of Instagram&rsquo;s most recognizable interactions: the like animation when tapping the heart. Through a practical example, we&rsquo;ll see how to implement this behavior in a clear and straightforward way.</p><p>The goal is to help you lose the fear of working with animations in .NET MAUI. Sometimes we assume animation is too complicated or that it&rsquo;s better not to attempt it at all. But the reality is that when used correctly and combined thoughtfully, even the most basic animations can produce great results. And the best part: with just a few lines of code, you can achieve this Instagram-like effect.</p><p>For better guidance, we&rsquo;ll divide this article into the following phases:</p><ul><li>We&rsquo;ll build a simple interface that represents the base structure of an Instagram post.</li><li>We&rsquo;ll start working with animations, walking through each step with its corresponding code example.</li><li>Finally, we will see a result of the explained code.</li></ul><h2 id="demo-of-the-goal-before-we-start-">Demo of the Goal Before We Start </h2><p>Before jumping into the implementation, here&rsquo;s a quick demo of how the Instagram-like animation we&rsquo;re building will look.</p><p><img src="https://d585tldpucybw.cloudfront.net/sfimages/default-source/blogs/2026/2026-04/01_instagram_post_structure.png?sfvrsn=4ec560ef_2" title="Instagram post structure" alt="Photo of two girls giving peace signs. Below are icons for likes, comments, reposts, shares" /></p><h2 id="building-the-structure-of-an-instagram-post-in-xaml">Building the Structure of an Instagram Post in XAML</h2><p>To better understand the animation, we&rsquo;ll first recreate a simplified Instagram post UI in XAML. This structure will serve as the foundation for our animation and should look like the example shown below.</p><p><img src="https://d585tldpucybw.cloudfront.net/sfimages/default-source/blogs/2026/2026-04/02_instagram_demo_animation.gif?sfvrsn=e763eb5f_2" title="Instagram like animation Demo" alt="When user clicks the heart, it pops up in a fun animation" /></p><p>To replicate the basic structure of an Instagram post, we&rsquo;ll start by adding a VerticalStackLayout. This layout will contain the user image, followed by a Grid that will be responsible for organizing the action icons: like, comment, repost and send.</p><p>Although, for now, we&rsquo;ll only animate the heart icon, including the remaining actions helps make the example feel more realistic and closer to a real Instagram post design. </p><p>Let&rsquo;s begin by creating the <strong>VerticalStackLayout</strong> and adding the <strong>Image</strong>.</p><pre class=" language-xml"><code class="prism  language-xml">&lt;VerticalStackLayout&gt;
    &lt;Image Source="models.png" 
       Aspect="AspectFill" 
       HeightRequest="350" /&gt; 
    &lt;!-- Add all the remaining code here -- &gt;
&lt;/VerticalStackLayout&gt;
</code></pre><p>Okay, now let&rsquo;s open a <strong>Grid</strong>. Initially, we&rsquo;ll add all the elements that are not related to the like interaction, so that later we can focus exclusively on the XAML for the &ldquo;likes.&rdquo;</p><pre class=" language-xml"><code class="prism  language-xml">&lt;Grid ColumnDefinitions="Auto,Auto,Auto,Auto,Auto,Auto,Auto,Auto"
    Padding="20,10" 
    ColumnSpacing="10"&gt;
    
    &lt;!-- Add likes implementation in the space --&gt; 
    &lt;Label Grid.Column="1" Text="5" /&gt;
    
    &lt;!-- Comments --&gt; 
    &lt;Image Grid.Column="2" Source="comment" WidthRequest="15" HeightRequest="15" /&gt; 
    &lt;Label Grid.Column="3" Text="23" /&gt;
    
    &lt;!-- Repost --&gt; 
    &lt;Image Grid.Column="4" Source="repost" WidthRequest="15" HeightRequest="15" /&gt; 
    &lt;Label Grid.Column="5" Text="1" /&gt;
    
    &lt;!-- Send --&gt; 
    &lt;Image Grid.Column="6" Source="send" WidthRequest="15" HeightRequest="15" /&gt; 
    &lt;Label Grid.Column="7" Text="2" /&gt; 
&lt;/Grid&gt;
</code></pre><h2 id="adding-likes-in-the-xaml">Adding Likes in the XAML</h2><p>Although there are different ways to implement this behavior&mdash;such as leveraging VisualState&mdash;for this example, we&rsquo;ll keep the approach intentionally simple. The goal is to take a closer look at how components like Grid and GestureRecognizers behave and how we can take advantage of them to build animations in a clear and controlled way.</p><p>We&rsquo;ll need three images to achieve the animation:</p><ul><li><strong>Outline image:</strong> When the post has not been liked yet, this is a heart with a transparent background and black outline.</li><li><strong>Filled image:</strong> When the post is liked, this is a solid heart (no outline) and it will remain hidden until the &ldquo;liked&rdquo; state needs to be displayed.</li><li><strong>Animated overlay :</strong> The image that will be used exclusively to display the animation.</li></ul><p>In XAML, this translates to the following. In the code example above, locate the line that says <code>&lt;!-- Add likes implementation in the space --&gt;</code> and replace it with the following code:</p><pre class=" language-xml"><code class="prism  language-xml">&lt;Grid Grid.Column="0" 
WidthRequest="15" 
HeightRequest="15"&gt;

&lt;Image x:Name="HeartIcon" 
    Source="heartoutline" 
    WidthRequest="15" 
    HeightRequest="15"&gt;

&lt;Image.GestureRecognizers&gt; 
    &lt;TapGestureRecognizer Tapped="OnHeartTapped" /&gt;
&lt;/Image.GestureRecognizers&gt; 
&lt;/Image&gt;

&lt;Image x:Name="HeartFilled"
    Source="heartfilledred" 
    WidthRequest="15" 
    HeightRequest="15" 
    Opacity="0" 
    InputTransparent="True" /&gt;

&lt;Image x:Name="HeartBurst" 
    Source="heartfilledred" 
    WidthRequest="15" 
    HeightRequest="15" 
    Opacity="0" 
    Scale="1" 
    TranslationY="0" 
    InputTransparent="True" /&gt; 
&lt;/Grid&gt;
</code></pre><p>✍️ We added a <strong>GestureRecognizer</strong> to the heart in its initial state. This allows us to detect the tap gesture and trigger the animation accordingly.</p><blockquote><p>If you&rsquo;d like to learn more about <a target="_blank" href="https://learn.microsoft.com/en-us/dotnet/maui/fundamentals/gestures/tap?view=net-maui-10.0">GestureRecognizers</a>, I recommend you check out this MS Learn article.</p></blockquote><h2 id="bringing-the-like-interaction-to-life-">Bringing the Like Interaction to Life </h2><p>In the previous XAML, we added an image with the name <code>HeartIcon</code> and associated it with an event called <code>OnHeartTapped</code>. The next step is to give that event a body and define what should happen when the user taps the heart.</p><p>The first thing we need is a variable that represents the current like state:</p><pre class=" language-csharp"><code class="prism  language-csharp">bool _isLiked;
</code></pre><p>Then, let&rsquo;s implement the <code>OnHeartTapped</code> event:</p><pre class=" language-csharp"><code class="prism  language-csharp">void OnHeartTapped(object sender, EventArgs e) 
{ 
    if (_isLiked) 
    { 
    SetLiked(false); 
    return; 
    }

    _ = PlayLikeAnimationAsync(); 
}
</code></pre><h3 id="what-happens-in-this-event">What Happens in This Event?</h3><ul><li>Every time the heart is tapped, we first check whether it is already marked as liked.<br />If it is, that means the user wants to remove the like. So we set it to false using <code>SetLiked(false)</code>.</li><li>If the post is not liked, it means we need to trigger the heart animation. We do that by calling <code>PlayLikeAnimationAsync()</code>.</li></ul><p>⚠️ <code>PlayLikeAnimationAsync</code> has not been created yet; we will add it and give it a body in the next steps.</p><p>Now that we know when the animation should be triggered, the next step is to create the <code>PlayLikeAnimationAsync</code> method to life. But before implementing it, let&rsquo;s do a brief overview of the animations we will be using:</p><ul><li><p><strong>FadeTo:</strong> allows us to progressively change the opacity of a visual element. It receives values between <strong>0</strong> and <strong>1.</strong></p><p> In our case, we use it to show or hide the heart while the like animation is happening.</p></li><li><p><strong>TranslateTo:</strong> this animation is responsible for moving the element along the <strong>X</strong> axis (horizontal movement) and the <strong>Y</strong> axis (vertical movement).</p><p> In our animation, we use it to simulate the heart jumping upward and then returning to its initial position.</p></li></ul><p>To be able to run these animations simultaneously, we will use <code>Task.WhenAll</code>.</p><p>There are also two additional methods, <code>SetLiked()</code> and <code>ResetWithEmptyHeart()</code>, which we will cover and explain in the next steps.</p><p>Now, let&rsquo;s see how all of this translates into code below.</p><pre class=" language-csharp"><code class="prism  language-csharp">async Task PlayLikeAnimationAsync() 
{ 
    if (_isLiked) return;
    
    await Task.WhenAll( 
    HeartBurst.FadeTo(1, 80, Easing.CubicOut), 
    HeartBurst.TranslateTo(0, -35, 160, Easing.CubicOut)
    );
    
    await Task.WhenAll( 
    HeartBurst.TranslateTo(0, 0, 120, Easing.CubicInOut)
    );
    
    SetLiked(true); 
    ResetWithEmptyHeart();
}
</code></pre><p>To close the animation flow, we rely on two methods that serve very specific purposes: <code>SetLiked</code> and <code>ResetWithEmptyHeart</code>.</p><h3 id="setliked">SetLiked</h3><p>This method is responsible for updating the visual state of the heart. Basically, if the like is true, we hide the <code>HeartIcon</code> (outline) and show the <code>HeartFilled</code>. If the like is false, we do the opposite: we show the outline icon and hide the filled icon.</p><p>In code, it looks like this:</p><pre class=" language-csharp"><code class="prism  language-csharp">void SetLiked(bool liked) 
{ 
    _isLiked = liked; 
    HeartIcon.Opacity = liked ? 0 : 1; 
    HeartFilled.Opacity = liked ? 1 : 0; 
}
</code></pre><h3 id="resetwithemptyheart">ResetWithEmptyHeart</h3><p>Finally, we have the <code>ResetWithEmptyHeart()</code> method. This one is responsible for cleaning up and resetting the animated image (<code>HeartBurst</code>) once the animation has finished, so that it always starts from a clean state the next time it runs.</p><p>In code, it would look like this:</p><pre class=" language-csharp"><code class="prism  language-csharp">void ResetWithEmptyHeart()    
 {
    HeartBurst.Opacity = 0; 
    HeartBurst.TranslationY = 0;
}
</code></pre><p>Here we reset:</p><ul><li>The opacity, so the animated heart is no longer visible.</li><li>And the vertical position, bringing the heart back to its starting point.</li></ul><p>And with this implementation, the animation is now complete.  It should behave as follows:</p><p><img src="https://d585tldpucybw.cloudfront.net/sfimages/default-source/blogs/2026/2026-04/03_instagram_like_animation.gif?sfvrsn=749c2f0c_2" title="Instagram like animations" alt="Heart like and unlike behaviors" /></p><aside><hr /><div class="row"><div class="col-4 u-normal-full u-small-mb0"><h4 class="u-fs20 u-fw5 u-lh125 u-mb0">Want to learn more about animations in .NET MAUI? </h4></div><div class="col-8"><p class="u-fs16 u-mb0">I recommend reading the official documentation article on
                <a href="https://learn.microsoft.com/en-us/dotnet/maui/user-interface/animation/basic?view=net-maui-10.0" target="_blank">basic animations in .NET MAUI</a>.
 </p></div></div><hr class="u-mb3" /></aside><h2 id="conclusion">Conclusion</h2><p>And that&rsquo;s it!  In a super simple way, we were able to replicate the Instagram like animation in .NET MAUI. We built it step by step so you could clearly understand how it works and, in the same way, apply this implementation to your everyday needs as a .NET MAUI developer.</p><p>If you have any questions or would like me to dive deeper into specific topics, feel free to leave a comment&mdash;I&rsquo;ll be happy to help! </p><p>See you in the next article! &zwj;♀️</p>]]></content>
  </entry>
  <entry>
    <id>urn:uuid:6480f9af-1aef-43f5-959f-cab45ab104fc</id>
    <title type="text">Getting Started with the .NET MAUI Speech-to-Text Button Control</title>
    <summary type="text">Add speech-to-text options to your note-taking, chat, meeting or many other types of apps, so your users can skip manual typing in your .NET MAUI app.</summary>
    <published>2026-04-02T19:58:04Z</published>
    <updated>2026-06-20T04:15:38Z</updated>
    <author>
      <name>Héctor Pérez </name>
    </author>
    <link rel="alternate" href="https://www.telerik.com/blogs/getting-started-net-maui-speech-to-text-button-control?utm_medium=feed&amp;utm_source=feedpress.me&amp;utm_campaign=Feed%3A+telerik-blogs-desktop"/>
    <content type="text"><![CDATA[<p><span class="featured">Add speech-to-text options to your note-taking, chat, meeting or many other types of apps, so your users can skip manual typing in your .NET MAUI app.</span></p><p>For several years, a common problem for mobile device users has been typing text quickly. Although innovative features such as swipe typing and word autocompletion have been implemented, undoubtedly one of the most comfortable methods remains voice dictation.</p><p>In .NET MAUI, you can take advantage of the Progress Telerik UI for <a target="_blank" href="https://www.telerik.com/maui-ui/speech-to-text-button">.NET MAUI SpeechToTextButton</a> control, which allows converting speech to text. Let&rsquo;s see how to use it in your own .NET MAUI apps!</p><h2 id="getting-to-know-the-telerik-speechtotextbutton-control-for-.net-maui">Getting to Know the Telerik SpeechToTextButton Control for .NET MAUI</h2><p>The SpeechToTextButton control uses platform-specific voice recognition services to perform speech-to-text conversion, including <a target="_blank" href="https://www.telerik.com/maui-ui/documentation/controls/speechtotextbutton/winui-support">WinUI</a>. The structure of the control is simple, and it is based on a button composed of a <strong>SpeechToTextButton Content</strong> and a <strong>SpeechToTextButton</strong>, which you can see in the following image:</p><p><img src="https://www.telerik.com/maui-ui/documentation/assets/e12eb57a64e50c12e588881ba7414605/speechtotextbutton-visual-structure.png" alt="Diagram showing the structure of Telerik’s SpeechToTextButton control for .NET MAUI" /></p><p>Some possible use cases for the control are:</p><ul><li>Voice note-taking</li><li>Chat applications</li><li>Voice search</li><li>Command control via voice</li><li>Meeting transcription</li><li>Among many others</li></ul><p>In reality, the range of use cases is quite large. Now let&rsquo;s analyze the control in more depth.</p><h2 id="creating-a-practical-case">Creating a Practical Case</h2><p>Let&rsquo;s start by creating a demo application, which will help us see the different features of the speech-to-text control. The idea of the application is to be a personal note-taking app that allows actions like editing text, saving notes and sharing them.</p><p>For this example, we&rsquo;ll use the <strong>CommunityToolkit.Mvvm</strong> package, which allows for rapid creation of view models. Below, I show you the initial code for the application in case you want to replicate it, which is as follows:</p><p><strong>TextEditorPage.xaml</strong>:</p><pre class=" language-xml"><code class="prism  language-xml"><span class="token tag"><span class="token tag"><span class="token punctuation">&lt;</span>Grid</span>
    <span class="token attr-name">Padding</span><span class="token attr-value"><span class="token punctuation">=</span><span class="token punctuation">"</span>20<span class="token punctuation">"</span></span>
    <span class="token attr-name">RowDefinitions</span><span class="token attr-value"><span class="token punctuation">=</span><span class="token punctuation">"</span>Auto, Auto, *, Auto<span class="token punctuation">"</span></span>
    <span class="token attr-name">RowSpacing</span><span class="token attr-value"><span class="token punctuation">=</span><span class="token punctuation">"</span>16<span class="token punctuation">"</span></span><span class="token punctuation">&gt;</span></span>

    <span class="token comment">&lt;!--  Header Section  --&gt;</span>

    <span class="token tag"><span class="token tag"><span class="token punctuation">&lt;</span>Label</span>
        <span class="token attr-name">FontAttributes</span><span class="token attr-value"><span class="token punctuation">=</span><span class="token punctuation">"</span>Bold<span class="token punctuation">"</span></span>
        <span class="token attr-name">FontSize</span><span class="token attr-value"><span class="token punctuation">=</span><span class="token punctuation">"</span>28<span class="token punctuation">"</span></span>
        <span class="token attr-name">Text</span><span class="token attr-value"><span class="token punctuation">=</span><span class="token punctuation">"</span>Fast Note<span class="token punctuation">"</span></span>
        <span class="token attr-name">TextColor</span><span class="token attr-value"><span class="token punctuation">=</span><span class="token punctuation">"</span>#1A1A2E<span class="token punctuation">"</span></span> <span class="token punctuation">/&gt;</span></span>

    <span class="token comment">&lt;!--  Status Bar  --&gt;</span>
    <span class="token tag"><span class="token tag"><span class="token punctuation">&lt;</span>Border</span>
        <span class="token attr-name">Grid.Row</span><span class="token attr-value"><span class="token punctuation">=</span><span class="token punctuation">"</span>1<span class="token punctuation">"</span></span>
        <span class="token attr-name">Padding</span><span class="token attr-value"><span class="token punctuation">=</span><span class="token punctuation">"</span>16,12<span class="token punctuation">"</span></span>
        <span class="token attr-name">BackgroundColor</span><span class="token attr-value"><span class="token punctuation">=</span><span class="token punctuation">"</span>#F3F4F6<span class="token punctuation">"</span></span>
        <span class="token attr-name">StrokeShape</span><span class="token attr-value"><span class="token punctuation">=</span><span class="token punctuation">"</span>RoundRectangle 12<span class="token punctuation">"</span></span>
        <span class="token attr-name">StrokeThickness</span><span class="token attr-value"><span class="token punctuation">=</span><span class="token punctuation">"</span>0<span class="token punctuation">"</span></span><span class="token punctuation">&gt;</span></span>
        <span class="token tag"><span class="token tag"><span class="token punctuation">&lt;</span>Grid</span> <span class="token attr-name">ColumnDefinitions</span><span class="token attr-value"><span class="token punctuation">=</span><span class="token punctuation">"</span>Auto, *, Auto<span class="token punctuation">"</span></span><span class="token punctuation">&gt;</span></span>
            <span class="token tag"><span class="token tag"><span class="token punctuation">&lt;</span>Label</span>
                <span class="token attr-name">Grid.Column</span><span class="token attr-value"><span class="token punctuation">=</span><span class="token punctuation">"</span>2<span class="token punctuation">"</span></span>
                <span class="token attr-name">FontSize</span><span class="token attr-value"><span class="token punctuation">=</span><span class="token punctuation">"</span>12<span class="token punctuation">"</span></span>
                <span class="token attr-name">Text</span><span class="token attr-value"><span class="token punctuation">=</span><span class="token punctuation">"</span>{Binding CharacterCount}<span class="token punctuation">"</span></span>
                <span class="token attr-name">TextColor</span><span class="token attr-value"><span class="token punctuation">=</span><span class="token punctuation">"</span>#9CA3AF<span class="token punctuation">"</span></span>
                <span class="token attr-name">VerticalOptions</span><span class="token attr-value"><span class="token punctuation">=</span><span class="token punctuation">"</span>Center<span class="token punctuation">"</span></span> <span class="token punctuation">/&gt;</span></span>
        <span class="token tag"><span class="token tag"><span class="token punctuation">&lt;/</span>Grid</span><span class="token punctuation">&gt;</span></span>
    <span class="token tag"><span class="token tag"><span class="token punctuation">&lt;/</span>Border</span><span class="token punctuation">&gt;</span></span>

    <span class="token comment">&lt;!--  Main Editor Area  --&gt;</span>
    <span class="token tag"><span class="token tag"><span class="token punctuation">&lt;</span>Border</span>
        <span class="token attr-name">Grid.Row</span><span class="token attr-value"><span class="token punctuation">=</span><span class="token punctuation">"</span>2<span class="token punctuation">"</span></span>
        <span class="token attr-name">Padding</span><span class="token attr-value"><span class="token punctuation">=</span><span class="token punctuation">"</span>0<span class="token punctuation">"</span></span>
        <span class="token attr-name">BackgroundColor</span><span class="token attr-value"><span class="token punctuation">=</span><span class="token punctuation">"</span>#FFFFFF<span class="token punctuation">"</span></span>
        <span class="token attr-name">Stroke</span><span class="token attr-value"><span class="token punctuation">=</span><span class="token punctuation">"</span>#E5E7EB<span class="token punctuation">"</span></span>
        <span class="token attr-name">StrokeShape</span><span class="token attr-value"><span class="token punctuation">=</span><span class="token punctuation">"</span>RoundRectangle 16<span class="token punctuation">"</span></span>
        <span class="token attr-name">StrokeThickness</span><span class="token attr-value"><span class="token punctuation">=</span><span class="token punctuation">"</span>1<span class="token punctuation">"</span></span><span class="token punctuation">&gt;</span></span>
        <span class="token tag"><span class="token tag"><span class="token punctuation">&lt;</span>Grid</span> <span class="token attr-name">RowDefinitions</span><span class="token attr-value"><span class="token punctuation">=</span><span class="token punctuation">"</span>*, Auto<span class="token punctuation">"</span></span><span class="token punctuation">&gt;</span></span>
            <span class="token tag"><span class="token tag"><span class="token punctuation">&lt;</span>Editor</span>
                <span class="token attr-name"><span class="token namespace">x:</span>Name</span><span class="token attr-value"><span class="token punctuation">=</span><span class="token punctuation">"</span>MainEditor<span class="token punctuation">"</span></span>
                <span class="token attr-name">Margin</span><span class="token attr-value"><span class="token punctuation">=</span><span class="token punctuation">"</span>16<span class="token punctuation">"</span></span>
                <span class="token attr-name">AutoSize</span><span class="token attr-value"><span class="token punctuation">=</span><span class="token punctuation">"</span>TextChanges<span class="token punctuation">"</span></span>
                <span class="token attr-name">BackgroundColor</span><span class="token attr-value"><span class="token punctuation">=</span><span class="token punctuation">"</span>Transparent<span class="token punctuation">"</span></span>
                <span class="token attr-name">FontSize</span><span class="token attr-value"><span class="token punctuation">=</span><span class="token punctuation">"</span>16<span class="token punctuation">"</span></span>
                <span class="token attr-name">Placeholder</span><span class="token attr-value"><span class="token punctuation">=</span><span class="token punctuation">"</span>Start typing or use voice input...<span class="token punctuation">"</span></span>
                <span class="token attr-name">PlaceholderColor</span><span class="token attr-value"><span class="token punctuation">=</span><span class="token punctuation">"</span>#9CA3AF<span class="token punctuation">"</span></span>
                <span class="token attr-name">Text</span><span class="token attr-value"><span class="token punctuation">=</span><span class="token punctuation">"</span>{Binding EditorText, Mode=TwoWay}<span class="token punctuation">"</span></span>
                <span class="token attr-name">TextColor</span><span class="token attr-value"><span class="token punctuation">=</span><span class="token punctuation">"</span>#1F2937<span class="token punctuation">"</span></span> <span class="token punctuation">/&gt;</span></span>

            <span class="token comment">&lt;!--  Editor Toolbar  --&gt;</span>
            <span class="token tag"><span class="token tag"><span class="token punctuation">&lt;</span>Border</span>
                <span class="token attr-name">Grid.Row</span><span class="token attr-value"><span class="token punctuation">=</span><span class="token punctuation">"</span>1<span class="token punctuation">"</span></span>
                <span class="token attr-name">Padding</span><span class="token attr-value"><span class="token punctuation">=</span><span class="token punctuation">"</span>12,0<span class="token punctuation">"</span></span>
                <span class="token attr-name">BackgroundColor</span><span class="token attr-value"><span class="token punctuation">=</span><span class="token punctuation">"</span>#F9FAFB<span class="token punctuation">"</span></span>
                <span class="token attr-name">HeightRequest</span><span class="token attr-value"><span class="token punctuation">=</span><span class="token punctuation">"</span>56<span class="token punctuation">"</span></span>
                <span class="token attr-name">StrokeThickness</span><span class="token attr-value"><span class="token punctuation">=</span><span class="token punctuation">"</span>0<span class="token punctuation">"</span></span><span class="token punctuation">&gt;</span></span>
                <span class="token tag"><span class="token tag"><span class="token punctuation">&lt;</span>Grid</span> <span class="token attr-name">ColumnDefinitions</span><span class="token attr-value"><span class="token punctuation">=</span><span class="token punctuation">"</span>*, Auto, Auto<span class="token punctuation">"</span></span><span class="token punctuation">&gt;</span></span>
                    <span class="token comment">&lt;!--  Word Count  --&gt;</span>
                    <span class="token tag"><span class="token tag"><span class="token punctuation">&lt;</span>VerticalStackLayout</span> <span class="token attr-name">VerticalOptions</span><span class="token attr-value"><span class="token punctuation">=</span><span class="token punctuation">"</span>Center<span class="token punctuation">"</span></span><span class="token punctuation">&gt;</span></span>
                        <span class="token tag"><span class="token tag"><span class="token punctuation">&lt;</span>Label</span>
                            <span class="token attr-name">FontSize</span><span class="token attr-value"><span class="token punctuation">=</span><span class="token punctuation">"</span>12<span class="token punctuation">"</span></span>
                            <span class="token attr-name">Text</span><span class="token attr-value"><span class="token punctuation">=</span><span class="token punctuation">"</span>{Binding WordCount}<span class="token punctuation">"</span></span>
                            <span class="token attr-name">TextColor</span><span class="token attr-value"><span class="token punctuation">=</span><span class="token punctuation">"</span>#6B7280<span class="token punctuation">"</span></span> <span class="token punctuation">/&gt;</span></span>
                    <span class="token tag"><span class="token tag"><span class="token punctuation">&lt;/</span>VerticalStackLayout</span><span class="token punctuation">&gt;</span></span>

                    <span class="token comment">&lt;!--  Clear Button  --&gt;</span>
                    <span class="token tag"><span class="token tag"><span class="token punctuation">&lt;</span>Button</span>
                        <span class="token attr-name">Grid.Column</span><span class="token attr-value"><span class="token punctuation">=</span><span class="token punctuation">"</span>1<span class="token punctuation">"</span></span>
                        <span class="token attr-name">Padding</span><span class="token attr-value"><span class="token punctuation">=</span><span class="token punctuation">"</span>12,8<span class="token punctuation">"</span></span>
                        <span class="token attr-name">BackgroundColor</span><span class="token attr-value"><span class="token punctuation">=</span><span class="token punctuation">"</span>Transparent<span class="token punctuation">"</span></span>
                        <span class="token attr-name">BorderWidth</span><span class="token attr-value"><span class="token punctuation">=</span><span class="token punctuation">"</span>0<span class="token punctuation">"</span></span>
                        <span class="token attr-name">Command</span><span class="token attr-value"><span class="token punctuation">=</span><span class="token punctuation">"</span>{Binding ClearTextCommand}<span class="token punctuation">"</span></span>
                        <span class="token attr-name">FontSize</span><span class="token attr-value"><span class="token punctuation">=</span><span class="token punctuation">"</span>14<span class="token punctuation">"</span></span>
                        <span class="token attr-name">IsEnabled</span><span class="token attr-value"><span class="token punctuation">=</span><span class="token punctuation">"</span>{Binding HasText}<span class="token punctuation">"</span></span>
                        <span class="token attr-name">Text</span><span class="token attr-value"><span class="token punctuation">=</span><span class="token punctuation">"</span>Clear<span class="token punctuation">"</span></span>
                        <span class="token attr-name">TextColor</span><span class="token attr-value"><span class="token punctuation">=</span><span class="token punctuation">"</span>#EF4444<span class="token punctuation">"</span></span> <span class="token punctuation">/&gt;</span></span>

                    <span class="token comment">&lt;!--  Copy Button  --&gt;</span>
                    <span class="token tag"><span class="token tag"><span class="token punctuation">&lt;</span>Button</span>
                        <span class="token attr-name">Grid.Column</span><span class="token attr-value"><span class="token punctuation">=</span><span class="token punctuation">"</span>2<span class="token punctuation">"</span></span>
                        <span class="token attr-name">Padding</span><span class="token attr-value"><span class="token punctuation">=</span><span class="token punctuation">"</span>12,8<span class="token punctuation">"</span></span>
                        <span class="token attr-name">BackgroundColor</span><span class="token attr-value"><span class="token punctuation">=</span><span class="token punctuation">"</span>Transparent<span class="token punctuation">"</span></span>
                        <span class="token attr-name">BorderWidth</span><span class="token attr-value"><span class="token punctuation">=</span><span class="token punctuation">"</span>0<span class="token punctuation">"</span></span>
                        <span class="token attr-name">Command</span><span class="token attr-value"><span class="token punctuation">=</span><span class="token punctuation">"</span>{Binding CopyTextCommand}<span class="token punctuation">"</span></span>
                        <span class="token attr-name">FontSize</span><span class="token attr-value"><span class="token punctuation">=</span><span class="token punctuation">"</span>14<span class="token punctuation">"</span></span>
                        <span class="token attr-name">IsEnabled</span><span class="token attr-value"><span class="token punctuation">=</span><span class="token punctuation">"</span>{Binding HasText}<span class="token punctuation">"</span></span>
                        <span class="token attr-name">Text</span><span class="token attr-value"><span class="token punctuation">=</span><span class="token punctuation">"</span>Copy<span class="token punctuation">"</span></span>
                        <span class="token attr-name">TextColor</span><span class="token attr-value"><span class="token punctuation">=</span><span class="token punctuation">"</span>#3B82F6<span class="token punctuation">"</span></span> <span class="token punctuation">/&gt;</span></span>
                <span class="token tag"><span class="token tag"><span class="token punctuation">&lt;/</span>Grid</span><span class="token punctuation">&gt;</span></span>
            <span class="token tag"><span class="token tag"><span class="token punctuation">&lt;/</span>Border</span><span class="token punctuation">&gt;</span></span>
        <span class="token tag"><span class="token tag"><span class="token punctuation">&lt;/</span>Grid</span><span class="token punctuation">&gt;</span></span>
    <span class="token tag"><span class="token tag"><span class="token punctuation">&lt;/</span>Border</span><span class="token punctuation">&gt;</span></span>

    <span class="token comment">&lt;!--  Quick Actions  --&gt;</span>
    <span class="token tag"><span class="token tag"><span class="token punctuation">&lt;</span>Grid</span>
        <span class="token attr-name">Grid.Row</span><span class="token attr-value"><span class="token punctuation">=</span><span class="token punctuation">"</span>3<span class="token punctuation">"</span></span>
        <span class="token attr-name">ColumnDefinitions</span><span class="token attr-value"><span class="token punctuation">=</span><span class="token punctuation">"</span>*, *, *<span class="token punctuation">"</span></span>
        <span class="token attr-name">ColumnSpacing</span><span class="token attr-value"><span class="token punctuation">=</span><span class="token punctuation">"</span>12<span class="token punctuation">"</span></span><span class="token punctuation">&gt;</span></span>
        <span class="token tag"><span class="token tag"><span class="token punctuation">&lt;</span>Button</span>
            <span class="token attr-name">BackgroundColor</span><span class="token attr-value"><span class="token punctuation">=</span><span class="token punctuation">"</span>#E5E7EB<span class="token punctuation">"</span></span>
            <span class="token attr-name">BorderWidth</span><span class="token attr-value"><span class="token punctuation">=</span><span class="token punctuation">"</span>0<span class="token punctuation">"</span></span>
            <span class="token attr-name">Command</span><span class="token attr-value"><span class="token punctuation">=</span><span class="token punctuation">"</span>{Binding NewDocumentCommand}<span class="token punctuation">"</span></span>
            <span class="token attr-name">CornerRadius</span><span class="token attr-value"><span class="token punctuation">=</span><span class="token punctuation">"</span>10<span class="token punctuation">"</span></span>
            <span class="token attr-name">FontSize</span><span class="token attr-value"><span class="token punctuation">=</span><span class="token punctuation">"</span>14<span class="token punctuation">"</span></span>
            <span class="token attr-name">HeightRequest</span><span class="token attr-value"><span class="token punctuation">=</span><span class="token punctuation">"</span>44<span class="token punctuation">"</span></span>
            <span class="token attr-name">IsEnabled</span><span class="token attr-value"><span class="token punctuation">=</span><span class="token punctuation">"</span>{Binding HasText}<span class="token punctuation">"</span></span>
            <span class="token attr-name">Text</span><span class="token attr-value"><span class="token punctuation">=</span><span class="token punctuation">"</span>New<span class="token punctuation">"</span></span>
            <span class="token attr-name">TextColor</span><span class="token attr-value"><span class="token punctuation">=</span><span class="token punctuation">"</span>#374151<span class="token punctuation">"</span></span> <span class="token punctuation">/&gt;</span></span>
        <span class="token tag"><span class="token tag"><span class="token punctuation">&lt;</span>Button</span>
            <span class="token attr-name">Grid.Column</span><span class="token attr-value"><span class="token punctuation">=</span><span class="token punctuation">"</span>1<span class="token punctuation">"</span></span>
            <span class="token attr-name">BackgroundColor</span><span class="token attr-value"><span class="token punctuation">=</span><span class="token punctuation">"</span>#10B981<span class="token punctuation">"</span></span>
            <span class="token attr-name">BorderWidth</span><span class="token attr-value"><span class="token punctuation">=</span><span class="token punctuation">"</span>0<span class="token punctuation">"</span></span>
            <span class="token attr-name">Command</span><span class="token attr-value"><span class="token punctuation">=</span><span class="token punctuation">"</span>{Binding SaveTextCommand}<span class="token punctuation">"</span></span>
            <span class="token attr-name">CornerRadius</span><span class="token attr-value"><span class="token punctuation">=</span><span class="token punctuation">"</span>10<span class="token punctuation">"</span></span>
            <span class="token attr-name">FontSize</span><span class="token attr-value"><span class="token punctuation">=</span><span class="token punctuation">"</span>14<span class="token punctuation">"</span></span>
            <span class="token attr-name">HeightRequest</span><span class="token attr-value"><span class="token punctuation">=</span><span class="token punctuation">"</span>44<span class="token punctuation">"</span></span>
            <span class="token attr-name">IsEnabled</span><span class="token attr-value"><span class="token punctuation">=</span><span class="token punctuation">"</span>{Binding HasText}<span class="token punctuation">"</span></span>
            <span class="token attr-name">Text</span><span class="token attr-value"><span class="token punctuation">=</span><span class="token punctuation">"</span>Save<span class="token punctuation">"</span></span>
            <span class="token attr-name">TextColor</span><span class="token attr-value"><span class="token punctuation">=</span><span class="token punctuation">"</span>#FFFFFF<span class="token punctuation">"</span></span> <span class="token punctuation">/&gt;</span></span>
        <span class="token tag"><span class="token tag"><span class="token punctuation">&lt;</span>Button</span>
            <span class="token attr-name">Grid.Column</span><span class="token attr-value"><span class="token punctuation">=</span><span class="token punctuation">"</span>2<span class="token punctuation">"</span></span>
            <span class="token attr-name">BackgroundColor</span><span class="token attr-value"><span class="token punctuation">=</span><span class="token punctuation">"</span>#8B5CF6<span class="token punctuation">"</span></span>
            <span class="token attr-name">BorderWidth</span><span class="token attr-value"><span class="token punctuation">=</span><span class="token punctuation">"</span>0<span class="token punctuation">"</span></span>
            <span class="token attr-name">Command</span><span class="token attr-value"><span class="token punctuation">=</span><span class="token punctuation">"</span>{Binding ShareTextCommand}<span class="token punctuation">"</span></span>
            <span class="token attr-name">CornerRadius</span><span class="token attr-value"><span class="token punctuation">=</span><span class="token punctuation">"</span>10<span class="token punctuation">"</span></span>
            <span class="token attr-name">FontSize</span><span class="token attr-value"><span class="token punctuation">=</span><span class="token punctuation">"</span>14<span class="token punctuation">"</span></span>
            <span class="token attr-name">HeightRequest</span><span class="token attr-value"><span class="token punctuation">=</span><span class="token punctuation">"</span>44<span class="token punctuation">"</span></span>
            <span class="token attr-name">IsEnabled</span><span class="token attr-value"><span class="token punctuation">=</span><span class="token punctuation">"</span>{Binding HasText}<span class="token punctuation">"</span></span>
            <span class="token attr-name">Text</span><span class="token attr-value"><span class="token punctuation">=</span><span class="token punctuation">"</span>Share<span class="token punctuation">"</span></span>
            <span class="token attr-name">TextColor</span><span class="token attr-value"><span class="token punctuation">=</span><span class="token punctuation">"</span>#FFFFFF<span class="token punctuation">"</span></span> <span class="token punctuation">/&gt;</span></span>
    <span class="token tag"><span class="token tag"><span class="token punctuation">&lt;/</span>Grid</span><span class="token punctuation">&gt;</span></span>

<span class="token tag"><span class="token tag"><span class="token punctuation">&lt;/</span>Grid</span><span class="token punctuation">&gt;</span></span>
</code></pre><p><strong>TextEditorPage.xaml.cs</strong>:</p><pre class=" language-csharp"><code class="prism  language-csharp"><span class="token keyword">public</span> <span class="token keyword">partial</span> <span class="token keyword">class</span> <span class="token class-name">TextEditorPage</span> <span class="token punctuation">:</span> ContentPage
<span class="token punctuation">{</span>
    <span class="token keyword">private</span> <span class="token keyword">readonly</span> TextEditorViewModel _viewModel<span class="token punctuation">;</span>

    <span class="token keyword">public</span> <span class="token function">TextEditorPage</span><span class="token punctuation">(</span><span class="token punctuation">)</span>
    <span class="token punctuation">{</span>
        <span class="token function">InitializeComponent</span><span class="token punctuation">(</span><span class="token punctuation">)</span><span class="token punctuation">;</span>
        _viewModel <span class="token operator">=</span> <span class="token keyword">new</span> <span class="token class-name">TextEditorViewModel</span><span class="token punctuation">(</span><span class="token punctuation">)</span><span class="token punctuation">;</span>
        BindingContext <span class="token operator">=</span> _viewModel<span class="token punctuation">;</span>
    <span class="token punctuation">}</span>
<span class="token punctuation">}</span>
</code></pre><p><strong>TextEditorViewModel.cs</strong>:</p><pre class=" language-csharp"><code class="prism  language-csharp"><span class="token keyword">public</span> <span class="token keyword">partial</span> <span class="token keyword">class</span> <span class="token class-name">TextEditorViewModel</span> <span class="token punctuation">:</span> ObservableObject
<span class="token punctuation">{</span>
    <span class="token punctuation">[</span>ObservableProperty<span class="token punctuation">]</span>
    <span class="token punctuation">[</span><span class="token function">NotifyPropertyChangedFor</span><span class="token punctuation">(</span><span class="token function">nameof</span><span class="token punctuation">(</span>CharacterCount<span class="token punctuation">)</span><span class="token punctuation">)</span><span class="token punctuation">]</span>
    <span class="token punctuation">[</span><span class="token function">NotifyPropertyChangedFor</span><span class="token punctuation">(</span><span class="token function">nameof</span><span class="token punctuation">(</span>WordCount<span class="token punctuation">)</span><span class="token punctuation">)</span><span class="token punctuation">]</span>
    <span class="token punctuation">[</span><span class="token function">NotifyPropertyChangedFor</span><span class="token punctuation">(</span><span class="token function">nameof</span><span class="token punctuation">(</span>HasText<span class="token punctuation">)</span><span class="token punctuation">)</span><span class="token punctuation">]</span>
    <span class="token keyword">private</span> <span class="token keyword">string</span> _editorText <span class="token operator">=</span> <span class="token keyword">string</span><span class="token punctuation">.</span>Empty<span class="token punctuation">;</span>

    <span class="token punctuation">[</span>ObservableProperty<span class="token punctuation">]</span>
    <span class="token keyword">private</span> <span class="token keyword">string</span> _statusText <span class="token operator">=</span> <span class="token string">"Ready"</span><span class="token punctuation">;</span>

    <span class="token punctuation">[</span>ObservableProperty<span class="token punctuation">]</span>
    <span class="token keyword">private</span> Color _statusColor <span class="token operator">=</span> Colors<span class="token punctuation">.</span>Gray<span class="token punctuation">;</span>

    <span class="token keyword">public</span> <span class="token keyword">string</span> CharacterCount <span class="token operator">=</span><span class="token operator">&gt;</span> $<span class="token string">"{EditorText?.Length ?? 0} characters"</span><span class="token punctuation">;</span>

    <span class="token keyword">public</span> <span class="token keyword">string</span> WordCount
    <span class="token punctuation">{</span>
        <span class="token keyword">get</span>
        <span class="token punctuation">{</span>
            <span class="token keyword">int</span> words <span class="token operator">=</span> <span class="token keyword">string</span><span class="token punctuation">.</span><span class="token function">IsNullOrWhiteSpace</span><span class="token punctuation">(</span>EditorText<span class="token punctuation">)</span>
                <span class="token operator">?</span> <span class="token number">0</span>
                <span class="token punctuation">:</span> EditorText<span class="token punctuation">.</span><span class="token function">Split</span><span class="token punctuation">(</span><span class="token punctuation">[</span><span class="token string">' '</span><span class="token punctuation">,</span> <span class="token string">'\n'</span><span class="token punctuation">,</span> <span class="token string">'\r'</span><span class="token punctuation">]</span><span class="token punctuation">,</span> StringSplitOptions<span class="token punctuation">.</span>RemoveEmptyEntries<span class="token punctuation">)</span><span class="token punctuation">.</span>Length<span class="token punctuation">;</span>
            <span class="token keyword">return</span> $<span class="token string">"{words} words"</span><span class="token punctuation">;</span>
        <span class="token punctuation">}</span>
    <span class="token punctuation">}</span>

    <span class="token keyword">public</span> <span class="token keyword">bool</span> HasText <span class="token operator">=</span><span class="token operator">&gt;</span> <span class="token operator">!</span><span class="token keyword">string</span><span class="token punctuation">.</span><span class="token function">IsNullOrEmpty</span><span class="token punctuation">(</span>EditorText<span class="token punctuation">)</span><span class="token punctuation">;</span>

    <span class="token preprocessor property">#<span class="token directive keyword">region</span> Commands</span>

    <span class="token punctuation">[</span>RelayCommand<span class="token punctuation">]</span>
    <span class="token keyword">private</span> <span class="token keyword">void</span> <span class="token function">ClearText</span><span class="token punctuation">(</span><span class="token punctuation">)</span>
    <span class="token punctuation">{</span>
        EditorText <span class="token operator">=</span> <span class="token keyword">string</span><span class="token punctuation">.</span>Empty<span class="token punctuation">;</span>
        <span class="token function">UpdateStatus</span><span class="token punctuation">(</span><span class="token string">"Text cleared"</span><span class="token punctuation">,</span> <span class="token keyword">null</span><span class="token punctuation">)</span><span class="token punctuation">;</span>
    <span class="token punctuation">}</span>

    <span class="token punctuation">[</span>RelayCommand<span class="token punctuation">]</span>
    <span class="token keyword">private</span> <span class="token keyword">async</span> Task <span class="token function">CopyTextAsync</span><span class="token punctuation">(</span><span class="token punctuation">)</span>
    <span class="token punctuation">{</span>
        <span class="token keyword">if</span> <span class="token punctuation">(</span><span class="token operator">!</span>HasText<span class="token punctuation">)</span> <span class="token keyword">return</span><span class="token punctuation">;</span>

        <span class="token keyword">await</span> Clipboard<span class="token punctuation">.</span>Default<span class="token punctuation">.</span><span class="token function">SetTextAsync</span><span class="token punctuation">(</span>EditorText<span class="token punctuation">)</span><span class="token punctuation">;</span>
        <span class="token function">UpdateStatus</span><span class="token punctuation">(</span><span class="token string">"Copied to clipboard"</span><span class="token punctuation">,</span> <span class="token string">"#10B981"</span><span class="token punctuation">)</span><span class="token punctuation">;</span>

        <span class="token keyword">await</span> Task<span class="token punctuation">.</span><span class="token function">Delay</span><span class="token punctuation">(</span><span class="token number">2000</span><span class="token punctuation">)</span><span class="token punctuation">;</span>
        <span class="token function">UpdateStatus</span><span class="token punctuation">(</span><span class="token string">"Ready"</span><span class="token punctuation">,</span> <span class="token keyword">null</span><span class="token punctuation">)</span><span class="token punctuation">;</span>
    <span class="token punctuation">}</span>

    <span class="token punctuation">[</span>RelayCommand<span class="token punctuation">]</span>
    <span class="token keyword">private</span> <span class="token keyword">async</span> Task <span class="token function">NewDocumentAsync</span><span class="token punctuation">(</span><span class="token punctuation">)</span>
    <span class="token punctuation">{</span>
        <span class="token keyword">if</span> <span class="token punctuation">(</span>HasText<span class="token punctuation">)</span>
        <span class="token punctuation">{</span>
            <span class="token keyword">if</span> <span class="token punctuation">(</span>Application<span class="token punctuation">.</span>Current<span class="token operator">?</span><span class="token punctuation">.</span>Windows<span class="token punctuation">.</span><span class="token function">FirstOrDefault</span><span class="token punctuation">(</span><span class="token punctuation">)</span><span class="token operator">?</span><span class="token punctuation">.</span>Page <span class="token keyword">is</span> Page page<span class="token punctuation">)</span>
            <span class="token punctuation">{</span>
                <span class="token keyword">bool</span> confirm <span class="token operator">=</span> <span class="token keyword">await</span> page<span class="token punctuation">.</span><span class="token function">DisplayAlertAsync</span><span class="token punctuation">(</span><span class="token string">"New Document"</span><span class="token punctuation">,</span>
                    <span class="token string">"Do you want to create a new document? Current text will be lost."</span><span class="token punctuation">,</span>
                    <span class="token string">"Yes"</span><span class="token punctuation">,</span> <span class="token string">"No"</span><span class="token punctuation">)</span><span class="token punctuation">;</span>

                <span class="token keyword">if</span> <span class="token punctuation">(</span><span class="token operator">!</span>confirm<span class="token punctuation">)</span> <span class="token keyword">return</span><span class="token punctuation">;</span>
            <span class="token punctuation">}</span>
        <span class="token punctuation">}</span>

        EditorText <span class="token operator">=</span> <span class="token keyword">string</span><span class="token punctuation">.</span>Empty<span class="token punctuation">;</span>
        <span class="token function">UpdateStatus</span><span class="token punctuation">(</span><span class="token string">"New document created"</span><span class="token punctuation">,</span> <span class="token string">"#10B981"</span><span class="token punctuation">)</span><span class="token punctuation">;</span>
    <span class="token punctuation">}</span>

    <span class="token punctuation">[</span>RelayCommand<span class="token punctuation">]</span>
    <span class="token keyword">private</span> <span class="token keyword">async</span> Task <span class="token function">SaveTextAsync</span><span class="token punctuation">(</span><span class="token punctuation">)</span>
    <span class="token punctuation">{</span>
        <span class="token keyword">var</span> page <span class="token operator">=</span> Application<span class="token punctuation">.</span>Current<span class="token operator">?</span><span class="token punctuation">.</span>Windows<span class="token punctuation">.</span><span class="token function">FirstOrDefault</span><span class="token punctuation">(</span><span class="token punctuation">)</span><span class="token operator">?</span><span class="token punctuation">.</span>Page<span class="token punctuation">;</span>
        <span class="token keyword">if</span> <span class="token punctuation">(</span>page <span class="token operator">==</span> <span class="token keyword">null</span><span class="token punctuation">)</span> <span class="token keyword">return</span><span class="token punctuation">;</span>

        <span class="token keyword">if</span> <span class="token punctuation">(</span><span class="token operator">!</span>HasText<span class="token punctuation">)</span>
        <span class="token punctuation">{</span>
            <span class="token keyword">await</span> page<span class="token punctuation">.</span><span class="token function">DisplayAlertAsync</span><span class="token punctuation">(</span><span class="token string">"Save"</span><span class="token punctuation">,</span> <span class="token string">"There is no text to save."</span><span class="token punctuation">,</span> <span class="token string">"OK"</span><span class="token punctuation">)</span><span class="token punctuation">;</span>
            <span class="token keyword">return</span><span class="token punctuation">;</span>
        <span class="token punctuation">}</span>

        <span class="token keyword">try</span>
        <span class="token punctuation">{</span>
            <span class="token keyword">string</span> fileName <span class="token operator">=</span> $<span class="token string">"VoiceNote_{DateTime.Now:yyyyMMdd_HHmmss}.txt"</span><span class="token punctuation">;</span>
            <span class="token keyword">string</span> filePath <span class="token operator">=</span> Path<span class="token punctuation">.</span><span class="token function">Combine</span><span class="token punctuation">(</span>FileSystem<span class="token punctuation">.</span>AppDataDirectory<span class="token punctuation">,</span> fileName<span class="token punctuation">)</span><span class="token punctuation">;</span>

            <span class="token keyword">await</span> File<span class="token punctuation">.</span><span class="token function">WriteAllTextAsync</span><span class="token punctuation">(</span>filePath<span class="token punctuation">,</span> EditorText<span class="token punctuation">)</span><span class="token punctuation">;</span>

            <span class="token function">UpdateStatus</span><span class="token punctuation">(</span><span class="token string">"Document saved"</span><span class="token punctuation">,</span> <span class="token string">"#10B981"</span><span class="token punctuation">)</span><span class="token punctuation">;</span>

            <span class="token keyword">await</span> page<span class="token punctuation">.</span><span class="token function">DisplayAlertAsync</span><span class="token punctuation">(</span><span class="token string">"Saved"</span><span class="token punctuation">,</span> $<span class="token string">"Document saved as {fileName}"</span><span class="token punctuation">,</span> <span class="token string">"OK"</span><span class="token punctuation">)</span><span class="token punctuation">;</span>
        <span class="token punctuation">}</span>
        <span class="token keyword">catch</span> <span class="token punctuation">(</span><span class="token class-name">Exception</span> ex<span class="token punctuation">)</span>
        <span class="token punctuation">{</span>
            <span class="token keyword">await</span> page<span class="token punctuation">.</span><span class="token function">DisplayAlertAsync</span><span class="token punctuation">(</span><span class="token string">"Error"</span><span class="token punctuation">,</span> $<span class="token string">"Could not save document: {ex.Message}"</span><span class="token punctuation">,</span> <span class="token string">"OK"</span><span class="token punctuation">)</span><span class="token punctuation">;</span>
        <span class="token punctuation">}</span>
    <span class="token punctuation">}</span>

    <span class="token punctuation">[</span>RelayCommand<span class="token punctuation">]</span>
    <span class="token keyword">private</span> <span class="token keyword">async</span> Task <span class="token function">ShareTextAsync</span><span class="token punctuation">(</span><span class="token punctuation">)</span>
    <span class="token punctuation">{</span>
        <span class="token keyword">if</span> <span class="token punctuation">(</span><span class="token operator">!</span>HasText<span class="token punctuation">)</span>
        <span class="token punctuation">{</span>
            <span class="token keyword">if</span> <span class="token punctuation">(</span>Application<span class="token punctuation">.</span>Current<span class="token operator">?</span><span class="token punctuation">.</span>Windows<span class="token punctuation">.</span><span class="token function">FirstOrDefault</span><span class="token punctuation">(</span><span class="token punctuation">)</span><span class="token operator">?</span><span class="token punctuation">.</span>Page <span class="token keyword">is</span> Page page<span class="token punctuation">)</span>
            <span class="token punctuation">{</span>
                <span class="token keyword">await</span> page<span class="token punctuation">.</span><span class="token function">DisplayAlertAsync</span><span class="token punctuation">(</span><span class="token string">"Share"</span><span class="token punctuation">,</span> <span class="token string">"There is no text to share."</span><span class="token punctuation">,</span> <span class="token string">"OK"</span><span class="token punctuation">)</span><span class="token punctuation">;</span>
            <span class="token punctuation">}</span>
            <span class="token keyword">return</span><span class="token punctuation">;</span>
        <span class="token punctuation">}</span>

        <span class="token keyword">await</span> Share<span class="token punctuation">.</span>Default<span class="token punctuation">.</span><span class="token function">RequestAsync</span><span class="token punctuation">(</span><span class="token keyword">new</span> <span class="token class-name">ShareTextRequest</span>
        <span class="token punctuation">{</span>
            Text <span class="token operator">=</span> EditorText<span class="token punctuation">,</span>
            Title <span class="token operator">=</span> <span class="token string">"Share Voice Note"</span>
        <span class="token punctuation">}</span><span class="token punctuation">)</span><span class="token punctuation">;</span>
    <span class="token punctuation">}</span>

    <span class="token preprocessor property">#<span class="token directive keyword">endregion</span></span>

    <span class="token preprocessor property">#<span class="token directive keyword">region</span> Helper Methods</span>

    <span class="token keyword">private</span> <span class="token keyword">void</span> <span class="token function">UpdateStatus</span><span class="token punctuation">(</span><span class="token keyword">string</span> text<span class="token punctuation">,</span> <span class="token keyword">string</span><span class="token operator">?</span> colorHex<span class="token punctuation">)</span>
    <span class="token punctuation">{</span>
        StatusText <span class="token operator">=</span> text<span class="token punctuation">;</span>
        StatusColor <span class="token operator">=</span> <span class="token keyword">string</span><span class="token punctuation">.</span><span class="token function">IsNullOrEmpty</span><span class="token punctuation">(</span>colorHex<span class="token punctuation">)</span> <span class="token operator">?</span> Colors<span class="token punctuation">.</span>Gray <span class="token punctuation">:</span> Color<span class="token punctuation">.</span><span class="token function">FromArgb</span><span class="token punctuation">(</span>colorHex<span class="token punctuation">)</span><span class="token punctuation">;</span>
    <span class="token punctuation">}</span>

    <span class="token keyword">public</span> <span class="token keyword">void</span> <span class="token function">UpdateButtonState</span><span class="token punctuation">(</span>Telerik<span class="token punctuation">.</span>Maui<span class="token punctuation">.</span>SpeechRecognizer<span class="token punctuation">.</span>SpeechRecognizerState state<span class="token punctuation">)</span>
    <span class="token punctuation">{</span>
        <span class="token keyword">switch</span> <span class="token punctuation">(</span>state<span class="token punctuation">)</span>
        <span class="token punctuation">{</span>
            <span class="token keyword">case</span> Telerik<span class="token punctuation">.</span>Maui<span class="token punctuation">.</span>SpeechRecognizer<span class="token punctuation">.</span>SpeechRecognizerState<span class="token punctuation">.</span>Listening<span class="token punctuation">:</span>
                <span class="token function">UpdateStatus</span><span class="token punctuation">(</span><span class="token string">"Listening..."</span><span class="token punctuation">,</span> <span class="token string">"#2563EB"</span><span class="token punctuation">)</span><span class="token punctuation">;</span>
                <span class="token keyword">break</span><span class="token punctuation">;</span>
            <span class="token keyword">case</span> Telerik<span class="token punctuation">.</span>Maui<span class="token punctuation">.</span>SpeechRecognizer<span class="token punctuation">.</span>SpeechRecognizerState<span class="token punctuation">.</span>Initializing<span class="token punctuation">:</span>
                <span class="token function">UpdateStatus</span><span class="token punctuation">(</span><span class="token string">"Initializing..."</span><span class="token punctuation">,</span> <span class="token string">"#F59E0B"</span><span class="token punctuation">)</span><span class="token punctuation">;</span>
                <span class="token keyword">break</span><span class="token punctuation">;</span>
            <span class="token keyword">default</span><span class="token punctuation">:</span>
                <span class="token function">UpdateStatus</span><span class="token punctuation">(</span><span class="token string">"Ready"</span><span class="token punctuation">,</span> <span class="token keyword">null</span><span class="token punctuation">)</span><span class="token punctuation">;</span>
                <span class="token keyword">break</span><span class="token punctuation">;</span>
        <span class="token punctuation">}</span>
    <span class="token punctuation">}</span>

    <span class="token preprocessor property">#<span class="token directive keyword">endregion</span></span>
<span class="token punctuation">}</span>
</code></pre><p>The above code results in the following application when executed:</p><p><img src="https://d585tldpucybw.cloudfront.net/sfimages/default-source/blogs/2026/2026-03/showing-a-note-taking-app-interface-being-used-through-a-keyboard.gif?sfvrsn=1143ca0e_2" alt="Showing a note-taking app interface being used through a keyboard" /></p><p>In the previous image, you can see the application, which only allows taking notes via the keyboard, which can be tedious, slow and boring. Therefore, we will use the speech-to-text control to improve quick note-taking.</p><h2 id="integrating-the-speechtotextbutton-control-into-the-application">Integrating the SpeechToTextButton Control into the Application</h2><p>The first thing you need to do to use the speech-to-text control is to follow the <a target="_blank" href="https://www.telerik.com/maui-ui/documentation/get-started/first-steps-vs">Telerik .NET MAUI controls installation guide</a>. Once you have done that, add the following namespace in the <code>ContentPage</code> where you want to use the control:</p><pre class=" language-xml"><code class="prism  language-xml">xmlns:telerik="http://schemas.telerik.com/2022/xaml/maui"</code></pre><p>Next, add the control using the <code>RadSpeechToTextButton</code> tag where you want to place it; in our example, it will be located where the <strong>Editor Toolbar</strong> comment is:</p><pre class=" language-xml"><code class="prism  language-xml"><span class="token tag"><span class="token tag"><span class="token punctuation">&lt;</span><span class="token namespace">telerik:</span>RadSpeechToTextButton</span>
    <span class="token attr-name"><span class="token namespace">x:</span>Name</span><span class="token attr-value"><span class="token punctuation">=</span><span class="token punctuation">"</span>SpeechButton<span class="token punctuation">"</span></span>
    <span class="token attr-name">Grid.Column</span><span class="token attr-value"><span class="token punctuation">=</span><span class="token punctuation">"</span>3<span class="token punctuation">"</span></span>
    <span class="token attr-name">VerticalOptions</span><span class="token attr-value"><span class="token punctuation">=</span><span class="token punctuation">"</span>Center<span class="token punctuation">"</span></span> <span class="token punctuation">/&gt;</span></span>
</code></pre><p>Since we will be using the microphone in the app for obtaining the transcription, you need to grant the <a target="_blank" href="https://www.telerik.com/maui-ui/documentation/controls/speechtotextbutton/getting-started#required-permissions">required permissions according to the platform</a> to allow audio recording and voice recognition. For example, for Android, you need to add the following line to <code>AndroidManifest.xml</code>:</p><pre class=" language-xml"><code class="prism  language-xml">&lt;uses-permission android:name="android.permission.RECORD_AUDIO" /&gt;</code></pre><p>The integration of the control provides a button with the necessary functionality to start the speech-to-text process:</p><p><img src="https://d585tldpucybw.cloudfront.net/sfimages/default-source/blogs/2026/2026-03/showing-the-button-that-enables-the-speech-to-text-functionality.gif?sfvrsn=8d2c43db_2" alt="Showing the button that enables the speech-to-text functionality, with the microphone activating automatically" /></p><p>In the image above, you can see that when the button to start recording is pressed, the microphone is automatically activated in the status bar (if it&rsquo;s the first execution, it will likely ask for microphone access), indicating that a recording process has started.</p><p>Now we need to handle the events or commands to obtain the transcription, which we will see next.</p><h2 id="available-events-and-commands-in-the-speech-to-text-control-for-.net-maui">Available Events and Commands in the Speech to Text Control for .NET MAUI</h2><p>The speech to text control has events and commands that we can use to react to different situations. For the events, we have the following available:</p><ul><li><code>SpeechRecognized</code>: This occurs when there is a successful speech recognition and includes an argument <code>SpeechRecognizerSpeechRecognizedEventArgs</code>, which contains the <code>FullText</code> obtained from the recognition and <code>FullTextConfidenceScore</code> indicating the confidence level of the recognition.</li><li><code>ErrorOccurred</code>: This occurs when there is an error in the recognition process, includes the argument <code>SpeechRecognizerErrorOccurredEventArgs</code>, which contains the <code>Message</code> property with the error message, the <code>Exception</code> associated with the error and <code>Handled</code> to determine if the error has been handled.</li><li><code>StateChanged</code>: This is fired as soon as there is a change in the state of the speech recognizer.</li></ul><p>On the other hand, we also have some commands that will allow us to handle events directly from the viewmodel if we need to, as is the case for us. To achieve this, we can modify the label of the <code>RadSpeechToTextButton</code> control by adding the commands <code>SpeechRecognizedCommand</code> and <code>ErrorOccurredCommand</code> as shown in the following example:</p><pre class=" language-xml"><code class="prism  language-xml"> <span class="token comment">&lt;!--  Editor Toolbar  --&gt;</span>
 <span class="token tag"><span class="token tag"><span class="token punctuation">&lt;</span>Border...</span><span class="token punctuation">&gt;</span></span>
    <span class="token tag"><span class="token tag"><span class="token punctuation">&lt;</span>Grid</span> <span class="token attr-name">ColumnDefinitions</span><span class="token attr-value"><span class="token punctuation">=</span><span class="token punctuation">"</span>*, Auto, Auto, Auto<span class="token punctuation">"</span></span><span class="token punctuation">&gt;</span></span>
        ...
        <span class="token tag"><span class="token tag"><span class="token punctuation">&lt;</span><span class="token namespace">telerik:</span>RadSpeechToTextButton</span>
            <span class="token attr-name"><span class="token namespace">x:</span>Name</span><span class="token attr-value"><span class="token punctuation">=</span><span class="token punctuation">"</span>SpeechButton<span class="token punctuation">"</span></span>
            <span class="token attr-name">Grid.Column</span><span class="token attr-value"><span class="token punctuation">=</span><span class="token punctuation">"</span>3<span class="token punctuation">"</span></span>
            <span class="token attr-name">ErrorOccurredCommand</span><span class="token attr-value"><span class="token punctuation">=</span><span class="token punctuation">"</span>{Binding ErrorOccurredCommand}<span class="token punctuation">"</span></span>
            <span class="token attr-name">SpeechRecognizedCommand</span><span class="token attr-value"><span class="token punctuation">=</span><span class="token punctuation">"</span>{Binding SpeechRecognizedCommand}<span class="token punctuation">"</span></span>
            <span class="token attr-name">VerticalOptions</span><span class="token attr-value"><span class="token punctuation">=</span><span class="token punctuation">"</span>Center<span class="token punctuation">"</span></span> <span class="token punctuation">/&gt;</span></span>
    <span class="token tag"><span class="token tag"><span class="token punctuation">&lt;/</span>Grid</span><span class="token punctuation">&gt;</span></span>
 <span class="token tag"><span class="token tag"><span class="token punctuation">&lt;/</span>Border</span><span class="token punctuation">&gt;</span></span>
</code></pre><p>Next, we need to handle the commands from the viewmodel as seen below:</p><pre class=" language-csharp"><code class="prism  language-csharp"><span class="token preprocessor property">#<span class="token directive keyword">region</span> Speech Recognition Commands</span>

<span class="token punctuation">[</span>RelayCommand<span class="token punctuation">]</span>
<span class="token keyword">private</span> <span class="token keyword">void</span> <span class="token function">SpeechRecognized</span><span class="token punctuation">(</span>SpeechToTextButtonSpeechRecognizedCommandContext context<span class="token punctuation">)</span>
<span class="token punctuation">{</span>
    EditorText <span class="token operator">=</span> context<span class="token punctuation">.</span>FullText<span class="token punctuation">;</span>
    <span class="token function">UpdateStatus</span><span class="token punctuation">(</span><span class="token string">"Speech recognized"</span><span class="token punctuation">,</span> <span class="token string">"#10B981"</span><span class="token punctuation">)</span><span class="token punctuation">;</span>
<span class="token punctuation">}</span>

<span class="token punctuation">[</span>RelayCommand<span class="token punctuation">]</span>
<span class="token keyword">private</span> <span class="token keyword">async</span> Task <span class="token function">ErrorOccurredAsync</span><span class="token punctuation">(</span>SpeechToTextButtonErrorOccurredCommandContext context<span class="token punctuation">)</span>
<span class="token punctuation">{</span>
    <span class="token function">UpdateStatus</span><span class="token punctuation">(</span><span class="token string">"Error occurred"</span><span class="token punctuation">,</span> <span class="token string">"#EF4444"</span><span class="token punctuation">)</span><span class="token punctuation">;</span>

    <span class="token keyword">if</span> <span class="token punctuation">(</span>Application<span class="token punctuation">.</span>Current<span class="token operator">?</span><span class="token punctuation">.</span>Windows<span class="token punctuation">.</span><span class="token function">FirstOrDefault</span><span class="token punctuation">(</span><span class="token punctuation">)</span><span class="token operator">?</span><span class="token punctuation">.</span>Page <span class="token keyword">is</span> Page page<span class="token punctuation">)</span>
    <span class="token punctuation">{</span>
        <span class="token keyword">await</span> page<span class="token punctuation">.</span><span class="token function">DisplayAlertAsync</span><span class="token punctuation">(</span><span class="token string">"Voice Input Error"</span><span class="token punctuation">,</span>
            $<span class="token string">"Unable to process voice input: {context.Message}"</span><span class="token punctuation">,</span>
            <span class="token string">"OK"</span><span class="token punctuation">)</span><span class="token punctuation">;</span>
    <span class="token punctuation">}</span>
<span class="token punctuation">}</span>

<span class="token preprocessor property">#<span class="token directive keyword">endregion</span></span>
</code></pre><p>In the previous code, you can see that the commands receive contexts similar to the arguments of the events. The first, <code>SpeechToTextButtonSpeechRecognizedCommandContext</code>, allows obtaining the <code>FullText</code> and <code>FullTextConfidenceScore</code> when there is speech recognition. The second, <code>SpeechToTextButtonErrorOccurredCommandContext</code>, contains the <code>Message</code> and <code>Exception</code> properties when there is an error in the speech recognition.</p><p>You can also see how <code>FullText</code> is assigned to the <code>EditorText</code> property, which is bound to the control of type <code>Editor</code>. This allows the transcription obtained to be displayed in the graphical interface, resulting in the following execution:</p><p><img src="https://d585tldpucybw.cloudfront.net/sfimages/default-source/blogs/2026/2026-03/live-demonstration-of-telerik-speech-to-text-control-for-maui.gif?sfvrsn=a3fc5485_2" alt="Live demonstration of Telerik’s Speech-to-Text control for .NET MAUI, enabling real-time voice transcription" /></p><p>Now we can obtain the transcription; however, there is a need for visual indicators that allow users to know what is happening in the application, and we can solve this through the states of the control. Let&rsquo;s see how.</p><h2 id="states-of-the-speech-to-text-control">States of the Speech-to-Text Control</h2><p>One thing that is appreciated as a developer is that Progress Telerik documentation is very clear regarding the architecture and lifecycle of the .NET MAUI SpeechToTextButton control, as can be seen in the following image:</p><p><img src="https://www.telerik.com/maui-ui/documentation/assets/0b2b21d54845c1079dac37312faab870/speechtotext-architecture.png" alt="Architecture and lifecycle of the SpeechToTextButton control" /></p><p>The diagram above shows us a series of states that we can detect thanks to the <code>StateChanged</code> event as seen below:</p><pre class=" language-xml"><code class="prism  language-xml"><span class="token tag"><span class="token tag"><span class="token punctuation">&lt;</span><span class="token namespace">telerik:</span>RadSpeechToTextButton</span>
    <span class="token attr-name"><span class="token namespace">x:</span>Name</span><span class="token attr-value"><span class="token punctuation">=</span><span class="token punctuation">"</span>SpeechButton<span class="token punctuation">"</span></span>
    <span class="token attr-name">Grid.Column</span><span class="token attr-value"><span class="token punctuation">=</span><span class="token punctuation">"</span>3<span class="token punctuation">"</span></span>
    <span class="token attr-name">ErrorOccurredCommand</span><span class="token attr-value"><span class="token punctuation">=</span><span class="token punctuation">"</span>{Binding ErrorOccurredCommand}<span class="token punctuation">"</span></span>
    <span class="token attr-name">SpeechRecognizedCommand</span><span class="token attr-value"><span class="token punctuation">=</span><span class="token punctuation">"</span>{Binding SpeechRecognizedCommand}<span class="token punctuation">"</span></span>
    <span class="token attr-name">StateChanged</span><span class="token attr-value"><span class="token punctuation">=</span><span class="token punctuation">"</span>OnStateChanged<span class="token punctuation">"</span></span>
    <span class="token attr-name">VerticalOptions</span><span class="token attr-value"><span class="token punctuation">=</span><span class="token punctuation">"</span>Center<span class="token punctuation">"</span></span> <span class="token punctuation">/&gt;</span></span>
</code></pre><p>In the code behind, we can invoke a method from the viewmodel that allows us to determine what to do with the detected state:</p><pre class=" language-csharp"><code class="prism  language-csharp"><span class="token keyword">private</span> <span class="token keyword">void</span> <span class="token function">OnStateChanged</span><span class="token punctuation">(</span><span class="token keyword">object</span> sender<span class="token punctuation">,</span> EventArgs e<span class="token punctuation">)</span>
<span class="token punctuation">{</span>
    <span class="token keyword">if</span> <span class="token punctuation">(</span>sender <span class="token keyword">is</span> RadSpeechToTextButton button<span class="token punctuation">)</span>
    <span class="token punctuation">{</span>
        MainThread<span class="token punctuation">.</span><span class="token function">BeginInvokeOnMainThread</span><span class="token punctuation">(</span><span class="token punctuation">(</span><span class="token punctuation">)</span> <span class="token operator">=</span><span class="token operator">&gt;</span>
        <span class="token punctuation">{</span>
            _viewModel<span class="token punctuation">.</span><span class="token function">UpdateButtonState</span><span class="token punctuation">(</span>button<span class="token punctuation">.</span>State<span class="token punctuation">)</span><span class="token punctuation">;</span>
        <span class="token punctuation">}</span><span class="token punctuation">)</span><span class="token punctuation">;</span>
    <span class="token punctuation">}</span>
<span class="token punctuation">}</span>
</code></pre><p>Within the viewmodel, we will compare the desired state using any of the states defined in the <code>Telerik.Maui.SpeechRecognizer.SpeechRecognizerState</code> enumeration.</p><p>For example, to react to state changes <code>Listening</code> and <code>Initializing</code>, the code would be as follows:</p><pre class=" language-csharp"><code class="prism  language-csharp"><span class="token keyword">public</span> <span class="token keyword">void</span> <span class="token function">UpdateButtonState</span><span class="token punctuation">(</span>Telerik<span class="token punctuation">.</span>Maui<span class="token punctuation">.</span>SpeechRecognizer<span class="token punctuation">.</span>SpeechRecognizerState state<span class="token punctuation">)</span>
<span class="token punctuation">{</span>        
    <span class="token keyword">switch</span> <span class="token punctuation">(</span>state<span class="token punctuation">)</span>
    <span class="token punctuation">{</span>            
        <span class="token keyword">case</span> Telerik<span class="token punctuation">.</span>Maui<span class="token punctuation">.</span>SpeechRecognizer<span class="token punctuation">.</span>SpeechRecognizerState<span class="token punctuation">.</span>Listening<span class="token punctuation">:</span>
            <span class="token function">UpdateStatus</span><span class="token punctuation">(</span><span class="token string">"Listening..."</span><span class="token punctuation">,</span> <span class="token string">"#2563EB"</span><span class="token punctuation">)</span><span class="token punctuation">;</span>
            <span class="token keyword">break</span><span class="token punctuation">;</span>
        <span class="token keyword">case</span> Telerik<span class="token punctuation">.</span>Maui<span class="token punctuation">.</span>SpeechRecognizer<span class="token punctuation">.</span>SpeechRecognizerState<span class="token punctuation">.</span>Initializing<span class="token punctuation">:</span>
            <span class="token function">UpdateStatus</span><span class="token punctuation">(</span><span class="token string">"Initializing..."</span><span class="token punctuation">,</span> <span class="token string">"#F59E0B"</span><span class="token punctuation">)</span><span class="token punctuation">;</span>
            <span class="token keyword">break</span><span class="token punctuation">;</span>
        <span class="token keyword">default</span><span class="token punctuation">:</span>
            <span class="token function">UpdateStatus</span><span class="token punctuation">(</span><span class="token string">"Ready"</span><span class="token punctuation">,</span> <span class="token keyword">null</span><span class="token punctuation">)</span><span class="token punctuation">;</span>
            <span class="token keyword">break</span><span class="token punctuation">;</span>
    <span class="token punctuation">}</span>
<span class="token punctuation">}</span>
</code></pre><p>Finally, in the graphical interface code, we can add visual indicators that provide feedback to the user about the state of the control. In our example, we do this in the comment section <strong>Status Bar</strong>:</p><pre class=" language-xml"><code class="prism  language-xml"><span class="token comment">&lt;!--  Status Bar  --&gt;</span>
<span class="token tag"><span class="token tag"><span class="token punctuation">&lt;</span>Border</span>
    <span class="token attr-name">Grid.Row</span><span class="token attr-value"><span class="token punctuation">=</span><span class="token punctuation">"</span>1<span class="token punctuation">"</span></span>
    <span class="token attr-name">Padding</span><span class="token attr-value"><span class="token punctuation">=</span><span class="token punctuation">"</span>16,12<span class="token punctuation">"</span></span>
    <span class="token attr-name">BackgroundColor</span><span class="token attr-value"><span class="token punctuation">=</span><span class="token punctuation">"</span>#F3F4F6<span class="token punctuation">"</span></span>
    <span class="token attr-name">StrokeShape</span><span class="token attr-value"><span class="token punctuation">=</span><span class="token punctuation">"</span>RoundRectangle 12<span class="token punctuation">"</span></span>
    <span class="token attr-name">StrokeThickness</span><span class="token attr-value"><span class="token punctuation">=</span><span class="token punctuation">"</span>0<span class="token punctuation">"</span></span><span class="token punctuation">&gt;</span></span>
    <span class="token tag"><span class="token tag"><span class="token punctuation">&lt;</span>Grid</span> <span class="token attr-name">ColumnDefinitions</span><span class="token attr-value"><span class="token punctuation">=</span><span class="token punctuation">"</span>Auto, *, Auto<span class="token punctuation">"</span></span><span class="token punctuation">&gt;</span></span>
        <span class="token tag"><span class="token tag"><span class="token punctuation">&lt;</span>Ellipse</span>
            <span class="token attr-name">BackgroundColor</span><span class="token attr-value"><span class="token punctuation">=</span><span class="token punctuation">"</span>{Binding StatusColor}<span class="token punctuation">"</span></span>
            <span class="token attr-name">HeightRequest</span><span class="token attr-value"><span class="token punctuation">=</span><span class="token punctuation">"</span>10<span class="token punctuation">"</span></span>
            <span class="token attr-name">VerticalOptions</span><span class="token attr-value"><span class="token punctuation">=</span><span class="token punctuation">"</span>Center<span class="token punctuation">"</span></span>
            <span class="token attr-name">WidthRequest</span><span class="token attr-value"><span class="token punctuation">=</span><span class="token punctuation">"</span>10<span class="token punctuation">"</span></span> <span class="token punctuation">/&gt;</span></span>        
        <span class="token tag"><span class="token tag"><span class="token punctuation">&lt;</span>Label</span>
            <span class="token attr-name">Grid.Column</span><span class="token attr-value"><span class="token punctuation">=</span><span class="token punctuation">"</span>1<span class="token punctuation">"</span></span>
            <span class="token attr-name">Margin</span><span class="token attr-value"><span class="token punctuation">=</span><span class="token punctuation">"</span>12,0,0,0<span class="token punctuation">"</span></span>
            <span class="token attr-name">FontSize</span><span class="token attr-value"><span class="token punctuation">=</span><span class="token punctuation">"</span>14<span class="token punctuation">"</span></span>
            <span class="token attr-name">Text</span><span class="token attr-value"><span class="token punctuation">=</span><span class="token punctuation">"</span>{Binding StatusText}<span class="token punctuation">"</span></span>
            <span class="token attr-name">TextColor</span><span class="token attr-value"><span class="token punctuation">=</span><span class="token punctuation">"</span>#374151<span class="token punctuation">"</span></span>
            <span class="token attr-name">VerticalOptions</span><span class="token attr-value"><span class="token punctuation">=</span><span class="token punctuation">"</span>Center<span class="token punctuation">"</span></span> <span class="token punctuation">/&gt;</span></span>
        <span class="token tag"><span class="token tag"><span class="token punctuation">&lt;</span>Label</span>
            <span class="token attr-name">Grid.Column</span><span class="token attr-value"><span class="token punctuation">=</span><span class="token punctuation">"</span>2<span class="token punctuation">"</span></span>
            <span class="token attr-name">FontSize</span><span class="token attr-value"><span class="token punctuation">=</span><span class="token punctuation">"</span>12<span class="token punctuation">"</span></span>
            <span class="token attr-name">Text</span><span class="token attr-value"><span class="token punctuation">=</span><span class="token punctuation">"</span>{Binding CharacterCount}<span class="token punctuation">"</span></span>
            <span class="token attr-name">TextColor</span><span class="token attr-value"><span class="token punctuation">=</span><span class="token punctuation">"</span>#9CA3AF<span class="token punctuation">"</span></span>
            <span class="token attr-name">VerticalOptions</span><span class="token attr-value"><span class="token punctuation">=</span><span class="token punctuation">"</span>Center<span class="token punctuation">"</span></span> <span class="token punctuation">/&gt;</span></span>
    <span class="token tag"><span class="token tag"><span class="token punctuation">&lt;/</span>Grid</span><span class="token punctuation">&gt;</span></span>
<span class="token tag"><span class="token tag"><span class="token punctuation">&lt;/</span>Border</span><span class="token punctuation">&gt;</span></span>
</code></pre><p>Once the previous code has been replaced, we will graphically see the state changes, to indicate to users that the component is ready to start transcription, if it is listening to speech or if speech has been recognized correctly:</p><p><img src="https://d585tldpucybw.cloudfront.net/sfimages/default-source/blogs/2026/2026-03/handling-the-state-validation-of-the-speech-to-text-control.gif?sfvrsn=4bfd00e8_2" alt="Handling the state validation of the Speech-to-Text control, providing user feedback about what is happening in the application" /></p><p>In the above image, you can see the state changes in action, according to the actions performed by the user on the speech to text control.</p><h2 id="conclusion">Conclusion</h2><p>Throughout this article, you have been able to learn about the SpeechToTextButton control from Telerik for .NET MAUI applications.</p><p>Implementing this type of component in your mobile applications can greatly simplify the friction that exists with users when it comes to entering lengthy or rapid text, something very trendy today with AI-based apps. I encourage you to try it out and help your users get the most out of your applications.</p><p>If you aren&rsquo;t already using Telerik UI for .NET MAUI, it comes with a free 30-day trial:</p><p><a target="_blank" href="https://www.telerik.com/try/ui-for-maui" class="Btn">Try Now</a></p>]]></content>
  </entry>
  <entry>
    <id>urn:uuid:5b2a3c79-efa5-4bc4-b24c-1cd5b9ea13e5</id>
    <title type="text">Accessibility (A11y) in .NET MAUI: What It Is and How to Implement It</title>
    <summary type="text">It’s time to add accessibility into the early stages of your .NET MAUI development cycle. The POUR principles can help.</summary>
    <published>2026-03-16T18:26:50Z</published>
    <updated>2026-06-20T04:15:38Z</updated>
    <author>
      <name>Leomaris Reyes </name>
    </author>
    <link rel="alternate" href="https://www.telerik.com/blogs/accessibility-net-maui-what-how-to-implement?utm_medium=feed&amp;utm_source=feedpress.me&amp;utm_campaign=Feed%3A+telerik-blogs-desktop"/>
    <content type="text"><![CDATA[<p><span class="featured">It&rsquo;s time to add accessibility into the early stages of your .NET MAUI development cycle. The POUR principles can help.</span></p><p>Developing applications that can be used by everyone is a goal that any app should keep in mind. When I say &ldquo;for everyone,&rdquo; I mean that our applications should be able to communicate a clear and understandable purpose, so that people with or without disabilities can use them without issues. In other words, it&rsquo;s not just about &ldquo;making it work,&rdquo; nor about limiting it to a single way of use (such as only being understandable if you can read the buttons).</p><p>You&rsquo;ve probably heard the term <strong>A11y,</strong> and maybe you&rsquo;ve stopped to think&hellip; What does it mean?  A11y refers to the <strong>accessibility</strong> of our applications. While it&rsquo;s much more common to hear this term in the web space, mobile applications should also take it into account to offer a better product.</p><p>In this article, you&rsquo;ll learn more about accessibility, some guidelines you can follow to apply it correctly in <strong>.NET MAUI</strong>, the aspects you should start paying attention to and why <strong>A11y is not an extra</strong>, but a fundamental part of the quality of a well-built application.</p><h2 id="let’s-talk-more-about-a11y">Let&rsquo;s Talk More About A11y</h2><p><strong>A11y</strong> is an abbreviated form of the word <strong>accessibility</strong>, and its goal is to allow people with or without visual, auditory, motor or cognitive disabilities to use your apps. A11Y is a type of abbreviation very common in technology, and it is known as a <strong>numeronym.</strong></p><p><img src="https://d585tldpucybw.cloudfront.net/sfimages/default-source/blogs/2026/2026-03/01_accessibilitysample.png?sfvrsn=2429b72_2" alt="A c c e s s i b i l i t y : Diagram showing why ‘Accessibility’ is abbreviated as A11y, with 11 letters between A and Y." /></p><p>It works as follows:</p><ul><li><strong>A:</strong> is the first letter of the word.</li><li><strong>11:</strong> is the number of characters that come after the first letter and before the last one. In Accessibility, specifically in &ldquo;ccessibilit,&rdquo; there are 11 letters.</li><li><strong>Y:</strong> is the last letter of the word.</li></ul><p>That&rsquo;s why it is abbreviated as: <strong>A11y.</strong> This method makes it much more convenient to write long terms in a faster way and helps standardize lengthy terminology.</p><h2 id="how-can-we-apply-a11y-in-our-apps">How Can We Apply A11y in Our Apps?</h2><p>To implement this in our applications, there are accessibility guidelines such as <strong>WCAG,</strong> which instruct us on how to adapt the tools that mobile devices already provide so they can work together with our apps.</p><p>The <strong><a target="_blank" href="https://www.w3.org/TR/WCAG22/">Web Content Accessibility Guidelines (WCAG)</a></strong> are a set of international guidelines created by the <strong>World Wide Web Consortium (W3C).</strong> Although web is part of their name, I always recommend applying these practices to all types of applications, including mobile. Our users will thank us for it.</p><p>In fact, the official documentation states the following:</p><blockquote><p>&ldquo;These guidelines address accessibility of web content on any kind of device (including desktops, laptops, kiosks, and mobile devices).&rdquo;</p></blockquote><p>The WCAG are built on <strong>four fundamental principles,</strong> known as <strong>POUR.</strong> WCAG defines what an application must comply with to be accessible, while POUR helps us understand how to think about accessibility from a development perspective.</p><p>These four criteria that make up <strong>POUR</strong> are:</p><ul><li><strong>P</strong>erceivable</li><li><strong>O</strong>perable</li><li><strong>U</strong>nderstandable</li><li><strong>R</strong>obust</li></ul><p>Let&rsquo;s take a closer look at <strong>POUR</strong>&mdash;what each principle means and some examples of how we can translate them into our <strong>.NET MAUI</strong> applications:</p><h2 id="perceivable">Perceivable</h2><p>This principle indicates that all the information in the app (including text and UI components) must be <strong>perceivable by the user</strong>, regardless of how they interact with the device. In other words, our app should not be based solely on visual information.</p><p>This is especially important for users who:</p><ul><li>Use screen readers such as <strong>TalkBack</strong> or <strong>VoiceOver</strong></li><li>Have low vision or use larger text sizes</li></ul><p>In <strong>.NET MAUI</strong>, we have <strong>SemanticProperties</strong>, which help us a lot with this aspect.</p><p> Semantic properties are the Microsoft-recommended approach in .NET MAUI to provide accessibility values in applications. This allows us to add a description to our visual elements so that they can be read by the screen reader.</p><p>Additionally, I recommend exploring <strong><a target="_blank" href="https://www.telerik.com/blogs/exploring-semanticorderview-net-maui-community-toolkit">SemanticOrderView</a></strong>. While the individual reading of each visual element is important, being able to provide the user with a <strong>reading order</strong> so that this reading is coherent greatly enhances a good user experience. For this, we can use <strong>SemanticOrderView</strong> from the <strong>.NET MAUI Community Toolkit</strong>.</p><p>Let&rsquo;s explore some examples of implementing the Percievable principle in .NET MAUI:</p><h3 id="alternative-text-for-images-and-icons">Alternative Text for Images and Icons</h3><p>Images and icons are very common in mobile apps, but for a screen reader, an image without a description is <strong>100% invisible</strong>. That&rsquo;s why it&rsquo;s recommended to tell the screen reader that there is something there and <strong>what it should read</strong>.</p><p>In the following example, you can see the <strong>warning.png</strong> image used in the UI. When navigating the app with VoiceOver or TalkBack, this image will be announced as &ldquo;Warning icon.&rdquo; For this reason, I recommend being as specific as possible when defining its description.</p><pre class=" language-xml"><code class="prism  language-xml">&lt;Image Source="warning.png"
 SemanticProperties.Description="Warning icon" /&gt;
</code></pre><h3 id="what-about-decorative-images">What About Decorative Images?</h3><p>Not all images provide information. In these cases, we can <strong>remove them from the accessibility tree</strong> so the screen reader ignores them (meaning it won&rsquo;t read them):</p><pre class=" language-xml"><code class="prism  language-xml">&lt;Image Source="divider.png"
 AutomationProperties.IsInAccessibleTree="False" /&gt;
</code></pre><p>This helps keep the experience cleaner and prevents the screen reader from reading unnecessary elements.</p><h3 id="headings">Headings</h3><p>Screen readers don&rsquo;t just &ldquo;read in order&rdquo; and stop there; they also allow users to <strong>navigate by sections</strong>. For this reason, it&rsquo;s important to mark titles or main sections as <strong>semantic headings</strong>.</p><pre class=" language-xml"><code class="prism  language-xml">&lt;Label Text="Payment Settings" 
 FontSize="24" 
 SemanticProperties.HeadingLevel="Level1" /&gt;
</code></pre><p>This way, the screen reader recognizes this element as a heading and makes navigation within the screen much easier.</p><h3 id="supporting-scalable-text">Supporting Scalable Text</h3><p>In addition to screen readers, there is also a significant number of users with low vision. You may have noticed that some people use very large text on their phones; that&rsquo;s probably why.</p><p>As developers, we can contribute to making our app more accessible by allowing it to adapt to the text size users feel most comfortable with.</p><p>For this, in .NET MAUI we have <strong>FontAutoScalingEnabled</strong>, a property that allows the text in our app to automatically scale according to the system preferences.</p><pre class=" language-xml"><code class="prism  language-xml">&lt;Label Text="Payment Settings" 
 FontSize="24" 
 FontAutoScalingEnabled="True" /&gt;
</code></pre><p>With this, if the user increases the text size from the device settings, the Label will scale accordingly, improving readability and aligning with the <strong>Perceivable</strong> principle.</p><h2 id="operable">Operable</h2><p>The Operable principle states that users must be able to interact with the app without difficulty, regardless of the way they use the device.</p><p>In other words, not all users interact in the same way. Some use screen readers, others use a keyboard or assisted navigation. For this reason, the app should not rely solely on complex gestures or interactions that do not provide a clear alternative.</p><p>In mobile applications, this principle basically translates into:</p><ul><li>Easy-to-tap controls</li><li>Clear and predictable navigation</li><li>Avoiding interactions that require extreme precision</li></ul><p>In .NET MAUI, many of these best practices can be applied directly using the components we already work with. Let&rsquo;s see NET MAUI some Operable examples we can apply:</p><h3 id="appropriate-size-for-interactive-elements">Appropriate Size for Interactive Elements</h3><p>A very common problem is having <strong>icons or buttons that are too small</strong>, which limits interaction and can make the app difficult&mdash;or even impossible&mdash;to use for some users.</p><p>For this reason, it is recommended to respect minimum sizes for interactive elements:</p><ul><li><p><strong>iOS:</strong> minimum <strong>44 &times; 44 pt</strong><br />This recommendation comes from Apple&rsquo;s Human Interface Guidelines, where this minimum size is established for interactive elements such as buttons or tappable icons.</p></li><li><p><strong>Android</strong>: minimum <strong>48 &times; 48 dp</strong><br />On Android, this recommendation comes from the Android Accessibility Guidelines and Material Design.</p></li></ul><p>In .NET MAUI, we can apply this easily, for example:</p><pre class=" language-xml"><code class="prism  language-xml">&lt;Button Text="Continue" 
 HeightRequest="48" 
 Padding="16,12" /&gt;
</code></pre><p>Or for icon ImageButton:</p><pre class=" language-xml"><code class="prism  language-xml">&lt;ImageButton Source="close.png" 
 WidthRequest="48" 
 HeightRequest="48" 
 Padding="12" 
 SemanticProperties.Description="Close" /&gt;
</code></pre><h2 id="understandable">Understandable</h2><p>This principle states that the information and interactions within our app must be <strong>easy to understand</strong>.</p><p>Why is this important?</p><ul><li>Not all users have the same technical level.</li><li>Some may have cognitive difficulties.</li><li>Others are simply using the app for the first time.</li></ul><p>In mobile applications, this principle mainly translates into:</p><ul><li>Clear and direct text</li><li>Consistent navigation</li><li>Predictable actions</li><li>Error messages that explain what happened and what to do next</li></ul><p>Some examples of Understandable in .NET MAUI:</p><h3 id="clear-language-in-text-and-labels">Clear Language in Text and Labels</h3><p>Avoid ambiguous or overly technical texts (I&rsquo;ve literally seen &ldquo;state error&rdquo; in apps &hellip; that should not happen), especially in buttons and important messages.</p><p>For example, for a save button, use text that clearly describes the action:</p><pre class=" language-xml"><code class="prism  language-xml">&lt;Button Text="Save changes" /&gt;
</code></pre><p>Once the save action is executed, if an error occurs, <strong>don&rsquo;t leave the user guessing or hanging</strong>. Tell them exactly what happened.</p><p>❌ Saving changes failed</p><p>✅ The name field cannot contain special characters</p><p>The idea is for the user to understand what happened and what the next step is, without having to interpret technical messages.</p><h2 id="robust">Robust</h2><p>This principle states that the app must be <strong>robust enough</strong> to work correctly across different environments or devices. In other words, the app should continue to work when:</p><ul><li>It runs on different versions of the operating system</li><li>It is used with screen readers such as TalkBack or VoiceOver</li><li>It is used across different platforms</li><li>It adapts to different screen sizes (small, medium and large) without affecting usability or content clarity</li></ul><p>An example of the Robust principle in <strong>.NET MAUI</strong> is the use of <strong>OnPlatform</strong>.</p><h3 id="onplatform">OnPlatform</h3><p>Although .NET MAUI abstracts many platform differences&mdash;and personally, I try to use OnPlatform as little as possible to keep maintenance easier across Android and iOS, always looking for visual elements that give me the same result&mdash;in some cases, Android and iOS behave differently, and using it becomes necessary.</p><p>If you run into that situation, you can use OnPlatform to keep the behavior on both platforms exactly how you want it:</p><pre class=" language-xml"><code class="prism  language-xml">&lt;Button Text="Continue" 
 HeightRequest="{OnPlatform iOS=44, Android=48}" 
 Padding="{OnPlatform iOS='16,12', Android='16,14'}" /&gt;
</code></pre><p>This way, you respect each platform&rsquo;s recommendations while keeping an accessible and consistent experience, aligned with the <strong>Robust</strong> principle.</p><h2 id="conclusion">Conclusion</h2><p>And that&rsquo;s it!  In this article, we talked about <strong>A11y</strong> and why accessibility should be part of how we build mobile apps with <strong>.NET MAUI,</strong> not something added at the end. By understanding the <strong>POUR principles</strong> we saw how accessibility can be applied through small, intentional UI decisions.</p><p>From making content perceivable and interactions operable, to keeping things understandable and keeping our apps robust across platforms, each choice helps create a better experience for more users.</p><p>Remember: users may not know what A11Y is, but they definitely feel it when an app is accessible. </p><p>See you in the next article! &zwj;♀️✨</p><aside><hr data-sf-ec-immutable="" /><div class="row"><div class="col-4 u-normal-full u-small-mb0"><h4 class="u-fs20 u-fw5 u-lh125 u-mb0">The Next Development Discipline Is ADD</h4></div><div class="col-8"><p class="u-fs16 u-mb0"><a target="_blank" href="https://www.telerik.com/blogs/next-development-discipline-add">Accessibility-Driven Development turns WCAG into a discipline.</a> With the EU Accessibility Act as the deadline, ADD is the next discipline to drive quality.</p></div></div></aside>]]></content>
  </entry>
  <entry>
    <id>urn:uuid:d14754de-590c-4eae-a95c-5390383b1082</id>
    <title type="text">5 UX Tips for .NET MAUI Developers</title>
    <summary type="text">Following these five UX tips as a .NET MAUI developer can help keep your app user-friendly and polished.</summary>
    <published>2026-03-10T16:30:34Z</published>
    <updated>2026-06-20T04:15:38Z</updated>
    <author>
      <name>Leomaris Reyes </name>
    </author>
    <link rel="alternate" href="https://www.telerik.com/blogs/5-ux-tips-net-maui-developers?utm_medium=feed&amp;utm_source=feedpress.me&amp;utm_campaign=Feed%3A+telerik-blogs-desktop"/>
    <content type="text"><![CDATA[<p><span class="featured">Following these five UX tips as a .NET MAUI developer can help keep your app user-friendly and polished.</span></p><p>Creating a pleasant app experience doesn&rsquo;t always depend on having the most complex designs, the most harmonious colors, or the best user experience (UX). Obviously, all of this carries a lot of weight, but many times that whole system can be overshadowed by the lack of small details that can make a big difference between an average app and one that feels fast and familiar for your user.</p><p>As developers, we make UI decisions every day while writing code, and this can happen without us fully realizing it.</p><p>The day-to-day work of a developer involves making important decisions to build great applications. In this article, we&rsquo;ll focus a bit on the UI side. While we usually have design teams that decide what the app&rsquo;s colors will be, where and how buttons will be placed, developers also have the responsibility of making the right technical decisions so that the required design is implemented following best practices.</p><p>The best practics span from making decisions like which screen layout to use, whether to use an icon or an image, how to display certain information on screen, to complying with accessibility rules. UI decisions are not made only for aesthetics; they are made based on the reason behind each element we use, since they can directly impact performance and the overall experience, not just the visual aspect.</p><p>Even going a bit further, it&rsquo;s also valid for developers to add design suggestions that design teams might not think about, such as using a Lottie instead of a heavier file (besides impacting visuals, it also impacts performance), supporting dark mode, among others.</p><p>In this article, I&rsquo;ll share five design-impacting recommendations for .NET MAUI development that can help your users love using your apps.</p><h2 id="avoid-nested-layouts-as-much-as-possible">1. Avoid Nested Layouts As Much As Possible</h2><p>It&rsquo;s important to understand the potential of each layout before you start building a UI. This is because, in most cases, you can achieve exactly the same visual result using different types of layouts.</p><p>For example, the same design can be built using combinations of <code>HorizontalStackLayout</code> and <code>VerticalStackLayout</code> as by using a single grid. Visually the result may be the same, but the impact on performance is probably quite different.</p><p>Each additional layout involves more measurement and layout calculations on screen, and that, accumulated over time, ends up impacting the overall fluidity of the application.</p><p>To make this easier to understand, let&rsquo;s look at it this way: if you need to go to a place that is 10 km away, you have three options:</p><ul><li>Go by private vehicle</li><li>Go by public transportation</li><li>Go on foot</li></ul><p>All three options will allow you to reach the same destination, but not in the same way. If you walk, it will take much longer and you will arrive tired. If you use public transportation, you will spend extra time waiting and moving between stops. While if you go by private vehicle, you will arrive faster and more efficiently.</p><p>The same thing happens with layouts in an application. You can achieve the same visual result using different layout combinations, but not all of them are equally efficient. Using nested unnecessarily layouts generates more layout calculations, directly affecting performance.</p><p>One recommendation I always give is to review Grid. This layout allows you to create complex designs using a single layout, reducing the number of layouts and, therefore, the processing load.</p><p>There are also scenarios where StackLayout is completely valid. In those cases, make sure to use the one that matches your orientation&mdash;<strong>VerticalStackLayout</strong> or <strong>HorizontalStackLayout</strong>&mdash;and avoid nesting them without a clear reason.</p><p>For example, if we want to achieve a three-column, three-row layout, an example of doing it with StackLayout would be as follows:</p><pre class=" language-xml"><code class="prism  language-xml">&lt;VerticalStackLayout Padding="16" Spacing="8"&gt; 
    &lt;HorizontalStackLayout Spacing="8"&gt; 
    &lt;BoxView Color="Red" HeightRequest="40" WidthRequest="40" /&gt; 
    &lt;BoxView Color="Green" HeightRequest="40" WidthRequest="40" /&gt; 
    &lt;BoxView Color="Blue" HeightRequest="40" WidthRequest="40" /&gt; 
    &lt;/HorizontalStackLayout&gt;
     
    &lt;HorizontalStackLayout Spacing="8"&gt; 
    &lt;BoxView Color="Orange" HeightRequest="40" WidthRequest="40" /&gt; 
    &lt;BoxView Color="Purple" HeightRequest="40" WidthRequest="40" /&gt; 
    &lt;BoxView Color="Pink" HeightRequest="40" WidthRequest="40" /&gt; 
    &lt;/HorizontalStackLayout&gt;
      
    &lt;HorizontalStackLayout Spacing="8"&gt; 
    &lt;BoxView Color="Gray" HeightRequest="40" WidthRequest="40" /&gt; 
    &lt;BoxView Color="Brown" HeightRequest="40" WidthRequest="40" /&gt; 
    &lt;BoxView Color="Black" HeightRequest="40" WidthRequest="40" /&gt; 
    &lt;/HorizontalStackLayout&gt; 
&lt;/VerticalStackLayout&gt;
</code></pre><p>But if we use a Grid, it would look like this:</p><pre class=" language-xml"><code class="prism  language-xml">&lt;Grid 
    RowDefinitions="Auto,Auto,Auto" 
    ColumnDefinitions="*,*,*" 
    Padding="16" 
    RowSpacing="8" 
    ColumnSpacing="8"&gt;
 
    &lt;!-- Row 1 --&gt; 
    &lt;BoxView Grid.Row="0" Grid.Column="0" Color="Red" HeightRequest="40" /&gt; 
    &lt;BoxView Grid.Row="0" Grid.Column="1" Color="Green" HeightRequest="40" /&gt; 
    &lt;BoxView Grid.Row="0" Grid.Column="2" Color="Blue" HeightRequest="40" /&gt;
    
    &lt;!-- Row 2 --&gt; 
    &lt;BoxView Grid.Row="1" Grid.Column="0" Color="Orange" HeightRequest="40" /&gt; 
    &lt;BoxView Grid.Row="1" Grid.Column="1" Color="Purple" HeightRequest="40" /&gt; 
    &lt;BoxView Grid.Row="1" Grid.Column="2" Color="Pink" HeightRequest="40" /&gt;
    
    &lt;!-- Row 3 --&gt; 
    &lt;BoxView Grid.Row="2" Grid.Column="0" Color="Gray" HeightRequest="40" /&gt; 
    &lt;BoxView Grid.Row="2" Grid.Column="1" Color="Brown" HeightRequest="40" /&gt; 
    &lt;BoxView Grid.Row="2" Grid.Column="2" Color="Black" HeightRequest="40" /&gt;

&lt;/Grid&gt;
</code></pre><aside><hr /><div class="row"><div class="col-4 u-normal-full u-small-mb0"><h4 class="u-fs20 u-fw5 u-lh125 u-mb0">Ready to explore a more powerful grid?</h4></div><div class="col-8"><p class="u-fs16 u-mb0">Check out the Progress Telerik UI for <a target="_blank" href="https://www.telerik.com/maui-ui/datagrid">.NET MAUI DataGrid</a>, a premium prebuilt grid with tons of customization options. The whole library is available to try free for 30 days.</p></div></div><hr class="u-mb3" /></aside><h2 id="add-accessibility-to-your-apps">2. Add Accessibility to Your Apps</h2><p>Sometimes we forget about what we don&rsquo;t notice, but just because we don&rsquo;t notice it doesn&rsquo;t mean it isn&rsquo;t important. Accessibility in apps allows us to adapt our applications for people with various impairments.</p><p>One quick win is to use <strong>SemanticProperties</strong>, which basically allow you to define text to be spoken out loud when a screen reader is employed. This way, if a person visually can&rsquo;t read the text, they can listen to it and stay aware of what is happening in the app.</p><p>You can add SemanticProperties to all the visual elements you&rsquo;re working with, as I show in the following example.</p><pre class=" language-xml"><code class="prism  language-xml">&lt;Entry x:Name="lastName" SemanticProperties.Description="Last name"/&gt;
</code></pre><p>For more information, I recommend reading the article &ldquo;<a target="_blank" href="https://www.telerik.com/blogs/creating-accessible-apps-semantic-properties-dotnet-maui">Creating Accessible Apps with Semantic Properties in .NET MAUI</a>.&rdquo;</p><h2 id="use-native-gradients-instead-of-gradient-images">3. Use Native Gradients Instead of Gradient Images</h2><p><img src="https://d585tldpucybw.cloudfront.net/sfimages/default-source/blogs/2026/2026-02/gradients-sample.png?sfvrsn=833b330_2" title="Gradients sample" alt="Gradients sample" /><br /><span style="font-size:11px;">Images obtained from the <a target="_blank" href="https://docs.microsoft.com/en-us/dotnet/maui/user-interface/brushes/lineargradient">official documentation</a>.</span></p><p>I&rsquo;ve noticed that many times images are added just to simulate gradients. However, with .NET MAUI we can create our own gradients using <strong>Brushes</strong>, which allows us to avoid adding unnecessary resources that can be heavier than a definition in C# or XAML.</p><p>Using native gradients allows us to play more with colors and achieve the desired design, but they also offer great benefits such as:</p><ul><li>Reducing the size of the application by avoiding additional images</li><li>Getting a more flexible UI</li><li>Gradients adapt better to different screen sizes; whereas images can look different on some devices, which forces us to maintain multiple versions of the same image</li><li>More flexibility when handling dark mode or light mode</li></ul><p>Additionally, <strong>Brushes</strong> in .NET MAUI allow us to define linear, radial or solid gradients in a simple way, reuse them through resources and maintain greater visual consistency across the application, all with a lower performance impact compared to images.</p><p>Example in code:</p><pre class=" language-xml"><code class="prism  language-xml">&lt;Border HeightRequest="120"&gt; 
    &lt;Border.Background&gt; 
    &lt;LinearGradientBrush StartPoint="0,0" EndPoint="1,1"&gt; 
    &lt;GradientStop Color="#4FACFE" Offset="0.0" /&gt; 
    &lt;GradientStop Color="#00F2FE" Offset="1.0" /&gt; 
    &lt;/LinearGradientBrush&gt; 
    &lt;/Border.Background&gt; 
&lt;/Border&gt;
</code></pre><p>To dive deeper into this topic, I recommend reading the article &ldquo;<a target="_blank" href="https://www.telerik.com/blogs/getting-started-brushes-dotnet-maui">Getting Started With Brushes in .NET MAUI</a>.&rdquo;</p><h2 id="use-preferences-correctly">4. Use Preferences Correctly</h2><p>Basically, Preferences are used to store simple information on the device, allowing faster access. A very common example of using Preferences is when we select the &ldquo;remember my email&rdquo; option when logging into an app.</p><p>What happens is that, in some cases, Preferences may be used incorrectly. Let&rsquo;s look at some common scenarios:</p><ul><li><p><strong>Storing information that should be in the database.</strong><br />My advice is to only store simple information in Preferences&mdash;data that you need at the moment and that helps you save time by avoiding unnecessary calls to an API or the database.</p></li><li><p><strong>Storing sensitive information without protection.</strong><br />In some cases, we need to store data that could be sensitive; if this is your case, always remember to <strong>encrypt</strong> the information. This way, if someone manages to access the Preferences, they won&rsquo;t be able to read the user&rsquo;s data in plain text.</p></li></ul><p>⚠️ Keep in mind that you should only store this type of information if it is <strong>absolutely necessary</strong>. Otherwise, it&rsquo;s better not to do so.</p><p>Using Preferences is very simple. You just need the following:</p><p>A <strong>Set</strong> to store the information:</p><pre class=" language-csharp"><code class="prism  language-csharp">Preferences.Default.Set("user_name", "Leo");
</code></pre><p>A <strong>Get</strong> to retrieve it:</p><pre class=" language-csharp"><code class="prism  language-csharp">string userName = Preferences.Default.Get("user_name", "Unknown");
</code></pre><p>To dive deeper into this topic, I recommend reading the article &ldquo;<a target="_blank" href="https://www.telerik.com/blogs/exploring-preferences-net-maui">Exploring Preferences in .NET MAUI</a>.&rdquo;</p><h2 id="use-fontimagesource-instead-of-icons">5. Use FontImageSource Instead of Icons</h2><p>Devs are always thinking about better performance, so here&rsquo;s a tip. Instead of using .png icons, consider using icon fonts through FontImageSource. This allows you to continue displaying icons in your UI while keeping your app lighter, since these icons behave like text rather than images.</p><p>This brings many benefits to your application, including:</p><ul><li>Font-based icons are much easier to customize. You can change their color, size and adapt them to light or dark mode without the need to create multiple versions of the same icon.</li><li>It allows you to have fewer resources in the app, reducing its size and making UI maintenance easier.</li></ul><p>To use FontImageSource, you only need the icon code you want to work with, and you can implement it as follows:</p><pre class=" language-xml"><code class="prism  language-xml">&lt;ImageButton&gt; 
    &lt;ImageButton.Source&gt; 
    &lt;FontImageSource 
    FontFamily="MaterialIcons" 
    Glyph="&amp;#xE87C;" 
    Color="Black" 
    Size="24" /&gt; 
    &lt;/ImageButton.Source&gt; 
&lt;/ImageButton&gt;
</code></pre><p>The Glyph represents the icon that will be rendered. There are several portals where you can explore icons; as an example, you can use FontAwesome.</p><p>For example, you can go to <a target="_blank" href="https://fontawesome.com/search">https://fontawesome.com/search</a>, select an icon and in the top-right corner you&rsquo;ll see the Unicode that you can copy and paste directly into your project.
</p><h2 id="conclusion">Conclusion</h2><p>And that&rsquo;s it!  In this article, we explored how UI decisions in .NET MAUI can make a big difference in performance and maintainability. Here are some key takeaways:</p><ul><li>From choosing the right layout and avoiding unnecessary nesting, to using gradients, icon fonts, accessibility features and storing data correctly, each decision adds up.</li><li>Building a good UI is not only about how it looks, but also about how it&rsquo;s implemented. Clean, thoughtful choices help your app feel faster, lighter and more polished&mdash;without adding unnecessary complexity.</li><li>Remember: users may not notice these decisions, but they definitely feel them. </li></ul><p>See you in the next article! &zwj;♀️✨</p>]]></content>
  </entry>
</feed>
