<?xml version="1.0" encoding="UTF-8"?>
<?xml-stylesheet type="text/xsl" media="screen" href="/~files/atom-premium.xsl"?>
                                                                                                                                                                                                                                                                                                                                                                                                                                                                                                                                             
<feed xmlns="http://www.w3.org/2005/Atom" xmlns:feedpress="https://feed.press/xmlns" xmlns:media="http://search.yahoo.com/mrss/" xmlns:podcast="https://podcastindex.org/namespace/1.0">
  <feedpress:locale>en</feedpress:locale>
  <link rel="hub" href="https://feedpress.superfeedr.com/"/>
  <logo>https://static.feedpress.com/logo/telerik-blogs-web-aspnet-mvc-6185076a20de0.jpg</logo>
  <title type="text">Telerik Blogs | Web | ASP.NET MVC</title>
  <subtitle type="text">The official blog of Progress Telerik - expert articles and tutorials for developers.</subtitle>
  <id>uuid:8773e822-51d4-4202-9c00-e67ef2cf3518;id=633</id>
  <updated>2026-04-08T02:12:37Z</updated>
  <contributor>
    <name>Peter Vogel </name>
  </contributor>
  <contributor>
    <name>Maria Ivanova </name>
  </contributor>
  <contributor>
    <name>Yanko Dzhemerenov </name>
  </contributor>
  <contributor>
    <name>Assis Zang </name>
  </contributor>
  <link rel="alternate" href="https://www.telerik.com/"/>
  <link rel="self" type="application/atom+xml" href="https://feeds.telerik.com/blogs/web-aspnet-mvc"/>
  <entry>
    <id>urn:uuid:a2228ce0-ff8c-42cd-a991-cae03f6490b0</id>
    <title type="text">Getting the Right Row on the Screen in the Kendo Grid</title>
    <summary type="text">You can move any row into the user’s view screen (and save the user scrolling to find it) using the KendoGrid scrollToItem method.</summary>
    <published>2026-01-22T17:22:33Z</published>
    <updated>2026-04-08T02:12:37Z</updated>
    <author>
      <name>Peter Vogel </name>
    </author>
    <link rel="alternate" href="https://feeds.telerik.com/link/23051/17260960/getting-the-right-row-on-the-screen-in-the-kendo-grid"/>
    <content type="text"><![CDATA[<p><span class="featured">You can move any row into the user&rsquo;s view screen (and save the user scrolling to find it) using the KendoGrid scrollToItem method.</span></p><p>It&rsquo;s probably too obvious to mention, but: When your user is working with a Graphical User Interface (like, for example, a webpage) you&rsquo;re mandated to get everything the user needs <em>on the screen</em>.</p><p>If you have a grid that has more rows than will fit on the screen, that mandate boils down to getting &ldquo;the row the user wants&rdquo; onto the screen, ideally without forcing the user to scroll-and-scan to find it.</p><p>In many of the Progress Kendo UI Grids, the <code>scrollToItem</code> method lets you get the row you or the user wants onto the screen, just by asking for the object the user wants. Using <code>scrollToItem</code>, you can pull a row that&rsquo;s part of the grid&rsquo;s page but not currently visible onto the screen, pull a row already on the screen to the top of the grid, or (in many cases) even pull rows not in the grid&rsquo;s current page onto the screen. Your users, rather than having to scroll to find the item they want, can jump straight to it or you can put a row you know your user needs to see onto the screen.</p><p>The <code>scrollToItem</code> method is available in the KendoGrid for <a target="_blank" href="https://www.telerik.com/kendo-angular-ui/components/grid/api/scrolltoitemrequest">Angular</a>, <a target="_blank" href="https://www.telerik.com/aspnet-mvc/documentation/html-helpers/data-management/grid/scrolling/scroll-to-item">ASP.NET MVC</a> and <a target="_blank" href="https://www.telerik.com/kendo-jquery-ui/documentation/api/javascript/ui/grid/methods/scrolltoitem">jQuery</a>.</p><p>While the <a target="_blank" href="https://www.telerik.com/kendo-react-ui/components/grid">React Data Grid</a> and the <a target="_blank" href="https://demos.telerik.com/blazor-ui/grid/overview">Blazor Grid</a> don&rsquo;t have <code>scrollToItem</code>, you can get some of the same behavior by accessing a row&rsquo;s underlying HTML <code>&lt;tr&gt;</code> element and using the DOM&rsquo;s <a target="_blank" href="https://developer.mozilla.org/en-US/docs/Web/API/Element/scrollIntoView"><code>scrollIntoView</code> method</a> &hellip; but the Kendo <code>scrollToItem</code> method is simpler to use and, even better, ties into your data model rather than the page&rsquo;s HTML. The only real limitation on <code>scrollToItem</code> is that it doesn&rsquo;t work with <a target="_blank" href="https://www.telerik.com/aspnet-core-ui/documentation/html-helpers/data-management/grid/grouping/group-paging">grouped paging</a>.</p><h2 id="configuring-the-project">Configuring the Project</h2><p>To demonstrate using <code>scrollToItem</code>, I used the KendoGrid for ASP.NET MVC in an ASP.NET Core 8 Razor Page project. My first step was to add the Telerik.UI.for.AspNet.Core and Microsoft.AspNetCore.Mvc.NewtonSoft.Json NuGet packages to my project. After that, in the project&rsquo;s Program.cs file, I added these statements before the <code>builder.Build()</code> statement:</p><pre class=" language-csharp"><code class="prism  language-csharp">builder<span class="token punctuation">.</span>Services<span class="token punctuation">.</span><span class="token function">AddKendo</span><span class="token punctuation">(</span><span class="token punctuation">)</span><span class="token punctuation">;</span>
builder<span class="token punctuation">.</span>Services<span class="token punctuation">.</span><span class="token function">AddMvc</span><span class="token punctuation">(</span><span class="token punctuation">)</span><span class="token punctuation">.</span><span class="token function">AddNewtonsoftJson</span><span class="token punctuation">(</span>options <span class="token operator">=</span><span class="token operator">&gt;</span>
   options<span class="token punctuation">.</span>SerializerSettings<span class="token punctuation">.</span>ContractResolver <span class="token operator">=</span>
    <span class="token keyword">new</span> <span class="token class-name">DefaultContractResolver</span><span class="token punctuation">(</span><span class="token punctuation">)</span><span class="token punctuation">)</span><span class="token punctuation">;</span>
</code></pre><p>I generated a <code>List</code> of <code>Product</code> objects for my grid to display in an action method in an action method I called <code>Get</code> in a controller I called <code>ProductsManager</code>. To support retrieving data from my grid through that action method, I also added this statement after the Program.cs file&rsquo;s <code>builder.Build()</code> statement:</p><pre class=" language-csharp"><code class="prism  language-csharp">app<span class="token punctuation">.</span><span class="token function">MapControllers</span><span class="token punctuation">(</span><span class="token punctuation">)</span><span class="token punctuation">;</span>
</code></pre><p>To complete configuring the project, I added these <code>&lt;link&gt;</code> and <code>&lt;script&gt;</code> tags to my project&rsquo;s _Layout.cshtml file:</p><pre class=" language-html"><code class="prism  language-html"><span class="token tag"><span class="token tag"><span class="token punctuation">&lt;</span>link</span> <span class="token attr-name">rel</span><span class="token attr-value"><span class="token punctuation">=</span><span class="token punctuation">"</span>stylesheet<span class="token punctuation">"</span></span> <span class="token attr-name">href</span><span class="token attr-value"><span class="token punctuation">=</span><span class="token punctuation">"</span>~/lib/bootstrap/dist/css/bootstrap.min.css<span class="token punctuation">"</span></span> <span class="token punctuation">/&gt;</span></span>
<span class="token tag"><span class="token tag"><span class="token punctuation">&lt;</span>link</span> <span class="token attr-name">rel</span><span class="token attr-value"><span class="token punctuation">=</span><span class="token punctuation">"</span>stylesheet<span class="token punctuation">"</span></span> <span class="token attr-name">href</span><span class="token attr-value"><span class="token punctuation">=</span><span class="token punctuation">"</span>~/css/site.css<span class="token punctuation">"</span></span> <span class="token attr-name">asp-append-version</span><span class="token attr-value"><span class="token punctuation">=</span><span class="token punctuation">"</span>true<span class="token punctuation">"</span></span> <span class="token punctuation">/&gt;</span></span>
<span class="token tag"><span class="token tag"><span class="token punctuation">&lt;</span>link</span> <span class="token attr-name">rel</span><span class="token attr-value"><span class="token punctuation">=</span><span class="token punctuation">"</span>stylesheet<span class="token punctuation">"</span></span> <span class="token attr-name">href</span><span class="token attr-value"><span class="token punctuation">=</span><span class="token punctuation">"</span>~/ScrollItem.styles.css<span class="token punctuation">"</span></span> <span class="token attr-name">asp-append-version</span><span class="token attr-value"><span class="token punctuation">=</span><span class="token punctuation">"</span>true<span class="token punctuation">"</span></span> <span class="token punctuation">/&gt;</span></span>
<span class="token tag"><span class="token tag"><span class="token punctuation">&lt;</span>script</span> <span class="token attr-name">src</span><span class="token attr-value"><span class="token punctuation">=</span><span class="token punctuation">"</span>~/lib/bootstrap/dist/js/bootstrap.bundle.min.js<span class="token punctuation">"</span></span><span class="token punctuation">&gt;</span></span><span class="token script language-javascript"></span><span class="token tag"><span class="token tag"><span class="token punctuation">&lt;/</span>script</span><span class="token punctuation">&gt;</span></span>
<span class="token tag"><span class="token tag"><span class="token punctuation">&lt;</span>script</span> <span class="token attr-name">src</span><span class="token attr-value"><span class="token punctuation">=</span><span class="token punctuation">"</span>~/js/site.js<span class="token punctuation">"</span></span> <span class="token attr-name">asp-append-version</span><span class="token attr-value"><span class="token punctuation">=</span><span class="token punctuation">"</span>true<span class="token punctuation">"</span></span><span class="token punctuation">&gt;</span></span><span class="token script language-javascript"></span><span class="token tag"><span class="token tag"><span class="token punctuation">&lt;/</span>script</span><span class="token punctuation">&gt;</span></span>
<span class="token tag"><span class="token tag"><span class="token punctuation">&lt;</span>link</span> <span class="token attr-name">rel</span><span class="token attr-value"><span class="token punctuation">=</span><span class="token punctuation">"</span>stylesheet<span class="token punctuation">"</span></span> <span class="token attr-name">href</span><span class="token attr-value"><span class="token punctuation">=</span><span class="token punctuation">"</span>https://kendo.cdn.telerik.com/themes/12.0.1/bootstrap/bootstrap-main.css<span class="token punctuation">"</span></span> <span class="token punctuation">/&gt;</span></span>
<span class="token tag"><span class="token tag"><span class="token punctuation">&lt;</span>script</span> <span class="token attr-name">src</span><span class="token attr-value"><span class="token punctuation">=</span><span class="token punctuation">"</span>https://code.jquery.com/jquery-3.7.0.min.js<span class="token punctuation">"</span></span><span class="token punctuation">&gt;</span></span><span class="token script language-javascript"></span><span class="token tag"><span class="token tag"><span class="token punctuation">&lt;/</span>script</span><span class="token punctuation">&gt;</span></span>
<span class="token tag"><span class="token tag"><span class="token punctuation">&lt;</span>script</span> <span class="token attr-name">src</span><span class="token attr-value"><span class="token punctuation">=</span><span class="token punctuation">"</span>https://kendo.cdn.telerik.com/2025.3.1002/js/kendo.all.min.js<span class="token punctuation">"</span></span><span class="token punctuation">&gt;</span></span><span class="token script language-javascript"></span><span class="token tag"><span class="token tag"><span class="token punctuation">&lt;/</span>script</span><span class="token punctuation">&gt;</span></span>
<span class="token tag"><span class="token tag"><span class="token punctuation">&lt;</span>script</span> <span class="token attr-name">src</span><span class="token attr-value"><span class="token punctuation">=</span><span class="token punctuation">"</span>https://kendo.cdn.telerik.com/2025.3.1002/js/kendo.aspnetmvc.min.js<span class="token punctuation">"</span></span><span class="token punctuation">&gt;</span></span><span class="token script language-javascript"></span><span class="token tag"><span class="token tag"><span class="token punctuation">&lt;/</span>script</span><span class="token punctuation">&gt;</span></span>
</code></pre><h2 id="configuring-the-grid">Configuring the Grid</h2><p>For my case study, I set up a grid with a very short window:</p><pre class=" language-razor"><code class="prism  language-razor">&lt;kendo-grid name="productGrid" height="250"&gt;

&lt;/kendo-grid&gt;
</code></pre><p>Inside that kendo-grid element, I nested a <code>datasource</code> element that would retrieve 20 rows into that short space, so that I&rsquo;ll have lots of rows in the grid&rsquo;s page that weren&rsquo;t &ldquo;on the screen&rdquo; to play with. Inside the <code>datasource</code> element, I put a <code>schema</code> element, with a <code>model</code> element inside it.</p><p>That <code>model</code> element is key to having the <code>scrollToItem</code> method work: Users can ask for a row in the grid to be displayed by using the property specified in the <code>model</code> element&rsquo;s <code>id</code> attribute. The property you use here must be unique for each row on the page so, nine times out of ten, the property you pick is going to be the property on your object&rsquo;s that holds the corresponding table&rsquo;s primary key.</p><p>In my case, for the <code>Product</code> object I&rsquo;m displaying in each row of my grid, I used the object&rsquo;s <code>ProductID</code> property:</p><pre class=" language-razor"><code class="prism  language-razor">&lt;datasource type="DataSourceTagHelperType.Ajax" page-size="20"&gt;
  &lt;schema&gt;
    &lt;model id="ProductID"&gt;
    &lt;/model&gt;
  &lt;/schema&gt;
</code></pre><p>The <code>scrollToItem</code> method works as long as scrolling is enabled for the grid, in either of the grid&rsquo;s <a target="_blank" href="https://www.telerik.com/aspnet-core-ui/documentation/api/kendo.mvc.taghelpers/gridscrollablesettingstaghelper">virtual or endless scrolling modes</a>.</p><p>That means that you don&rsquo;t need to include a <code>scrollable</code> element in your grid&rsquo;s definition (the defaults are fine), but, if you do include the element:</p><ul><li>If the <code>enabled</code> attribute is present, it must be set to <code>true</code></li><li>If either of the <code>virtual</code> or <code>endless</code> attributes are present, at lest one of them must be set to <code>true</code></li></ul><p>Inside the <code>datasource</code> element, you&rsquo;ll also need a <code>transport</code> element to specify where your data is coming from. (I used the <code>Url</code> object&rsquo;s <code>Action</code> method to call my <code>Get</code> action method in my <code>ProductsManager</code> controller.):</p><pre class=" language-razor"><code class="prism  language-razor">  &lt;/schema&gt;
  &lt;transport&gt;
    &lt;read url='@Url.Action("Get", "ProductsManager")'  /&gt;
  &lt;/transport&gt;
&lt;/datasource&gt;
</code></pre><p>Following the <code>datasource</code> element, you define the columns you want displayed in the grid (and you don&rsquo;t need to include the column that you&rsquo;ll use to pull the right row onto the screen):</p><pre class=" language-razor"><code class="prism  language-razor">&lt;columns&gt;
  &lt;column field="ProductName" title="Name" /&gt;
  &lt;column field="Category" title="Category" /&gt;
  &lt;column field="Price" title="Price" /&gt;
&lt;/columns&gt;
</code></pre><h2 id="using-scrolltoitem">Using scrollToItem</h2><p>With all of that in place, you can write some JavaScript code to pull a row onto the screen. For this case study, I added a textbox to allow the user to enter the ProductID of the item they wanted to pull onto the screen. In the textbox&rsquo;s <code>onblur</code> event I called a function I named <code>MoveToItem</code>, passing a reference to the textbox to that function:</p><pre class=" language-html"><code class="prism  language-html"><span class="token tag"><span class="token tag"><span class="token punctuation">&lt;</span>br</span><span class="token punctuation">/&gt;</span></span>
<span class="token tag"><span class="token tag"><span class="token punctuation">&lt;</span>input</span> <span class="token attr-name">onblur</span><span class="token attr-value"><span class="token punctuation">=</span><span class="token punctuation">"</span>MoveToItem(this)<span class="token punctuation">"</span></span> <span class="token punctuation">/&gt;</span></span>
<span class="token tag"><span class="token tag"><span class="token punctuation">&lt;</span>br</span> <span class="token punctuation">/&gt;</span></span>
</code></pre><p>To support calling the grid&rsquo;s <code>scrollToItem</code> method, I need a reference to the grid. In any real application, I&rsquo;ll probably need that reference multiple times so, rather than keep retrieving that reference, I declared a global variable to hold the reference and loaded that variable from a jQuery <code>onready</code> function:</p><pre class=" language-javascript"><code class="prism  language-javascript"><span class="token operator">&lt;</span>script<span class="token operator">&gt;</span>
    <span class="token keyword">let</span> grid<span class="token punctuation">;</span>
    <span class="token function">$</span><span class="token punctuation">(</span><span class="token punctuation">(</span><span class="token punctuation">)</span> <span class="token operator">=&gt;</span> <span class="token punctuation">{</span>
        grid <span class="token operator">=</span> <span class="token function">$</span><span class="token punctuation">(</span><span class="token string">"#productGrid"</span><span class="token punctuation">)</span><span class="token punctuation">.</span><span class="token function">kendoGrid</span><span class="token punctuation">(</span><span class="token punctuation">)</span><span class="token punctuation">;</span>
    <span class="token punctuation">}</span><span class="token punctuation">)</span><span class="token punctuation">;</span>
</code></pre><p>Below that function, I added my <code>MoveToItem</code> function. In that function, I called the grid&rsquo;s <code>scrollToItem</code> method, passing the method the <code>value</code> property of the textbox I passed to the function (after checking that the textbox has something in it <code>value</code> property, of course):</p><pre class=" language-javascript"><code class="prism  language-javascript"><span class="token keyword">const</span> <span class="token function-variable function">MoveToItem</span> <span class="token operator">=</span> <span class="token punctuation">(</span>txt<span class="token punctuation">)</span> <span class="token operator">=&gt;</span> 
<span class="token punctuation">{</span>
    <span class="token keyword">if</span> <span class="token punctuation">(</span>txt<span class="token punctuation">.</span>value<span class="token punctuation">)</span>
    <span class="token punctuation">{</span>
        grid<span class="token punctuation">.</span><span class="token function">scrollToItem</span><span class="token punctuation">(</span>txt<span class="token punctuation">.</span>value<span class="token punctuation">)</span><span class="token punctuation">;</span>
    <span class="token punctuation">}</span>
<span class="token punctuation">}</span><span class="token punctuation">;</span>
</code></pre><p>When that command executes, the row with the matching <code>ProductID</code> becomes the top row in the grid (assuming there are enough rows to fill the rest of the grid&mdash;if there aren&rsquo;t enough rows, the grid will display the last rows in the grid, including the row with the matching <code>ProductID</code>).</p><h2 id="fetching-new-data">Fetching New Data</h2><p>That is, as long as the user passes a valid <code>ProductID</code> or that <code>ProductID</code> is on the current page. What do you do when that isn&rsquo;t true?</p><p>The best solution for ensuring only valid <code>ProductID</code>s are passed to your function is, of course, to have the user select a <code>ProductID</code> from a dropdown list rather than entering whatever they want into a textbox. A dropdown list would also let the user select a product name from the dropdown list but allow you to pass a <code>ProductID</code> to your function.</p><p>A typical dropdown list would look like this:</p><pre class=" language-html"><code class="prism  language-html"><span class="token tag"><span class="token tag"><span class="token punctuation">&lt;</span>select</span> <span class="token attr-name">onchange</span><span class="token attr-value"><span class="token punctuation">=</span><span class="token punctuation">"</span>MoveToItem(this)<span class="token punctuation">"</span></span><span class="token punctuation">&gt;</span></span>
  <span class="token tag"><span class="token tag"><span class="token punctuation">&lt;</span>option</span> <span class="token attr-name">value</span><span class="token attr-value"><span class="token punctuation">=</span><span class="token punctuation">"</span>top<span class="token punctuation">"</span></span><span class="token punctuation">&gt;</span></span>Select a product<span class="token tag"><span class="token tag"><span class="token punctuation">&lt;/</span>option</span><span class="token punctuation">&gt;</span></span>
  <span class="token tag"><span class="token tag"><span class="token punctuation">&lt;</span>option</span> <span class="token attr-name">value</span><span class="token attr-value"><span class="token punctuation">=</span><span class="token punctuation">"</span>A1<span class="token punctuation">"</span></span><span class="token punctuation">&gt;</span></span>Chai Tea<span class="token tag"><span class="token tag"><span class="token punctuation">&lt;/</span>option</span><span class="token punctuation">&gt;</span></span>
 ...
</code></pre><p>And the JavaScript function to work with it would look like this:</p><pre class=" language-javascript"><code class="prism  language-javascript"><span class="token keyword">const</span> <span class="token function-variable function">MoveToItem</span> <span class="token operator">=</span> <span class="token punctuation">(</span>sel<span class="token punctuation">)</span> <span class="token operator">=&gt;</span> <span class="token punctuation">{</span>
  <span class="token function">alert</span><span class="token punctuation">(</span>sel<span class="token punctuation">.</span>value<span class="token punctuation">)</span><span class="token punctuation">;</span>
  grid<span class="token punctuation">.</span><span class="token function">scrollToItem</span><span class="token punctuation">(</span>sel<span class="token punctuation">.</span>value<span class="token punctuation">)</span><span class="token punctuation">;</span>
<span class="token punctuation">}</span>
</code></pre><p>But what if, for some reason, a dropdown list isn&rsquo;t an option or the user&rsquo;s entry is valid but the object isn&rsquo;t in the grid&rsquo;s current page? Provided you have virtual scrolling enabled, you can handle both of those scenarios by passing a callback function as the second parameter to the <code>scrollToItem</code> method.</p><p>The callback function is only called if <code>scrollToItem</code> can&rsquo;t scroll to the item specified in its first parameter. So, for the &ldquo;invalid choice&rdquo; scenario, you can use that callback function to provide an error message. Basic code would look like this:</p><pre class=" language-javascript"><code class="prism  language-javascript"><span class="token keyword">const</span> <span class="token function-variable function">MoveToItem</span> <span class="token operator">=</span> <span class="token punctuation">(</span>txt<span class="token punctuation">)</span> <span class="token operator">=&gt;</span> 
<span class="token punctuation">{</span>
  <span class="token keyword">if</span> <span class="token punctuation">(</span>txt<span class="token punctuation">.</span>value<span class="token punctuation">)</span>
  <span class="token punctuation">{</span>
    grid<span class="token punctuation">.</span><span class="token function">scrollToItem</span><span class="token punctuation">(</span>txt<span class="token punctuation">.</span>value<span class="token punctuation">,</span> 
    <span class="token keyword">function</span> <span class="token punctuation">(</span><span class="token punctuation">)</span> <span class="token punctuation">{</span> 
        <span class="token keyword">if</span> <span class="token punctuation">(</span><span class="token operator">&lt;</span>&hellip;check <span class="token keyword">for</span> invalid value&hellip;<span class="token operator">&gt;</span><span class="token punctuation">)</span> 
        <span class="token punctuation">{</span>
          <span class="token function">alert</span><span class="token punctuation">(</span><span class="token string">"Invalid ProductID: "</span> <span class="token operator">+</span> txt<span class="token punctuation">.</span>value<span class="token punctuation">)</span><span class="token punctuation">;</span>
        <span class="token punctuation">}</span>
      <span class="token punctuation">}</span>
    <span class="token punctuation">)</span><span class="token punctuation">;</span>
  <span class="token punctuation">}</span>
<span class="token punctuation">}</span>
</code></pre><p>However, that callback function is also passed an object that you can use to pull a row not in the current grid page onto the screen &hellip; provided you know the row&rsquo;s position in your virtual list. All you need to do (after you determine the row&rsquo;s position in your virtual list) is pass the row&rsquo;s position to the object&rsquo;s <code>success</code> method.</p><p>This sample code doesn&rsquo;t attempt to find the right object that but just pulls the first row back onto the screen when the requested object isn&rsquo;t found on the current page:</p><pre class=" language-javascript"><code class="prism  language-javascript"><span class="token keyword">const</span> <span class="token function-variable function">MoveToItem</span> <span class="token operator">=</span> <span class="token punctuation">(</span>e<span class="token punctuation">)</span> <span class="token operator">=&gt;</span> 
<span class="token punctuation">{</span>
  <span class="token keyword">if</span> <span class="token punctuation">(</span>e<span class="token punctuation">.</span>value<span class="token punctuation">)</span>
  <span class="token punctuation">{</span>
    grid<span class="token punctuation">.</span><span class="token function">scrollToItem</span><span class="token punctuation">(</span>txt<span class="token punctuation">.</span>value<span class="token punctuation">,</span> 
      <span class="token keyword">function</span> <span class="token punctuation">(</span>o<span class="token punctuation">)</span> <span class="token punctuation">{</span> 
        <span class="token keyword">if</span> <span class="token punctuation">(</span><span class="token operator">&lt;</span>&hellip;check <span class="token keyword">for</span> invalid value&hellip;<span class="token operator">&gt;</span><span class="token punctuation">)</span> 
      <span class="token punctuation">{</span>
        <span class="token function">alert</span><span class="token punctuation">(</span><span class="token string">"Invalid ProductID: "</span> <span class="token operator">+</span> txt<span class="token punctuation">.</span>value<span class="token punctuation">)</span><span class="token punctuation">;</span>
      <span class="token punctuation">}</span>
      <span class="token keyword">else</span>
      <span class="token punctuation">{</span>
        o<span class="token punctuation">.</span><span class="token function">success</span><span class="token punctuation">(</span><span class="token number">1</span><span class="token punctuation">)</span><span class="token punctuation">;</span>
      <span class="token punctuation">}</span>
    <span class="token punctuation">}</span>
  <span class="token punctuation">}</span>
<span class="token punctuation">}</span>
</code></pre><p>In a GUI, your first goal is to provide your user whatever they need right in front of them. The <code>scrollToItem</code> method is the tool that enables you to do that while letting the user jump straight to the row they want.</p><hr /><p>Explore all the grids Progress provides with a free 30-day trial of the Progress Telerik DevCraft bundle:</p><p><a target="_blank" href="https://www.telerik.com/devcraft">Try Telerik DevCraft</a></p><img src="https://feeds.telerik.com/link/23051/17260960.gif" height="1" width="1"/>]]></content>
  </entry>
  <entry>
    <id>urn:uuid:9a6c5a42-1f4c-4364-ac42-68013afa4c4b</id>
    <title type="text">Hiding and Revealing Mobile Content with the ASP.NET MVC Responsive Panel</title>
    <summary type="text">The Telerik UI for ASP.NET MVC Responsive Panel makes it ridiculously easy to hide part of your UI (and get it back) on small screens.</summary>
    <published>2025-11-06T15:04:54Z</published>
    <updated>2026-04-08T02:12:37Z</updated>
    <author>
      <name>Peter Vogel </name>
    </author>
    <link rel="alternate" href="https://feeds.telerik.com/link/23051/17204418/hiding-revealing-mobile-content-aspnet-mvc-responsive-panel"/>
    <content type="text"><![CDATA[<p><span class="featured">The Telerik UI for ASP.NET MVC Responsive Panel makes it ridiculously easy to hide part of your UI (and get it back) on small screens.</span></p><p>When it comes to creating a responsive UI that does the right thing on all the various devices your users interact with, you need controls that will &ldquo;do the right thing&rdquo; out of the box. And, of the various controls in your UI, it&rsquo;s the UI components that take up more space that you&rsquo;re most concerned with. The <a target="_blank" href="https://www.telerik.com/aspnet-mvc/charts">Telerik UI for ASP.NET MVC Chart</a>, for example, because the whole point of having a chart is to display information with clarity.</p><p>I&rsquo;ve got two solutions here: one that I think you should do all the time and a more sophisticated solution for a more interactive UI.</p><h2 id="keeping-the-size-right">Keeping the Size Right</h2><p>The good news here is that, by default, the ASP.NET MVC Chart (a server-side wrapper for the kendo-chart widget) will resize itself to display in the space available to it on your user&rsquo;s screen. However, the chart doesn&rsquo;t adjust its size or position as screen size or orientation changes.</p><p>Essentially this means that you&rsquo;ll get the &ldquo;right&rdquo; size when your chart initially displays, but if, for example, the user switches from portrait to landscape, the chart won&rsquo;t update its display.</p><p>There&rsquo;s a simple solution for addressing this. If you have a chart that begins with this:</p><pre class=" language-razor"><code class="prism  language-razor">&lt;kendo-chart name="MyChart"&gt;
  &hellip;more&hellip;
</code></pre><p>Then just add this code to your page, substituting in whatever is in your chart&rsquo;s <code class="inline-code">name</code> attribute where I have <code class="inline-code">MyChart</code> in this code:</p><pre class=" language-javascript"><code class="prism  language-javascript"><span class="token operator">&lt;</span>script<span class="token operator">&gt;</span>
<span class="token function">$</span><span class="token punctuation">(</span>window<span class="token punctuation">)</span><span class="token punctuation">.</span><span class="token function">on</span><span class="token punctuation">(</span><span class="token string">'resize'</span><span class="token punctuation">,</span> <span class="token keyword">function</span> <span class="token punctuation">(</span><span class="token punctuation">)</span>
<span class="token punctuation">{</span>
  <span class="token function">$</span><span class="token punctuation">(</span><span class="token string">"#MyChart"</span><span class="token punctuation">)</span><span class="token punctuation">.</span><span class="token function">css</span><span class="token punctuation">(</span><span class="token string">"width"</span><span class="token punctuation">,</span> <span class="token string">"100%"</span><span class="token punctuation">)</span>
    <span class="token punctuation">.</span><span class="token function">data</span><span class="token punctuation">(</span><span class="token string">"kendoChart"</span><span class="token punctuation">)</span><span class="token punctuation">.</span><span class="token function">resize</span><span class="token punctuation">(</span><span class="token punctuation">)</span><span class="token punctuation">;</span>
<span class="token punctuation">}</span>
<span class="token punctuation">)</span><span class="token punctuation">;</span>
<span class="token operator">&lt;</span><span class="token operator">/</span>script<span class="token operator">&gt;</span>
</code></pre><p>With this code in place, your chart will now redisplay in the correct size as your browser changes shape or size. You should, I think, include this code in any page where you&rsquo;re displaying a chart (I&rsquo;m going to assume this code is in place for the rest of this post, for example).</p><h2 id="more-interactivity">More Interactivity</h2><p>But now, I&rsquo;m going to take advantage of a more sophisticated solution for handling a UI with a chart: leveraging the <a target="_blank" href="https://www.telerik.com/aspnet-mvc/responsive-panel">Responsive Panel for ASP.NET MVC</a> (a server-side wrapper for the Kendo UI Responsive Panel widget). The Responsive Panel lets you automatically tuck content out of the way as the user&rsquo;s screen gets smaller, replacing that content with a button that allows the user to display the hidden content.</p><p>That means, for example, you can have a grid and a chart on the page and have the chart disappear when space gets tight &hellip; but still make the chart available when the user wants it. This UI for example, has a grid, followed by a chart, followed by some additional information.</p><p><img src="https://d585tldpucybw.cloudfront.net/sfimages/default-source/blogs/2025/2025-08/chart-in-responsive-grid-1.png?sfvrsn=2c9acca8_2" alt="A Web page showing a grid across the top of the page, followed by a chart (also running across the page), and followed by another section with the heading “Caveats and Warnings.”" /></p><p>With the Responsive Panel, I can have that chart disappear on smaller screens to free up space for the other sections while giving the user the ability to bring back the chart on demand. And that turns out to be ridiculously easy to implement.</p><h2 id="integrating-the-responsive-panel">Integrating the Responsive Panel</h2><p>In my example, my initial layout would look something like this:</p><pre class=" language-razor"><code class="prism  language-razor">&lt;h2&gt;Data&lt;/h2&gt;
&lt;kendo-grid name="MyGrid"&gt;
  &hellip;grid&hellip;
&lt;/kendo-grid&gt;

&lt;h2&gt;Chart&lt;/h2&gt;
&lt;kendo-chart name="MyChart"&gt;
  &hellip;chart&hellip;
&lt;/kendo-chart&gt;

&lt;h2&gt;Caveats and Warnings&lt;/h2&gt;
  &hellip;content&hellip;
</code></pre><p>To have the chart disappear when space gets tight, all I have to do is wrap my chart (and any related content) in the Responsive Panel tag helper. You just need to set three attributes on the panel&rsquo;s tag helper:</p><ul><li><code class="inline-code">name</code>: Whatever name you want to use to refer to the grid.</li><li><code class="inline-code">breakpoint</code>: The width, in pixels, when the panel should disappear.</li><li><code class="inline-code">orientation</code>: This is where the content will appear and can be any one of <code class="inline-code">top</code>, <code class="inline-code">bottom</code>, <code class="inline-code">left</code> or <code class="inline-code">right</code>. Feel free to experiment, but you probably want top.</li></ul><p>This example will cause my chart to disappear from the screen when the screen width is less than 700 pixels:</p><pre class=" language-razor"><code class="prism  language-razor">  &hellip;grid&hellip;
&lt;/kendo-grid&gt;

&lt;kendo-responsivepanel name="MyPanel"
  breakpoint="700"
  orientation="top"&gt;

  &lt;h2&gt;Chart&lt;/h2&gt;
  &lt;kendo-chart name="MyChart"&gt;
    &hellip;chart&hellip;
  &lt;/kendo-chart&gt;

&lt;/kendo-responsivepanel&gt;

&lt;h2&gt;Caveats and Warnings&lt;/h2&gt;
  &hellip;content&hellip;
</code></pre><p>Finally, somewhere on the page (and outside of the responsive panel), add a button to hide and display the panel, assigning it the CSS class rule <code class="inline-code">k-rpanel-toggle</code> so that the panel can find it. Something like this would work:</p><pre class=" language-razor"><code class="prism  language-razor">&lt;button id="panelButton" class="k-rpanel-toggle"&gt;
  Show Chart
&lt;/button&gt;
&lt;br/&gt;
&lt;kendo-repsonsivepanel &hellip;
</code></pre><p>Now, with those changes, when the window gets too small (whether because the user has adjusted the size of their browser window, the user is viewing the page on a smartphone or the user rotates out of landscape mode into portrait mode on their tablet), your chart will get out of the way and be replaced by your button:</p><p><img src="https://d585tldpucybw.cloudfront.net/sfimages/default-source/blogs/2025/2025-08/chart-in-responsive-grid-2.png?sfvrsn=aee24f3f_2" alt="A Web page from the previous screenshot but in a narrower display. The page still shows the grid across the top of the page and a button with the caption “Show Chart” has appeared above the grid. The chart is gone and the section with the heading “Caveats and Warnings” has moved up to under the grid" /></p><p>If the user clicks the button, the panel content (my chart, in this case) reappears, sized to fit in the appropriate space. When the chart is displayed, clicking the button will tuck the content back away.</p><p><img src="https://d585tldpucybw.cloudfront.net/sfimages/default-source/blogs/2025/2025-08/chart-in-responsive-grid-3.png?sfvrsn=b117b855_2" alt="The chart from the previous screenshot but the chart is now displaying under the grid but has been resized to fit into the narrower window." /></p><h2 id="enhancing-the-ui">Enhancing the UI</h2><p>There are a couple of enhancements you might want to make. First, the caption I have on my button&mdash;&ldquo;Show Chart&rdquo; &mdash;isn&rsquo;t really appropriate once the panel appears because clicking the button will now <em>hide</em> the chart. I could go with a more generic caption on the button (e.g., just &ldquo;Chart&rdquo;), or I could change the caption on the button when the chart is visible.</p><p>Second, there might also be scenarios where I want to open (or close) the panel from my application&rsquo;s client-side code. If, for example, if I&rsquo;m allowing my user to change data in the grid, I might want to redisplay the chart after the user saves their changes so that users can see a visual representation of their changes. I can do both of those things with a little bit of code.</p><p>To handle updating the button&rsquo;s caption, I add some jQuery-enabled code to run when my page is ready to display. In that code, I grab references to the button that controls my panel and the panel itself. With those references, I can use the panel&rsquo;s <code class="inline-code">bind</code> method to wire up functions that the button&rsquo;s caption as the panel&rsquo;s <code class="inline-code">open</code> and <code class="inline-code">close</code> events fire (jQuery&rsquo;s <code class="inline-code">text</code> function will let me change the button&rsquo;s caption).</p><p>Here&rsquo;s what that code looks like:</p><pre class=" language-javascript"><code class="prism  language-javascript">  <span class="token function">$</span><span class="token punctuation">(</span> <span class="token punctuation">(</span><span class="token punctuation">)</span> <span class="token operator">=&gt;</span> <span class="token punctuation">{</span>
    <span class="token keyword">let</span> btn <span class="token operator">=</span> <span class="token function">$</span><span class="token punctuation">(</span><span class="token string">"#panelButton"</span><span class="token punctuation">)</span><span class="token punctuation">;</span>
    <span class="token keyword">let</span> panel <span class="token operator">=</span> <span class="token function">$</span><span class="token punctuation">(</span><span class="token string">"#MyPanel"</span><span class="token punctuation">)</span><span class="token punctuation">.</span><span class="token function">data</span><span class="token punctuation">(</span><span class="token string">"kendoResponsivePanel"</span><span class="token punctuation">)</span><span class="token punctuation">;</span>
      panel<span class="token punctuation">.</span><span class="token function">bind</span><span class="token punctuation">(</span><span class="token string">"open"</span><span class="token punctuation">,</span> <span class="token punctuation">(</span><span class="token punctuation">)</span> <span class="token operator">=&gt;</span> btn<span class="token punctuation">.</span><span class="token function">text</span><span class="token punctuation">(</span><span class="token string">"Hide Chart"</span><span class="token punctuation">)</span>  <span class="token punctuation">)</span><span class="token punctuation">;</span>
      panel<span class="token punctuation">.</span><span class="token function">bind</span><span class="token punctuation">(</span><span class="token string">"close"</span><span class="token punctuation">,</span> <span class="token punctuation">(</span><span class="token punctuation">)</span> <span class="token operator">=&gt;</span> btn<span class="token punctuation">.</span><span class="token function">text</span><span class="token punctuation">(</span><span class="token string">"Show Chart"</span><span class="token punctuation">)</span>  <span class="token punctuation">)</span><span class="token punctuation">;</span>
    <span class="token punctuation">}</span>
<span class="token punctuation">)</span> <span class="token punctuation">;</span>
</code></pre><p>For my other scenario (opening or closing the panel from my code), I can just call the panel&rsquo;s <code class="inline-code">open</code> or <code class="inline-code">close</code> function. There&rsquo;s one caveat here, though: if you are opening or closing the panel from an interactive event (e.g., an <code class="inline-code">onclick</code> event), your function must accept the event&rsquo;s default parameter and call the parameter&rsquo;s <code class="inline-code">stopPropogation</code> function. Typical code would look like this:</p><pre class=" language-javascript"><code class="prism  language-javascript"><span class="token keyword">const</span> <span class="token function-variable function">OpenPanel</span> <span class="token operator">=</span> <span class="token punctuation">(</span>e<span class="token punctuation">)</span> <span class="token operator">=&gt;</span> <span class="token punctuation">{</span>
  e<span class="token punctuation">.</span><span class="token function">stopPropagation</span><span class="token punctuation">(</span><span class="token punctuation">)</span><span class="token punctuation">;</span>
  <span class="token function">$</span><span class="token punctuation">(</span><span class="token string">"#MyPanel"</span><span class="token punctuation">)</span><span class="token punctuation">.</span><span class="token function">data</span><span class="token punctuation">(</span><span class="token string">"kendoResponsivePanel"</span><span class="token punctuation">)</span><span class="token punctuation">.</span><span class="token function">open</span><span class="token punctuation">(</span><span class="token punctuation">)</span><span class="token punctuation">;</span>
<span class="token punctuation">}</span>
</code></pre><p>Of course, as with all the Telerik UI for ASP.NET MVC components, there&rsquo;s more you can do here if you want. Rather than provide your own button, for example, the panel will generate a hamburger menu for you. This <a target="_blank" href="https://demos.telerik.com/kendo-ui/responsive-panel/index">demo</a> demonstrates that and integrates the panel with a sidebar that slides in from the side of the screen.</p><p>But if all you need is to get some content out of the way when space gets tight, you&rsquo;ve got all you need to make that happen.</p><p>Try all this out yourself with a free 30-trial of the Telerik UI for ASP.NET MVC library:</p><p><a href="https://www.telerik.com/try/ui-for-asp.net-mvc" target="_blank" class="Btn">Get Started</a></p><img src="https://feeds.telerik.com/link/23051/17204418.gif" height="1" width="1"/>]]></content>
  </entry>
  <entry>
    <id>urn:uuid:797c9d5d-0b66-4d34-a652-dded04c3b26f</id>
    <title type="text">Deploying ASP.NET Core Applications with Docker—Part 2</title>
    <summary type="text">Due to its flexibility and simplicity, Docker makes it easy to manage applications and their dependencies. In this second part about Docker with ASP.NET Core, we will see how to add a SQL Server database to the application and how to run it in a Docker container using Docker Compose.</summary>
    <published>2025-01-23T10:13:04Z</published>
    <updated>2026-04-08T02:12:37Z</updated>
    <author>
      <name>Assis Zang </name>
    </author>
    <link rel="alternate" href="https://feeds.telerik.com/link/23051/16945670/deploying-aspnet-core-applications-docker-part-2"/>
    <content type="text"><![CDATA[<p><span class="featured">Due to its flexibility and simplicity, Docker makes it easy to manage applications and their dependencies. In this second part about Docker with ASP.NET Core, we will see how to add a SQL Server database to the application and how to run it in a Docker container using Docker Compose.</span></p><p>In the <a href="https://www.telerik.com/blogs/deploying-aspnet-core-applications-docker-part-1" target="_blank">first part</a>, we saw an introduction to Docker, understanding how it works and its advantages compared to virtual machines. In addition, we created our first Dockerfile and executed the commands to deploy an ASP.NET Core MVC application running in a Docker container.</p><p>In that example, we used the .NET in-memory storage resources as the database, but in real-world scenarios, it is common to use SQL databases such as SQL Server and MySQL. And that is what we will cover in this post.</p><p>Using the application from the last post, we will create a connection to an SQL Server database and create a container for it. In addition, we will see how to configure Docker to execute Entity Framework Core commands when deploying a new Docker image of the application.</p><h2 id="configuring-the-base-application">Configuring the Base Application</h2><p>In this post, we will take advantage of the application created in the first part, just modifying what is necessary. So, you can use the following Git command to download the base application via HTTPS. If you prefer, you can access the remote repository at this link: <a target="_blank" href="https://github.com/zangassis/reminder-list">https://github.com/zangassis/reminder-list</a>.</p><pre class=" language-bash"><code class="prism  language-bash"><span class="token function">git</span> clone https://github.com/zangassis/reminder-list.git
</code></pre><p>Then, let&rsquo;s add the Entity Framework Core and SQL Server dependencies to the application. Open the project with your code editor and click on the file with the <code class="inline-code">.csproj</code> extension. Add the following code to it:</p><pre class=" language-csharp"><code class="prism  language-csharp"><span class="token operator">&lt;</span>PackageReference Include<span class="token operator">=</span><span class="token string">"Microsoft.EntityFrameworkCore .Design"</span> Version<span class="token operator">=</span><span class="token string">"9.0.0"</span><span class="token operator">&gt;</span>
      <span class="token operator">&lt;</span>IncludeAssets<span class="token operator">&gt;</span>runtime<span class="token punctuation">;</span> build<span class="token punctuation">;</span> native<span class="token punctuation">;</span> contentfiles<span class="token punctuation">;</span> analyzers<span class="token punctuation">;</span> buildtransitive<span class="token operator">&lt;</span><span class="token operator">/</span>IncludeAssets<span class="token operator">&gt;</span>
      <span class="token operator">&lt;</span>PrivateAssets<span class="token operator">&gt;</span>all<span class="token operator">&lt;</span><span class="token operator">/</span>PrivateAssets<span class="token operator">&gt;</span>
    <span class="token operator">&lt;</span><span class="token operator">/</span>PackageReference<span class="token operator">&gt;</span>
    <span class="token operator">&lt;</span>PackageReference Include<span class="token operator">=</span><span class="token string">"Microsoft.EntityFrameworkCore .SqlServer"</span> Version<span class="token operator">=</span><span class="token string">"9.0.0"</span> <span class="token operator">/</span><span class="token operator">&gt;</span>
</code></pre><p>Now let&rsquo;s create a class to execute the migration commands and create the database and tables when the application is run in the docker container.</p><p>Inside the Data folder, add the following class:</p><ul><li>DatabaseManagementService</li></ul><pre class=" language-csharp"><code class="prism  language-csharp"><span class="token keyword">using</span> Microsoft<span class="token punctuation">.</span>EntityFrameworkCore<span class="token punctuation">;</span>
<span class="token keyword">using</span> Microsoft<span class="token punctuation">.</span>EntityFrameworkCore<span class="token punctuation">.</span>Infrastructure<span class="token punctuation">;</span>
<span class="token keyword">using</span> Microsoft<span class="token punctuation">.</span>EntityFrameworkCore<span class="token punctuation">.</span>Storage<span class="token punctuation">;</span>

<span class="token keyword">namespace</span> ReminderList<span class="token punctuation">.</span>Data
<span class="token punctuation">{</span>
    <span class="token keyword">public</span> <span class="token keyword">static</span> <span class="token keyword">class</span> <span class="token class-name">DatabaseManagementService</span>
    <span class="token punctuation">{</span>
        <span class="token keyword">public</span> <span class="token keyword">static</span> <span class="token keyword">void</span> <span class="token function">MigrationInitialisation</span><span class="token punctuation">(</span>IApplicationBuilder app<span class="token punctuation">)</span>
        <span class="token punctuation">{</span>
            <span class="token keyword">using</span> <span class="token punctuation">(</span><span class="token keyword">var</span> serviceScope <span class="token operator">=</span> app<span class="token punctuation">.</span>ApplicationServices<span class="token punctuation">.</span><span class="token function">CreateScope</span><span class="token punctuation">(</span><span class="token punctuation">)</span><span class="token punctuation">)</span>
            <span class="token punctuation">{</span>
                <span class="token keyword">var</span> context <span class="token operator">=</span> serviceScope<span class="token punctuation">.</span>ServiceProvider<span class="token punctuation">.</span><span class="token generic-method function">GetRequiredService<span class="token punctuation">&lt;</span>TodoContext<span class="token punctuation">&gt;</span></span><span class="token punctuation">(</span><span class="token punctuation">)</span><span class="token punctuation">;</span>

                <span class="token keyword">if</span> <span class="token punctuation">(</span><span class="token operator">!</span>context<span class="token punctuation">.</span>Database<span class="token punctuation">.</span><span class="token generic-method function">GetService<span class="token punctuation">&lt;</span>IRelationalDatabaseCreator<span class="token punctuation">&gt;</span></span><span class="token punctuation">(</span><span class="token punctuation">)</span><span class="token punctuation">.</span><span class="token function">Exists</span><span class="token punctuation">(</span><span class="token punctuation">)</span><span class="token punctuation">)</span>
                <span class="token punctuation">{</span>
                    context<span class="token punctuation">.</span>Database<span class="token punctuation">.</span><span class="token function">Migrate</span><span class="token punctuation">(</span><span class="token punctuation">)</span><span class="token punctuation">;</span>
                <span class="token punctuation">}</span>
            <span class="token punctuation">}</span>
        <span class="token punctuation">}</span>
    <span class="token punctuation">}</span>
<span class="token punctuation">}</span>
</code></pre><p>Here, the <code class="inline-code">CreateScope()</code> method creates a scope to access dependent services registered in the <code class="inline-code">IServiceCollection</code>, such as the ApplicationDbContext. Then, the <code class="inline-code">serviceScope.ServiceProvider.GetRequiredService&lt;ApplicationDbContext&gt;()</code> retrieves an instance of <code class="inline-code">ApplicationDbContext</code>, which is the class responsible for interacting with the database. Finally, if the database does not exist, the <code class="inline-code">Migrate()</code> method applies all pending migrations, updating the database schema according to the definitions of the migrations that were generated in the project.</p><p>Now we no longer need the database memory configuration, but rather the SQL Server configuration. So, open the Program.cs file and remove the following settings:</p><pre class=" language-csharp"><code class="prism  language-csharp">builder<span class="token punctuation">.</span>Services<span class="token punctuation">.</span><span class="token generic-method function">AddDbContext<span class="token punctuation">&lt;</span>TodoContext<span class="token punctuation">&gt;</span></span><span class="token punctuation">(</span>options <span class="token operator">=</span><span class="token operator">&gt;</span>
options<span class="token punctuation">.</span><span class="token function">UseInMemoryDatabase</span><span class="token punctuation">(</span><span class="token string">"TodoList"</span><span class="token punctuation">)</span><span class="token punctuation">)</span><span class="token punctuation">;</span>
</code></pre><p>And then add the following:</p><pre class=" language-csharp"><code class="prism  language-csharp"><span class="token keyword">var</span> connectionString <span class="token operator">=</span> builder<span class="token punctuation">.</span>Configuration<span class="token punctuation">.</span><span class="token function">GetConnectionString</span><span class="token punctuation">(</span><span class="token string">"DefaultConnection"</span><span class="token punctuation">)</span><span class="token punctuation">;</span>

builder<span class="token punctuation">.</span>Services<span class="token punctuation">.</span><span class="token generic-method function">AddDbContext<span class="token punctuation">&lt;</span>TodoContext<span class="token punctuation">&gt;</span></span><span class="token punctuation">(</span>options <span class="token operator">=</span><span class="token operator">&gt;</span>
    options<span class="token punctuation">.</span><span class="token function">UseSqlServer</span><span class="token punctuation">(</span>connectionString<span class="token punctuation">)</span><span class="token punctuation">)</span><span class="token punctuation">;</span>
</code></pre><p>And right after the code snippet <code class="inline-code">app.UseAuthorization();</code>, add the call to the <code class="inline-code">MigrationInitialisation()</code> method that will execute the migration commands when the application is built in the Docker container:</p><pre class=" language-csharp"><code class="prism  language-csharp">DatabaseManagementService<span class="token punctuation">.</span><span class="token function">MigrationInitialisation</span><span class="token punctuation">(</span>app<span class="token punctuation">)</span><span class="token punctuation">;</span>
</code></pre><p>Now let&rsquo;s add the connection string in the <code class="inline-code">appsettings.json</code> file. Open the appsettings.json file and add the following:</p><pre class=" language-json"><code class="prism  language-json"><span class="token string">"ConnectionStrings"</span><span class="token punctuation">:</span> <span class="token punctuation">{</span>
    <span class="token string">"DefaultConnection"</span><span class="token punctuation">:</span> <span class="token string">"Server=mssql-server,1433;Initial Catalog=TodoListDb;User ID=SA;Password=8/geTo'7l0f4;TrustServerCertificate=true"</span>
  <span class="token punctuation">}</span><span class="token punctuation">,</span>
</code></pre><p>Here we define the SQL Server database settings, such as database name, user ID and password, among others. These settings will be the same ones used when we create the SQL Server Docker container&mdash;so for the application to be able to connect to the database in the container, these credentials need to be configured correctly.</p><h3 id="creating-the-docker-compose-file">Creating the Docker Compose File</h3><p>Docker Compose is a tool that allows you to define and run applications in multiple Docker containers.</p><p>It uses a configuration file, commonly called <code class="inline-code">docker-compose.yml</code>, where the services that make up the application are configured, such as APIs, databases, logging services, etc.</p><p><img src="https://d585tldpucybw.cloudfront.net/sfimages/default-source/blogs/2024/2024-12/docker-compose-flowchart.png?sfvrsn=3028df76_2" title="docker compose flowchart" alt="Docker compose flowchart" /></p><p>Compose is useful in scenarios where it is necessary to manage multiple containers. For example, in a backend application in ASP.NET Core, the first container would be for the application executable, and the second would be for the database (e.g. SQL Server or PostgreSQL). And a third container for additional tools (e.g., Redis, Nginx, etc.).</p><p>Instead of creating a Dockerfile for each service, we can create a Docker Compose for all services.</p><p>In the scenario of the post, we will need a container for the web application and a second container for the SQL Server database. So, in the project root folder, create a new file called <code class="inline-code">docker-compose.yml</code> and inside it add the code below:</p><pre class=" language-yaml"><code class="prism  language-yaml"><span class="token key atrule">version</span><span class="token punctuation">:</span> <span class="token string">'3'</span>
<span class="token key atrule">services</span><span class="token punctuation">:</span>
  <span class="token key atrule">mssql-server</span><span class="token punctuation">:</span>
    <span class="token key atrule">image</span><span class="token punctuation">:</span> mcr.microsoft.com/mssql/server<span class="token punctuation">:</span>2022<span class="token punctuation">-</span>latest
    <span class="token key atrule">environment</span><span class="token punctuation">:</span>
      <span class="token key atrule">ACCEPT_EULA</span><span class="token punctuation">:</span> <span class="token string">"Y"</span>
      <span class="token key atrule">SA_PASSWORD</span><span class="token punctuation">:</span> <span class="token string">"8/geTo'7l0f4"</span>
      <span class="token key atrule">MSSQL_PID</span><span class="token punctuation">:</span> Express
    <span class="token key atrule">ports</span><span class="token punctuation">:</span>
      <span class="token punctuation">-</span> <span class="token string">"1433:1433"</span>
    <span class="token key atrule">volumes</span><span class="token punctuation">:</span>
        <span class="token punctuation">-</span> ./sqlserver<span class="token punctuation">-</span>data/volumes/sqlserver<span class="token punctuation">:</span>/var/opt/mssql/data
  <span class="token key atrule">todo-app</span><span class="token punctuation">:</span>
    <span class="token key atrule">build</span><span class="token punctuation">:</span> .
    <span class="token key atrule">environment</span><span class="token punctuation">:</span>
      <span class="token key atrule">ASPNETCORE_ENVIRONMENT</span><span class="token punctuation">:</span> <span class="token string">"Development"</span>
    <span class="token key atrule">ports</span><span class="token punctuation">:</span> 
      <span class="token punctuation">-</span> <span class="token string">"8090:80"</span>
</code></pre><p>Now, let&rsquo;s analyze each part of this code.</p><ul><li><p><strong>version: '3'</strong>: Defines the version of Docker Compose to be used. In this case, Version 3 is used for modern projects.</p></li><li><p><strong>services</strong>: Contains the definition of the services that will be executed.</p></li><li><p><strong>mssql-server</strong>: Configures a container with the Microsoft SQL Server database.</p></li><li><p><strong>image</strong>: Uses the latest official SQL Server 2022 image available in the Microsoft Container Registry.</p></li><li><p><strong>environment</strong>: Defines environment variables to configure the SQL Server.</p></li><li><p><strong>ACCEPT_EULA: "Y"</strong>: Accepts the SQL Server license terms.</p></li><li><p><strong>SA_PASSWORD: "8/geTo'7l0f4"</strong> Defines the system administrator (SA) password. Following SQL Server security rules (minimum of 8 characters, with uppercase letters, lowercase letters, numbers and special characters).</p></li><li><p><strong>MSSQL_PID: "Express"</strong>: Configures SQL Server to run in the free Express edition.</p></li><li><p><strong>ports</strong>: Maps port 1433 of the container to port 1433 of the host.</p></li><li><p><strong>volumes: ./sqlserver-data/volumes/sqlserver:/var/opt/mssql/data</strong>: Mounts a persistent volume on the host to store SQL Server data, storing the data in the local folder and mapping it to the <code class="inline-code">/var/opt/mssql/data</code> directory inside the container.</p></li><li><p><strong>todo-app</strong>: Configures the ASP.NET Core application.</p></li><li><p><strong>build</strong>: Indicates that the container will be built from the current directory using the Dockerfile in this directory.</p></li><li><p><strong>environment-</strong>: Sets environment variables for the application.</p></li><li><p><strong>ASPNETCORE_ENVIRONMENT: "Development"</strong>: Sets the application environment as Development.</p></li><li><p><strong>ports</strong>: Maps port 80 of the container to port 8090 of the host, allowing access to the application via <a target="_blank" href="http://localhost:8090">http://localhost:8090</a>.</p></li></ul><h3 id="running-compose-commands">Running Compose Commands</h3><p>Before running the command to persist the docker-compose file, it is necessary to generate the EF Core migrations files, so that when the container is created, the database and tables are also created.</p><p>So, open a terminal in the root of the application and run the following command:</p><pre class=" language-bash"><code class="prism  language-bash">dotnet ef migrations add InitialCreate
</code></pre><p>Now we can run the docker command that will create the containers. In the terminal, run the following command:</p><pre class=" language-bash"><code class="prism  language-bash">docker compose up --build
</code></pre><p>Let&rsquo;s explain each command:</p><p><strong>Rebuild Container Images</strong>: The <code class="inline-code">--build</code> parameter forces Docker Compose to rebuild the container images.</p><p><strong>Upload Services</strong>: The docker-compose up command starts the services defined in the docker-compose.yml file. It creates and initializes the service containers, connecting them according to the defined network configuration.</p><p>If everything goes well, you can check the images and containers created on the docker desktop.</p><p><img src="https://d585tldpucybw.cloudfront.net/sfimages/default-source/blogs/2024/2024-12/checking-docker-images.png?sfvrsn=274df8a5_2" title="checking docker images" alt="Checking docker images" /></p><p><img src="https://d585tldpucybw.cloudfront.net/sfimages/default-source/blogs/2024/2024-12/checking-docker-containers.png?sfvrsn=4c3f9cb8_2" title="checking docker containers" alt="Checking docker containers" /></p><p>Note that there is a container for the SQL Server database and another container for the application, so if we had more applications, they could all access the same database that is running in the Docker container.</p><h2 id="testing-the-application">Testing the Application</h2><p>Now you can access the application in the browser to check if everything is working correctly. So, in the browser, access the address: <code class="inline-code">https://localhost:8090/Todo</code> and try to create a new task:</p><p><img src="https://d585tldpucybw.cloudfront.net/sfimages/default-source/blogs/2024/2024-12/testing-the-application.png?sfvrsn=fd652f9_2" title="testing the application" alt="Testing the application" /></p><p>You can access the source code with the post modifications in this GitHub repository: <a target="_blank" href="https://github.com/zangassis/reminder-list-docker-sql">Source code</a>.</p><p>Now the web application we created no longer accesses the in-memory database. Instead it accesses the SQL Server that has an instance running in the container. The image below demonstrates a flow of the example created in the post where docker compose creates an image and container for the SQL Server, in addition to using the Dockerfile to create the image and container of the ASP.NET Core application.</p><p><img src="https://d585tldpucybw.cloudfront.net/sfimages/default-source/blogs/2024/2024-12/container-and-image-flow.png?sfvrsn=87e3cb55_2" title="container and image flow" alt="Container and image flow" /></p><h2 id="conclusion">Conclusion</h2><p>Using Docker to manage applications enables agility and efficiency in system development and deployment. With a few configurations and commands, developers can quickly deploy applications in isolated environments, regardless of the operating system or machine configuration. In addition, Docker makes it easier to scale and manage dependencies, allowing teams to focus more on developing features and less on environment configuration and potential issues during this process.</p><p>In this post, we saw how to improve a project that already used Docker. In this example, we created Docker Compose, which allows the configuration of several services, without the need for a Docker file per service. Thus, we integrated the application with the SQL Server database that was also running in a Docker container. We also checked details on how to configure EF Core to execute the migration commands when the container was started.</p><p>You can use Docker to speed up the development, testing and deployment of web applications.</p><aside><hr data-sf-ec-immutable="" /><div class="row"><div class="col-4 u-normal-full u-small-mb0"><h4 class="u-fs20 u-fw5 u-lh125 u-mb0">Get Started Integrating AI in Your ASP.NET Core Applications</h4></div><div class="col-8"><p class="u-fs16 u-mb0">AI has the potential to transform data analysis and manipulation, making them significantly simpler. Learn how to <a target="_blank" href="https://www.telerik.com/blogs/get-started-integrating-ai-aspnet-core-applications">integrate an ASP.NET Core application with the OpenAI API</a> to perform data analysis directly on the backend.</p></div></div><hr class="u-mb3" /></aside><img src="https://feeds.telerik.com/link/23051/16945670.gif" height="1" width="1"/>]]></content>
  </entry>
  <entry>
    <id>urn:uuid:9a972f0b-4e20-4e7d-bcb5-2240287dff77</id>
    <title type="text">Deploying ASP.NET Core Applications with Docker—Part 1</title>
    <summary type="text">In this post, we will understand what Docker is, how it works and how to create a complete environment to deploy ASP.NET Core applications in Docker containers.</summary>
    <published>2025-01-15T18:30:01Z</published>
    <updated>2026-04-08T02:12:37Z</updated>
    <author>
      <name>Assis Zang </name>
    </author>
    <link rel="alternate" href="https://feeds.telerik.com/link/23051/16940797/deploying-aspnet-core-applications-docker-part-1"/>
    <content type="text"><![CDATA[<p><span class="featured">In this post, we will understand what Docker is, how it works and how to create a complete environment to deploy ASP.NET Core applications in Docker containers.</span></p><p>Keeping a web application running with all its dependencies involves several configurations and adjustments, which can be challenging. To help with this process, we can use Docker&mdash;a formidable tool that encapsulates the application, its dependencies and configurations in standardized containers.</p><p>In this post, we will understand how Docker works and how to start integrating its functionalities into an ASP.NET Core application.</p><h2 id="introduction-to-docker">Introduction to Docker</h2><p><a target="_blank" href="https://www.docker.com">Docker</a> is an open-source platform designed to make it easier to create, test and deploy applications in isolated environments called containers.</p><p>Docker containers are isolated environments that allow you to run applications and their dependencies independently of the operating system. They act as &ldquo;boxes&rdquo; that contain everything an application needs to function, such as libraries, environment variables, configurations and the code itself. This allows the application to run in any environment, be it on a desktop, on production servers or in the cloud, without complications or complex configurations, which is its main advantage.</p><p>Developers can use Docker to create application images, which are ready-to-run snapshots and easily share them with other developers or operations teams. This improves consistency, reduces compatibility issues and simplifies the process of deploying and maintaining complex applications.</p><p>In addition, Docker integrates well with CI/CD (Continuous Integration and Delivery) systems, making it a popular tool among teams working with microservices and highly scalable environments. For these reasons, it has become an important choice for developers and DevOps professionals looking for agility and efficiency in software development and delivery.</p><h3 id="containers-vs.-virtual-machines">Containers vs. Virtual Machines</h3><p>Containers and virtual machines (VMs) are both technologies that isolate applications and their dependencies. The two provide similar benefits, but they do so in different ways.</p><p>Containers form an abstraction at the application layer that packages code and its dependencies together. A single machine can contain multiple containers and share the operating system kernel, allowing each to run as an isolated process. Unlike VMs, containers take up very little disk space (usually tens of MBs in size) and can handle more applications at the same time.</p><p>In contrast, virtual machines provide an abstraction of physical hardware. The hypervisor allows multiple VMs to run on a single machine. Each VM is composed of a complete copy of an operating system, including the application, binaries and libraries, taking up tens of GBs. This entire process can slow down VM startup.</p><p><img src="https://d585tldpucybw.cloudfront.net/sfimages/default-source/blogs/2024/2024-12/containers-vs-virtualmachines.png?sfvrsn=7941c4d4_2" title="containers vs virtual machines" alt="Containers VS Virtual Machines" /></p><p>As can be seen in the image above, unlike virtual machines, containers do not need a hypervisor to virtualize the operating system, as they directly share the host operating system kernel.</p><p>The absence of a hypervisor reduces overhead, as there is no need to simulate hardware or load a full operating system inside each instance. This lighter structure allows containers to start faster and take up less disk space and memory compared to virtual machines.</p><h3 id="docker-images">Docker Images</h3><p>A Docker image, also known as a container image, is a &ldquo;package&rdquo; that contains everything an application needs to run inside a container.</p><p>They include the application&rsquo;s source code, libraries, dependencies, environment variables and any configurations needed for the application to function properly. These images are created through a standalone executable file called a Dockerfile. In simple terms, a Docker image is a template or blueprint that defines what the container should execute.</p><p>Each Docker image is built through layers. These layers are made up of instructions written in the Dockerfile file, which describe each step required to build the application. Each command in the Dockerfile creates a new layer.</p><p>Layers allow images to be built and run efficiently because Docker only stores the differences between each layer. Thus, if several images share the same layer, such as a base library for example, Docker only stores that layer once, avoiding unnecessary overhead.</p><p>Below is an example of a Dockerfile for an ASP.NET Core application. Note that each command creates a new layer.</p><pre class=" language-dockerfile"><code class="prism  language-dockerfile"><span class="token comment"># Step 1: Build image</span>
<span class="token keyword">FROM</span> mcr.microsoft.com/dotnet/sdk<span class="token punctuation">:</span>8.0 AS build<span class="token punctuation">-</span>env

<span class="token comment"># Sets the working directory</span>
<span class="token keyword">WORKDIR</span> /app

<span class="token comment"># Copies project files and restores dependencies</span>
<span class="token keyword">COPY</span> *.csproj ./
<span class="token keyword">RUN</span> dotnet restore

<span class="token comment"># Copy all remaining files and build the application</span>
<span class="token keyword">COPY</span> . ./
<span class="token keyword">RUN</span> dotnet publish <span class="token punctuation">-</span>c Release <span class="token punctuation">-</span>o /app/out

<span class="token comment"># Step 2: Run Image</span>
<span class="token keyword">FROM</span> mcr.microsoft.com/dotnet/aspnet<span class="token punctuation">:</span>8.0

<span class="token comment"># Sets the working directory</span>
<span class="token keyword">WORKDIR</span> /app

<span class="token comment"># Copies files from the build step to the final image</span>
<span class="token keyword">COPY</span> <span class="token punctuation">-</span><span class="token punctuation">-</span>from=build<span class="token punctuation">-</span>env /app/out .

<span class="token comment"># Exposes the port used by the application</span>
<span class="token keyword">EXPOSE</span> 80

<span class="token comment"># Defines the input command to start the application</span>
<span class="token keyword">ENTRYPOINT</span> <span class="token punctuation">[</span><span class="token string">"dotnet"</span><span class="token punctuation">,</span> <span class="token string">"ApplicationName.dll"</span><span class="token punctuation">]</span>
</code></pre><h3 id="images-vs.-containers">Images vs. Containers</h3><p>A Docker image is a static blueprint, while a container is a live instance of that image. In simple terms, the container is the execution of the image. In this sense, multiple containers can be created from the same image.</p><p>For example, an image could contain a web application such as an API or worker service, and you can launch as many containers as you need from that image, with each container operating as an independent instance of the server.</p><p><img src="https://d585tldpucybw.cloudfront.net/sfimages/default-source/blogs/2024/2024-12/images-vs-containers.png?sfvrsn=ed617eaa_4" title="images vs containers" alt="Images vs containers" /></p><h2 id="hands-on-with-docker">Hands-on with Docker</h2><p>To put Docker into practice, we will create a web application in ASP.NET Core and then we will configure Docker images and containers. So the first step is to install Docker on your computer.</p><h3 id="installing-docker-desktop">Installing Docker Desktop</h3><p>You can use the Docker Desktop tool that installs and configures what you need to have the local Docker server on your machine. To do this, simply access the <a target="_blank" href="https://docs.docker.com/engine/install/">Docker Desktop download page</a> and install the version compatible with your operating system. Currently available for Windows, Mac (macOS) and Linux.</p><p>Important: Docker Desktop has restrictions for commercial use. Therefore, before installing it, check whether or not you need a license to use it.</p><h3 id="creating-the-application">Creating the Application</h3><p>To practice using Docker, we will create an ASP.NET Core application using the MVC (Model, View, Controller) template to manage a task schedule.</p><p>To keep the focus on the Docker configurations, in this first part we will use an in-memory database, so no extra configurations will be necessary for the application to work.</p><p>You can access the project source code in this GitHub repository: <a target="_blank" href="https://github.com/zangassis/reminder-list">Reminder List</a>.</p><p>To create the base application, you can use the following .NET command:</p><pre class=" language-bash"><code class="prism  language-bash">dotnet new mvc -o ReminderList -au none
</code></pre><p>This command will create an application using the MVC template. In addition, the <code class="inline-code">-au none</code> command prevents authentication resources from being added, as they are not relevant in this context.</p><p>Now open a terminal at the root of the application and run the commands below to download the NuGet packages that will be needed.</p><pre class=" language-bash"><code class="prism  language-bash">dotnet add package Microsoft.EntityFrameworkCore. InMemory
dotnet add package Microsoft. EntityFrameworkCore
</code></pre><p>Next, inside the folder &ldquo;Models&rdquo; create the following class:</p><pre class=" language-csharp"><code class="prism  language-csharp"><span class="token keyword">namespace</span> ReminderList<span class="token punctuation">.</span>Models<span class="token punctuation">;</span>
<span class="token keyword">public</span> <span class="token keyword">class</span> <span class="token class-name">TodoItem</span>
<span class="token punctuation">{</span>
    <span class="token keyword">public</span> <span class="token keyword">int</span> Id <span class="token punctuation">{</span> <span class="token keyword">get</span><span class="token punctuation">;</span> <span class="token keyword">set</span><span class="token punctuation">;</span> <span class="token punctuation">}</span>
    <span class="token keyword">public</span> <span class="token keyword">string</span> Title <span class="token punctuation">{</span> <span class="token keyword">get</span><span class="token punctuation">;</span> <span class="token keyword">set</span><span class="token punctuation">;</span> <span class="token punctuation">}</span>
    <span class="token keyword">public</span> <span class="token keyword">bool</span> IsCompleted <span class="token punctuation">{</span> <span class="token keyword">get</span><span class="token punctuation">;</span> <span class="token keyword">set</span><span class="token punctuation">;</span> <span class="token punctuation">}</span> <span class="token operator">=</span> <span class="token keyword">false</span><span class="token punctuation">;</span>
<span class="token punctuation">}</span>
</code></pre><p>Then, create a new folder called &ldquo;Data&rdquo; and, inside it, create the following class:</p><pre class=" language-csharp"><code class="prism  language-csharp"><span class="token keyword">using</span> Microsoft<span class="token punctuation">.</span>EntityFrameworkCore<span class="token punctuation">;</span>
<span class="token keyword">using</span> ReminderList<span class="token punctuation">.</span>Models<span class="token punctuation">;</span>

<span class="token keyword">namespace</span> ReminderList<span class="token punctuation">.</span>Data<span class="token punctuation">;</span>
<span class="token keyword">public</span> <span class="token keyword">class</span> <span class="token class-name">TodoContext</span> <span class="token punctuation">:</span> DbContext
<span class="token punctuation">{</span>
    <span class="token keyword">public</span> <span class="token function">TodoContext</span><span class="token punctuation">(</span>DbContextOptions<span class="token operator">&lt;</span>TodoContext<span class="token operator">&gt;</span> options<span class="token punctuation">)</span> <span class="token punctuation">:</span> <span class="token keyword">base</span><span class="token punctuation">(</span>options<span class="token punctuation">)</span> <span class="token punctuation">{</span> <span class="token punctuation">}</span>

    <span class="token keyword">public</span> DbSet<span class="token operator">&lt;</span>TodoItem<span class="token operator">&gt;</span> TodoItems <span class="token punctuation">{</span> <span class="token keyword">get</span><span class="token punctuation">;</span> <span class="token keyword">set</span><span class="token punctuation">;</span> <span class="token punctuation">}</span>
<span class="token punctuation">}</span>
</code></pre><p>Inside the folder &ldquo;Controller&rdquo; add the following controller:</p><pre class=" language-csharp"><code class="prism  language-csharp"><span class="token keyword">using</span> Microsoft<span class="token punctuation">.</span>AspNetCore<span class="token punctuation">.</span>Mvc<span class="token punctuation">;</span>
<span class="token keyword">using</span> Microsoft<span class="token punctuation">.</span>EntityFrameworkCore<span class="token punctuation">;</span>
<span class="token keyword">using</span> ReminderList<span class="token punctuation">.</span>Data<span class="token punctuation">;</span>
<span class="token keyword">using</span> ReminderList<span class="token punctuation">.</span>Models<span class="token punctuation">;</span>

<span class="token keyword">namespace</span> ReminderList<span class="token punctuation">.</span>Controllers
<span class="token punctuation">{</span>
    <span class="token keyword">public</span> <span class="token keyword">class</span> <span class="token class-name">TodoController</span> <span class="token punctuation">:</span> Controller
    <span class="token punctuation">{</span>
        <span class="token keyword">private</span> <span class="token keyword">readonly</span> TodoContext _context<span class="token punctuation">;</span>

        <span class="token keyword">public</span> <span class="token function">TodoController</span><span class="token punctuation">(</span>TodoContext context<span class="token punctuation">)</span>
        <span class="token punctuation">{</span>
            _context <span class="token operator">=</span> context<span class="token punctuation">;</span>
        <span class="token punctuation">}</span>

        <span class="token keyword">public</span> <span class="token keyword">async</span> Task<span class="token operator">&lt;</span>IActionResult<span class="token operator">&gt;</span> <span class="token function">Index</span><span class="token punctuation">(</span><span class="token punctuation">)</span>
        <span class="token punctuation">{</span>
            <span class="token keyword">return</span> <span class="token function">View</span><span class="token punctuation">(</span><span class="token keyword">await</span> _context<span class="token punctuation">.</span>TodoItems<span class="token punctuation">.</span><span class="token function">ToListAsync</span><span class="token punctuation">(</span><span class="token punctuation">)</span><span class="token punctuation">)</span><span class="token punctuation">;</span>
        <span class="token punctuation">}</span>

        <span class="token keyword">public</span> IActionResult <span class="token function">Create</span><span class="token punctuation">(</span><span class="token punctuation">)</span>
        <span class="token punctuation">{</span>
            <span class="token keyword">return</span> <span class="token function">View</span><span class="token punctuation">(</span><span class="token punctuation">)</span><span class="token punctuation">;</span>
        <span class="token punctuation">}</span>

        <span class="token punctuation">[</span>HttpPost<span class="token punctuation">]</span>
        <span class="token punctuation">[</span>ValidateAntiForgeryToken<span class="token punctuation">]</span>
        <span class="token keyword">public</span> <span class="token keyword">async</span> Task<span class="token operator">&lt;</span>IActionResult<span class="token operator">&gt;</span> <span class="token function">Create</span><span class="token punctuation">(</span>TodoItem todoItem<span class="token punctuation">)</span>
        <span class="token punctuation">{</span>
            <span class="token keyword">if</span> <span class="token punctuation">(</span>ModelState<span class="token punctuation">.</span>IsValid<span class="token punctuation">)</span>
            <span class="token punctuation">{</span>
                _context<span class="token punctuation">.</span><span class="token function">Add</span><span class="token punctuation">(</span>todoItem<span class="token punctuation">)</span><span class="token punctuation">;</span>
                <span class="token keyword">await</span> _context<span class="token punctuation">.</span><span class="token function">SaveChangesAsync</span><span class="token punctuation">(</span><span class="token punctuation">)</span><span class="token punctuation">;</span>
                <span class="token keyword">return</span> <span class="token function">RedirectToAction</span><span class="token punctuation">(</span><span class="token function">nameof</span><span class="token punctuation">(</span>Index<span class="token punctuation">)</span><span class="token punctuation">)</span><span class="token punctuation">;</span>
            <span class="token punctuation">}</span>
            <span class="token keyword">return</span> <span class="token function">View</span><span class="token punctuation">(</span>todoItem<span class="token punctuation">)</span><span class="token punctuation">;</span>
        <span class="token punctuation">}</span>

        <span class="token keyword">public</span> <span class="token keyword">async</span> Task<span class="token operator">&lt;</span>IActionResult<span class="token operator">&gt;</span> <span class="token function">Edit</span><span class="token punctuation">(</span><span class="token keyword">int</span><span class="token operator">?</span> id<span class="token punctuation">)</span>
        <span class="token punctuation">{</span>
            <span class="token keyword">if</span> <span class="token punctuation">(</span>id <span class="token operator">==</span> <span class="token keyword">null</span><span class="token punctuation">)</span>
            <span class="token punctuation">{</span>
                <span class="token keyword">return</span> <span class="token function">NotFound</span><span class="token punctuation">(</span><span class="token punctuation">)</span><span class="token punctuation">;</span>
            <span class="token punctuation">}</span>

            <span class="token keyword">var</span> todoItem <span class="token operator">=</span> <span class="token keyword">await</span> _context<span class="token punctuation">.</span>TodoItems<span class="token punctuation">.</span><span class="token function">FindAsync</span><span class="token punctuation">(</span>id<span class="token punctuation">)</span><span class="token punctuation">;</span>
            <span class="token keyword">if</span> <span class="token punctuation">(</span>todoItem <span class="token operator">==</span> <span class="token keyword">null</span><span class="token punctuation">)</span>
            <span class="token punctuation">{</span>
                <span class="token keyword">return</span> <span class="token function">NotFound</span><span class="token punctuation">(</span><span class="token punctuation">)</span><span class="token punctuation">;</span>
            <span class="token punctuation">}</span>
            <span class="token keyword">return</span> <span class="token function">View</span><span class="token punctuation">(</span>todoItem<span class="token punctuation">)</span><span class="token punctuation">;</span>
        <span class="token punctuation">}</span>

        <span class="token punctuation">[</span>HttpPost<span class="token punctuation">]</span>
        <span class="token punctuation">[</span>ValidateAntiForgeryToken<span class="token punctuation">]</span>
        <span class="token keyword">public</span> <span class="token keyword">async</span> Task<span class="token operator">&lt;</span>IActionResult<span class="token operator">&gt;</span> <span class="token function">Edit</span><span class="token punctuation">(</span><span class="token keyword">int</span> id<span class="token punctuation">,</span> TodoItem todoItem<span class="token punctuation">)</span>
        <span class="token punctuation">{</span>
            <span class="token keyword">if</span> <span class="token punctuation">(</span>id <span class="token operator">!=</span> todoItem<span class="token punctuation">.</span>Id<span class="token punctuation">)</span>
            <span class="token punctuation">{</span>
                <span class="token keyword">return</span> <span class="token function">NotFound</span><span class="token punctuation">(</span><span class="token punctuation">)</span><span class="token punctuation">;</span>
            <span class="token punctuation">}</span>

            <span class="token keyword">if</span> <span class="token punctuation">(</span>ModelState<span class="token punctuation">.</span>IsValid<span class="token punctuation">)</span>
            <span class="token punctuation">{</span>
                <span class="token keyword">try</span>
                <span class="token punctuation">{</span>
                    _context<span class="token punctuation">.</span><span class="token function">Update</span><span class="token punctuation">(</span>todoItem<span class="token punctuation">)</span><span class="token punctuation">;</span>
                    <span class="token keyword">await</span> _context<span class="token punctuation">.</span><span class="token function">SaveChangesAsync</span><span class="token punctuation">(</span><span class="token punctuation">)</span><span class="token punctuation">;</span>
                <span class="token punctuation">}</span>
                <span class="token keyword">catch</span> <span class="token punctuation">(</span><span class="token class-name">DbUpdateConcurrencyException</span><span class="token punctuation">)</span>
                <span class="token punctuation">{</span>
                    <span class="token keyword">if</span> <span class="token punctuation">(</span><span class="token operator">!</span><span class="token function">TodoItemExists</span><span class="token punctuation">(</span>todoItem<span class="token punctuation">.</span>Id<span class="token punctuation">)</span><span class="token punctuation">)</span>
                    <span class="token punctuation">{</span>
                        <span class="token keyword">return</span> <span class="token function">NotFound</span><span class="token punctuation">(</span><span class="token punctuation">)</span><span class="token punctuation">;</span>
                    <span class="token punctuation">}</span>
                    <span class="token keyword">else</span>
                    <span class="token punctuation">{</span>
                        <span class="token keyword">throw</span><span class="token punctuation">;</span>
                    <span class="token punctuation">}</span>
                <span class="token punctuation">}</span>
                <span class="token keyword">return</span> <span class="token function">RedirectToAction</span><span class="token punctuation">(</span><span class="token function">nameof</span><span class="token punctuation">(</span>Index<span class="token punctuation">)</span><span class="token punctuation">)</span><span class="token punctuation">;</span>
            <span class="token punctuation">}</span>
            <span class="token keyword">return</span> <span class="token function">View</span><span class="token punctuation">(</span>todoItem<span class="token punctuation">)</span><span class="token punctuation">;</span>
        <span class="token punctuation">}</span>

        <span class="token keyword">public</span> <span class="token keyword">async</span> Task<span class="token operator">&lt;</span>IActionResult<span class="token operator">&gt;</span> <span class="token function">Delete</span><span class="token punctuation">(</span><span class="token keyword">int</span><span class="token operator">?</span> id<span class="token punctuation">)</span>
        <span class="token punctuation">{</span>
            <span class="token keyword">if</span> <span class="token punctuation">(</span>id <span class="token operator">==</span> <span class="token keyword">null</span><span class="token punctuation">)</span>
            <span class="token punctuation">{</span>
                <span class="token keyword">return</span> <span class="token function">NotFound</span><span class="token punctuation">(</span><span class="token punctuation">)</span><span class="token punctuation">;</span>
            <span class="token punctuation">}</span>

            <span class="token keyword">var</span> todoItem <span class="token operator">=</span> <span class="token keyword">await</span> _context<span class="token punctuation">.</span>TodoItems
                <span class="token punctuation">.</span><span class="token function">FirstOrDefaultAsync</span><span class="token punctuation">(</span>m <span class="token operator">=</span><span class="token operator">&gt;</span> m<span class="token punctuation">.</span>Id <span class="token operator">==</span> id<span class="token punctuation">)</span><span class="token punctuation">;</span>
            <span class="token keyword">if</span> <span class="token punctuation">(</span>todoItem <span class="token operator">==</span> <span class="token keyword">null</span><span class="token punctuation">)</span>
            <span class="token punctuation">{</span>
                <span class="token keyword">return</span> <span class="token function">NotFound</span><span class="token punctuation">(</span><span class="token punctuation">)</span><span class="token punctuation">;</span>
            <span class="token punctuation">}</span>

            <span class="token keyword">return</span> <span class="token function">View</span><span class="token punctuation">(</span>todoItem<span class="token punctuation">)</span><span class="token punctuation">;</span>
        <span class="token punctuation">}</span>

        <span class="token punctuation">[</span>HttpPost<span class="token punctuation">,</span> <span class="token function">ActionName</span><span class="token punctuation">(</span><span class="token string">"Delete"</span><span class="token punctuation">)</span><span class="token punctuation">]</span>
        <span class="token punctuation">[</span>ValidateAntiForgeryToken<span class="token punctuation">]</span>
        <span class="token keyword">public</span> <span class="token keyword">async</span> Task<span class="token operator">&lt;</span>IActionResult<span class="token operator">&gt;</span> <span class="token function">DeleteConfirmed</span><span class="token punctuation">(</span><span class="token keyword">int</span> id<span class="token punctuation">)</span>
        <span class="token punctuation">{</span>
            <span class="token keyword">var</span> todoItem <span class="token operator">=</span> <span class="token keyword">await</span> _context<span class="token punctuation">.</span>TodoItems<span class="token punctuation">.</span><span class="token function">FindAsync</span><span class="token punctuation">(</span>id<span class="token punctuation">)</span><span class="token punctuation">;</span>
            _context<span class="token punctuation">.</span>TodoItems<span class="token punctuation">.</span><span class="token function">Remove</span><span class="token punctuation">(</span>todoItem<span class="token punctuation">)</span><span class="token punctuation">;</span>
            <span class="token keyword">await</span> _context<span class="token punctuation">.</span><span class="token function">SaveChangesAsync</span><span class="token punctuation">(</span><span class="token punctuation">)</span><span class="token punctuation">;</span>
            <span class="token keyword">return</span> <span class="token function">RedirectToAction</span><span class="token punctuation">(</span><span class="token function">nameof</span><span class="token punctuation">(</span>Index<span class="token punctuation">)</span><span class="token punctuation">)</span><span class="token punctuation">;</span>
        <span class="token punctuation">}</span>

        <span class="token keyword">private</span> <span class="token keyword">bool</span> <span class="token function">TodoItemExists</span><span class="token punctuation">(</span><span class="token keyword">int</span> id<span class="token punctuation">)</span>
        <span class="token punctuation">{</span>
            <span class="token keyword">return</span> _context<span class="token punctuation">.</span>TodoItems<span class="token punctuation">.</span><span class="token function">Any</span><span class="token punctuation">(</span>e <span class="token operator">=</span><span class="token operator">&gt;</span> e<span class="token punctuation">.</span>Id <span class="token operator">==</span> id<span class="token punctuation">)</span><span class="token punctuation">;</span>
        <span class="token punctuation">}</span>
    <span class="token punctuation">}</span>
<span class="token punctuation">}</span>
</code></pre><p>Now, let&rsquo;s create the views files. Inside the &ldquo;Views&rdquo; folder, create a new folder called &ldquo;Todo&rdquo; and, inside that, add the following views:</p><ul><li>Index.cshtml</li></ul><pre class=" language-cshtml"><code class="prism  language-cshtml">@model IEnumerable&lt;ReminderList.Models.TodoItem&gt;

&lt;h2&gt;Todo List&lt;/h2&gt;

&lt;p&gt;
    &lt;a asp-action="Create"&gt;Add New Task&lt;/a&gt;
&lt;/p&gt;

&lt;table class="table"&gt;
    &lt;thead&gt;
        &lt;tr&gt;
            &lt;th&gt;Title&lt;/th&gt;
            &lt;th&gt;Is Completed&lt;/th&gt;
            &lt;th&gt;&lt;/th&gt;
        &lt;/tr&gt;
    &lt;/thead&gt;
    &lt;tbody&gt;
    @foreach (var item in Model)
    {
        &lt;tr&gt;
            &lt;td&gt;@item.Title&lt;/td&gt;
            &lt;td&gt;@item.IsCompleted&lt;/td&gt;
            &lt;td&gt;
                &lt;a asp-action="Edit" asp-route-id="@item.Id"&gt;Edit&lt;/a&gt; |
                &lt;a asp-action="Delete" asp-route-id="@item.Id"&gt;Delete&lt;/a&gt;
            &lt;/td&gt;
        &lt;/tr&gt;
    }
    &lt;/tbody&gt;
&lt;/table&gt;
</code></pre><ul><li>Create.cshtml</li></ul><pre class=" language-cshtml"><code class="prism  language-cshtml">@model ReminderList.Models.TodoItem

&lt;h2&gt;Create New Task&lt;/h2&gt;

&lt;form asp-action="Create"&gt;
    &lt;div class="form-group"&gt;
        &lt;label asp-for="Title"&gt;&lt;/label&gt;
        &lt;input asp-for="Title" class="form-control" /&gt;
    &lt;/div&gt;
    &lt;div class="form-group"&gt;
        &lt;label asp-for="IsCompleted"&gt;&lt;/label&gt;
        &lt;input asp-for="IsCompleted" class="form-check-input" type="checkbox" /&gt;
    &lt;/div&gt;
    &lt;button type="submit" class="btn btn-primary"&gt;Create&lt;/button&gt;
&lt;/form&gt;
</code></pre><ul><li>Edit.cshtml</li></ul><pre class=" language-cshtml"><code class="prism  language-cshtml">@model ReminderList.Models.TodoItem

&lt;h2&gt;Edit Task&lt;/h2&gt;

&lt;form asp-action="Edit"&gt;
    &lt;input type="hidden" asp-for="Id" /&gt;
    &lt;div class="form-group"&gt;
        &lt;label asp-for="Title"&gt;&lt;/label&gt;
        &lt;input asp-for="Title" class="form-control" /&gt;
    &lt;/div&gt;
    &lt;div class="form-group"&gt;
        &lt;label asp-for="IsCompleted"&gt;&lt;/label&gt;
        &lt;input asp-for="IsCompleted" class="form-check-input" type="checkbox" /&gt;
    &lt;/div&gt;
    &lt;button type="submit" class="btn btn-primary"&gt;Save&lt;/button&gt;
&lt;/form&gt;
</code></pre><ul><li>Delete.cshtml</li></ul><pre class=" language-cshtml"><code class="prism  language-cshtml">@model ReminderList.Models.TodoItem

&lt;h2&gt;Delete Task&lt;/h2&gt;

&lt;div&gt;
    &lt;h4&gt;Are you sure you want to delete this task?&lt;/h4&gt;
    &lt;div&gt;
        &lt;p&gt;
            &lt;strong&gt;Title:&lt;/strong&gt; @Model.Title
        &lt;/p&gt;
        &lt;p&gt;
            &lt;strong&gt;Is Completed:&lt;/strong&gt; @Model.IsCompleted
        &lt;/p&gt;
    &lt;/div&gt;
    &lt;form asp-action="DeleteConfirmed"&gt;
        &lt;input type="hidden" asp-for="Id" /&gt;
        &lt;button type="submit" class="btn btn-danger"&gt;Delete&lt;/button&gt;
        &lt;a asp-action="Index" class="btn btn-secondary"&gt;Cancel&lt;/a&gt;
    &lt;/form&gt;
&lt;/div&gt;
</code></pre><p>Then, in the Program.cs file, replace the code by following:</p><pre class=" language-csharp"><code class="prism  language-csharp"><span class="token keyword">using</span> Microsoft<span class="token punctuation">.</span>EntityFrameworkCore<span class="token punctuation">;</span>
<span class="token keyword">using</span> ReminderList<span class="token punctuation">.</span>Data<span class="token punctuation">;</span>

<span class="token keyword">var</span> builder <span class="token operator">=</span> WebApplication<span class="token punctuation">.</span><span class="token function">CreateBuilder</span><span class="token punctuation">(</span>args<span class="token punctuation">)</span><span class="token punctuation">;</span>
builder<span class="token punctuation">.</span>WebHost<span class="token punctuation">.</span><span class="token function">UseUrls</span><span class="token punctuation">(</span><span class="token string">"http://*:80"</span><span class="token punctuation">)</span><span class="token punctuation">;</span>

<span class="token comment">// Add services to the container.</span>
builder<span class="token punctuation">.</span>Services<span class="token punctuation">.</span><span class="token function">AddControllersWithViews</span><span class="token punctuation">(</span><span class="token punctuation">)</span><span class="token punctuation">;</span>

<span class="token operator">/</span><span class="token operator">/</span> Configure the <span class="token keyword">in</span><span class="token operator">-</span>memory database
builder<span class="token punctuation">.</span>Services<span class="token punctuation">.</span><span class="token generic-method function">AddDbContext<span class="token punctuation">&lt;</span>TodoContext<span class="token punctuation">&gt;</span></span><span class="token punctuation">(</span>options <span class="token operator">=</span><span class="token operator">&gt;</span>
options<span class="token punctuation">.</span><span class="token function">UseInMemoryDatabase</span><span class="token punctuation">(</span><span class="token string">"TodoList"</span><span class="token punctuation">)</span><span class="token punctuation">)</span><span class="token punctuation">;</span>

<span class="token keyword">var</span> app <span class="token operator">=</span> builder<span class="token punctuation">.</span><span class="token function">Build</span><span class="token punctuation">(</span><span class="token punctuation">)</span><span class="token punctuation">;</span>

<span class="token keyword">if</span> <span class="token punctuation">(</span>app<span class="token punctuation">.</span>Environment<span class="token punctuation">.</span><span class="token function">IsDevelopment</span><span class="token punctuation">(</span><span class="token punctuation">)</span><span class="token punctuation">)</span>
<span class="token punctuation">{</span>
    app<span class="token punctuation">.</span><span class="token function">UseDeveloperExceptionPage</span><span class="token punctuation">(</span><span class="token punctuation">)</span><span class="token punctuation">;</span>
<span class="token punctuation">}</span>
<span class="token keyword">else</span>
<span class="token punctuation">{</span>
    app<span class="token punctuation">.</span><span class="token function">UseExceptionHandler</span><span class="token punctuation">(</span><span class="token string">"/Home/Error"</span><span class="token punctuation">)</span><span class="token punctuation">;</span>
<span class="token punctuation">}</span>

app<span class="token punctuation">.</span><span class="token function">UseHttpsRedirection</span><span class="token punctuation">(</span><span class="token punctuation">)</span><span class="token punctuation">;</span>
app<span class="token punctuation">.</span><span class="token function">UseStaticFiles</span><span class="token punctuation">(</span><span class="token punctuation">)</span><span class="token punctuation">;</span>

app<span class="token punctuation">.</span><span class="token function">UseRouting</span><span class="token punctuation">(</span><span class="token punctuation">)</span><span class="token punctuation">;</span>

app<span class="token punctuation">.</span><span class="token function">UseAuthorization</span><span class="token punctuation">(</span><span class="token punctuation">)</span><span class="token punctuation">;</span>

app<span class="token punctuation">.</span><span class="token function">MapControllerRoute</span><span class="token punctuation">(</span>
name<span class="token punctuation">:</span> <span class="token string">"default"</span><span class="token punctuation">,</span>
pattern<span class="token punctuation">:</span> <span class="token string">"{controller=Home}/{action=Index}/{id?}"</span><span class="token punctuation">)</span><span class="token punctuation">;</span>

app<span class="token punctuation">.</span><span class="token function">Run</span><span class="token punctuation">(</span><span class="token punctuation">)</span><span class="token punctuation">;</span>
</code></pre><p>The code <code class="inline-code">builder.WebHost.UseUrls("http://*:80");</code> defines the URL and port on which the ASP.NET Core server will listen for HTTP requests when running in the Docker container.</p><h3 id="creating-the-dockerfile">Creating the Dockerfile</h3><p>The next step is to create the file that will contain the steps for creating the Docker image.</p><p>In the application root directory, create a file called <code class="inline-code">Dockerfile</code>. It doesn&rsquo;t need an extension, just use exactly that name.</p><p>Then, open the file with a text editor, and add the following code to it:</p><pre><code>FROM mcr.microsoft.com/dotnet/sdk:9.0 AS build

WORKDIR /app

COPY *.csproj ./
RUN dotnet restore

COPY . ./

RUN dotnet publish -c Release -o /app/publish

FROM mcr.microsoft.com/dotnet/aspnet:9.0 AS base

ENV ASPNETCORE_ENVIRONMENT=Development

WORKDIR /app

COPY --from=build /app/publish .

EXPOSE 80

ENTRYPOINT ["dotnet", "ReminderList.dll"]
</code></pre><p>Now let&rsquo;s analyze each part of this code.</p><ul><li><p><code class="inline-code">FROM mcr.microsoft.com/dotnet/sdk:9.0 AS build</code>: Sets the base image (.NET 9.0 SDK) for the build step, including compilation tools, dependency restoration and application publishing.</p></li><li><p><code class="inline-code">WORKDIR /app</code>: Sets the working directory to /app inside the container, where all the commands below will be executed.</p></li><li><p><code class="inline-code">COPY *.csproj ./</code>: Copies the application&rsquo;s .csproj (project) file to the container&rsquo;s <code class="inline-code">/app</code> working directory. This allows only the files needed to restore dependencies to be copied initially, avoiding the need to rebuild dependencies every time a code file changes.</p></li><li><p><code class="inline-code">RUN dotnet restore</code>: Restores the project dependencies, downloading the NuGet packages required for the application. This process helps to take advantage of the Docker cache for restoration.</p></li><li><p><code class="inline-code">COPY . ./</code>: Copies the entire contents of the current directory to the container, including the source code.</p></li><li><p><code class="inline-code">RUN dotnet publish -c Release -o /app/publish</code>: Compiles and publishes the application in Release mode to the /app/publish directory, creating an optimized, production-ready version.</p></li><li><p><code class="inline-code">FROM mcr.microsoft.com/dotnet/aspnet:9.0 AS base</code>: Sets the base image for the final step, which uses the ASP.NET Core 9.0 runtime.</p></li><li><p><code class="inline-code">ENV ASPNETCORE_ENVIRONMENT=Development</code>: Sets the ASPNETCORE_ENVIRONMENT environment variable to Development, indicating that the application will run in development mode.</p></li><li><p><code class="inline-code">WORKDIR /app</code>: Sets the working directory of the final step to <code class="inline-code">/app</code>.</p></li><li><p><code class="inline-code">COPY --from=build /app/publish .</code>: Copies the published folder (<code class="inline-code">/app/publish</code>) from the build step to the current <code class="inline-code">/app</code> directory in the final step.</p></li><li><p><code class="inline-code">EXPOSE 80</code>: Exposes port 80 of the container so that it can receive HTTP connections.</p></li><li><p><code class="inline-code">ENTRYPOINT ["dotnet", "ReminderList.dll"]</code>: Sets the entry point for the application. This specifies that when the container starts, it will execute the <code class="inline-code">dotnet ReminderList.dll</code> command, which will launch the ASP.NET Core application executable.</p></li></ul><h3 id="creating-the-docker-image">Creating the Docker Image</h3><p>Now that we understand what each step of the Dockerfile means, we can run the command that will use that file and create the docker image.</p><p>So, in the root of the application, open a terminal and run the following command:</p><pre class=" language-bash"><code class="prism  language-bash">docker build -t todoapp <span class="token keyword">.</span>
</code></pre><p><code class="inline-code">docker build</code>: This command builds a Docker image based on the Dockerfile found in the current directory represented by the dot (.).</p><p>The <code class="inline-code">-t flag</code> (short for &ldquo;tag&rdquo;) allows you to give a name to the image that will be built, which in this case is todoapp. This helps identify the image in the local Docker repository.</p><p>Below you can see the result of the execution and if everything went well.</p><p><a href="https://d585tldpucybw.cloudfront.net/sfimages/default-source/blogs/2024/2024-12/commands-result.png?sfvrsn=5040738f_2" target="_blank"><img src="https://d585tldpucybw.cloudfront.net/sfimages/default-source/blogs/2024/2024-12/commands-result.png?sfvrsn=5040738f_2" title="commands result" alt="Commands result" /></a></p><p>Now you can check the newly created image in Docker Desktop.</p><p><a href="https://d585tldpucybw.cloudfront.net/sfimages/default-source/blogs/2024/2024-12/docker-image.png?sfvrsn=b6b8a43f_2" target="_blank"><img src="https://d585tldpucybw.cloudfront.net/sfimages/default-source/blogs/2024/2024-12/docker-image.png?sfvrsn=b6b8a43f_2" title="docker image" alt="Docker image" /></a></p><h3 id="creating-the-docker-container">Creating the Docker Container</h3><p>With the image ready, we can create the docker container that will use the image to create an instance of our application.</p><p>So, in the application root directory, run the following command:</p><pre class=" language-bash"><code class="prism  language-bash">docker run -d -p 8080:80 --name todoapp-container todoapp
</code></pre><p>Let&rsquo;s analyze each of these commands in detail:</p><ul><li><p><code class="inline-code">docker run</code>: Starts a new container based on a Docker image.</p></li><li><p><code class="inline-code">-d</code>: Stands for detached mode. The container will run in the background, allowing you to continue using the terminal while the container runs.</p></li><li><p><code class="inline-code">-p 8080:80</code>: Maps a host port to the container port, where 8080 is the port on your computer (host) that will be used to access the application, while 80 is the port exposed by the container (as specified in the Dockerfile by the EXPOSE 80 command).</p></li><li><p><code class="inline-code">--name todoapp-container</code>: Gives a custom name to the container.</p></li><li><p><code class="inline-code">todoapp</code>: This is the name of the Docker image created previously. This image will be used to create the container.</p></li></ul><p>The result of the commands can be seen below, as well as the container in Docker Desktop:</p><p><a href="https://d585tldpucybw.cloudfront.net/sfimages/default-source/blogs/2024/2024-12/container-commands-result.png?sfvrsn=26d5d1ce_2" target="_blank"><img src="https://d585tldpucybw.cloudfront.net/sfimages/default-source/blogs/2024/2024-12/container-commands-result.png?sfvrsn=26d5d1ce_2" title="container commands result" alt="Container commands result" /></a></p><p>Note that this command outputs an ID. This is the ID of the container that was created and started by the <code class="inline-code">docker run</code> command. It is a unique identifier generated by Docker for the newly created container.</p><p><a href="https://d585tldpucybw.cloudfront.net/sfimages/default-source/blogs/2024/2024-12/docker-container.png?sfvrsn=6de181d1_2" target="_blank"><img src="https://d585tldpucybw.cloudfront.net/sfimages/default-source/blogs/2024/2024-12/docker-container.png?sfvrsn=6de181d1_2" title="docker container" alt="Docker container" /></a></p><p>Now that the container has been created, we can access the address <a target="_blank" href="http://localhost:8080/Todo">http://localhost:8080/Todo</a> to see the application online.</p><p><a href="https://d585tldpucybw.cloudfront.net/sfimages/default-source/blogs/2024/2024-12/accessing-the-application.png?sfvrsn=970f7354_2" target="_blank"><img src="https://d585tldpucybw.cloudfront.net/sfimages/default-source/blogs/2024/2024-12/accessing-the-application.png?sfvrsn=970f7354_2" title="accessing the application" alt="Accessing the application" /></a></p><h2 id="conclusion">Conclusion</h2><p>Docker is a tool that makes it easier to deploy applications and has many advantages when compared to traditional virtual machines since each Docker container can share the same operating system as the host. Furthermore, Docker&rsquo;s mechanisms are extremely efficient, requiring only what is necessary to get the applications up and running, which makes the deployment process extremely agile.</p><p>In this post, we created a simple application to manage a list of tasks using the ASP.NET Core MVC template. Then, we created a Dockerfile and ran the commands to get the application running in a Docker container.</p><p>In the <a href="https://www.telerik.com/blogs/deploying-aspnet-core-applications-docker-part-2" target="_blank">next part</a>, we will add a database to the application, create an individual container for it and see how to verify that everything works correctly.</p><img src="https://feeds.telerik.com/link/23051/16940797.gif" height="1" width="1"/>]]></content>
  </entry>
  <entry>
    <id>urn:uuid:a0bd601e-7fda-46b2-b9a6-57ed1dce7a3b</id>
    <title type="text">ASP.NET Core/MVC Productivity Tools with Telerik</title>
    <summary type="text">Whether you’re working with ASP.NET Core or ASP.NET MVC, Telerik can help you be more productive. See some of my favorite tools.</summary>
    <published>2023-10-26T14:39:00Z</published>
    <updated>2026-04-08T02:12:37Z</updated>
    <author>
      <name>Jefferson S. Motta </name>
    </author>
    <link rel="alternate" href="https://feeds.telerik.com/link/23051/16411615/aspnet-core-mvc-productivity-tools-telerik"/>
    <content type="text"><![CDATA[<p><span class="featured">Whether you&rsquo;re working with ASP.NET Core or ASP.NET MVC, Telerik can help you be more productive. See some of my favorite tools.</span></p><p>Progress Telerik is a popular suite of user interface components and productivity tools that enhances the development process when used with ASP.NET Core and MVC. It integrates with tools like Visual Studio, Visual Studio Code and ReSharper. Telerik components
    can also coexist with tools like Git, Docker, Entity Framework Profiler, Fiddler and LINQPad, aiding in the creation of a comprehensive and efficient development environment.</p><p>This article is filled with practical examples and scenarios, demonstrating the tangible benefits of Telerik <a target="_blank" href="https://www.telerik.com/aspnet-core-ui">UI for ASP.NET Core</a> and <a target="_blank" href="https://www.telerik.com/aspnet-mvc">UI for ASP.NET MVC</a> development.</p><h2 id="boost-your-productivity-with-telerik-and-your-favorite-tools">Boost Your Productivity with Telerik and Your Favorite Tools</h2><p>In the constant pursuit of enhancing productivity and efficiency, Telerik emerges as a highly beneficial tool for developers.</p><p>This widely recognized collection of UI components and productivity-enhancing tools syncs flawlessly with ASP.NET Core and MVC, significantly improving the development workflow.</p><h3 id="visual-studio-and-visual-studio-code">Visual Studio and Visual Studio Code</h3><p>Telerik offers extensions for both Visual Studio and Visual Studio Code that enhance the productivity of ASP.NET Core and MVC developers.</p><p>The Telerik UI for ASP.NET Core and UI for MVC extensions allow developers to use and customize a vast library of ready-to-use UI components directly in the <a target="_blank" href="https://visualstudio.microsoft.com/">Visual Studio</a> environment. It also provides project templates and configuration wizards to simplify the creation and setup of new projects.</p><p>As a full-featured integrated development environment (IDE), Visual Studio has built-in support for developing applications using Microsoft&rsquo;s technology stack, including ASP.NET Core and MVC. It features powerful debugging tools, extensive code-editing
    features and integrated testing tools.</p><p><a target="_blank" href="https://code.visualstudio.com/">Visual Studio Code</a> is a lighter, more streamlined code editor that supports many languages. It&rsquo;s highly extensible via plugins, with features such as IntelliSense
    for intelligent completions, built-in Git integration and the ability to debug from the editor.</p><p>You don&rsquo;t have to write UI code from scratch; choose an element from the Telerik UI library, add it to your project and customize it as needed. As a result, Telerik UI can significantly speed up developing user interfaces for your applications.</p><p>The Telerik UI for ASP.NET Core extensions provides UI components for various purposes, such as data input (e.g., text boxes and dropdown lists), data display (grids and charts), and layout (panels and windows). Each component comes with a set of customization
    options to tailor the look and behavior of the element to your specific needs.</p><h4 id="project-templates-and-configuration-wizards">Project Templates and Configuration Wizards</h4><p>Progress Telerik&rsquo;s templates for ASP.NET Core and MVC projects can further enhance your productivity in Visual Studio. Create a new project and choose one of these templates for a preconfigured project setup with Telerik UI components already integrated.
    The Configuration Wizard can guide you through the setup and configuration of Telerik components, making the process even more straightforward.</p><h3 id="resharper">ReSharper</h3><p>ReSharper is a renowned productivity tool developed by JetBrains that enhances the functionality of the Visual Studio IDE. It provides a series of features that streamline and optimize the process of writing code, particularly C#, the language of choice
    for ASP.NET Core and MVC. Using Telerik with ReSharper comes with several benefits:</p><h4 id="code-navigation-and-analysis">Code Navigation and Analysis</h4><p>ReSharper offers powerful features for navigating the codebase. Features such as <code class="inline-code">Go to Definition</code>, <code class="inline-code">Find Usages</code>&nbsp;and <code class="inline-code">Navigate To</code> can help developers
    better understand the Telerik UI components and their work.</p><p>ReSharper also has a sophisticated static code analysis engine that can automatically highlight errors and potential improvements in your code, including the part of the codebase that uses Telerik components.</p><h4 id="refactoring-capabilities">Refactoring Capabilities</h4><p>ReSharper provides extensive automated code refactoring with C# and other languages. If you&rsquo;re writing custom logic using Telerik components or extending the components, these refactoring tools can simplify efforts to keep your code clean and maintainable.</p><h4 id="quick-fixes">Quick Fixes</h4><p>When ReSharper&rsquo;s code analysis detects an issue in your code, it often provides one or more quick fixes. This feature is equally effective when working with Telerik UI components. If you make a mistake&mdash;say, misusing a Telerik API&mdash;ReSharper
    can often offer a quick fix to automatically correct the issue.</p><h4 id="code-templates">Code Templates</h4><p>ReSharper provides several code templates for common coding patterns and practices. You can also define your templates if you often find yourself writing the same boilerplate code when using Telerik components.</p><h4 id="seamless-integration-with-visual-studio">Seamless Integration with Visual Studio</h4><p>ReSharper integrates seamlessly with Visual Studio, enhancing existing functionality without disrupting your workflow. You can use Telerik components and ReSharper&rsquo;s advanced features side by side, enjoying a streamlined, efficient development
    process.
</p><h3 id="telerik-fiddler-everywhere">Telerik Fiddler Everywhere</h3><p>If you&rsquo;re using Telerik components in an ASP.NET Core or MVC application that also exposes APIs, you can use <a target="_blank" href="https://www.telerik.com/fiddler/fiddler-everywhere">Fiddler Everywhere</a> to test these APIs. For example, if you have a Telerik UI Grid that fetches data from an API, you can use Fiddler Everywhere to send requests to this API to ensure it works correctly and returns the
    expected data. As a result, you can isolate any issues and ensure that the API does not cause any problems with your UI components.</p><h4 id="simulating-api-responses">Simulating API Responses</h4><p>Fiddler Everywhere allows you to simulate API responses, which can be handy in the development phase of your application. For example, if your application includes a Telerik UI component that depends on an API still under development, you can use
    Fiddler to mock the API response. The tool allows you to continue developing and testing the UI component without waiting for the API to be finished.</p><p>Telerik UI for ASP.NET Core, UI for ASP.NET MVC and Fiddler Everywhere are all part of the <a target="_blank" href="https://www.telerik.com/devcraft">Telerik DevCraft bundle</a>,
 and using them together can contribute to a more robust and efficient development process. Add in the automated testing power of Telerik Test Studio (also included with DevCraft), and you have an absolute powerhouse team on your side.</p><h3 id="git">Git</h3><p>Telerik components do not interact with <a target="_blank" href="https://git-scm.com/">Git</a> directly. However, Git is essential to code versioning, in any project.</p><h3 id="docker">Docker</h3><p>Docker is an open-source initiative that simplifies the process of deploying applications as autonomous, transportable containers that can operate both on cloud-based and on-site platforms. Telerik components do not interact directly with <a target="_blank" href="https://www.docker.com/products/docker-desktop/">Docker</a>, but you can deploy your ASP.NET Core or MVC applications using Docker containers, regardless of whether you&rsquo;re using Telerik components in your application.
</p><h3 id="entity-framework-profiler">Entity Framework Profiler</h3><p><a target="_blank" href="https://entityframework-extensions.net/ef-profiler">Entity Framework Profiler</a> is a visual debugging tool that operates in real time, providing development teams with crucial insights into using
    Entity Framework, LINQ or Entity SQL. This tool enables developers to enhance their application&rsquo;s data access layer by profiling and optimizing LINQ queries. It reveals a wealth of performance metrics and offers a thorough perspective on
    the performance of the data access code.</p><p>Using Progress Telerik&rsquo;s data access libraries and components, such as Telerik Data Access, Entity Framework Profiler becomes a powerful tool for debugging and optimizing.</p><h4 id="monitoring-database-interactions">Monitoring Database Interactions</h4><p>With Entity Framework Profiler, you can monitor the real-time interactions between your application and your database&mdash;both the queries sent to the database and the results returned. For example, suppose you&rsquo;re using Telerik Data Access
    to interact with your database. The profiler can give you detailed insight into these interactions, helping you understand what&rsquo;s happening when you execute a query or update operation.</p><h4 id="optimizing-queries">Optimizing Queries</h4><p>Entity Framework Profiler can help you optimize your database queries. If you&rsquo;re using Telerik Data Access to write LINQ queries, for example, the profiler can analyze these queries and suggest improvements. It can highlight potentially problematic
    areas such as unnecessary joins, select N+1 issues, unbounded result sets and more.</p><h4 id="identifying-performance-bottlenecks">Identifying Performance Bottlenecks</h4><p>Identify performance bottlenecks in your data access code with a wealth of performance metrics from Entity Framework Profiler. For example, if a particular operation using Telerik Data Access is slow, the profiler can help you understand why and what
    you can do about it.</p><h4 id="debugging">Debugging</h4><p>Entity Framework Profiler isn&rsquo;t just for optimization; it can also help you debug your code. For example, if something isn&rsquo;t working as expected in your data access code, you can use the profiler to track down the issue. It can show you
    the exact SQL being sent to the database and the returned results, allowing you to see if the problem lies in your database, your queries or elsewhere.</p><p>When using Progress Telerik&rsquo;s data access libraries and components, incorporating a tool like Entity Framework Profiler in your development process can significantly enhance your understanding of your data access code and improve its performance,
    efficiency and reliability.</p><h3 id="linqpad">LINQPad</h3><p><a target="_blank" href="https://www.linqpad.net/">LINQPad</a> is an influential utility that allows developers to dynamically query databases using a current query language known as LINQ. It offers an informal, streamlined
    platform for prototyping, experimenting and testing queries. LINQPad serves as an excellent supplementary tool when incorporating Progress Telerik&rsquo;s data access libraries into your project.</p><h4 id="query-testing-and-optimization">Query Testing and Optimization</h4><p>With LINQPad, you can test your LINQ queries interactively before integrating them into your project, to ensure that your queries work as expected and return the desired results. Additionally, LINQPad lets you optimize your queries, providing insights
    about potential performance issues like select N+1 problems or inefficient joins. If you&rsquo;re using Progress Telerik&rsquo;s data access libraries to create LINQ queries, you can perfect them in LINQPad before moving them to your application
    code.
</p><h4 id="prototyping-and-experimenting">Prototyping and Experimenting</h4><p>LINQPad provides an excellent environment for prototyping and experimenting with new ideas. If you&rsquo;re considering different approaches to retrieving or manipulating your data with Progress Telerik&rsquo;s libraries, you can try them out in LINQPad
    before implementing them in your project. Iterating and refining your ideas can help you avoid going down a path that turns out to be unworkable or inefficient.</p><h4 id="learning-and-debugging">Learning and Debugging</h4><p>If you&rsquo;re new to LINQ or Progress Telerik&rsquo;s data access libraries, LINQPad can be an excellent learning tool. It gives you immediate feedback on your queries, so you can quickly see the effects of different approaches and learn the ins
    and outs of the libraries you&rsquo;re using. LINQPad&rsquo;s ability to execute any C# or VB expression instantly makes it an excellent tool for debugging and understanding complex code expressions.</p><h4 id="database-insights">Database Insights</h4><p>In addition to working with LINQ queries, LINQPad can provide valuable insights into your database structure. It can generate a schema and let you browse and analyze your data directly. If you&rsquo;re using Progress Telerik&rsquo;s data access libraries
    to interact with your database, this can provide you with a better understanding of your data and how your queries interact with it.</p><h2 id="conclusion">Conclusion</h2><p>If you want to boost your productivity as a developer, consider trying Telerik. Its integration with essential ASP.NET Core and MVC development tools makes it a powerful addition to your toolkit.</p><p>Try both libraries, plus more: <a href="https://www.telerik.com/try/devcraft-ultimate" target="_blank" class="Btn">Try DevCraft</a></p><img src="https://feeds.telerik.com/link/23051/16411615.gif" height="1" width="1"/>]]></content>
  </entry>
  <entry>
    <id>urn:uuid:165b0b64-2112-429e-85a9-3b07780e9e7b</id>
    <title type="text">How to Migrate from Telerik UI for ASP.NET MVC to UI for ASP.NET Core</title>
    <summary type="text">If you’re already using Telerik UI for ASP.NET MVC and want to switch your project to ASP.NET Core, the steps to migrate are easier than you think.</summary>
    <published>2023-09-13T07:33:01Z</published>
    <updated>2026-04-08T02:12:37Z</updated>
    <author>
      <name>Jefferson S. Motta </name>
    </author>
    <link rel="alternate" href="https://feeds.telerik.com/link/23051/16347219/how-to-migrate-telerik-ui-aspnet-mvc-aspnet-core"/>
    <content type="text"><![CDATA[<p><span class="featured">If you&rsquo;re already using Telerik UI for ASP.NET MVC and want to switch your project to ASP.NET Core, the steps to migrate are easier than you think.</span></p><p>In this post, I will guide you in how to migrate a <a target="_blank" href="https://www.telerik.com/aspnet-mvc">Telerik UI for MVC</a> application to <a target="_blank" href="https://www.telerik.com/aspnet-core-ui">Telerik UI for ASP.NET Core</a>. In a previous post, I demonstrated how to <a href="https://www.telerik.com/blogs/5-easy-steps-migrate-aspnet-mvc-project-aspnet-core" target="_blank">migrate any MVC application to Telerik UI for ASP.NET Core</a>. So, if you need to become more familiar with Telerik, please look at that post.</p><p>Migrating a solution from Telerik UI for MVC can be easier than you imagine. The point that you need to take care of is the dependencies, like the business layer and other assemblies, from the project coded by your team.</p><p>The project used in this demonstration is the Telerik UI for MVC 5 Grid and Menu.</p><p><img src="https://d585tldpucybw.cloudfront.net/sfimages/default-source/blogs/2023/2023-07/mvc-grid-menu.png?sfvrsn=bde6482_3" alt="Create New Project showing Grid and Menu template selected" /></p><p>Now let&rsquo;s do it. Follow these steps.</p><ol><li>Create a new blank project using the Telerik extension menu on Visual Studio. In this sample, I am using Visual Studio 2022.</li></ol><p><img src="https://d585tldpucybw.cloudfront.net/sfimages/default-source/blogs/2023/2023-07/create-new-telerik-project.png?sfvrsn=7bb956fb_3" alt="Extensions - Telerik - Telerik UI for ASP.NET Core - Create New Telerik Project" /></p><ol start="2"><li>Choose the path for your application and, after that, an empty template. If you are in doubt about choosing between <a href="https://www.telerik.com/blogs/using-kendo-ui-telerik-aspnet-core-tag-vs-html-helper-syntax" target="_blank">HTML or Tag Helpers, please take a look at this post that explains the differences between them</a>.</li></ol><p><img src="https://d585tldpucybw.cloudfront.net/sfimages/default-source/blogs/2023/2023-07/create-project-template.png?sfvrsn=1be82083_3" alt="Create New Project screen has templates - blank is selected" /></p><ol start="3"><li><p>Copy the Controller application files, renaming the old namespace to the new one. See the image below.</p></li><li><p>Start copying your Models; see the image below.</p></li><li><p>Copy your Views; see the image below.</p></li><li><p>Migrate your Shared files; see the image below.</p></li></ol><p><img src="https://d585tldpucybw.cloudfront.net/sfimages/default-source/blogs/2023/2023-07/controllers-models-views-shared.png?sfvrsn=b861fa11_3" alt="File structure has controllers, models, views, shared files marked in the order listed above" /></p><ol start="7"><li>Adjust your HomeController, bringing the ActionResults.</li></ol><p>The code inside your home controller should be updated with namespaces, and if your application has deprecated code, it should be replaced by a new one. Today we have lots of NuGet packages that can replace these deprecated codes.</p><p><strong>Tip:</strong> Remember to have a successful compilation of the old code before starting the migration.</p><p>If you have business layers and other dependencies, you must bring them to .NET 6/7 first.</p><p>Those are the basic steps to migrate your MVC project to Core! Pretty straightforward, but I will now show you an even easier approach.</p><h2 id="migrate-even-faster">Migrate Even Faster</h2><p>Let me share how I make this migration faster and easier.</p><ol><li>Choose a template that fits the best for your case. I chose Grid and Menu for this sample.</li></ol><p><img src="https://d585tldpucybw.cloudfront.net/sfimages/default-source/blogs/2023/2023-07/mvc-grid-menu.png?sfvrsn=bde6482_3" alt="Create New Project showing Grid and Menu template selected" /></p><ol start="2"><li><p>Repeat the steps below, changing the files to your legacy MVC project.</p></li><li><p>Copy the Controller application files; see the image below.</p></li><li><p>Start copying your Models; see the image below.</p></li><li><p>Copy your Views; see the image below.</p></li><li><p>Migrate your Shared files; see the image below.</p></li></ol><p><img src="https://d585tldpucybw.cloudfront.net/sfimages/default-source/blogs/2023/2023-07/controllers-models-views-shared.png?sfvrsn=b861fa11_3" alt="File structure has controllers, models, views, shared files marked in the order listed above" /></p><p>Adjusting the new project with your legacy code will be easier and you won&rsquo;t miss any needed references.</p><h2 id="conclusion">Conclusion</h2><p>The migration process can sometimes be frustrating due to dependencies and deprecated code, but today most of the NuGet packs already have a new version of .NET 6/7.</p><p>This post helped you to migrate smoothly and start a quick and significant advantage from the new Telerik UI for ASP.NET Core in terms of processing and quick response to end users.</p><p>You can open a support ticket at any time with Telerik&rsquo;s legendary support team, who will help you cross this journey.</p><h3 id="references">References</h3><ul><li><a href="https://www.telerik.com/blogs/5-easy-steps-migrate-aspnet-mvc-project-aspnet-core" target="_blank">5 Easy Steps to Migrate an ASP.NET MVC Project to an ASP.NET Core</a></li><li><a href="https://www.telerik.com/blogs/using-kendo-ui-telerik-aspnet-core-tag-vs-html-helper-syntax" target="_blank">Using Kendo UI with Telerik UI for ASP.NET Core: Tag vs. HTML Helper Syntax</a></li><li>Check out this <a href="https://www.telerik.com/blogs/migrate-aspnet-core-mvc-aspnet-framework-mvc" target="_blank">older blog post about migration</a> that goes into more detail and highlights many more real-world problems
        you may bump into when migrating a project, like database setup and specifics about differences in a .NET Core project configuration.</li></ul><h2>Try Now</h2><p>Both Telerik UI for ASP.NET Core and ASP.NET MVC are trustworthy products that will be supported for many years to come. We encourage you to use whichever library will best serve your project.</p><p><a href="https://www.telerik.com/try/aspnet-core-ui" class="Btn">Try UI for ASP.NET Core</a> <a href="https://www.telerik.com/try/ui-for-asp.net-mvc" target="_blank" class="Btn">Try UI for ASP.NET MVC</a></p><p>Each of the above comes with a free 30-day trial. Or try out both with Telerik <a target="_blank" href="https://www.telerik.com/devcraft">DevCraft</a>. With DevCraft, you not only have access to our professionally designed UI components for web, desktop and mobile applications, but also embedded
    reporting and report management solutions, document processing libraries and automated testing and mocking tools. The link to <a href="https://www.telerik.com/try/devcraft-ultimate" target="_blank">try DevCraft is here</a>.</p><img src="https://feeds.telerik.com/link/23051/16347219.gif" height="1" width="1"/>]]></content>
  </entry>
  <entry>
    <id>urn:uuid:f911b46c-e183-4eb2-8ba4-79a8860d104b</id>
    <title type="text">5 Easy Steps to Migrate an ASP.NET MVC Project to an ASP.NET Core</title>
    <summary type="text">Learn the five easy steps to migrate your existing ASP.NET MVC .NET 4.x/5/6 to Telerik UI for ASP.NET Core 7.</summary>
    <published>2023-08-29T15:04:00Z</published>
    <updated>2026-04-08T02:12:37Z</updated>
    <author>
      <name>Jefferson S. Motta </name>
    </author>
    <link rel="alternate" href="https://feeds.telerik.com/link/23051/16320852/5-easy-steps-migrate-aspnet-mvc-project-aspnet-core"/>
    <content type="text"><![CDATA[<p><span class="featured">Learn the five easy steps to migrate your existing ASP.NET MVC .NET 4.x/5/6 to Telerik UI for ASP.NET Core 7.</span></p><h2 id="what-is-the-difference-between-asp.net-mvc-and-asp.net-core">What is the Difference Between ASP.NET MVC and ASP.NET Core?</h2><p><img src="https://d585tldpucybw.cloudfront.net/sfimages/default-source/blogs/2023/2023-07/aspnet-mvc.png?sfvrsn=c1be5f68_3" alt="ASP.NET MVC" />&nbsp;
 &nbsp; <img src="https://d585tldpucybw.cloudfront.net/sfimages/default-source/blogs/2023/2023-07/net-core.png?sfvrsn=50fdd2b2_3" alt=".NET Core logo" /></p><p><strong>ASP.NET MVC</strong> is a web application framework developed by Microsoft that implements the model-view-controller (MVC) pattern. It is an open-source framework used for creating web applications. It allows developers to build dynamic, scalable
    and secure web applications.</p><p><strong>ASP.NET Core</strong> is a cross-platform, open-source framework for building modern, cloud-based web applications. It is highly optimized for cloud deployment and is lighter and more modular than the whole .NET framework. It is built to be modular,
    so you can choose which components you need and easily plug them in. .NET Core includes libraries for ASP.NET Core MVC, Web API and Entity Framework Core.</p><p>Next, I&rsquo;d like to introduce <strong><a target="_blank" href="https://www.telerik.com/aspnet-core-ui">Telerik UI for ASP.NET Core</a></strong>, the professional-grade
    UI component library for modern web projects. Speed up your development time and maximize your coding efficiency with the help of over 100+ pre-built components, including popular, high-performance and modern responsive UI controls. Get advanced user
    controls like <a href="https://demos.telerik.com/aspnet-core/grid" target="_blank">ASP.NET Core Grid</a>, Scheduler, TreeView and more, with complete customization and styling, plus out-of-the-box support for popular platforms, including Angular, React and Vue. Develop fast and straightforward integrations to add a high-end experience
    to your web apps and websites used by worldwide enterprises. (And if you decide to stick with MVC, you can still use Telerik power with <a target="_blank" href="https://www.telerik.com/aspnet-mvc">UI for ASP.NET MVC</a>.)</p><p><img sf-custom-thumbnail="true" src="https://d585tldpucybw.cloudfront.net/sfimages/default-source/blogs/2023/2023-07/nasa-visa-microsoft.png?sfvrsn=cd862c2c_3" width="200" alt="Logos for Nasa, Visa, Microsoft" sf-constrain-proportions="true" />&nbsp; &nbsp; &nbsp;&nbsp;<img sf-custom-thumbnail="true" src="https://d585tldpucybw.cloudfront.net/sfimages/default-source/blogs/2023/2023-07/fox-samsung-ibm.png?sfvrsn=f14624e9_3" width="200" alt="Logos for Fox, Samsung, IBM" sf-constrain-proportions="true" />&nbsp; &nbsp; &nbsp;&nbsp;<img sf-custom-thumbnail="true" src="https://d585tldpucybw.cloudfront.net/sfimages/default-source/blogs/2023/2023-07/world-bank-group-volvo.png?sfvrsn=e5b9687a_3" width="200" alt="Logos for World Bank Group and Volvo" sf-constrain-proportions="true" /></p><p>But what benefits does ASP.NET Core offer over MVC .NET Framework 4? Or why migrate from ASP.NET MVC to ASP.NET Core?</p><ul><li><strong>Cross-platform support:</strong> ASP.NET Core is designed to run on Windows, macOS and Linux, making it an excellent choice for developing software on multiple platforms.</li><li><strong>Higher performance:</strong> ASP.NET Core is designed to be a high-performance platform, providing better throughput and lower overhead than its predecessor.</li><li><strong>Modular architecture:</strong> ASP.NET Core makes it much easier to build complex applications by allowing developers to break apps down into more manageable, modular components.</li><li><strong>Cloud-ready:</strong> ASP.NET Core provides built-in support for deploying applications to the cloud, making it great for cloud development.</li><li><strong>Support for open source:</strong> ASP.NET Core has been embraced by the open-source community, and an extensive list of libraries, tools, and frameworks is available for developing applications.</li><li><strong>More robust security:</strong> ASP.NET Core includes many security improvements, such as role-based security, identity management, and claims-based authorization.</li></ul><p>I have prepared these five steps from zero to start with Telerik UI for ASP.NET Core, migrating your existing ASP.NET MVC .NET Framework 4. The steps from .NET 5 or 6 are identical, with minor differences.</p><ol><li>Install the necessary setup.</li><li>Create a new project based on the ASP.NET Core MVC project template.</li><li>Install the necessary NuGet packages in the project and ensure all dependencies from your old solution.</li><li>Move all controllers, models and views from your existing project to the new project.</li><li>Implement any required ASP.NET Core migration tasks, such as updating routing or dependency injection.</li></ol><p>How easy is it?</p><p><img src="https://d585tldpucybw.cloudfront.net/sfimages/default-source/blogs/2023/2023-07/easy-gauge.png?sfvrsn=aa5350b1_3" alt="Circular gauge from easy at 1 to hard at 5 points to 1.5" /></p><p>To ensure the preservation of your original files, you need to have a backup from the original files or start a new branch or Git repository for this task. Remember that some of the components will not work with .NET Core, so you can look at the provider&rsquo;s
    NuGet homepage for potential updates compatible with .NET Core.</p><p>If your team is not planning to update to the last version of .NET Core every year, like .NET 8, .NET 9, etc., you can use .NET 6 which is an LTS (Long-Term Support) version that will have official support until November 12, 2024.</p><p>Remember that in some cases, you will need to rewrite deprecated code.</p><h2 id="let’s-work-on-it">Let&rsquo;s Work on It!</h2><h3 id="install-the-necessary-setup">1. Install the Necessary Setup</h3><p><img src="https://d585tldpucybw.cloudfront.net/sfimages/default-source/blogs/2023/2023-07/visual-studio.png?sfvrsn=99fa1e8c_3" alt="Visual Studio logo" />&nbsp; <strong>Visual Studio 2022</strong></p><p>Install <strong>Visual Studio 2022</strong>. You can use the Community version&mdash;its license can be used by one team or five individual developers, and each developer can use the license on up to five devices.</p><p>Download it from: <a target="_blank" href="http://launch.visualstudio.com/">http://launch.visualstudio.com/</a></p><p>In setup, select ASP.NET modules.</p><p><img src="https://d585tldpucybw.cloudfront.net/sfimages/default-source/blogs/2023/2023-07/aspnet-web-development.png?sfvrsn=5bf34f44_3" alt="VS setup indicates selecting ASP.NET and web development" /></p><p>For .NET 6, you can use the previous version, Visual Studio 2019.</p><p>Install your License of Telerik UI for ASP.NET Core or a trial from <a href="https://www.telerik.com/download" target="_blank">https://www.telerik.com/download</a>.</p><p>Create a free account if you still need to do this.</p><p><img src="https://d585tldpucybw.cloudfront.net/sfimages/default-source/blogs/2023/2023-07/telerik-account.png?sfvrsn=d6778f30_3" alt="Enter your email to sign in or create an account on Telerik" /></p><p>Download the Control Panel from the Account page:</p><p><img src="https://d585tldpucybw.cloudfront.net/sfimages/default-source/blogs/2023/2023-07/account-page.png?sfvrsn=aa73e511_3" alt="Account page shows Latest downloads for you" /></p><p>Select only Telerik UI for ASP.NET Core or let all components on:</p><p><img src="https://d585tldpucybw.cloudfront.net/sfimages/default-source/blogs/2023/2023-07/install-products.png?sfvrsn=558e8e09_3" alt="Select products to install includes several Telerik and Kendo UI component libraries - choose at least Telerik UI for ASP.NET Core" /></p><h3 id="create-a-visual-studio-asp.net-core-mvc-project">2. Create a Visual Studio ASP.NET Core MVC Project</h3><p>Once you have set up Telerik, access Visual Studio and create a new project based on the ASP.NET Core MVC project template.</p><p><img src="https://d585tldpucybw.cloudfront.net/?sfvrsn=7bb956fb_3" alt="Extensions - Telerik - Telerik UI for ASP.NET Core - Create New Telerik Project" /></p><p><img src="https://d585tldpucybw.cloudfront.net/sfimages/default-source/blogs/2023/2023-07/configure-new-project.png?sfvrsn=c8cd5ad7_3" alt="Configure your new project - Telerik C# ASP.NET Core MVC Application" /></p><p>Select a blank template. I do recommend using the HTML Tag. In Telerik Kendo UI is the element that defines the structure and content of the webpage. The tag is the HTML used as markup to describe the component&rsquo;s properties.</p><p><img src="https://d585tldpucybw.cloudfront.net/?sfvrsn=1be82083_3" alt="Create New Project screen has templates - blank is selected" /></p><h3 id="install-nuget-packages">3. Install NuGet Packages</h3><p>Install the necessary NuGet packages in the project and ensure all dependencies from your old solution have been taken care of.</p><p><img src="https://d585tldpucybw.cloudfront.net/sfimages/default-source/blogs/2023/2023-07/nuget.png?sfvrsn=e6bb5676_3" alt="NuGet package manager" /></p><h3 id="move-controllers-models-and-views">4. Move Controllers, Models and Views</h3><p>Move all controllers, models and views from your existing project to the new project.</p><p>These are the main folders that you will act on.</p><p><img src="https://d585tldpucybw.cloudfront.net/sfimages/default-source/blogs/2023/2023-07/controllers-models-views.png?sfvrsn=3e541487_3" alt="project file structure with highlighting on controllers, models, views folders" /></p><h3 id="implement-required-migration-tasks">5. Implement Required Migration Tasks</h3><p>Implement any required ASP.NET Core migration tasks, such as updating routing or dependency injection.</p><p>Update <a href="https://www.telerik.com/aspnet-core-ui" target="_blank">ASP.NET Core components</a> to reflect any changes in routing, dependency injection or other migration tasks. In addition, each member must be updated to reflect the changes of the new ASP.NET Core version to ensure the application runs securely
    and bug-free.</p><aside><hr /><div class="row"><div class="col-4 u-normal-full u-small-mb0"><h4 class="u-fs20 u-fw5 u-lh125 u-mb0">Best-in-Class ASP.NET Core Grid</h4></div><div class="col-8"><p class="u-fs16 u-mb0"><a href="https://www.telerik.com/blogs/best-class-aspnet-core-grid" target="_blank">Meet the grid</a> that&rsquo;s powerful and flexible enough to meet all your needs for interacting with data while offering an
                intuitive, modern design for quick development of beautiful ASP.NET Core apps.</p></div></div><hr class="u-mb3" /></aside><p>You can check a project with the state before and after migrating to Telerik UI for ASP.NET Core in my GitHub: <a target="_blank" href="https://github.com/jssmotta/AspnetMVC4">https://github.com/jssmotta/AspnetMVC4</a>.</p><p>After this process, you can start migrating your old components with the Telerik UI for ASP.NET Core components; you can find information on the online documentation at <a target="_blank" href="https://docs.telerik.com/aspnet-core/introduction">https://docs.telerik.com/aspnet-core/introduction</a>.</p><p>You can contact Telerik&rsquo;s legendary support team at any time&mdash;even during your free trial&mdash;to solve any questions about the products.</p><p><a target="_blank" href="https://www.telerik.com/try/aspnet-core-ui" class="Btn">Try UI for ASP.NET Core</a></p><blockquote>Using Telerik UI for ASP.NET MVC and curious about how to migrate to Telerik UI for ASP.NET Core? Check out this post: <a href="https://www.telerik.com/blogs/how-to-migrate-telerik-ui-aspnet-mvc-aspnet-core" target="_blank">How to Migrate from Telerik UI for ASP.NET MVC to UI for ASP.NET Core</a>.</blockquote><p>&nbsp;</p><img src="https://feeds.telerik.com/link/23051/16320852.gif" height="1" width="1"/>]]></content>
  </entry>
  <entry>
    <id>urn:uuid:d2f46425-887f-46dd-acdb-0476c21ab833</id>
    <title type="text">How Much Will It Hurt? The 10 Things You Need to Do to Migrate Your MVC/Web API App to ASP.NET Core</title>
    <summary type="text">It is possible to migrate your .NET Framework ASP.NET MVC application to any version of .NET/.NET Core—including the latest version. Some parts of the process are more challenging than other parts, though, so you need to be prepared.</summary>
    <published>2023-06-20T14:55:00Z</published>
    <updated>2026-04-08T02:12:37Z</updated>
    <author>
      <name>Peter Vogel </name>
    </author>
    <link rel="alternate" href="https://feeds.telerik.com/link/23051/16198770/how-much-hurt-10-things-need-migrate-mvc-web-api-app-aspnet-core"/>
    <content type="text"><![CDATA[<p><span class="featured">It is possible to migrate your .NET Framework ASP.NET MVC application to any version of .NET/.NET Core&mdash;including the latest version. Some parts of the process are more ... <em>challenging </em>... than other parts, though, so you need
    to be prepared.</span></p><h2 id="table-of-contents">Table of Contents</h2><ul><li><a href="https://www.telerik.com#migrating-your-aspnet-mvc-5-application-to-aspnet-core" data-sf-ec-immutable="">Migrating Your ASP.NET MVC 5 Application to ASP.NET Core</a></li><li><a href="https://www.telerik.com#application-specific" data-sf-ec-immutable="">Application Specific</a><br>&nbsp;&nbsp;&nbsp;&nbsp;&nbsp;◦ <a href="https://www.telerik.com#class-libraries-and-third-party-packages" data-sf-ec-immutable="">Class libraries and Third-Party Packages</a><br>&nbsp;&nbsp;&nbsp;&nbsp;&nbsp;◦
 <a href="https://www.telerik.com#data-access" data-sf-ec-immutable="">Data Access</a></li><li><a href="https://www.telerik.com#the-easy-stuff" data-sf-ec-immutable="">The Easy Stuff</a><br>&nbsp;&nbsp;&nbsp;&nbsp;&nbsp;◦ <a href="https://www.telerik.com#configuring-your-application" data-sf-ec-immutable="">Configuring Your Application</a><br>&nbsp;&nbsp;&nbsp;&nbsp;&nbsp;◦
 <a href="https://www.telerik.com#controllers-views-and-models" data-sf-ec-immutable="">Controllers, Views and Models</a><br>&nbsp;&nbsp;&nbsp;&nbsp;&nbsp;◦ <a href="https://www.telerik.com#routing" data-sf-ec-immutable="">Routing</a></li><li><a href="https://www.telerik.com#the-hard-stuff" data-sf-ec-immutable="">The Hard Stuff</a><br>&nbsp;&nbsp;&nbsp;&nbsp;&nbsp;◦ <a href="https://www.telerik.com#web-config-configuration" data-sf-ec-immutable="">Web.config configuration</a><br>&nbsp;&nbsp;&nbsp;&nbsp;&nbsp;◦ <a href="https://www.telerik.com#cache" data-sf-ec-immutable="">Cache</a><br>&nbsp;&nbsp;&nbsp;&nbsp;&nbsp;◦ <a href="https://www.telerik.com#session" data-sf-ec-immutable="">Session</a><br>&nbsp;&nbsp;&nbsp;&nbsp;&nbsp;◦ <a href="https://www.telerik.com#authorization#authentication" data-sf-ec-immutable="">Authorization/Authentication</a><br>&nbsp;&nbsp;&nbsp;&nbsp;&nbsp;◦ <a href="https://www.telerik.com#handlers-and-modules" data-sf-ec-immutable="">Handlers and Modules (Middleware)</a></li><li><a href="https://www.telerik.com#after-the-migration" data-sf-ec-immutable="">After the Migration</a></li></ul><h2 id="migrating-your-aspnet-mvc-5-application-to-aspnet-core">Migrating Your ASP.NET MVC 5 Application to ASP.NET Core</h2><p>Before you migrate your perfectly good ASP.NET MVC 5/.NET Framework 4.5+ app to ASP.NET Core &hellip; is this something you really need to do? Migrating your application won&rsquo;t necessarily be challenging, but it can involve a lot of time consuming/repetitious/grunt
    work (which means it can be expensive). Since that&rsquo;s the case, you should migrate your application only if:</p><ul><li>There&rsquo;s some functionality you want to add to your application that can only be done in ASP.NET Core (e.g., creating a cross-platform app)</li><li>You want to reduce the size of your toolkit by having nothing but ASP.NET Core applications in your application portfolio</li><li>You&rsquo;re paid by the hour and want to drive up your billable time</li></ul><p>If you&rsquo;re committed to migrating then here are the 10 areas that you&rsquo;ll need to migrate, each with its varying degrees of pain and suffering. While the reason you&rsquo;re migrating may be to take advantage of new features in ASP.NET Core
    (Razor Pages, Tag Helpers, faster Web services and so on), I&rsquo;m going to assume that you&rsquo;ll take advantage of those new features <em>after</em> you&rsquo;ve got your application up and running in ASP.NET Core. Quite frankly, for an application
    of any size, you&rsquo;ll have enough problems just doing that.</p><h2 id="application-specific">Application Specific</h2><p>There are some migration issues that you may not have to deal with because they will depend on what features your application uses that aren&rsquo;t part of the base ASP.NET framework.</p><h3 id="class-libraries-and-third-party-packages">Class Libraries and Third-Party Packages</h3><p>This category is, potentially, your biggest headache. Or not. You could be lucky.</p><p>For example, if your application is using only class libraries that you&rsquo;ve created and those libraries don&rsquo;t contain any Windows-specific code or use any third-party packages, then you can probably just reference those libraries&rsquo; DLLs
    from your ASP.NET Core project and carry on with your life.</p><p>If you wanted to future-proof your application or position your application to run on any platform, then you could also:</p><ol><li>Create a Visual Studio 2022 project using the &ldquo;Class Library that targets .NET or .NET Standard&rdquo; template</li><li>Copy your class library code files into that new project</li><li>If your code compiles, reference that new project&rsquo;s DLLs from your web application</li></ol><p>If, however, your project is using a third-party package or a class library with Windows-specific code (and you want to create a cross-platform app), then you&rsquo;re going to need to upgrade to a .NET Core equivalent. What could possibly go wrong?</p><p>Well, first, of course, there may not be a .NET Core equivalent to the package for you to upgrade to. Even if there is, the .NET Core version may have a significantly different interface than the package your old application was built with. If either
    of those cases is true, then you&rsquo;re going to have hunt down and rewrite the relevant code in your project, ideally without introducing any new bugs.</p><aside><hr data-sf-ec-immutable=""><div class="row"><div class="col-4 u-normal-full u-small-mb0"><h4 class="u-fs20 u-fw5 u-lh125 u-mb0">FREE Ebook&mdash;Unit Testing Legacy Code: Effective Approaches
            </h4></div><div class="col-8"><p class="u-fs16 u-mb0">Be sure you update your code without introducing bugs.
                <a target="_blank" href="https://www.telerik.com/campaigns/justmock/wp-ebook-unit-testing-legacy-code">Use our guide to the most effective approaches for unit testing legacy code.</a></p></div></div><hr class="u-mb3"></aside><p>And if the new package actually behaves differently than the old package, then you are potentially in for a significant rewrite to accommodate/compensate for the new behavior.</p><p>Presumably, your new package&rsquo;s vendor can provide you with some guidance on migrating to the new package so, with one exception, I&rsquo;m going to ignore this category because all your issues will be package-specific. I will say that your best
    friend here is a library of regression tests that will let you see if the new version of your application works the same as your old version.</p><p>The one exception I&rsquo;ll make is if you&rsquo;re using a dependency injection/inversion of a control container (an IoC). If you&rsquo;re <em>not</em> using an IoC, then you can continue to new up your classes as you need them. If you&rsquo;re using
    an IoC, you should know that ASP.NET Core comes with its own IoC (the ASP.NET Core Services collection). You&rsquo;ll need to look at the differences between ASP.NET Core&rsquo;s built-in IoC and the ASP.NET Core version of your existing IoC (assuming
    an ASP.NET Core version exists) before deciding which will require the least work when migrating.</p><h3 id="data-access">Data Access</h3><p>If you&rsquo;re converting a business application, you&rsquo;ll have a lot of data access code in your application. If your application uses ADO.NET, you can continue to use it.</p><p>If you&rsquo;ve used Entity Framework 6 (EF6) in a code-first mode (EF6), you can continue to use that also. If, on the other hand, your application is using an EDMX file and its related visual designer, then you&rsquo;ll need to move to the code first
    approach by creating your own entity and DbContext files before migrating. In all these cases, you&rsquo;ll just need to add the relevant NuGet packages to your ASP.NET Application and you&rsquo;ll be ready to move on.</p><p>If you&rsquo;re considering upgrading to Entity Framework Core from EF6 and used a code-first approach, then you&rsquo;ll find that much (perhaps all) of your application is &ldquo;code-compatible&rdquo; with Entity Framework Core&mdash;most of your changes
    will be around instantiating the DbContext object and <a href="https://learn.microsoft.com/en-us/ef/core/dbcontext-configuration/" target="_blank">setting its connection string</a>.</p><p>However Entity Framework Core is &hellip; different and, while your EF6 code may be compatible, the rules for processing that code <a href="https://learn.microsoft.com/en-us/ef/efcore-and-ef6/porting/port-behavior" target="_blank">have changed</a>.
 You&rsquo;ll need to do extensive testing to make sure that your application still works as it did before (it <em>probably</em> will).</p><p>The smart move, though, is to stick with your existing data access technology and defer upgrading to Entity Framework Core to a later date (assuming you ever want to&mdash;remember that &ldquo;working&rdquo; is a feature). If you do decide to upgrade,
    Microsoft has a <a href="https://learn.microsoft.com/en-us/ef/efcore-and-ef6/porting/" target="_blank">guide</a> that you should review.</p><p>Having said all that, regardless of your choice, you&rsquo;ll need to change how you store your connection strings&mdash;see the section on the Web.config file further along.</p><h2 id="the-easy-stuff">The Easy Stuff</h2><p>Some areas of your application should be relatively easy to migrate. For these areas, the effort involved will be controlled primarily by the size of your application (i.e., the more Controllers/Views/Models/Routes you have, the longer you&rsquo;ll have
    to spend on migrating them).</p><h3 id="configuring-your-application">Configuring Your Application</h3><p>The single biggest difference between an MVC 5 and an ASP.NET Core project is how the project is configured. In ASP.NET Core 6 and later, configuration is handled entirely in the Program.cs file. The simplest solution for creating an MVC 5-compatible
    project in ASP.NET Core is to pick Visual Studio 2022&rsquo;s &ldquo;ASP.NET Core Web App (Model-View-Controller)&rdquo; template when creating your ASP.NET Core project. That template also supports mixed MVC 5/Web API projects.</p><hr><blockquote><a target="_blank" href="https://www.telerik.com/devcraft">Telerik DevCraft</a> can make development easier with access to <a target="_blank" href="https://www.telerik.com/aspnet-mvc">UI for ASP.NET MVC</a> and <a href="https://www.telerik.com/aspnet-core-ui" target="_blank">UI for ASP.NET Core</a>, plus embedded reporting, automated testing, debugging tools, and more.
    </blockquote><hr><p>For a pure Web API project, create your new project with Visual Studio 2022&rsquo;s &ldquo;ASP.NET Core Web API&rdquo; template.</p><p>Three tips:</p><ul><li>If you can give your new ASP.NET Core project the same name/namespace as your old project, you can save yourself a couple of global search-and-replaces later on.</li><li>When working through the template wizard that creates your project, you&rsquo;ll probably want to leave the HTTPS support option turned on because your app is probably using HTTPS in production.</li><li>For Web API projects, make sure that the UseControllers option is checked when creating your project (and you might as well keep the the OpenAPI option checked, too&mdash;you&rsquo;ll thank me later when someone asks for documentation on your Web
        service).
    </li></ul><h3 id="controllers-views-and-models">Controllers, Views and Models</h3><p>For both MVC and Web API projects, your next step is, in File Explorer, to drag the contents of your old project&rsquo;s Controllers, Views and Models folders to the equivalent folders in your new ASP.NET Core project. ASP.NET Core projects don&rsquo;t
    use the .csproj file to track project members, so if you drop your files into your new project&rsquo;s folders using File Explorer, those files will show up in Visual Studio&rsquo;s Solution Explorer in your new project.</p><p>Here&rsquo;s the good news: With Views, HTML Helpers still work and, if you&rsquo;ve been good about not injecting third-party libraries into your Views, your View should work just fine as is. The same is true of your Models.</p><p>The news is almost as good for your Controllers (ignoring any problems with class-libraries): The bulk of your Controller code is probably completely compatible with ASP.NET Core. Where it isn&rsquo;t (and also ignoring the problems I&rsquo;ll discuss
    later), you can handle the problems with a global search and replace.</p><p>For your MVC Controllers, you&rsquo;ll need to update the using statements because the base ASP.NET Core Controller class is in a different namespace than the MVC 5 Controller class. A global search and replace that swaps &ldquo;using System.Web.Mvc&rdquo;
    with &ldquo;using Microsoft.AspNetCore.Mvc&rdquo; should do the trick.</p><p>For your Web API controllers, you&rsquo;ll need to update both the base class (from &ldquo;ApiController&rdquo; to &ldquo;ControllerBase&rdquo;) and your using statements (from &ldquo;using System.Web.Http&rdquo; to &ldquo;using Microsoft.AspNetCore.Mvc&rdquo;).
    Again, global search-and-replace is your friend here.</p><p>If you have Web API Controllers and are using CORS, you&rsquo;ll need to make two changes to your Project.cs file. First, right after the statement that sets the builder variable, add this code to configure CORS:</p><pre class=" language-csharp"><code class="prism  language-csharp">builder<span class="token punctuation">.</span>Services<span class="token punctuation">.</span><span class="token function">AddCors</span><span class="token punctuation">(</span>options <span class="token operator">=</span><span class="token operator">&gt;</span>
<span class="token punctuation">{</span>
    options<span class="token punctuation">.</span><span class="token function">AddDefaultPolicy</span><span class="token punctuation">(</span>
        policy <span class="token operator">=</span><span class="token operator">&gt;</span>
        <span class="token punctuation">{</span>
            policy<span class="token punctuation">.</span><span class="token function">WithOrigins</span><span class="token punctuation">(</span><span class="token string">"&hellip;url&hellip;"</span><span class="token punctuation">,</span>
                                             <span class="token string">"&hellip;url&hellip;"</span><span class="token punctuation">)</span><span class="token punctuation">;</span>
        <span class="token punctuation">}</span><span class="token punctuation">)</span><span class="token punctuation">;</span>
<span class="token punctuation">}</span><span class="token punctuation">)</span><span class="token punctuation">;</span>
</code></pre><p>Further down in Program.cs, right after the app.UseRouting statement, add this line to enable CORS:</p><pre class=" language-csharp"><code class="prism  language-csharp">app<span class="token punctuation">.</span><span class="token function">UseCors</span><span class="token punctuation">(</span><span class="token punctuation">)</span><span class="token punctuation">;</span>
</code></pre><p>If you&rsquo;re not happy with the default CORS policy, Microsoft has a <a href="https://learn.microsoft.com/en-us/aspnet/core/security/cors?view=aspnetcore-7.0#cors-policy-options" target="_blank">guide</a> for configuring a custom
    CORS policy.</p><p>Now would also be a good time to do another global search-and-replace to update all the using statements that reference your old project&rsquo;s namespace to your new project&rsquo;s namespace (unless, as I said, you&rsquo;ve been clever enough that your
    ASP.NET Core project has the same namespace as the old one).</p><h3 id="routing">Routing</h3><p>If you&rsquo;ve been using nothing but attribute-based routing, I have more good news for you: Virtually everything still works. The only exception here is that there is no longer a separate RoutePrefix attribute in ASP.NET Core&mdash;the Route attribute
    takes care of that functionality. Another global search-and-replace swapping &ldquo;[RoutePrefix&rdquo; to &ldquo;[Route&rdquo; will fix that.</p><p>If you&rsquo;ve been using conventional routing (i.e., defining all your routes in the RouteConfig file), the news is still pretty good: You&rsquo;ll need to copy your MapRoute statements to your new project&rsquo;s Program.cs file and paste them above
    the app.MapControllerRoute statement that you&rsquo;ll find there. And then you&rsquo;ll need to rewrite them.</p><p>Your existing routes will look something like this:</p><pre class=" language-csharp"><code class="prism  language-csharp">routes<span class="token punctuation">.</span><span class="token function">MapRoute</span><span class="token punctuation">(</span>  
                name<span class="token punctuation">:</span> <span class="token string">"routename"</span><span class="token punctuation">,</span>  
                url<span class="token punctuation">:</span> <span class="token string">"routetemplate"</span><span class="token punctuation">,</span>  
                defaults<span class="token punctuation">:</span> <span class="token keyword">new</span> <span class="token punctuation">{</span> controller <span class="token operator">=</span> <span class="token string">"controllername"</span><span class="token punctuation">,</span> action <span class="token operator">=</span> <span class="token string">"actionname"</span><span class="token punctuation">,</span> etc<span class="token punctuation">.</span> <span class="token punctuation">}</span>  
            <span class="token punctuation">)</span><span class="token punctuation">;</span>
</code></pre><p>You&rsquo;ll need to convert them into the new syntax which looks like this (note the asterisks to mark the differences):</p><pre class=" language-csharp"><code class="prism  language-csharp">*app<span class="token punctuation">.</span><span class="token function">MapControllerRoute</span>*<span class="token punctuation">(</span>
name<span class="token punctuation">:</span> <span class="token string">"routename"</span><span class="token punctuation">,</span>
               *pattern*<span class="token punctuation">:</span> <span class="token string">"routetemplate"</span><span class="token punctuation">,</span>
               defaults<span class="token punctuation">:</span> <span class="token keyword">new</span> <span class="token punctuation">{</span> controller <span class="token operator">=</span> <span class="token string">"controllername"</span><span class="token punctuation">,</span> action <span class="token operator">=</span> <span class="token string">"actionname"</span><span class="token punctuation">,</span> etc<span class="token punctuation">.</span> <span class="token punctuation">}</span><span class="token punctuation">)</span><span class="token punctuation">;</span>
</code></pre><p>Selecting the MapRoute statements you just pasted and doing some careful search-and-replaces within that selection should take care of most (maybe, all) of the required changes.</p><h2 id="the-hard-stuff">The Hard Stuff</h2><p>And this is where things start getting ugly. The following changes will require some thought and effort and will be controlled by how often you use each of these features. If, for example, you&rsquo;ve got the MemoryCache object wound through your application,
    then you&rsquo;ll have to track down every place you&rsquo;ve used it and rewrite that code. Sorry about that.</p><h3 id="web-config-configuration">Web.config Configuration</h3><p>The XML-based Web.config file and the ConfigurationManager object are both gone in ASP.NET Core. This isn&rsquo;t a problem that&rsquo;s going to be handled by search-and-replace.</p><p>By default, application settings are kept in a JSON file in your project called (somewhat obviously) appsettings.json. While you can coerce your ASP.NET Core project into using an XML configuration file, in my opinion it&rsquo;s easier to convert to using
    the new appsettings file.</p><p>Your first step, then, is going to be converting the entries in the appSettings and connectionString sections in your Web.config file. Currently, those sections will look something like this:</p><pre class=" language-xml"><code class="prism  language-xml"><span class="token tag"><span class="token tag"><span class="token punctuation">&lt;</span>appSettings</span><span class="token punctuation">&gt;</span></span>
    <span class="token tag"><span class="token tag"><span class="token punctuation">&lt;</span>add</span> <span class="token attr-name">key</span><span class="token attr-value"><span class="token punctuation">=</span><span class="token punctuation">"</span>&hellip;<span class="token punctuation">"</span></span> <span class="token attr-name">value</span><span class="token attr-value"><span class="token punctuation">=</span><span class="token punctuation">"</span>&hellip;<span class="token punctuation">"</span></span> <span class="token punctuation">/&gt;</span></span>
    &hellip;more&hellip;
  <span class="token tag"><span class="token tag"><span class="token punctuation">&lt;/</span>appSettings</span><span class="token punctuation">&gt;</span></span>
  <span class="token tag"><span class="token tag"><span class="token punctuation">&lt;</span>connectionStrings</span><span class="token punctuation">&gt;</span></span>
    <span class="token tag"><span class="token tag"><span class="token punctuation">&lt;</span>add</span> <span class="token attr-name">name</span><span class="token attr-value"><span class="token punctuation">=</span><span class="token punctuation">"</span>db<span class="token punctuation">"</span></span> <span class="token attr-name">connectionString</span><span class="token attr-value"><span class="token punctuation">=</span><span class="token punctuation">"</span>&hellip;<span class="token punctuation">"</span></span> <span class="token attr-name">providerName</span><span class="token attr-value"><span class="token punctuation">=</span><span class="token punctuation">"</span>...<span class="token punctuation">"</span></span><span class="token punctuation">/&gt;</span></span>
    &hellip;more&hellip;
  <span class="token tag"><span class="token tag"><span class="token punctuation">&lt;/</span>connectionStrings</span><span class="token punctuation">&gt;</span></span>
</code></pre><p>The equivalent JSON would look like the following. You should add it to the default appsettings.json file after the existing AllowedHosts line and before the file&rsquo;s final closing French brace:</p><pre class=" language-json"><code class="prism  language-json">  <span class="token string">"AllowedHosts"</span><span class="token punctuation">:</span> <span class="token string">"*"</span><span class="token punctuation">,</span> 
  <span class="token string">"key"</span><span class="token punctuation">:</span> <span class="token string">"value"</span><span class="token punctuation">,</span>
      &hellip;more&hellip;<span class="token punctuation">,</span>  
  <span class="token string">"ConnectionStrings"</span><span class="token punctuation">:</span> <span class="token punctuation">{</span>
      <span class="token string">"db"</span><span class="token punctuation">:</span> <span class="token string">"connectionString"</span><span class="token punctuation">:</span> <span class="token string">"&hellip;"</span><span class="token punctuation">,</span>
     &hellip;more&hellip;
    <span class="token punctuation">}</span>
<span class="token punctuation">}</span>  
</code></pre><p>Next, track down any Controller that instantiates an ADO.NET *Connection or Entity Framework DbContext object. For each of those Controllers, you&rsquo;ll need to extend its constructor (or add a constructor if the Controller doesn&rsquo;t have one) to
    have it accept an IConfiguration object from ASP.NET Core&rsquo;s default IoC. You can then read your connection string from that object using the IConfiguration object&rsquo;s GetConnectionString method, passing the name of your connection string
    in appsettings.json.</p><p>That code would look something like this:</p><pre class=" language-csharp"><code class="prism  language-csharp"><span class="token keyword">private</span> <span class="token keyword">readonly</span> <span class="token keyword">string</span><span class="token operator">?</span> db<span class="token punctuation">;</span>
<span class="token keyword">public</span> <span class="token function">HomeController</span><span class="token punctuation">(</span>&hellip;any existing parameters&hellip;<span class="token punctuation">,</span> IConfiguration config<span class="token punctuation">)</span>
<span class="token punctuation">{</span>
   db <span class="token operator">=</span> config<span class="token punctuation">.</span><span class="token function">GetConnectionString</span><span class="token punctuation">(</span><span class="token string">"db"</span><span class="token punctuation">)</span><span class="token punctuation">;</span>
<span class="token punctuation">}</span>
</code></pre><p>Now you can pass that connection string to your DbContext or ADO.NET connection objects as you need it.</p><p>Similarly, you&rsquo;ll need to find wherever you&rsquo;re reading your appsettings section and rewrite that code. To retrieve your appsetting values, you can use the IConfiguration object&rsquo;s <code class="inline-code">GetValue&lt;T&gt;</code> method
    like this:</p><pre class=" language-csharp"><code class="prism  language-csharp"><span class="token keyword">private</span> <span class="token keyword">readonly</span> <span class="token keyword">string</span><span class="token operator">?</span> setting<span class="token punctuation">;</span>
<span class="token keyword">public</span> <span class="token function">HomeController</span><span class="token punctuation">(</span>&hellip;any existing parameters&hellip;<span class="token punctuation">,</span> IConfiguration config<span class="token punctuation">)</span>
<span class="token punctuation">{</span>
   setting <span class="token operator">=</span> config<span class="token punctuation">.</span><span class="token generic-method function">GetValue<span class="token punctuation">&lt;</span><span class="token keyword">string</span><span class="token punctuation">&gt;</span></span><span class="token punctuation">(</span><span class="token string">"key"</span><span class="token punctuation">)</span><span class="token punctuation">;</span>
</code></pre><p>If you&rsquo;ve been transforming your Web.config file to create development/test/production versions, you can do a similar thing by creating versions of the appsetting.json file called appsettings.development.json, appsettings.staging.json and appsettings.production.json.
    The version of your appsetting.*.json file that will be used by your application is based on how your application is started and is configured in your project&rsquo;s launchsettings.json file.</p><p>The easiest way to work with the launchsettings file is to select your project&rsquo;s Properties, then select the Properties&rsquo; Debug tab, and (in the General section) click on the &ldquo;Open debug launch profiles UI&rdquo; link. That will display
    the Launch Profiles dialog.</p><p><img src="https://d585tldpucybw.cloudfront.net/sfimages/default-source/blogs/2023/2023-05/asp.net-conversion-01-launch-profiles.png?sfvrsn=894348bb_3" alt="Visual Studio’s Properties dialog with the Debug tab displayed. A hyperlink with the text Open debug launch profiles UI can be seen on the tab. A dialog named Launch Profiles has been opened. On its left side, two items are lists named http and IIS Express. The http item is selected. On the right hand side a number of sections are listed including one named Environment Variables. In that section, an entry with the name ASPNETCORE_ENVIRONMENT appears with the value Development."></p><p>That dialog lets you set the ASPNETCORE_ENVIRONMENT environment variable which controls which appsettings.*.json file your application will use, based on how your project is started. The two default settings you&rsquo;ll find already set up both set the
    environment variable to &ldquo;development.&rdquo; Again, Microsoft has a useful <a href="https://learn.microsoft.com/en-us/aspnet/core/fundamentals/environments?view=aspnetcore-7.0" target="_blank">guide</a> for configuring
    these settings.
</p><h3 id="session">Session</h3><p>The Session object is no longer included by default in ASP.NET Core and you&rsquo;ll need to add and configure it in your Program.cs file (this includes any configuration settings for this object that you have set in your Web.config file).</p><p>In your Program.cs file, you need this line following the statement that sets the builder variable to configure a basic Session object:</p><pre class=" language-csharp"><code class="prism  language-csharp">builder<span class="token punctuation">.</span>services<span class="token punctuation">.</span><span class="token function">AddSession</span><span class="token punctuation">(</span><span class="token punctuation">)</span><span class="token punctuation">;</span>
</code></pre><p>To configure the Session object, you follow a common pattern for objects configured in Program.cs: The AddSession method accepts a lambda expression that it passes an options object to. You can configure the Session object by working with the options
    object passed to the lambda expression.</p><p>This example sets the Session object&rsquo;s timeout to 10 minutes:</p><pre class=" language-csharp"><code class="prism  language-csharp">builder<span class="token punctuation">.</span>services<span class="token punctuation">.</span><span class="token function">AddSession</span><span class="token punctuation">(</span>options <span class="token operator">=</span><span class="token operator">&gt;</span>
<span class="token punctuation">{</span>
  options<span class="token punctuation">.</span>IdleTimeout <span class="token operator">=</span> TimeSpan<span class="token punctuation">.</span><span class="token function">FromMinutes</span><span class="token punctuation">(</span><span class="token number">10</span><span class="token punctuation">)</span><span class="token punctuation">;</span>
<span class="token punctuation">}</span><span class="token punctuation">)</span><span class="token punctuation">;</span>
</code></pre><p>There are multiple options you can set through this <a href="https://learn.microsoft.com/en-us/dotnet/api/microsoft.aspnetcore.builder.sessionoptions?view=aspnetcore-7.0" target="_blank">options object</a>.</p><p>Further down in Program.cs after the call to UseRouting and before the call to MapControllerRoute, add this line to enable the Session object:</p><pre class=" language-csharp"><code class="prism  language-csharp">app<span class="token punctuation">.</span><span class="token function">UseSession</span><span class="token punctuation">(</span><span class="token punctuation">)</span><span class="token punctuation">;</span>
</code></pre><p>Using centralized session state with SQL Server is supported through distributed caching with <a href="https://learn.microsoft.com/en-us/aspnet/core/performance/caching/distributed?view=aspnetcore-7.0" target="_blank">Microsoft.Extensions.Caching.SqlServer</a>.</p><p>With that configuration taken care of, you can now access the Session object through the Controller&rsquo;s HttpContext property through that object&rsquo;s Session property (the HttpContext always has a Session property &hellip; but if you don&rsquo;t
    configure the Session object in Program.cs, there&rsquo;s nothing behind that Session property to make it work).</p><p>The ASP.NET Core Session object has a new, method-based syntax that supports a more limited set of datatypes than the .NET Framework Session object: you can only store strings, 32-bit integers and byte arrays (the relevant methods are GetString/SetString,
    GetInt32/SetInt32 and Get/Set). For example, storing and retrieving a string in the Session object looks like this in ASP.NET Core:</p><pre class=" language-csharp"><code class="prism  language-csharp">HttpContext<span class="token punctuation">.</span>Session<span class="token punctuation">.</span><span class="token function">SetString</span><span class="token punctuation">(</span><span class="token string">"TransactionId"</span><span class="token punctuation">,</span> <span class="token string">"X001"</span><span class="token punctuation">)</span><span class="token punctuation">;</span> 
<span class="token keyword">string</span><span class="token operator">?</span> tId <span class="token operator">=</span> HttpContext<span class="token punctuation">.</span>Session<span class="token punctuation">.</span><span class="token function">GetString</span><span class="token punctuation">(</span><span class="token string">"TransactionId"</span><span class="token punctuation">)</span><span class="token punctuation">;</span>
</code></pre><p>You can store objects if you convert them to JSON strings (Microsoft has some sample <a href="https://learn.microsoft.com/en-us/aspnet/core/fundamentals/app-state?view=aspnetcore-7.0" target="_blank">extension methods</a> that
    add generic Set and Get methods for storing objects).</p><p>Obviously, you&rsquo;re not going to be able to convert from your existing Session code to this new syntax using a global search-and-replace. So, some time back, I wrote a <a href="https://visualstudiomagazine.com/articles/2018/12/01/working-with-session.aspx?oly_enc_id=3025F3612090E7X" target="_blank">an extension method</a> that attaches to the new Session object and uses a custom class that mimics the old Session syntax with the ASP.NET Core Session object. If you add that class and extension method to
    your application, you can probably convert your existing code to ASP.NET Core using a search-and-replace.</p><p>The result isn&rsquo;t pretty, though&mdash;your converted code will look something like this:</p><pre class=" language-csharp"><code class="prism  language-csharp">Session<span class="token punctuation">.</span><span class="token function">AddIndexer</span><span class="token punctuation">(</span><span class="token punctuation">)</span><span class="token punctuation">[</span><span class="token string">"TransactionId"</span><span class="token punctuation">]</span> <span class="token operator">=</span> <span class="token string">"X001"</span><span class="token punctuation">;</span>
</code></pre><p>This code may prove mysterious to the next programmer who has to deal with it but, if you have a lot of Session code, it&rsquo;s a hack that might save you some time during migration.</p><h3 id="cache">Cache</h3><p>Like the Session object, the Cache object (in either its original form or as the .NET Framework MemoryCache) is no longer included by default in ASP.NET Core&mdash;you need to add and configure it in your Program.cs file (and, again, this includes setting
    any configuration settings you have in your Web.config file).</p><p>You just need to add this line to Program.cs after the line that sets the builder variable:</p><pre class=" language-csharp"><code class="prism  language-csharp">builder<span class="token punctuation">.</span>services<span class="token punctuation">.</span><span class="token function">AddMemoryCache</span><span class="token punctuation">(</span><span class="token punctuation">)</span><span class="token punctuation">;</span>
</code></pre><p>As with AddSession, you can configure the Cache by passing AddMemoryCache a lambda expression that accepts the <a href="https://learn.microsoft.com/en-us/dotnet/api/microsoft.extensions.caching.memory.memorycacheoptions?view=dotnet-plat-ext-7.0" target="_blank">MemoryCacheOptions object</a>. You can then use that options object to configure the cache.</p><p>This example sets the number of entries allowed in the cache to 100:</p><pre class=" language-csharp"><code class="prism  language-csharp">builder<span class="token punctuation">.</span>Services<span class="token punctuation">.</span><span class="token function">AddMemoryCache</span><span class="token punctuation">(</span>opt <span class="token operator">=</span><span class="token operator">&gt;</span> opt<span class="token punctuation">.</span>SizeLimit <span class="token operator">=</span> <span class="token number">100</span><span class="token punctuation">)</span><span class="token punctuation">;</span>
</code></pre><p>To use the Cache object in your code, you&rsquo;ll need to grab it from ASP.NET Core&rsquo;s IoC in the constructor for your Controller. Code like this would work:</p><pre class=" language-csharp"><code class="prism  language-csharp"><span class="token keyword">public</span> <span class="token keyword">class</span> <span class="token class-name">Home</span> <span class="token punctuation">:</span> Controller
   <span class="token punctuation">{</span>
     <span class="token keyword">private</span> IMemoryCache Cache<span class="token punctuation">;</span>
     <span class="token keyword">public</span> <span class="token function">HomeController</span><span class="token punctuation">(</span>IMemoryCache cache<span class="token punctuation">)</span>
     <span class="token punctuation">{</span>
        Cache <span class="token operator">=</span> cache<span class="token punctuation">;</span>
     <span class="token punctuation">}</span>
</code></pre><p>Again, as with the Session object, the syntax for storing and retrieving has changed&mdash;you&rsquo;ll then need to rewrite all the code where you use the Cache to use the new syntax. The simplest methods to use are the Get and Set which, unlike the
    Session object&rsquo;s base methods, can store any data type. Caching options are set by configuring a <a href="https://learn.microsoft.com/en-us/dotnet/api/microsoft.extensions.caching.memory.memorycacheoptions?view=dotnet-plat-ext-7.0" target="_blank">MemoryCacheEntryOptions object</a> and passing it as the third parameter to the Cache&rsquo;s Get method.</p><p>Typical code using the new syntax would look like this:</p><pre class=" language-csharp"><code class="prism  language-csharp">Cache<span class="token punctuation">.</span><span class="token function">Set</span><span class="token punctuation">(</span>&ldquo;key&rdquo;<span class="token punctuation">,</span> &ldquo;<span class="token keyword">value</span>&rdquo;<span class="token punctuation">,</span> <span class="token keyword">new</span> <span class="token class-name">MemoryCacheEntryOptions</span><span class="token punctuation">(</span><span class="token punctuation">)</span>
                                                      <span class="token punctuation">.</span><span class="token function">SetSlidingExpiration</span><span class="token punctuation">(</span>TimeSpan<span class="token punctuation">.</span><span class="token function">FromSeconds</span><span class="token punctuation">(</span><span class="token number">3</span><span class="token punctuation">)</span><span class="token punctuation">)</span><span class="token punctuation">)</span><span class="token punctuation">;</span>
</code></pre><p>Again, you&rsquo;re not going to be able to handle this conversion with a search-and-replace. Plan your time accordingly.</p><h3 id="authorization-authentication">Authorization/Authentication</h3><p>The bad news here is that your existing authentication code won&rsquo;t work and you&rsquo;ll need to configure authentication in your Program.cs file from scratch (plus, there&rsquo;s no longer an option to pick your authentication configuration as part
    of creating your application).</p><p>First, somewhere after the code that sets the builder variable in Program.cs, you&rsquo;ll need to add this code (assuming it isn&rsquo;t present) to support the anonymous user:</p><pre class=" language-csharp"><code class="prism  language-csharp">builder<span class="token punctuation">.</span>services<span class="token punctuation">.</span><span class="token generic-method function">AddDefaultIdentity<span class="token punctuation">&lt;</span>IdentityUser<span class="token punctuation">&gt;</span></span><span class="token punctuation">(</span><span class="token punctuation">)</span>
                            <span class="token punctuation">.</span><span class="token generic-method function">AddRoles<span class="token punctuation">&lt;</span>IdentityRole<span class="token punctuation">&gt;</span></span><span class="token punctuation">(</span><span class="token punctuation">)</span><span class="token punctuation">;</span>
</code></pre><p>Further down in Program.cs, after the app variable is set, you need to add this code to turn on authentication and authorization (again, assuming this code isn&rsquo;t present):</p><pre class=" language-csharp"><code class="prism  language-csharp">app<span class="token punctuation">.</span><span class="token function">AddAuthentication</span><span class="token punctuation">(</span><span class="token punctuation">)</span><span class="token punctuation">;</span>
app<span class="token punctuation">.</span><span class="token function">AddAuthorization</span><span class="token punctuation">(</span><span class="token punctuation">)</span><span class="token punctuation">;</span>
</code></pre><p>After making those changes, you&rsquo;ll still need to configure your code to work with your designated identity provider (I&rsquo;m assuming that you&rsquo;re no longer allowed to create your own authentication system but have to integrate with your
    organization&rsquo;s system). As Microsoft&rsquo;s <a href="https://learn.microsoft.com/en-us/aspnet/core/security/authentication/?view=aspnetcore-7.0" target="_blank">guide</a> makes clear, this is a non-trivial task.
</p><p>There is one bit of good news, though: Once you have the right authentication code in Program.cs, your Authorize attributes should still work, as should your ClaimsPrincipal code.</p><h3 id="handlers-and-modules">Handlers and Modules</h3><p>If you&rsquo;ve used handlers or modules to customize your ASP.NET application&rsquo;s processing pipeline then the nearest equivalent for you to replace them is ASP.NET Core&rsquo;s middleware. The best solution is to move your code to a class with this
    structure:
</p><pre class=" language-csharp"><code class="prism  language-csharp"><span class="token keyword">public</span> <span class="token keyword">class</span> <span class="token operator">&lt;</span>classname<span class="token operator">&gt;</span>
<span class="token punctuation">{</span>
  <span class="token keyword">private</span> <span class="token keyword">readonly</span> RequestDelegate rd<span class="token punctuation">;</span>
  <span class="token generic-method function"><span class="token keyword">public</span> <span class="token punctuation">&lt;</span>classname<span class="token punctuation">&gt;</span></span><span class="token punctuation">(</span>RequestDelegate next<span class="token punctuation">)</span>
  <span class="token punctuation">{</span>
    rd <span class="token operator">=</span> next<span class="token punctuation">;</span>
  <span class="token punctuation">}</span>
  <span class="token keyword">public</span> <span class="token keyword">async</span> Task <span class="token function">Invoke</span><span class="token punctuation">(</span>HttpContext ctxt<span class="token punctuation">)</span>
  <span class="token punctuation">{</span>
    <span class="token comment">//&hellip;work with HttpContext in handling request&hellip;</span>
    <span class="token keyword">await</span> rd<span class="token punctuation">.</span><span class="token function">Invoke</span><span class="token punctuation">(</span>ctxt<span class="token punctuation">)</span><span class="token punctuation">;</span>

    <span class="token comment">//&hellip;work with HttpContext in handling response&hellip;</span>

  <span class="token punctuation">}</span>
<span class="token punctuation">}</span>
</code></pre><p>Your class&rsquo;s constructor will be passed a RequestDelegate that points to the next module in the ASP.NET Core pipeline. Your class&rsquo;s Invoke method will be called when it&rsquo;s your module&rsquo;s turn for processing. Your Invoke method will
    be passed an HttpContext information with information about the current request and (later) your application&rsquo;s response.</p><p>Inside your Invoke method, you should call the RequestDelegate&rsquo;s Invoke method to pass control to the next module in the pipeline. Code in your class&rsquo;s Invoke method before your call to rd.Invoke will normally handle requests on their way
    to your Controllers (a good place to reject requests or add headers). Code after the call to rd.Invoke will normally handle responses on their way back to the client (a good place to add or remove headers).</p><p>For example, code like this before the call to rd.Invoke would allow you to check for a specific authorization header and reject any requests that don&rsquo;t have it:</p><pre class=" language-csharp"><code class="prism  language-csharp"><span class="token keyword">string</span> <span class="token keyword">value</span> <span class="token operator">=</span> ctx<span class="token punctuation">.</span>Request<span class="token punctuation">.</span>Headers<span class="token punctuation">[</span>HeaderNames<span class="token punctuation">.</span>Authorization<span class="token punctuation">]</span><span class="token punctuation">;</span>
<span class="token keyword">if</span> <span class="token punctuation">(</span><span class="token keyword">string</span><span class="token punctuation">.</span><span class="token function">IsNullOrEmpty</span><span class="token punctuation">(</span><span class="token keyword">value</span><span class="token punctuation">)</span> <span class="token operator">||</span> <span class="token operator">!</span><span class="token keyword">value</span><span class="token punctuation">.</span><span class="token function">Contains</span><span class="token punctuation">(</span><span class="token string">"ABC123"</span><span class="token punctuation">)</span><span class="token punctuation">)</span>
<span class="token punctuation">{</span>
   ctx<span class="token punctuation">.</span>Response<span class="token punctuation">.</span>StatusCode <span class="token operator">=</span> <span class="token number">401</span><span class="token punctuation">;</span>
   <span class="token keyword">await</span> ctx<span class="token punctuation">.</span>Response<span class="token punctuation">.</span><span class="token function">WriteAsync</span><span class="token punctuation">(</span><span class="token string">"Invalid or missing contract id"</span><span class="token punctuation">)</span><span class="token punctuation">;</span>
   <span class="token keyword">return</span><span class="token punctuation">;</span>
<span class="token punctuation">}</span>
</code></pre><p>In code following the rd.Invoke call, you can use the RequestAborted property on the HttpContext object passed to your Invoke method to determine if the original request was rejected.</p><p>To add your new middleware to your application&rsquo;s processing pipeline, return to your Program.cs file and after the line that sets the app variable, call the UseMiddleware method, specifying the type of your class. This example adds a class called
    CheckPhoto to the pipeline:</p><pre class=" language-csharp"><code class="prism  language-csharp">app<span class="token punctuation">.</span><span class="token generic-method function">UseMiddleware<span class="token punctuation">&lt;</span>CheckPhoto<span class="token punctuation">&gt;</span></span><span class="token punctuation">(</span><span class="token punctuation">)</span><span class="token punctuation">;</span>
</code></pre><p>The higher in Program.cs that you call UseMiddleware, the earlier in the processing that your middleware will be called.</p><h2 id="after-the-migration">After the Migration</h2><p>If you address all 10 of these areas in your .NET Framework application, then you should end up with a working ASP.NET Core application. You&rsquo;re now in a position to take advantage of all the new features available in ASP.NET Core (and let me recommend
    the <a href="https://www.learningtree.ca/courses/aspnet-core-mvc-developers-training" target="_blank">ASP.NET Core Migration course I wrote for Learning Tree International</a> that covers all the new stuff and none of the old
    stuff).
</p><p>In the meantime and as far as your migration effort goes: Best of luck. Hope you live.</p><hr><blockquote><strong>Next up:</strong> <a href="https://www.telerik.com/blogs/modern-cross-platform-aspnet-core-controls" target="_blank">Modern Cross-Platform ASP.NET Core Controls</a>.</blockquote><img src="https://feeds.telerik.com/link/23051/16198770.gif" height="1" width="1"/>]]></content>
  </entry>
  <entry>
    <id>urn:uuid:ce4f8486-24fe-4a51-9235-9a4f28a7da9a</id>
    <title type="text">What’s New in Telerik Web UI Component Libraries with R2 2023</title>
    <summary type="text">See what R2 2023 delivers to the .NET UI libraries for web from Progress Telerik for Blazor, ASP.NET Core, ASP.NET MVC and ASP.NET AJAX.</summary>
    <published>2023-06-07T13:49:32Z</published>
    <updated>2026-04-08T02:12:37Z</updated>
    <author>
      <name>Lyubomir Atanasov </name>
    </author>
    <link rel="alternate" href="https://feeds.telerik.com/link/23051/16170942/r2-2023-telerik-web-release"/>
    <content type="text"><![CDATA[<p><span class="featured">See what R2 2023 delivers to the .NET UI libraries for web from Progress Telerik for Blazor, ASP.NET Core, ASP.NET MVC and ASP.NET AJAX.</span></p><p>Announcing the much-awaited R2 2023 update of Telerik UI for Blazor, ASP.NET Core and MVC and ASP.NET AJAX!</p><p>In this blog post, we&rsquo;ll delve into the exciting new features and enhancements that will elevate your web development projects to a whole new level. Get ready to unlock the full potential of the latest Telerik UI release.</p><p>Feel free to jump to your favorite section:</p><ul><li><a href="https://www.telerik.com#common-release-items" data-sf-ec-immutable="">Common Release Items</a></li><li><a href="https://www.telerik.com#telerik-ui-for-blazor" data-sf-ec-immutable="">Telerik UI for Blazor</a></li><li><a href="https://www.telerik.com#telerik-ui-for-aspnet-core-and-mvc" data-sf-ec-immutable="">Telerik UI for ASP.NET Core/MVC</a></li><li><a href="https://www.telerik.com#telerik-ui-for-aspnet-ajax" data-sf-ec-immutable="">Telerik UI for ASP.NET AJAX</a></li><li><a href="https://www.telerik.com#progress-telerik-.net-web-desktop--mobile-products-r2-2023-release-webinar--june-8" data-sf-ec-immutable="">Webinar details for June 8</a></li></ul><h2 id="common-release-items">Common Release Items</h2><h3 id="font-icons-to-svg-icons">Font Icons to SVG Icons</h3><p>In the R2 2023 update, a significant change was introduced to the default icon type in Telerik and Kendo UI libraries and components. We have shifted from font icons to SVG icons as part of our continuous efforts to improve product quality&nbsp; and theming
    mechanisms, and to ensure compliance with Content Security Policy (CSP). This transition allows us to enhance the visual experience and align with evolving web standards.</p><p><img src="https://d585tldpucybw.cloudfront.net/sfimages/default-source/blogs/2023/2023-05/allcomponents-svg-icon_770.png?sfvrsn=132bd02f_3" alt="Illustration of Telerik and Kendo UI mascots with SVG" /></p><p>For more information, be sure to check out the dedicated <a href="https://www.telerik.com/blogs/future-icons-telerik-kendo-ui-themes" target="_blank">icon blog post</a> on this topic. It&rsquo;s packed with valuable insights to
    help you learn more.
</p><h3 id="compatibility-with-.net-8-preview-4">Compatibility with .NET 8 Preview 4</h3><p><img src="https://d585tldpucybw.cloudfront.net/sfimages/default-source/blogs/2023/2023-04/net-8-preview.png?sfvrsn=3b028942_3" alt=".NET 8 Preview with Telerik Ninja" /></p><p>The Telerik UI for Blazor and UI ASP.NET Core libraries are now compatible with <a href="https://devblogs.microsoft.com/dotnet/announcing-dotnet-8-preview-4" target="_blank">Microsoft&rsquo;s .NET 8 preview 4</a>, released in mid-March.
    This exciting development enables developers to leverage the cutting-edge features and performance enhancements of .NET 8 while harnessing the robust UI components offered by Telerik.</p><h3 id="design-system-documentation">Design System Documentation</h3><p>An exciting addition in R2 2023 is the launch of a <a href="https://www.telerik.com/design-system/docs/" target="_blank">design system documentation site</a> dedicated to the Telerik and Kendo UI libraries. This site provides a
    comprehensive collection of design assets, frontend documentation and valuable resources. Initially, we have included documentation for nearly 20 essential components. Our goal is to continuously expand this site, empowering you with the necessary
    tools to create visually impressive digital experiences and design systems using the robust capabilities of Telerik and Kendo UI.</p><p><img src="https://d585tldpucybw.cloudfront.net/sfimages/default-source/blogs/2023/2023-06/progress-design-system.png?sfvrsn=f117595e_3" alt="Screenshot from Progress Design System website" /></p><p>The design system documentation site now includes the initial version of the CSS Utils package, a convenient library of HTML classes tailored for CSS properties. This package allows you to effortlessly style page layouts without writing extensive CSS
    code. For example, adding a border radius is as simple as applying the <code>.k-rounded-md</code> class to the element.</p><p>The <a href="https://www.telerik.com/design-system/docs/utils/get-started/introduction/" target="_blank">CSS Utils package</a> is integrated within our Telerik and Kendo UI themes. When you install any of our themes, you automatically
    get the CSS Utils package. However, if you only require the Utils package for page layout styling, you can install it separately.</p><p>We have plans to expand the package&rsquo;s capabilities, including adding a color system and typography options, and expanding the sizing map. Stay tuned for future updates!</p><h3 id="less-themes-deprecation">LESS Themes Deprecation</h3><p>In accordance with the previous announcement made in January 2022, starting from R1 2023, we will discontinue support for LESS themes in our Telerik and Kendo UI products. We recommend that any customers currently using LESS themes transition to an equivalent
    theme based on SASS. For detailed information on the reasons behind this change and its potential impact on you, please refer to titled &ldquo;<a href="https://www.telerik.com/blogs/future-plans-telerik-kendo-ui-less-themes" target="_blank">Future Plans for the Telerik and Kendo UI LESS Themes</a>&rdquo;.</p><h3 id="themebuilder-pro-support">ThemeBuilder Pro Support</h3><p><img src="https://d585tldpucybw.cloudfront.net/sfimages/default-source/blogs/2023/2023-06/new-themebuilder-pro.png?sfvrsn=e8712359_3" alt="ThemeBuilder collaboration" /></p><p><a target="_blank" href="https://www.telerik.com/themebuilder">ThemeBuilder Pro</a> is here with exciting updates and new features for enhanced development. This release
        introduces full customization support for Kendo UI (jQuery) and Telerik UI (ASP.NET Core/MVC), giving you complete control over your web application&rsquo;s appearance. You can now seamlessly integrate with Figma for smooth collaboration between
        design and development teams.</p><p>The automatic migration feature ensures a hassle-free transition to the latest theme version. Improved variable management, SSO support, and granular project permissions further empower developers and designers. ThemeBuilder Pro is dedicated to providing
        powerful tools and capabilities for an exceptional development experience.</p><p>Read more in the <a href="https://www.telerik.com/blogs/r2-2023-themebuilder-release" target="_blank">dedicated ThemeBuilder blog post</a>.</p><h3 id="web-installer-fips-compliance">Web Installer FIPS Compliance</h3><p>Our recent upgrade to the Web installer (Telerik Control Panel), includes support for Federal Information Processing Standards (<a href="https://csrc.nist.gov/publications/detail/fips/140/2/final" target="_blank">FIPS</a>)
 compliance. This improvement is designed to provide our clients with enhanced security, meeting the high standards required by industries and government agencies.</p><p>By implementing specific cryptographic algorithms and security protocols approved by the National Institute of Standards and Technology (NIST), FIPS compliance ensures the protection, integrity and confidentiality of your valuable data. We can now
        deliver a more secure installation process, giving you peace of mind and confidence in the safety of your information.</p><h3>Enhanced Forms Rendering</h3><p>Telerik UI brings a fresh and modernized approach to forms rendering and layout. With this latest update, we have revamped the forms rendering and layout in multiple UI components, including the Data Grid, TreeList, Scheduler, DateTimePicker and more. </p><p>The enhanced forms rendering delivers a seamless and visually appealing experience to your users. By incorporating modern design principles and best practices, we have focused on improving the overall aesthetics and usability of forms within these
        components.
    </p><h2 id="telerik-ui-for-blazor">Telerik UI for Blazor</h2><p>Stay ahead of the curve with our latest release of <a target="_blank" href="https://www.telerik.com/blazor-ui">Telerik UI for Blazor</a>, empowering you to create
        robust and visually stunning applications.</p><h3 id="introducing-blazor-hybrid-uniting-web-and-native-client-development">Introducing Blazor Hybrid: Uniting Web and Native Client Development</h3><p><img src="https://d585tldpucybw.cloudfront.net/sfimages/default-source/blogs/2023/2023-06/blazor-hybrid.png?sfvrsn=88e34ee1_4" alt="Progress Telerik UI for Blazor Hybrid for Windows, macOS, Android, and iOS" /></p><p>We&rsquo;re happy to announce the official support for Blazor Hybrid in our upcoming R2 2023 release. Now, you can effortlessly create mobile and desktop applications while incorporating Telerik UI for Blazor components into your hybrid apps. Blazor
        Hybrid apps utilize HTML, CSS, C# and JavaScript, allowing for code sharing between web, desktop and mobile clients. Additionally, Blazor applications can be adapted for use with .NET MAUI, enabling integration with desktop and mobile platforms.</p><p>Explore the following materials to learn how you can seamlessly integrate Telerik UI for Blazor into your hybrid apps and take your development to the next level:</p><ul><li><a target="_blank" href="https://www.telerik.com/blazor-ui/blazor-hybrid">Telerik UI: Blazor Hybrid</a></li><li><a target="_blank" href="https://www.telerik.com/campaigns/blazor/ebook-blazor-hybrid">eBook: Blazor Hybrid and Web in One Solution</a></li><li><a href="https://www.telerik.com/videos/blazor-power-hour-a-look-at-blazorhybrid" target="_blank">Blazor Power Hour: A look at BlazorHybrid</a></li><li><a href="https://www.telerik.com/videos/the-blazor-power-hour-testing-blazor-hybrid" target="_blank">The Blazor Power Hour: Testing Blazor Hybrid</a></li><li><a href="https://www.telerik.com/blogs/telerik-blazor-ui-native-apps" target="_blank">Telerik Blazor UI in Native Apps</a></li></ul><h3 id="new-blazor-pivotgrid-component">New Blazor PivotGrid Component</h3><p><img src="https://d585tldpucybw.cloudfront.net/sfimages/default-source/blogs/2023/2023-06/blazor-pivotgrid.png?sfvrsn=5a2338cf_3" alt="Blazor PivotGrid" /></p><p>We&rsquo;re excited to announce the Telerik UI for Blazor PivotGrid component&mdash;an Excel-like experience for effortlessly processing, aggregating, visualizing and analyzing tabular and multi-dimensional data. This feature-rich UI component supports
        both local and remote data binding, along with essential functionalities like filtering, sorting and a configuration panel. Let&rsquo;s explore the key features:</p><p><strong>Organize and Summarize Pivot Data:</strong></p><ul><li>Deliver an Excel-like experience by processing and analyzing tabular and multi-dimensional data.</li><li>Supports data binding to an OLAP service, enabling interactive analysis.</li><li>Offers extensive customization options for a tailored user experience.</li></ul><p><strong>Local and Remote Binding to OLAP Data Sources:</strong></p><ul><li>Bind data to a local source or remote OLAP service via HTTP.</li><li>Access aggregated and organized data from multidimensional structures (cubes).</li></ul><p><strong>Configuration Panel:</strong></p><ul><li>Intuitive and customizable configuration panel like Microsoft Excel.</li><li>Allows users to modify fields, apply filters and define pivot fields.</li><li>Highly adaptable to match design needs, including custom component integration.</li></ul><p><strong>Sorting:</strong></p><ul><li>Enable single or multiple column sorting in ascending or descending order.</li><li>Supports sorting various data types.</li></ul><p><strong>Filtering:</strong></p><ul><li>Provide flexible data display by enabling filtering based on specific criteria.</li><li>Swift response with various filtering options, operators and predefined fields.</li><li>Supports filtering via XMLA access to the OLAP Cube service.</li></ul><p><a href="https://demos.telerik.com/blazor-ui/pivotgrid/overview" target="_blank">See a demo of the UI for Blazor PivotGrid component.</a></p><h3 id="new-blazor-dropzone-component">New Blazor DropZone Component</h3><p><img src="https://d585tldpucybw.cloudfront.net/sfimages/default-source/blogs/2023/2023-06/blazor-dropzone.png?sfvrsn=338b59d3_3" alt="Blazor DropZone Component for user uploads" /></p><p>Introducing the addition of the DropZone component to our Blazor toolkit. This component offers a user-friendly way for file uploads in Blazor applications. Users can easily drag and drop files onto a designated area on their screen, and the files
        will be automatically transferred to the file select/upload feature. Say goodbye to complicated file uploads and enjoy the simplicity and convenience of our new DropZone component.</p><p><a href="https://demos.telerik.com/blazor-ui/dropzone/overview" target="_blank">See a demo of the UI for Blazor DropZone component.</a></p><h3 id="right-to-left-support">Right-to-Left Support</h3><p>We are happy to announce that Telerik UI for Blazor components now support right-to-left (RTL) languages! This feature is available in the latest 4.2.0 release of Telerik UI for Blazor and brings a range of benefits to developers building applications
        for audiences that read and write in RTL languages.</p><p><img src="https://d585tldpucybw.cloudfront.net/sfimages/default-source/blogs/2023/2023-06/rtl-support.png?sfvrsn=db3faddc_5" alt="Illustrated component has LTR and then RTL layout" /></p><p>With the new RTL support, developers can easily create applications that cater to the needs of RTL language users, without having to manually modify the layout or styles. This means that components like grids, charts and dropdowns will automatically
        adjust their layout to support RTL languages. Additionally, text alignment, text direction and other layout features will be optimized for RTL languages, making it easier for users to navigate and interact with the application.</p><p>The RTL support in UI for Blazor can be turned on with a single property <strong>EnableRtl</strong> once at the TelerikRootComponent and that will let all of the components take advantage of the feature. More details and specifics for popups can be
        found in the <a href="https://docs.telerik.com/blazor-ui/globalization/rtl-support" target="_blank">UI for Blazor RTL support documentation article</a>.</p><h3 id="enhancements-in-the-fileselect--upload-ui-components">Enhancements in the FileSelect &amp; Upload UI Components</h3><p><strong>Built-in Drag and Drop</strong><br />The FileSelect and Upload components now have built-in drag-and-drop file support, courtesy of the new DropZone component. Enjoy the convenience of seamlessly dragging and dropping files, right from the
        start.
    </p><p><img src="https://d585tldpucybw.cloudfront.net/sfimages/default-source/blogs/2023/2023-06/drag-drop-fileselect.png?sfvrsn=8912ccb6_3" alt="" /></p><p><a href="https://demos.telerik.com/blazor-ui/fileselect/overview" target="_blank">See a demo of the UI for Blazor FileSelect drag and drop support.</a></p><h3 id="data-grid--treelist-enhacements">Data Grid &amp; TreeList Enhacements</h3><p>The R2 2023 release of Telerik UI for Blazor brings exciting updates to the DataGrid and TreeList components. These enhancements include new customization options and expanded configuration capabilities. Let&rsquo;s dive into the key highlights:</p><p><strong>Pager Template</strong><br />Customize the appearance of pagers with ease. Utilize the Pager Template to replace the default pager with your own custom markup, tailored to your clients&rsquo; needs.</p><p><img src="https://d585tldpucybw.cloudfront.net/sfimages/default-source/blogs/2023/2023-06/grid-pager.gif?sfvrsn=bbd5fe54_3" alt="User pages through data" /></p><p><a href="https://demos.telerik.com/blazor-ui/treelist/templates" target="_blank">See how to customize the UI for Blazor TreeList component pager.</a></p><p><strong>Popup Edit Form Template</strong><br />Elevate the data entry experience by leveraging the Popup Edit Form Template. Enable GridEditMode.Popup for the Data Grid and TreeListEditMode.Popup for the TreeList to create custom content within the
        edit form. Customize form fields, validation rules and more.</p><p><img src="https://d585tldpucybw.cloudfront.net/sfimages/default-source/blogs/2023/2023-06/popup-edit.png?sfvrsn=75494386_3" alt="popup edit options show fields for ID, firstname label, outofoffice label, and buttons for save and cancel" /></p><h3 id="datagrid-treelist-treeview-performance-bump">DataGrid, TreeList, TreeView Performance Bump</h3><p>We are delighted to share that our Blazor Data Grid, TreeList and TreeView components have undergone a remarkable performance enhancement. In the latest release, we have significantly minimized the re-rendering of content cells, ensuring it occurs
        only when absolutely required. As a result, our tests have shown a significant 40% reduction in component refresh time.</p><p><img src="https://d585tldpucybw.cloudfront.net/sfimages/default-source/blogs/2023/2023-06/performance-rocket.png?sfvrsn=b8a8c3df_6" alt="rocket illustration" /></p><p>Although template cells will continue to re-render since they can contain arbitrary markup, we are confident that this improvement will have a tangible impact on the overall performance of the Blazor component&rsquo;s usability.</p><h3 id="chart-enhancements">Chart Enhancements</h3><p>The latest release of Telerik UI for Blazor brings exciting enhancements to the Charts component, offering improved customization options and new features. Let&rsquo;s explore the key additions briefly.</p><p><strong>Position Configuration</strong><br />Users can now position the Stock Chart <strong>navigator</strong> on top, providing a fresh appearance option alongside the existing bottom position.</p><p><a href="https://demos.telerik.com/blazor-ui/stockchart/overview" target="_blank">See the Telerik UI for Blazor StockChart navigator demo.</a></p><p><strong>Chart and StockChart Subtitle</strong><br />The new subtitle property enables developers to add secondary or explanatory subtitles below the main chart title and style them differently for enhanced customization.</p><p><a href="https://demos.telerik.com/blazor-ui/chart/overview" target="_blank">See the Telerik UI for Blazor Subtitle Property in Charts demo.</a></p><p><strong>Format and Template Parameters for Axes in Blazor StockChart</strong><br />The introduction of format and template options allows effortless customization of labels for ValueAxis, CategoryAxis and NavigatorCategoryAxis in the Blazor StockChart.</p><p>These enhancements in Telerik UI for Blazor Charts offer developers greater control over the appearance and functionality of their charts, enabling them to create visually stunning and interactive experiences.</p><h3 id="globalization-and-localization">Globalization and Localization</h3><p>As part of this update, we are adding a new label to the components, displaying the text: &ldquo;Drag and drop files here to upload.&rdquo; To support localization and globalization, two new resource keys have been introduced: Upload_DropZoneHint
        and FileSelect_DropZoneHint.</p><h3 id="custom-content-in-selectfiles-button">Custom Content in SelectFiles Button</h3><p>In this release, we&rsquo;ve added templating support for the SelectFiles button in FileSelect and Upload components. Now clients can fully customize the button&rsquo;s appearance, including the option to render icons, providing more flexibility and
        visual appeal.</p><h3 id="fileselect-new-methods">FileSelect New Methods</h3><p>The latest release of the Blazor FileSelect component introduces two new methods: <strong>ClearFiles</strong> and <strong>OpenSelectFilesDialog</strong>. ClearFiles enables removing files from the list programmatically, providing more control over
        the selection process. OpenSelectFilesDialog allows for opening the browser file selection dialog with a single API call.</p><h3 id="exposing-selected-items-in-file-manager">Exposing Selected Items in File Manager</h3><p>We have enhanced the Telerik UI for Blazor File Manager component to provide you with more flexibility in customization. With the latest update, the Blazor FileManager component now supports two-way binding of the selected items.</p><p><a href="https://demos.telerik.com/blazor-ui/filemanager/selection" target="_blank">See the Telerik UI for Blazor FileManager expose selected items demo.</a></p><h3 id="window-support-for-footer">Window: Support for Footer</h3><p>The footer section of the Telerik UI for Blazor Window component can now be customized according to your needs. Take advantage of the following parameters to fully utilize the Window footer:</p><ul><li>The WindowFooter parameter adds a new section at the bottom of the window.</li><li>The FooterLayoutAlign parameter allows you to apply different styles to the buttons in the footer. Select from the available options (Start, Center, End and Stretched) and observe how they enhance the appearance of your application.</li></ul><h3 id="combine-autogenerated--custom-fields-in-the-form-component">Combine Autogenerated &amp; Custom Fields in the Form Component</h3><p><img src="https://d585tldpucybw.cloudfront.net/sfimages/default-source/blogs/2023/2023-06/autogenerated-custom-fields-form.png?sfvrsn=69cdccf0_3" alt="In a form, ID, Age, and graduate grade have dropdowns. Name is an open field. Hire date and meeting date both have calendar options for selection" /></p><p>This enhanced feature within the UI for Blazor Form component enables the simultaneous utilization of autogenerated form items alongside manually defined ones. It allows developers to make use of the autogenerated fields for the majority of their
        model fields, while still providing the flexibility to customize specific fields as needed.</p><p><a href="https://demos.telerik.com/blazor-ui/form/auto-generated" target="_blank">See a demo of autogenerated and custom fields in the UI for Blazor Form component.</a></p><h3 id="customize-the-map-component-marker-appearance">Customize the Map Component Marker Appearance</h3><p><img src="https://d585tldpucybw.cloudfront.net/sfimages/default-source/blogs/2023/2023-03/map-mapmarker.png?sfvrsn=eca652f8_3" alt="The Map has custom pins showing weather in Boston and Austin" /></p><p>The Blazor Map component&rsquo;s user interface (UI) now includes a templating functionality that simplifies the process of customizing the appearance of markers on the map. Developers have the ability to define their own HTML markup to style the
        markers according to their preferences.</p><p><a href="https://demos.telerik.com/blazor-ui/map/marker-template" target="_blank">See how to customize the UI for Blazor Map component marker.</a></p><h3 id="visible-parameter-tilelayout-component-items">Visible Parameter TileLayout Component Items</h3><p><img src="https://d585tldpucybw.cloudfront.net/sfimages/default-source/blogs/2023/2023-03/tilelayout-itemvisibility.gif?sfvrsn=51af2672_3" alt="Three cards showing location name and an image. Sofia, Rome, South Africa. Then Sofia, South Africa, San Francisco." /></p><p>We have exposed a new parameter named Visible to control whether a given TileLayout item is visible or not.</p><p><a href="https://demos.telerik.com/blazor-ui/tilelayout/item-visibility" target="_blank">See a demo of the items visibility in the UI for Blazor TileLayout component.</a></p><h3 id="print-method-in-the-pdf-viewer-component">Print Method in the PDF Viewer Component</h3><p><img src="https://d585tldpucybw.cloudfront.net/sfimages/default-source/blogs/2023/2023-06/kendoangular-pdfviewer-ui-component.png?sfvrsn=93d18487_3" alt="PDF viewer allows paging, zooming, selection, searching, saving, downloading, and printing" /></p><p>The <a href="https://demos.telerik.com/blazor-ui/pdfviewer/overview" target="_blank">UI for Blazor PDFViewer component</a> now provides the ability to print the current document programmatically. By introducing the <code>Print()</code> method, developers now have a straightforward means to incorporate printing functionality into their Blazor applications that utilize the PDF Viewer component.</p><h3 id="add-themecolor-parameter-for-window--dialog">Add ThemeColor Parameter for Window &amp; Dialog</h3><p><img src="https://d585tldpucybw.cloudfront.net/sfimages/default-source/blogs/2023/2023-03/dialog-themecolor.gif?sfvrsn=90de8717_3" alt="Theme color changes on the Blazor Dialog adjust the background color of the bar at the top. None default is almost white, primary is blue, dark is almost black, and light is a medium gray" /></p><p>A new parameter named <strong>ThemeColor</strong> has been added to the UI for Blazor Window and Dialog components. This feature enables easy customization of the title bar color for both components. It provides a range of selectable values such as
        &ldquo;Primary,&rdquo; &ldquo;Dark,&rdquo; &ldquo;Light&rdquo; or even an empty option for no color.</p><p><a href="https://demos.telerik.com/blazor-ui/dialog/configuration" target="_blank">See an example the UI for Blazor Dialog ThemeColor options.</a></p><h3 id="refresh-method-for-all-select-type-components">Refresh Method for All Select-Type Components</h3><p>In this latest release, we are introducing a new method called Refresh to enhance our select-type UI components, including AutoComplete, ComboBox, DropDownList, MultiColumnComboBox and MultiSelect. The method allows you to easily refresh the popup
        of the selects and comes in handy when the popup remains open, but changes need to be applied.</p><h3 id="deprecation-of-.net-3-and-.net-5-in-telerik-ui-for-blazor">Deprecation of .NET 3 and .NET 5 in Telerik UI for Blazor</h3><p>Starting from R1 2024, we will no longer provide support for .NET 3 and .NET 5 in Telerik UI for Blazor. To ensure uninterrupted support and leverage the latest advancements, we highly recommend planning and initiating the migration of your projects
        to .NET 6 or later.</p><p>This strategic decision allows us to stay ahead of the curve, providing you with a robust and future-proof component library that keeps pace with the rapid advancements in web application development. Stay tuned for exciting updates as we embark on
        this journey together!</p><h2 id="telerik-ui-for-aspnet-core-and-mvc">Telerik UI for ASP.NET Core and MVC</h2><p>Discover the latest features and elevate your development experience with Telerik UI for ASP.NET Core and MVC!</p><h3 id="new-template-component-csp-compatible">New Template Component (CSP-Compatible)</h3><p><img src="https://d585tldpucybw.cloudfront.net/sfimages/default-source/blogs/2023/2023-06/template-component.png?sfvrsn=6cbc638d_3" alt="illustrated template component" /></p><p>Introducing the Template component in the Telerik UI for ASP.NET Core and MVC UI libraries! This new feature can be incorporated it into UI controls, which require complex layout templates like the Grid or the TreeList. Deliver smooth integration
        and strengthen security of your applications.</p><p><strong>HTML and Tag Helpers</strong><br />The Telerik UI for ASP.NET Core Template component provides support for both HTML and Tag Helper modes. The HTML Helper Template introduces these two options:</p><ul><li><strong>AddComponent()</strong>, which is a method accepting any Telerik UI for ASP.NET Core HTML Helper component declaration</li><li><strong>AddHtml()</strong>, which is a method that accepts HTML code</li></ul><p>If you&rsquo;re leveraging the Tag Helper mode, you can easily integrate the UI control and HTML code within the <code>&lt;{parentTagName}-{templateOption}&gt;</code> tag.</p><p>See the documentation for the <a href="https://docs.telerik.com/aspnet-core/html-helpers/template/overview" target="_blank">Telerik UI for ASP.NET Core Template component</a> or the <a href="https://docs.telerik.com/aspnet-mvc/html-helpers/template/overview" target="_blank">Telerik UI for ASP.NET MVC Template component</a>.</p><h3 id="datagrid-enhancements">DataGrid Enhancements</h3><p>The latest release of Telerik UI for ASP.NET Core and MVC brings exciting enhancements to the DataGrid component, offering improved usability options and new features.</p><p><strong>New Row Resizing Feature</strong><br />Introducing the highly anticipated feature in the latest release of our Data Grid component: row resizing! Now, end users can resize rows and adjust their heights effortlessly. This new functionality
        allows for better visibility of cells with larger values while maintaining the integrity of the remaining rows in the Data Grid. Stay in control of your data presentation and provide a seamless user experience with the row resizing feature.</p><p><img src="https://d585tldpucybw.cloudfront.net/sfimages/default-source/blogs/2023/2023-06/datagrid-row-resizing.gif?sfvrsn=c3a514fa_3" alt="User drags to enlarge row height" /></p><p><strong>Compact Data Grid Mode</strong><br />Introducing the Compact Grid, a new feature in the Telerik UI for ASP.NET Core and MVC Grid components! By utilizing the Size parameter configuration, the Compact Grid optimizes screen space by reducing
        padding and margins, resulting in a condensed and efficient data table. Now you can display more information at once, maximizing productivity.</p><p><img src="https://d585tldpucybw.cloudfront.net/sfimages/default-source/blogs/2023/2023-06/grid-compactrendering.gif?sfvrsn=f505e978_3" alt="Default Grid size vs. High Density Size Grid" /></p><p>The Compact Grid seamlessly integrates with our Default, Bootstrap, Material and Fluent themes, providing flexibility in design choices. Experience the power of data density with the Compact Grid feature.</p><p>See the demo for <a href="https://demos.telerik.com/aspnet-core/grid/sizing" target="_blank">Telerik UI for ASP.NET Core Compact Grid</a> or <a href="https://demos.telerik.com/aspnet-mvc/grid/sizing" target="_blank">Telerik UI for ASP.NET MVC Compact Grid demo</a>.</p><h3 id="scheduler-enhancements">Scheduler Enhancements</h3><p><strong>Highlight Ongoing Events</strong><br />We are pleased to announce the addition of the &ldquo;highlight current events&rdquo; functionality to our Scheduler component! Elevate your application&rsquo;s user experience by easily indicating ongoing
        events in a visually distinct manner. With the simple configuration method of <code>OngoingEvents</code>, enabling this feature and customizing the refresh interval is effortless.</p><p><img src="https://d585tldpucybw.cloudfront.net/sfimages/default-source/blogs/2023/2023-06/scheduler-highlightedevent.png?sfvrsn=4221d3e3_3" alt="On a calendar view, one event is highlighted with a red border" /></p><p>See the <a href="https://demos.telerik.com/aspnet-core/scheduler/ongoing-events" target="_blank">Telerik UI for ASP.NET Core Scheduler highlight ongoing events demo</a> or the <a href="https://demos.telerik.com/aspnet-mvc/scheduler/ongoing-events" target="_blank"> Telerik UI for ASP.NET MVC Scheduler highlight ongoing events demo</a>.</p><p><strong>Google Calendar Integration Demo</strong><br />Many of you have been curious about how to incorporate our Scheduler component into Google Calendar, so we have prepared a demonstration. To assist you in implementing this integration, we have
        created a comprehensive <a href="https://docs.telerik.com/aspnet-core/knowledge-base/scheduler-google-calendar-integration" target="_blank">how-to article and a sample project</a>.</p><h3 id="datetimepicker-enhancement-starttime-and-endtime-options">DateTimePicker Enhancement: StartTime and EndTime Options</h3><p>R2 2023 welcomes the enhanced DateTimePicker component in Telerik UI for ASP.NET Core and MVC! Effortlessly configure start and end date/time values and easily manage time ranges.</p><p>See the start and end times demo for <a href="https://demos.telerik.com/aspnet-core/datetimepicker" target="_blank">Telerik UI for ASP.NET Core DateTimePicker</a> or for <a href="https://demos.telerik.com/aspnet-mvc/datetimepicker" target="_blank">Telerik UI for ASP.NET MVC DateTimePicker</a>.</p><h3 id="data-editing-ux-enhancements">Data Editing UX: Enhancements</h3><p>We are delighted to introduce improved date editing options in the Telerik UI for ASP.NET Core DateInput component. These options offer greater flexibility and control when configuring the behavior of the component during date editing. Take advantage
        of the following configuration options:</p><ul><li><strong>AutoSwitchParts:</strong> Automatically moves to the next segment after entering a valid value.</li><li><strong>AutoSwitchKeys:</strong> Configures a custom key to trigger moving to the next segment.</li><li><strong>EnableMouseWheel:</strong> Increases or decreases segment values using the mouse wheel.</li><li><strong>AutoCorrect:</strong> Automatically corrects the value if it falls out of range.</li><li><strong>Steps:</strong> Defines the increment and decrement steps for each available date segment.</li></ul><p>See the editing demo for <a href="https://demos.telerik.com/aspnet-core/dateinput/date-editing" target="_blank">Telerik UI for ASP.NET Core DateInput</a> or for <a href="https://demos.telerik.com/aspnet-mvc/dateinput/date-editing" target="_blank">Telerik UI for ASP.NET MVC DateInput</a>.</p><h3 id="gantt-popup-edit-form-improvements">Gantt: Popup Edit Form Improvements</h3><p>In our latest release, we&rsquo;ve made several updates to enhance the editing and customization capabilities of our Gantt UI component. Now you can fine-tune every aspect of the Gantt to meet your users&rsquo; preferences. Notable changes include:
    </p><ul><li>Reorganized Gantt edit popup form with tabs for easier navigation and editing of different sections.</li><li>Expanded capabilities to configure and edit all data fields present in the Gantt.</li><li>Streamlined editing of parent tasks directly from the task&rsquo;s edit form, eliminating the need for separate sections.</li><li>Integrated dependencies editing into the edit form, eliminating the need for a separate popup window.</li><li>A new &ldquo;Other&rdquo; tab in the Gantt edit popup for editing custom fields, providing a cleaner and more organized experience.</li></ul><p><img src="https://d585tldpucybw.cloudfront.net/sfimages/default-source/blogs/2023/2023-06/gantt-popupeditenhancements.gif?sfvrsn=c5707367_3" alt="User flips through tabs of Gantt popup - General, Resources, Predecessors, Successors, Other" /></p><p>See an example of the improved Gantt editing experience:</p><ul><li><a href="https://demos.telerik.com/aspnet-core/gantt" target="_blank">Telerik UI for ASP.NET Core Gantt component demo</a></li><li><a href="https://demos.telerik.com/aspnet-mvc/gantt" target="_blank">Telerik UI for ASP.NET MVC Gantt component demo</a></li></ul><h3 id="enhanced-demos-with-adaptive-behavior">Enhanced Demos with Adaptive Behavior</h3><p>In the R2 2023 release, we focused on improving the UI components for ASP.NET Core and MVC to be more adaptable and responsive. Along with introducing new built-in settings, we made sure to showcase the adaptiveness of the components through our demos.</p><h2 id="telerik-ui-for-aspnet-ajax">Telerik UI for ASP.NET AJAX</h2><p>We are thrilled to share the new components and enhancements in Telerik UI for ASP.NET AJAX R2 2023 release.</p><h3 id="new-arcgauge-and-circulargauge-components">New ArcGauge and CircularGauge Components</h3><p>Easily represent value ranges on an arc shape using the powerful Telerik UI for ASP.NET AJAX ArcGauge component. This data visualization tool allows you to showcase progress toward a goal by defining minimum and maximum angles, ranging from 0
            to 360 degrees.</p><p><img src="https://d585tldpucybw.cloudfront.net/sfimages/default-source/blogs/2023/2023-06/arcgauge.png?sfvrsn=997a69ba_3" alt="A half circle is filled from light gray to blue to just past halfway around, and reads 51%. A slider bar at the bottom matches 51% too." /></p><p>Or enhance your data visualization with the Telerik UI for ASP.NET AJAX CircularGauge component. This versatile AJAX control allows you to represent values within a full-scale, 360-degree arc. It offers a compact and intuitive solution that seamlessly
            integrates into any web application.</p><p><img src="https://d585tldpucybw.cloudfront.net/sfimages/default-source/blogs/2023/2023-06/circulargauge.png?sfvrsn=ad264b92_3" alt="A temperature gauge goes all the way around in a circle, from 0 to beyond 120." /></p><p>Explore the features of these component through these demos:</p><ol><li>Center template: Customize the appearance and behavior of the center label within the arc/circle using templates.</li><li>Scale customization: Tailor the visual properties of the component to meet your specific application requirements.</li><li>Color ranges: Assign different fill colors to values based on their significance, enhancing the meaning of the visualization.</li></ol><p>See the Telerik UI for ASP.NET AJAX <a href="https://demos.telerik.com/aspnet-ajax/gauge/examples/types/arcgauge/defaultcs.aspx" target="_blank">ArcGauge</a> and <a href="https://demos.telerik.com/aspnet-ajax/gauge/Examples/Types/CircularGauge/DefaultCS.aspx" target="_blank">CircularGauge</a> in action.</p><h3 id="fixes-and-improvements">Fixes and Improvements</h3><p>In this release, we have made several enhancements in the Ajax, AutoCompleteBox, Button, Calendar, Captcha, Combobox, Editor, ListView, Signature and Treeview components. These improvements include adding support for the latest Chrome browser
            on iOS mobile devices and updating the W3C validator in the XHTML Validator dialog of RadEditor to the latest version.</p><p><strong>Single Line RadAutoCompleteBox</strong><br />Responding to customer feedback, we have introduced an additional mode for the RadAutoComplete component. Alongside the multiline option, you can now utilize the SingleLineEntries property to
            configure the AutoComplete feature. This new setting enables the display of all input provided in a single line input field with a horizontal scroll.</p><p><img src="https://d585tldpucybw.cloudfront.net/sfimages/default-source/blogs/2023/2023-03/new-singlelineentries-property.gif?sfvrsn=e3706b4d_3" alt="Properties all show in a single line" /></p><p><a href="https://demos.telerik.com/aspnet-ajax/autocompletebox/examples/default/defaultcs.aspx" target="_blank">See a demo of the single line mode of the UI for ASP.NET AJAX AutoComplete component.</a></p><p><strong>Integration demo for RadEditor and RadSignature</strong><br />Take a look at the <a href="https://demos.telerik.com/aspnet-ajax/editor/examples/signaturedialog/defaultcs.aspx" target="_blank">Signature Dialog demo</a> to understand how you can incorporate handwritten signatures into a WYSIWYG (what you see is what you get) editor. This demo presents a signature pad that allows users to draw their signatures. Once users finish creating their signature, they
            can click on the &ldquo;Store on Server as PNG and Insert&rdquo; button. This action saves the signature as a PNG file and seamlessly inserts the image into the editor.</p><p><img src="https://d585tldpucybw.cloudfront.net/sfimages/default-source/blogs/2023/2023-03/editor-signaturedialog.gif?sfvrsn=868286c2_3" alt="User draws signature and inserts it" /></p><h3 id="end-of-.net-3.5-4.0-support">End of .NET 3.5-4.0 Support</h3><p>Please note that R2 2023 SP1 on March 15 is the last version to provide support and assemblies for .NET Framework 3.5 and 4.0.</p><p>As of R2 2023, we will continue shipping assemblies compatible with .NET 4.5-4.8 versions of the framework. You can read more at: <a href="https://docs.telerik.com/devtools/aspnet-ajax/getting-started/installation/technical-information#end-of-net-framework-35-and-40-support-for-telerik-ui-for-aspnet-ajax" target="_blank">End of .NET Framework 3.5 and 4.0 Support for Telerik UI for ASP.NET AJAX</a>.</p><h2 id="progress-telerik-.net-web-desktop--mobile-products-r2-2023-release-webinar--june-8">Progress Telerik .NET Web, Desktop &amp; Mobile Products R2 2023 Release Webinar | June 8</h2><p><a target="_blank" href="https://www.telerik.com/campaigns/telerik-r2-2023-release-webinar-web-desktop-mobile-and-cross-platform-products"><img src="https://d585tldpucybw.cloudfront.net/sfimages/default-source/blogs/2023/2023-04/telerik-dev-webinar-r2.png?sfvrsn=6ea4b1c3_3" alt="" /></a></p><p>Discover all updates across Telerik <a target="_blank" href="https://www.telerik.com/blazor-ui">UI for Blazor</a>,
 <a target="_blank" href="https://www.telerik.com/aspnet-core-ui">UI for ASP.NET Core</a>, <a target="_blank" href="https://www.telerik.com/aspnet-mvc">UI for ASP.NET MVC</a>,
 <a target="_blank" href="https://www.telerik.com/products/aspnet-ajax.aspx">UI for ASP.NET AJAX</a>, <a target="_blank" href="https://www.telerik.com/products/wpf/overview.aspx">UI for WPF</a>,
 <a target="_blank" href="https://www.telerik.com/products/winforms.aspx">UI for WinForms</a>, <a target="_blank" href="https://www.telerik.com/winui">UI for WinUI</a>, <a target="_blank" href="https://www.telerik.com/maui-ui">UI for .NET MAUI</a> and <a target="_blank" href="https://www.telerik.com/xamarin-ui">UI for Xamarin</a> and
 <a target="_blank" href="https://www.telerik.com/themebuilder">ThemeBuilder</a>.</p><p><a href="https://www.telerik.com/campaigns/telerik-r2-2023-release-webinar-web-desktop-mobile-and-cross-platform-products" class="Btn" target="_blank">Save Your Seat</a></p><h3 id="join-us-on-twitch">Join Us on Twitch</h3><p>Join the  <a href="https://www.telerik.com/codeitlive" target="_blank">Livestream Release Party</a> on release day, June 7, 11 a.m. &ndash; 12:30 p.m. ET to
                hear the release news and hang out with dev friends.</p><p>The live webinars and Twitch sessions are a great opportunity for you to ask questions before and during the webinars. We&rsquo;ll be waiting to hear from you on Twitter&mdash;just use the <strong>#heyTelerik</strong> and <strong>#heyKendoUI</strong> hashtags. Another great option is the live chat during our release session on <strong><a href="https://www.twitch.tv/codeitlive%22%20/t%20%22_blank" target="_blank">CodeItLive</a>, our Twitch channel</strong>.</p><p>&nbsp;</p><img src="https://feeds.telerik.com/link/23051/16170942.gif" height="1" width="1"/>]]></content>
  </entry>
  <entry>
    <id>urn:uuid:53a85fc0-abad-4995-9c97-6b3e8de9cb26</id>
    <title type="text">How to Create the Best Working Plan with MVC Gantt Chart</title>
    <summary type="text">Create the best working plan divided by tasks and timeframes with Telerik UI for ASP.NET MVC Gantt Chart.</summary>
    <published>2023-03-08T08:21:02Z</published>
    <updated>2026-04-08T02:12:37Z</updated>
    <author>
      <name>Anton Mironov </name>
    </author>
    <link rel="alternate" href="https://feeds.telerik.com/link/23051/16009896/how-to-create-best-working-plan-mvc-gantt-chart"/>
    <content type="text"><![CDATA[<p><span class="featured">Create the best working plan divided by tasks and timeframes with Telerik UI for ASP.NET MVC Gantt Chart.</span></p><p>In our daily routines, we are resolving different challenges. For the basic ones, we can easily decide how to act. However, from time to time, we do face more complex ones. What&rsquo;s the best approach to handle those? Divide them into a couple of smaller
    tasks.
</p><p>A big project implies difficult execution, but breaking it down into smaller, more digestible phases results in simplification. The <a href="https://www.telerik.com/aspnet-mvc/ganttchart" target="_blank">Gantt Chart</a> from Progress
    <a target="_blank" href="https://www.telerik.com/aspnet-mvc">Telerik UI for ASP.NET MVC</a> is the perfect tool for doing exactly that. It enables you to identify
    smaller parts of a project and plan their execution in timeframes. Furthermore, splitting the amount of time needed to finish the work and aligning it to the different phases ensures the due date is met without any delays.</p><p>The ASP.NET MVC Gantt control is part of <a href="https://demos.telerik.com/aspnet-mvc/" target="_blank">Telerik UI for ASP.NET MVC</a>, a professional-grade UI library with 110+ components for building modern and feature-rich
    web applications. The Gantt is a server-side wrapper for the <a href="https://docs.telerik.com/kendo-ui/controls/scheduling/gantt/overview" target="_blank">Kendo UI for jQuery Gantt</a> component and comes in the form of a
    HtmlHelper.
</p><h2 id="we-are-part-of-a-team">We Are Part of a Team</h2><p>Think about a time when you were given a complex task. Let&rsquo;s say that you had a software project to deliver, and the task was to implement code for it. What would have been better and more effective? To execute the project as a team.</p><p>Assigning parts of the whole implementation to different developers not only improves the work process but also promotes diversity and creative thinking. And calculating the needed time to execute the smaller tasks will provide the whole picture on how
    the process is happening.</p><p>Henry Ford said, &ldquo;If everyone is moving forward together, then success takes care of itself.&rdquo; But don&rsquo;t take our word on that&mdash;check out the <a href="https://demos.telerik.com/aspnet-mvc/gantt" target="_blank">Telerik UI for ASP.NET MVC Gantt Chart demo</a>,
 which represents exactly the project management capability of the component.</p><p><img src="https://d585tldpucybw.cloudfront.net/sfimages/default-source/blogs/2023/2023-03/1-telerik-ui-for-asp.net-mvc-gantt-blog-post.png?sfvrsn=a4d853d1_3" alt="Gantt chart" /></p><h2 id="how-to-achieve-the-desired-results-with-the-gantt-component">How to Achieve the Desired Results with the Gantt Component?</h2><p>Based on the above-mentioned use case, we can conclude that the Telerik UI for ASP.NET MVC Gantt is commonly used in project management as it provides an easy and comprehensive way of showing tasks or events displayed against time. Leveraging the Gantt
    chart, users can distinguish at a glance:</p><ul><li>What the various activities are</li><li>When each activity begins and ends</li><li>For how long each activity is scheduled to last</li><li>Where activities overlap with other activities, and by how much</li></ul><p>Here&rsquo;s a snippet which we call <strong>the declaration of the Gantt component</strong>. It allows you to configure the layout of the Gantt chart and build a hierarchy of parent and children tasks, displayed in the left-hand side of the Telerik UI
    for ASP.NET MVC Gantt component.</p><pre class=" language-csharp"><code class="prism  language-csharp">@<span class="token punctuation">(</span>Html<span class="token punctuation">.</span><span class="token function">Kendo</span><span class="token punctuation">(</span><span class="token punctuation">)</span><span class="token punctuation">.</span><span class="token generic-method function">Gantt<span class="token punctuation">&lt;</span>TaskViewModel<span class="token punctuation">,</span> DependencyViewModel<span class="token punctuation">&gt;</span></span><span class="token punctuation">(</span><span class="token punctuation">)</span> 
  <span class="token punctuation">.</span><span class="token function">Name</span><span class="token punctuation">(</span><span class="token string">"gantt"</span><span class="token punctuation">)</span> 
  <span class="token punctuation">.</span><span class="token function">Columns</span><span class="token punctuation">(</span>columns <span class="token operator">=</span><span class="token operator">&gt;</span> 
  <span class="token punctuation">{</span> 
    columns<span class="token punctuation">.</span><span class="token function">Bound</span><span class="token punctuation">(</span>c <span class="token operator">=</span><span class="token operator">&gt;</span> c<span class="token punctuation">.</span>Title<span class="token punctuation">)</span><span class="token punctuation">.</span><span class="token function">Title</span><span class="token punctuation">(</span><span class="token string">"Task"</span><span class="token punctuation">)</span><span class="token punctuation">.</span><span class="token function">Editable</span><span class="token punctuation">(</span><span class="token keyword">true</span><span class="token punctuation">)</span><span class="token punctuation">.</span><span class="token function">Sortable</span><span class="token punctuation">(</span><span class="token keyword">true</span><span class="token punctuation">)</span><span class="token punctuation">.</span><span class="token function">Width</span><span class="token punctuation">(</span><span class="token number">200</span><span class="token punctuation">)</span><span class="token punctuation">;</span> 
    columns<span class="token punctuation">.</span><span class="token function">Bound</span><span class="token punctuation">(</span>c <span class="token operator">=</span><span class="token operator">&gt;</span> c<span class="token punctuation">.</span>Start<span class="token punctuation">)</span><span class="token punctuation">.</span><span class="token function">Title</span><span class="token punctuation">(</span><span class="token string">"Actual Start Date"</span><span class="token punctuation">)</span><span class="token punctuation">.</span><span class="token function">Format</span><span class="token punctuation">(</span><span class="token string">"{0:M/d/yyyy}"</span><span class="token punctuation">)</span><span class="token punctuation">.</span><span class="token function">Width</span><span class="token punctuation">(</span><span class="token number">85</span><span class="token punctuation">)</span><span class="token punctuation">;</span> 
    columns<span class="token punctuation">.</span><span class="token function">Bound</span><span class="token punctuation">(</span>c <span class="token operator">=</span><span class="token operator">&gt;</span> c<span class="token punctuation">.</span>End<span class="token punctuation">)</span><span class="token punctuation">.</span><span class="token function">Title</span><span class="token punctuation">(</span><span class="token string">"Actual End Date"</span><span class="token punctuation">)</span><span class="token punctuation">.</span><span class="token function">Format</span><span class="token punctuation">(</span><span class="token string">"{0:M/d/yyyy}"</span><span class="token punctuation">)</span><span class="token punctuation">.</span><span class="token function">Width</span><span class="token punctuation">(</span><span class="token number">85</span><span class="token punctuation">)</span><span class="token punctuation">;</span> 
    columns<span class="token punctuation">.</span><span class="token function">Bound</span><span class="token punctuation">(</span>c <span class="token operator">=</span><span class="token operator">&gt;</span> c<span class="token punctuation">.</span>PlannedStart<span class="token punctuation">)</span><span class="token punctuation">.</span><span class="token function">Title</span><span class="token punctuation">(</span><span class="token string">"Planned Start Date"</span><span class="token punctuation">)</span><span class="token punctuation">.</span><span class="token function">Format</span><span class="token punctuation">(</span><span class="token string">"{0:M/d/yyyy}"</span><span class="token punctuation">)</span><span class="token punctuation">.</span><span class="token function">Width</span><span class="token punctuation">(</span><span class="token number">85</span><span class="token punctuation">)</span><span class="token punctuation">;</span> 
    columns<span class="token punctuation">.</span><span class="token function">Bound</span><span class="token punctuation">(</span>c <span class="token operator">=</span><span class="token operator">&gt;</span> c<span class="token punctuation">.</span>PlannedEnd<span class="token punctuation">)</span><span class="token punctuation">.</span><span class="token function">Title</span><span class="token punctuation">(</span><span class="token string">"Planned End Date"</span><span class="token punctuation">)</span><span class="token punctuation">.</span><span class="token function">Format</span><span class="token punctuation">(</span><span class="token string">"{0:M/d/yyyy}"</span><span class="token punctuation">)</span><span class="token punctuation">.</span><span class="token function">Width</span><span class="token punctuation">(</span><span class="token number">85</span><span class="token punctuation">)</span><span class="token punctuation">;</span> 
    columns<span class="token punctuation">.</span><span class="token function">Bound</span><span class="token punctuation">(</span>c <span class="token operator">=</span><span class="token operator">&gt;</span> c<span class="token punctuation">.</span>TeamLead<span class="token punctuation">)</span><span class="token punctuation">.</span><span class="token function">Title</span><span class="token punctuation">(</span><span class="token string">"Team Lead"</span><span class="token punctuation">)</span><span class="token punctuation">.</span><span class="token function">Format</span><span class="token punctuation">(</span><span class="token string">"{0:M/d/yyyy}"</span><span class="token punctuation">)</span><span class="token punctuation">.</span><span class="token function">Width</span><span class="token punctuation">(</span><span class="token number">65</span><span class="token punctuation">)</span><span class="token punctuation">.</span><span class="token function">TemplateId</span><span class="token punctuation">(</span><span class="token string">"teamlead-template"</span><span class="token punctuation">)</span><span class="token punctuation">;</span> 
  <span class="token punctuation">}</span><span class="token punctuation">)</span> 
  <span class="token punctuation">.</span><span class="token function">Views</span><span class="token punctuation">(</span>views <span class="token operator">=</span><span class="token operator">&gt;</span> 
  <span class="token punctuation">{</span> 
    views<span class="token punctuation">.</span><span class="token function">DayView</span><span class="token punctuation">(</span><span class="token punctuation">)</span><span class="token punctuation">;</span> 
    views<span class="token punctuation">.</span><span class="token function">WeekView</span><span class="token punctuation">(</span>weekView <span class="token operator">=</span><span class="token operator">&gt;</span> weekView<span class="token punctuation">.</span><span class="token function">Selected</span><span class="token punctuation">(</span><span class="token keyword">true</span><span class="token punctuation">)</span><span class="token punctuation">)</span><span class="token punctuation">;</span> 
    views<span class="token punctuation">.</span><span class="token function">MonthView</span><span class="token punctuation">(</span><span class="token punctuation">)</span><span class="token punctuation">;</span> 
  <span class="token punctuation">}</span><span class="token punctuation">)</span> 
  <span class="token punctuation">.</span><span class="token function">ShowPlannedTasks</span><span class="token punctuation">(</span><span class="token keyword">true</span><span class="token punctuation">)</span> 
  <span class="token punctuation">.</span><span class="token function">Editable</span><span class="token punctuation">(</span><span class="token keyword">true</span><span class="token punctuation">)</span> 
  <span class="token punctuation">.</span><span class="token function">Resizable</span><span class="token punctuation">(</span><span class="token keyword">true</span><span class="token punctuation">)</span> 
  <span class="token punctuation">.</span><span class="token function">Height</span><span class="token punctuation">(</span><span class="token number">590</span><span class="token punctuation">)</span> 
  <span class="token punctuation">.</span><span class="token function">TaskTemplateId</span><span class="token punctuation">(</span><span class="token string">"task-template"</span><span class="token punctuation">)</span> 
  <span class="token punctuation">.</span><span class="token function">ListWidth</span><span class="token punctuation">(</span><span class="token string">"45%"</span><span class="token punctuation">)</span> 
  <span class="token punctuation">.</span><span class="token function">ShowWorkHours</span><span class="token punctuation">(</span><span class="token keyword">false</span><span class="token punctuation">)</span> 
  <span class="token punctuation">.</span><span class="token function">ShowWorkDays</span><span class="token punctuation">(</span><span class="token keyword">false</span><span class="token punctuation">)</span> 
  <span class="token punctuation">.</span><span class="token function">Snap</span><span class="token punctuation">(</span><span class="token keyword">false</span><span class="token punctuation">)</span> 
  <span class="token punctuation">.</span><span class="token function">DataSource</span><span class="token punctuation">(</span>d <span class="token operator">=</span><span class="token operator">&gt;</span> d 
    <span class="token punctuation">.</span><span class="token function">Model</span><span class="token punctuation">(</span>m <span class="token operator">=</span><span class="token operator">&gt;</span> 
    <span class="token punctuation">{</span> 
      m<span class="token punctuation">.</span><span class="token function">Id</span><span class="token punctuation">(</span>f <span class="token operator">=</span><span class="token operator">&gt;</span> f<span class="token punctuation">.</span>TaskID<span class="token punctuation">)</span><span class="token punctuation">;</span> 
      m<span class="token punctuation">.</span><span class="token function">ParentId</span><span class="token punctuation">(</span>f <span class="token operator">=</span><span class="token operator">&gt;</span> f<span class="token punctuation">.</span>ParentID<span class="token punctuation">)</span><span class="token punctuation">;</span> 
      m<span class="token punctuation">.</span><span class="token function">OrderId</span><span class="token punctuation">(</span>f <span class="token operator">=</span><span class="token operator">&gt;</span> f<span class="token punctuation">.</span>OrderId<span class="token punctuation">)</span><span class="token punctuation">;</span> 
      m<span class="token punctuation">.</span><span class="token function">Field</span><span class="token punctuation">(</span>f <span class="token operator">=</span><span class="token operator">&gt;</span> f<span class="token punctuation">.</span>Expanded<span class="token punctuation">)</span><span class="token punctuation">.</span><span class="token function">DefaultValue</span><span class="token punctuation">(</span><span class="token keyword">true</span><span class="token punctuation">)</span><span class="token punctuation">;</span> 
    <span class="token punctuation">}</span><span class="token punctuation">)</span> 
    <span class="token punctuation">.</span><span class="token function">Read</span><span class="token punctuation">(</span><span class="token string">"Read_Tasks"</span><span class="token punctuation">,</span> <span class="token string">"Home"</span><span class="token punctuation">)</span> 
    <span class="token punctuation">.</span><span class="token function">Update</span><span class="token punctuation">(</span><span class="token string">"Update_Tasks"</span><span class="token punctuation">,</span> <span class="token string">"Home"</span><span class="token punctuation">)</span> 
  <span class="token punctuation">)</span> 
  <span class="token punctuation">.</span><span class="token function">DependenciesDataSource</span><span class="token punctuation">(</span>d <span class="token operator">=</span><span class="token operator">&gt;</span> d 
    <span class="token punctuation">.</span><span class="token function">Model</span><span class="token punctuation">(</span>m <span class="token operator">=</span><span class="token operator">&gt;</span> 
    <span class="token punctuation">{</span> 
      m<span class="token punctuation">.</span><span class="token function">Id</span><span class="token punctuation">(</span>f <span class="token operator">=</span><span class="token operator">&gt;</span> f<span class="token punctuation">.</span>DependencyID<span class="token punctuation">)</span><span class="token punctuation">;</span> 
      m<span class="token punctuation">.</span><span class="token function">PredecessorId</span><span class="token punctuation">(</span>f <span class="token operator">=</span><span class="token operator">&gt;</span> f<span class="token punctuation">.</span>PredecessorID<span class="token punctuation">)</span><span class="token punctuation">;</span> 
      m<span class="token punctuation">.</span><span class="token function">SuccessorId</span><span class="token punctuation">(</span>f <span class="token operator">=</span><span class="token operator">&gt;</span> f<span class="token punctuation">.</span>SuccessorID<span class="token punctuation">)</span><span class="token punctuation">;</span> 
      m<span class="token punctuation">.</span><span class="token function">Type</span><span class="token punctuation">(</span>f <span class="token operator">=</span><span class="token operator">&gt;</span> f<span class="token punctuation">.</span>Type<span class="token punctuation">)</span><span class="token punctuation">;</span> 
    <span class="token punctuation">}</span><span class="token punctuation">)</span> 
    <span class="token punctuation">.</span><span class="token function">Read</span><span class="token punctuation">(</span><span class="token string">"Read_Dependencies"</span><span class="token punctuation">,</span> <span class="token string">"Home"</span><span class="token punctuation">)</span> 
    <span class="token punctuation">.</span><span class="token function">Create</span><span class="token punctuation">(</span><span class="token string">"Create_Dependency"</span><span class="token punctuation">,</span> <span class="token string">"Home"</span><span class="token punctuation">)</span> 
    <span class="token punctuation">.</span><span class="token function">Destroy</span><span class="token punctuation">(</span><span class="token string">"Destroy_Dependency"</span><span class="token punctuation">,</span> <span class="token string">"Home"</span><span class="token punctuation">)</span> 
  <span class="token punctuation">)</span> 
<span class="token punctuation">)</span> 
</code></pre><p><img src="https://d585tldpucybw.cloudfront.net/sfimages/default-source/blogs/2023/2023-03/2-telerik-ui-for-asp.net-mvc-gantt-team-view-blog-post.png?sfvrsn=cb2a2f22_3" alt="Gantt chart with a team view" /></p><p>Let&rsquo;s highlight and pay a little bit more attention to this particular part of the snippet:</p><pre class=" language-csharp"><code class="prism  language-csharp"><span class="token punctuation">.</span><span class="token function">Views</span><span class="token punctuation">(</span>views <span class="token operator">=</span><span class="token operator">&gt;</span>
<span class="token punctuation">{</span>
  views<span class="token punctuation">.</span><span class="token function">DayView</span><span class="token punctuation">(</span><span class="token punctuation">)</span><span class="token punctuation">;</span>
  views<span class="token punctuation">.</span><span class="token function">WeekView</span><span class="token punctuation">(</span>weekView <span class="token operator">=</span><span class="token operator">&gt;</span> weekView<span class="token punctuation">.</span><span class="token function">Selected</span><span class="token punctuation">(</span><span class="token keyword">true</span><span class="token punctuation">)</span><span class="token punctuation">)</span><span class="token punctuation">;</span>
  views<span class="token punctuation">.</span><span class="token function">MonthView</span><span class="token punctuation">(</span><span class="token punctuation">)</span><span class="token punctuation">;</span>
</code></pre><p>It will allow you to <strong>display the flow choosing a specific time view&mdash;day, week or month</strong>. This capability is available through the Gantt Chart integration with the <a href="https://www.telerik.com/aspnet-mvc/toolbar" target="_blank">Telerik UI for ASP.NET MVC ToolBar</a> component.</p><p><img src="https://d585tldpucybw.cloudfront.net/sfimages/default-source/blogs/2023/2023-03/3-telerik-ui-for-asp.net-mvc-gantt-day-week-month-blog-post.gif?sfvrsn=7596e927_3" alt="Gantt chart day, week, moth views" /></p><p>Feel free to also apply <a href="https://demos.telerik.com/aspnet-mvc/gantt/task-template" target="_blank">custom task templates</a> to ensure a better user experience. The <a href="https://docs.telerik.com/kendo-ui/api/javascript/ui/gantt" target="_blank">Client API</a> and the <a href="https://docs.telerik.com/aspnet-mvc/api/Kendo.Mvc.UI.Fluent/GanttBuilder" target="_blank">Server API</a> provide many configuration options, along with
    dozens of methods and events.</p><p>The snippet below shows the <strong>configuration of the team lead column within the project management chart</strong> as well as the task templates:</p><pre class=" language-html"><code class="prism  language-html"><span class="token tag"><span class="token tag"><span class="token punctuation">&lt;</span>script</span> <span class="token attr-name">id</span><span class="token attr-value"><span class="token punctuation">=</span><span class="token punctuation">"</span>task-template<span class="token punctuation">"</span></span> <span class="token attr-name">type</span><span class="token attr-value"><span class="token punctuation">=</span><span class="token punctuation">"</span>text/x-kendo-template<span class="token punctuation">"</span></span><span class="token punctuation">&gt;</span></span><span class="token script language-javascript"> 
    <span class="token operator">&lt;</span>div <span class="token keyword">class</span><span class="token operator">=</span><span class="token string">"template"</span> style<span class="token operator">=</span><span class="token string">"display: flex;"</span><span class="token operator">&gt;</span> 
        <span class="token operator">&lt;</span>span style<span class="token operator">=</span><span class="token string">"padding-right: 8px;"</span><span class="token operator">&gt;</span>#<span class="token operator">=</span> TeamLead #<span class="token operator">&lt;</span><span class="token operator">/</span>span<span class="token operator">&gt;</span> 
        <span class="token operator">&lt;</span>div <span class="token keyword">class</span><span class="token operator">=</span><span class="token string">"progress"</span> style<span class="token operator">=</span><span class="token string">"width:#= (100 * parseFloat(percentComplete)) #%"</span><span class="token operator">&gt;</span>#<span class="token operator">=</span> <span class="token punctuation">(</span><span class="token number">100</span> <span class="token operator">*</span> <span class="token function">parseFloat</span><span class="token punctuation">(</span>percentComplete<span class="token punctuation">)</span><span class="token punctuation">)</span> #<span class="token operator">%</span><span class="token operator">&lt;</span><span class="token operator">/</span>div<span class="token operator">&gt;</span> 
    <span class="token operator">&lt;</span><span class="token operator">/</span>div<span class="token operator">&gt;</span> 
</span><span class="token tag"><span class="token tag"><span class="token punctuation">&lt;/</span>script</span><span class="token punctuation">&gt;</span></span> 
 
<span class="token tag"><span class="token tag"><span class="token punctuation">&lt;</span>script</span> <span class="token attr-name">id</span><span class="token attr-value"><span class="token punctuation">=</span><span class="token punctuation">"</span>teamlead-template<span class="token punctuation">"</span></span> <span class="token attr-name">type</span><span class="token attr-value"><span class="token punctuation">=</span><span class="token punctuation">"</span>text/x-kendo-template<span class="token punctuation">"</span></span><span class="token punctuation">&gt;</span></span><span class="token script language-javascript"> 
    <span class="token operator">&lt;</span>div <span class="token keyword">class</span><span class="token operator">=</span><span class="token string">"template"</span><span class="token operator">&gt;</span> 
        <span class="token operator">&lt;</span>img <span class="token keyword">class</span><span class="token operator">=</span><span class="token string">"resource-img"</span> src<span class="token operator">=</span><span class="token string">"../content/#:ImageID#.jpg"</span><span class="token operator">/</span><span class="token operator">&gt;</span> 
<span class="token operator">&lt;</span>span<span class="token operator">&gt;</span>#<span class="token operator">=</span> TeamLead #<span class="token operator">&lt;</span><span class="token operator">/</span>span<span class="token operator">&gt;</span> 
    <span class="token operator">&lt;</span><span class="token operator">/</span>div<span class="token operator">&gt;</span> 
</span><span class="token tag"><span class="token tag"><span class="token punctuation">&lt;/</span>script</span><span class="token punctuation">&gt;</span></span> 
</code></pre><p>In the right-hand side of the Gantt component, you can visualize every chunk of the project management process with its own private settings as a start and end time. You can also represent the percentage that indicates the progress of the task completion.</p><p><img src="https://d585tldpucybw.cloudfront.net/sfimages/default-source/blogs/2023/2023-03/4-telerik-ui-for-asp.net-mvc-gantt-task-view-blog-post.png?sfvrsn=fcb465b6_3" alt="Gantt view of week with team members and percentage of completion" /></p><p>Below you&rsquo;ll find a snippet on how to create a TaskViewModel in the Controller:</p><pre class=" language-csharp"><code class="prism  language-csharp"><span class="token keyword">new</span> <span class="token class-name">TaskViewModel</span>
<span class="token punctuation">{</span>
  TaskID <span class="token operator">=</span> Guid<span class="token punctuation">.</span><span class="token function">Parse</span><span class="token punctuation">(</span><span class="token string">"c57c36ff-0695-45af-8be5-15ad6547311d"</span><span class="token punctuation">)</span><span class="token punctuation">,</span>
  Title <span class="token operator">=</span> <span class="token string">"Software validation, research and implementation"</span><span class="token punctuation">,</span>
  ParentID <span class="token operator">=</span> <span class="token keyword">null</span><span class="token punctuation">,</span>
  OrderId <span class="token operator">=</span> <span class="token number">0</span><span class="token punctuation">,</span>
  Start <span class="token operator">=</span> <span class="token keyword">new</span> <span class="token class-name">DateTime</span><span class="token punctuation">(</span><span class="token number">2020</span><span class="token punctuation">,</span> <span class="token number">6</span><span class="token punctuation">,</span> <span class="token number">1</span><span class="token punctuation">,</span> <span class="token number">3</span><span class="token punctuation">,</span> <span class="token number">0</span><span class="token punctuation">,</span> <span class="token number">0</span><span class="token punctuation">)</span><span class="token punctuation">,</span>
  End <span class="token operator">=</span> <span class="token keyword">new</span> <span class="token class-name">DateTime</span><span class="token punctuation">(</span><span class="token number">2020</span><span class="token punctuation">,</span> <span class="token number">6</span><span class="token punctuation">,</span> <span class="token number">18</span><span class="token punctuation">,</span> <span class="token number">3</span><span class="token punctuation">,</span> <span class="token number">0</span><span class="token punctuation">,</span> <span class="token number">0</span><span class="token punctuation">)</span><span class="token punctuation">,</span>
  PlannedStart <span class="token operator">=</span> <span class="token keyword">new</span> <span class="token class-name">DateTime</span><span class="token punctuation">(</span><span class="token number">2020</span><span class="token punctuation">,</span> <span class="token number">6</span><span class="token punctuation">,</span> <span class="token number">1</span><span class="token punctuation">,</span> <span class="token number">3</span><span class="token punctuation">,</span> <span class="token number">0</span><span class="token punctuation">,</span> <span class="token number">0</span><span class="token punctuation">)</span><span class="token punctuation">,</span>
  PlannedEnd <span class="token operator">=</span> <span class="token keyword">new</span> <span class="token class-name">DateTime</span><span class="token punctuation">(</span><span class="token number">2020</span><span class="token punctuation">,</span> <span class="token number">6</span><span class="token punctuation">,</span> <span class="token number">12</span><span class="token punctuation">,</span> <span class="token number">3</span><span class="token punctuation">,</span> <span class="token number">0</span><span class="token punctuation">,</span> <span class="token number">0</span><span class="token punctuation">)</span><span class="token punctuation">,</span>
  PercentComplete <span class="token operator">=</span> <span class="token number">0</span><span class="token punctuation">.</span>43M<span class="token punctuation">,</span>
  Summary <span class="token operator">=</span> <span class="token keyword">true</span><span class="token punctuation">,</span>
  Expanded <span class="token operator">=</span> <span class="token keyword">true</span><span class="token punctuation">,</span>
  TeamLead <span class="token operator">=</span> <span class="token string">"Darrel Solis"</span><span class="token punctuation">,</span>
  ImageID <span class="token operator">=</span> <span class="token number">1</span><span class="token punctuation">,</span>
<span class="token punctuation">}</span>
</code></pre><h2 id="test-the-flexibility-of-the-gantt-component">Test the Flexibility of the Gantt Component</h2><p>There are many reasons why to apply custom tools to a UI component like the Gantt. The biggest is, of course, the customization enabling you to align the look and feel of the component to your personal or brand needs.</p><p>Adding custom tools to the Gannt component also allows you to control the presentation of the data (tasks, events, time duration, etc.) and the overall design of the charts based on your preferences or style guides, including dark or light modes, different
    button colors and many more.</p><p>There are numerous examples of custom tools added to a Gantt. <a href="https://dojo.telerik.com/@anton.mironov/OmaFulAH" target="_blank">Check out this example to see how to color a hovered item</a>.</p><p><img src="https://d585tldpucybw.cloudfront.net/sfimages/default-source/blogs/2023/2023-03/5-telerik-ui-for-asp.net-mvc-gantt-hovered-item-blog-post.gif?sfvrsn=39a2d938_3" alt="Hovering a Gantt item turns the row yellow, and selecting it is a more orange color" /></p><p>If you&rsquo;re interested in learning more about the Gantt Chart&rsquo;s custom scenarios and implementations, feel free to visit the following libraries:</p><ul><li><a href="https://docs.telerik.com/aspnet-mvc/search?q=gantt" target="_blank">ASP.NET MVC articles</a></li><li><a href="https://docs.telerik.com/kendo-ui/search?q=gantt" target="_blank">Kendo UI for jQuery articles</a></li><li><a href="https://docs.telerik.com/aspnet-core/search?q=gantt" target="_blank">ASP.NET Core articles</a></li></ul><h2 id="try-out-the-telerik-ui-for-asp.-net-mvc-gantt-chart-today">Try out the Telerik UI for ASP.NET MVC Gantt Chart Today</h2><p>Want to start taking advantage of the ASP.NET MVC Gantt, or any of the other 110+ ready-made components, like the Grid or the Scheduler? Start a free trial today and experience for yourself that building rich interactive applications for half the time
    is just a click away.</p><p><a href="https://www.telerik.com/try/ui-for-asp.net-mvc" target="_blank" class="Btn">Try Telerik UI for ASP.NET MVC</a></p><h2 id="sharing-is-caring">Sharing Is Caring</h2><p>Once you try the Gantt Chart component, don&rsquo;t forget to share your experience and ideas in the comments sections below or by visiting the Telerik UI for ASP.NET MVC <a href="https://feedback.telerik.com/aspnet-mvc" target="_blank">Feedback portal</a>.
 Your input makes a difference.</p><h2 id="for-the-curious-ones-history-of-gantt">For the Curious Ones: History of Gantt</h2><p>The first Gantt chart was devised in the mid-1890s by Karol Adamiecki, a Polish engineer who ran a steelwork in southern Poland and became interested in management ideas and techniques.</p><p>15 years after Adamiecki, Henry Gantt, an American engineer and project management consultant, devised his own version of the chart and it was exactly this version that became widely known and popular in western countries.</p><p>Consequently, it was Henry Gantt whose name was to become associated with charts of this type.</p><p><img src="https://d585tldpucybw.cloudfront.net/sfimages/default-source/blogs/2023/2023-03/6-telerik-ui-for-asp.net-mvc-gantt-inventors-blog-post.png?sfvrsn=3cf6fb2b_3" alt="Henry Gantt and Karol Adamiecki" /></p><img src="https://feeds.telerik.com/link/23051/16009896.gif" height="1" width="1"/>]]></content>
  </entry>
  <entry>
    <id>urn:uuid:c8e1064b-51f6-41ce-95bb-13a24c7e7797</id>
    <title type="text">Customizing Filtering in the Telerik UI for ASP.NET MVC Grid</title>
    <summary type="text">When it comes to filtering data, the Telerik UI for ASP.NET MVC Grid gives the user tremendous power—it can, in fact, be a little intimidating. Here’s how to configure the grid to meet your user’s needs.</summary>
    <published>2023-02-15T15:12:17Z</published>
    <updated>2026-04-08T02:12:37Z</updated>
    <author>
      <name>Peter Vogel </name>
    </author>
    <link rel="alternate" href="https://feeds.telerik.com/link/23051/15977298/customizing-filtering-telerik-ui-aspnet-mvc-grid"/>
    <content type="text"><![CDATA[<p><span class="featured">When it comes to filtering data, the Telerik UI for ASP.NET MVC Grid gives the user tremendous power&mdash;it can, in fact, be a little intimidating. Here&rsquo;s how to configure the grid to meet your user&rsquo;s needs.</span></p><p>With a grid of any length, if users don&rsquo;t have the ability to filter the items down to the one they&rsquo;re actually interested in &hellip; well, then, your page is going to fail. A grid displaying more than a half dozen items is only useful if
    it lets users find the items they need.</p><p>The thing is, if the <a href="https://www.telerik.com/aspnet-mvc/grid" target="_blank">Progress Telerik UI for ASP.NET MVC</a> <a href="https://www.telerik.com/aspnet-mvc/grid" target="_blank">Grid</a> has
    any failing, it&rsquo;s that its filtering options provide so much functionality that it&rsquo;s a little intimidating to users.</p><p><img src="https://d585tldpucybw.cloudfront.net/sfimages/default-source/blogs/2023/2023-02/aspnetgrid-filtering-01-no-configuration.png?sfvrsn=ea9767db_3" title="No Configuration" alt="A screenshot of the first column of a grid with its filtering dialog displayed. The captions in the dialog are generic (“Show items with value that”). There are textboxes provided for entering values but they don’t provide column-specific support (i.e., lists of acceptable values or a date selection tool). There are two sets of textboxes joined by an And operator." /></p><p>More specifically, while providing every filtering option your user&rsquo;s might need, the default settings don&rsquo;t focus on what your users need in this UI. Fortunately, the Grid comes with all the options you need to create a filtering experience
    focused on your users&rsquo; actual needs.</p><p>By the way, calling this component the &ldquo;ASP.NET MVC Grid&rdquo; is a bit of a misnomer&mdash;the Grid works as well in Razor Pages as it does in MVC Views. Here&rsquo;s the markup for a grid added to an application&rsquo;s default Index.cshtml Razor
    Page, for example (and it&rsquo;s almost identical to what you&rsquo;d use in an MVC View):</p><pre class=" language-markup"><code class="prism  language-markup"><span class="token tag"><span class="token tag"><span class="token punctuation">&lt;</span>kendo-grid</span> <span class="token attr-name">name</span><span class="token attr-value"><span class="token punctuation">=</span><span class="token punctuation">"</span>products<span class="token punctuation">"</span></span><span class="token punctuation">&gt;</span></span>
    <span class="token tag"><span class="token tag"><span class="token punctuation">&lt;</span>datasource</span> <span class="token attr-name">name</span><span class="token attr-value"><span class="token punctuation">=</span><span class="token punctuation">"</span>productsDS<span class="token punctuation">"</span></span> <span class="token attr-name">type</span><span class="token attr-value"><span class="token punctuation">=</span><span class="token punctuation">"</span>DataSourceTagHelperType.Ajax<span class="token punctuation">"</span></span><span class="token punctuation">&gt;</span></span>
        <span class="token tag"><span class="token tag"><span class="token punctuation">&lt;</span>transport</span><span class="token punctuation">&gt;</span></span>
            <span class="token tag"><span class="token tag"><span class="token punctuation">&lt;</span>read</span> <span class="token attr-name">url</span><span class="token attr-value"><span class="token punctuation">=</span><span class="token punctuation">'</span>@Url.Page(<span class="token punctuation">"</span>/Index<span class="token punctuation">"</span>,<span class="token punctuation">"</span>Read<span class="token punctuation">"</span>)<span class="token punctuation">'</span></span> <span class="token attr-name">data</span><span class="token attr-value"><span class="token punctuation">=</span><span class="token punctuation">"</span>dataFunction<span class="token punctuation">"</span></span> <span class="token punctuation">/&gt;</span></span>
        <span class="token tag"><span class="token tag"><span class="token punctuation">&lt;/</span>transport</span><span class="token punctuation">&gt;</span></span>
        <span class="token tag"><span class="token tag"><span class="token punctuation">&lt;</span>schema</span><span class="token punctuation">&gt;</span></span>
            <span class="token tag"><span class="token tag"><span class="token punctuation">&lt;</span>model</span><span class="token punctuation">&gt;</span></span>
                <span class="token tag"><span class="token tag"><span class="token punctuation">&lt;</span>fields</span><span class="token punctuation">&gt;</span></span>
                    <span class="token tag"><span class="token tag"><span class="token punctuation">&lt;</span>field</span> <span class="token attr-name">name</span><span class="token attr-value"><span class="token punctuation">=</span><span class="token punctuation">"</span>TotalQuantity<span class="token punctuation">"</span></span> <span class="token attr-name">type</span><span class="token attr-value"><span class="token punctuation">=</span><span class="token punctuation">"</span>number<span class="token punctuation">"</span></span><span class="token punctuation">&gt;</span></span><span class="token tag"><span class="token tag"><span class="token punctuation">&lt;/</span>field</span><span class="token punctuation">&gt;</span></span>
                    <span class="token tag"><span class="token tag"><span class="token punctuation">&lt;</span>field</span> <span class="token attr-name">name</span><span class="token attr-value"><span class="token punctuation">=</span><span class="token punctuation">"</span>LastDelivery<span class="token punctuation">"</span></span> <span class="token attr-name">type</span><span class="token attr-value"><span class="token punctuation">=</span><span class="token punctuation">"</span>date<span class="token punctuation">"</span></span><span class="token punctuation">&gt;</span></span><span class="token tag"><span class="token tag"><span class="token punctuation">&lt;/</span>field</span><span class="token punctuation">&gt;</span></span>
                    <span class="token tag"><span class="token tag"><span class="token punctuation">&lt;</span>field</span> <span class="token attr-name">name</span><span class="token attr-value"><span class="token punctuation">=</span><span class="token punctuation">"</span>InStock<span class="token punctuation">"</span></span> <span class="token attr-name">type</span><span class="token attr-value"><span class="token punctuation">=</span><span class="token punctuation">"</span>boolean<span class="token punctuation">"</span></span><span class="token punctuation">&gt;</span></span><span class="token tag"><span class="token tag"><span class="token punctuation">&lt;/</span>field</span><span class="token punctuation">&gt;</span></span>
                <span class="token tag"><span class="token tag"><span class="token punctuation">&lt;/</span>fields</span><span class="token punctuation">&gt;</span></span>
            <span class="token tag"><span class="token tag"><span class="token punctuation">&lt;/</span>model</span><span class="token punctuation">&gt;</span></span>
        <span class="token tag"><span class="token tag"><span class="token punctuation">&lt;/</span>schema</span><span class="token punctuation">&gt;</span></span>
    <span class="token tag"><span class="token tag"><span class="token punctuation">&lt;/</span>datasource</span><span class="token punctuation">&gt;</span></span>    
    <span class="token tag"><span class="token tag"><span class="token punctuation">&lt;</span>columns</span><span class="token punctuation">&gt;</span></span>
        <span class="token tag"><span class="token tag"><span class="token punctuation">&lt;</span>column</span> <span class="token attr-name">field</span><span class="token attr-value"><span class="token punctuation">=</span><span class="token punctuation">"</span>ProductId<span class="token punctuation">"</span></span> <span class="token attr-name">title</span><span class="token attr-value"><span class="token punctuation">=</span><span class="token punctuation">"</span>Id<span class="token punctuation">"</span></span> <span class="token attr-name">width</span><span class="token attr-value"><span class="token punctuation">=</span><span class="token punctuation">"</span>100<span class="token punctuation">"</span></span> <span class="token punctuation">/&gt;</span></span>
        <span class="token tag"><span class="token tag"><span class="token punctuation">&lt;</span>column</span> <span class="token attr-name">field</span><span class="token attr-value"><span class="token punctuation">=</span><span class="token punctuation">"</span>ProductName<span class="token punctuation">"</span></span> <span class="token attr-name">title</span><span class="token attr-value"><span class="token punctuation">=</span><span class="token punctuation">"</span>Name<span class="token punctuation">"</span></span> <span class="token attr-name">width</span><span class="token attr-value"><span class="token punctuation">=</span><span class="token punctuation">"</span>240<span class="token punctuation">"</span></span><span class="token punctuation">/&gt;</span></span>
        <span class="token tag"><span class="token tag"><span class="token punctuation">&lt;</span>column</span> <span class="token attr-name">field</span><span class="token attr-value"><span class="token punctuation">=</span><span class="token punctuation">"</span>LastDelivery<span class="token punctuation">"</span></span> <span class="token attr-name">format</span><span class="token attr-value"><span class="token punctuation">=</span><span class="token punctuation">"</span>{0:MMM-dd}<span class="token punctuation">"</span></span> <span class="token attr-name">title</span><span class="token attr-value"><span class="token punctuation">=</span><span class="token punctuation">"</span>Last Delivery<span class="token punctuation">"</span></span> <span class="token attr-name">width</span><span class="token attr-value"><span class="token punctuation">=</span><span class="token punctuation">"</span>150<span class="token punctuation">"</span></span> <span class="token punctuation">/&gt;</span></span>
        <span class="token tag"><span class="token tag"><span class="token punctuation">&lt;</span>column</span> <span class="token attr-name">field</span><span class="token attr-value"><span class="token punctuation">=</span><span class="token punctuation">"</span>InStock<span class="token punctuation">"</span></span> <span class="token attr-name">title</span><span class="token attr-value"><span class="token punctuation">=</span><span class="token punctuation">"</span>In Stock<span class="token punctuation">"</span></span> <span class="token attr-name">width</span><span class="token attr-value"><span class="token punctuation">=</span><span class="token punctuation">"</span>150<span class="token punctuation">"</span></span> <span class="token punctuation">/&gt;</span></span>
        <span class="token tag"><span class="token tag"><span class="token punctuation">&lt;</span>column</span> <span class="token attr-name">field</span><span class="token attr-value"><span class="token punctuation">=</span><span class="token punctuation">"</span>TotalQuantity<span class="token punctuation">"</span></span> <span class="token attr-name">title</span><span class="token attr-value"><span class="token punctuation">=</span><span class="token punctuation">"</span>Quantity on Hand<span class="token punctuation">"</span></span> <span class="token attr-name">width</span><span class="token attr-value"><span class="token punctuation">=</span><span class="token punctuation">"</span>150<span class="token punctuation">"</span></span> <span class="token punctuation">/&gt;</span></span>       
    <span class="token tag"><span class="token tag"><span class="token punctuation">&lt;/</span>columns</span><span class="token punctuation">&gt;</span></span>
    <span class="token tag"><span class="token tag"><span class="token punctuation">&lt;</span>filterable</span> <span class="token attr-name">enabled</span><span class="token attr-value"><span class="token punctuation">=</span><span class="token punctuation">"</span>true<span class="token punctuation">"</span></span> <span class="token attr-name">mode</span><span class="token attr-value"><span class="token punctuation">=</span><span class="token punctuation">"</span>row<span class="token punctuation">"</span></span> <span class="token punctuation">/&gt;</span></span>
<span class="token tag"><span class="token tag"><span class="token punctuation">&lt;/</span>kendo-grid</span><span class="token punctuation">&gt;</span></span>
</code></pre><p>From the filtering point of view, the interesting element in that markup is the last one: The filterable element which configures all the column&rsquo;s filter menus into something a little more user friendly by setting the Grid&rsquo;s filter mode to
    &ldquo;row.&rdquo;
</p><p><img src="https://d585tldpucybw.cloudfront.net/sfimages/default-source/blogs/2023/2023-02/aspnetgrid-filtering-02-initial-configuration.png?sfvrsn=89e7eb1f_3" title="Initial Configuration" alt="In this screenshot, the filter dialog has been replaced with a dropdown list of selected comparison operators (e.g. “is equal to”, “is after”). There’s a separate textbox at the top of the column for users to enter values into. This is a date column and the textbox is supported by a date selection tool." /></p><p>While the filterable element is your first step in customizing the Grid&rsquo;s filtering functionality, the other sections in the Grid&rsquo;s markup are also important when customizing the Grid&rsquo;s filtering capabilities.</p><h3 id="datasource">datasource</h3><p>The read element inside the transport element specifies where the data is to be fetched from after the Grid is downloaded to the browser. The transport element also supports update/delete/insert requests so all its calls are sent to the data source as
    POST requests.</p><p>This is also the only area that reflects that the Grid is on a Razor Page. I&rsquo;m setting the read option to a URL that points to a handler method in a Razor Page, using Url.Page (I just have to pass the page name and the handler name).</p><h3 id="schema">schema</h3><p>This element lets you specify the data type for the properties of the complex object that your grid is listing (in my case, that&rsquo;s a Product object). By default, all of the object&rsquo;s properties are assumed to be of type string so I only have
    to provide types for those properties that aren&rsquo;t string: TotalQuantity (a number), LastDelivery (a date) and InStock (a Boolean).</p><h3 id="columns">columns</h3><p>This element defines the columns in the Grid, specifying the property on the object to be displayed and some additional options (e.g., the title for the column, a format string for the data, and so on). While your Grid is displaying an object, filtering
    is organized around the Grid&rsquo;s columns.</p><h3 id="code">Code</h3><p>For the record, here&rsquo;s the C# code from my page&rsquo;s code-behind file. The OnGet method is automatically called when the page is first requested and loads a collection of Product objects named <code class="inline-code">ps</code>.</p><p>The OnPostRead method called when the grid is displayed in the browser, using that URL I set up in the grid&rsquo;s transport section. Since the Grid&rsquo;s calls are always POST requests and I specified my handler name as &ldquo;Read,&rdquo; my method
    has to be called OnPostRead.</p><p>The example returns the JSON result of converting my <code class="inline-code">ps</code> List into something the grid can use:</p><pre class=" language-csharp"><code class="prism  language-csharp"><span class="token keyword">public</span> <span class="token keyword">class</span> <span class="token class-name">IndexModel</span> <span class="token punctuation">:</span> PageModel
<span class="token punctuation">{</span>
   <span class="token keyword">public</span> <span class="token keyword">static</span> IList<span class="token operator">&lt;</span>Product<span class="token operator">&gt;</span> ps<span class="token punctuation">;</span>

   <span class="token keyword">public</span> <span class="token keyword">async</span> <span class="token keyword">void</span> <span class="token function">OnGet</span><span class="token punctuation">(</span><span class="token punctuation">)</span>
   <span class="token punctuation">{</span>
      <span class="token keyword">if</span> <span class="token punctuation">(</span> ps <span class="token operator">==</span> <span class="token keyword">null</span><span class="token punctuation">)</span>
      <span class="token punctuation">{</span>
          ProductRepo pr <span class="token operator">=</span> <span class="token keyword">new</span> <span class="token class-name">ProductRepo</span><span class="token punctuation">(</span><span class="token punctuation">)</span><span class="token punctuation">;</span>
          ps <span class="token operator">=</span> <span class="token keyword">await</span> pr<span class="token punctuation">.</span><span class="token function">GetAllAsync</span><span class="token punctuation">(</span><span class="token punctuation">)</span><span class="token punctuation">;</span>
      <span class="token punctuation">}</span>
   <span class="token punctuation">}</span>

   <span class="token keyword">public</span> JsonResult <span class="token function">OnPostRead</span><span class="token punctuation">(</span><span class="token punctuation">[</span>DataSourceRequest<span class="token punctuation">]</span> DataSourceRequest request<span class="token punctuation">)</span>
   <span class="token punctuation">{</span>
          <span class="token keyword">return</span> <span class="token keyword">new</span> <span class="token class-name">JsonResult</span><span class="token punctuation">(</span>ps<span class="token punctuation">.</span><span class="token function">ToDataSourceResult</span><span class="token punctuation">(</span>request<span class="token punctuation">)</span><span class="token punctuation">)</span><span class="token punctuation">;</span>
   <span class="token punctuation">}</span>
<span class="token punctuation">}</span>
</code></pre><p>By the way, I could have set my grid up to call any <a href="https://demos.telerik.com/aspnet-core/grid/custom-datasource" target="_blank">web service I wanted</a>, but I like the way Razor Pages bundles everything up into a single
    package. I could also just as easily be using an <a href="https://www.telerik.com/blogs/asp-net-core-and-data-grids" target="_blank">Entity Framework context and table</a> to build my grid&rsquo;s list of objects.</p><h2 id="configuring-filtering">Configuring Filtering</h2><p>If the first step in customizing filtering is adding the filterable element, the second step is specifying the data types in the schema section.</p><p>Because I&rsquo;ve declared my LastDelivery property as a date in my schema section, the Grid provides a calendar control on the LastDelivery column to let the user select the data to filter on. Similarly, by declaring my InStock property as a Boolean,
    the user gets two radio buttons at the top of the InStock column to use to filter rows. And, finally, because my TotalQuantity is flagged as a number, that column gets a spinner for selecting numeric values.</p><p><img src="https://d585tldpucybw.cloudfront.net/sfimages/default-source/blogs/2023/2023-02/aspnetgrid-filtering-03-column-headers.png?sfvrsn=7a197aa7_3" title="Column Headers" alt="A screenshot of the whole grid. Every column has a textbox on top of the column for the filtering column except for the Boolean InStock column – it has two radio buttons labeled “Is true” and “Is false” -- and the numeric Total Quantity column – it has a numeric spinner at its top. The LastDelivery column has a date selection option to the right of its textbox." /></p><p>Thanks to my schema settings, even the filter menus on each column that pick the comparison operators are configured to match the data type of the property the column is displaying:</p><p><img src="https://d585tldpucybw.cloudfront.net/sfimages/default-source/blogs/2023/2023-02/aspnetgrid-filtering-04-column-menus.png?sfvrsn=65e676c6_3" title="Column Menus" alt="Three columns from the grid showing the comparison operators available to filter with. The string column has options “is equal to”, “starts with”, and “contains”; the date column has options like “is after” and “is before”; the numeric column has options like “is greater than” and “is less than or equal to”." /></p><p>By default, the grid does all its filtering on the server. That can be great if you want to ensure you&rsquo;re your users are always looking at the most recent data or if you want to take advantage of faster processing on your server. However, in my
    example, because I&rsquo;m caching data after my initial get and have only a small number of products to display, I don&rsquo;t need the additional power of server-side filtering.</p><p>It makes sense, then, in this example to turn off server-side filtering (other than the initial data fetch) and eliminate repeated trips to the server when the user filters the grid rows. That will not only give my user a better/faster experience, it
    also reduces demand on my server-side resources. To implement client-side filtering, I just need to add the server-operation attribute to my grid&rsquo;s datasource tag and set it to false:</p><pre class=" language-markup"><code class="prism  language-markup"><span class="token tag"><span class="token tag"><span class="token punctuation">&lt;</span>datasource</span>  <span class="token attr-name">type</span><span class="token attr-value"><span class="token punctuation">=</span><span class="token punctuation">"</span>DataSourceTagHelperType.Ajax<span class="token punctuation">"</span></span> <span class="token attr-name">server-operation</span><span class="token attr-value"><span class="token punctuation">=</span><span class="token punctuation">"</span>false<span class="token punctuation">"</span></span><span class="token punctuation">&gt;</span></span>
</code></pre><h2 id="focusing-on-the-user’s-needs">Focusing on the User&rsquo;s Needs</h2><p>Even with these changes, you may be giving your users more filtering power they need or want. Often all the user wants to do is find the rows whose columns match specific values (this is especially true with columns containing string values). If that&rsquo;s
    the case, this UI may make more sense:</p><p><img src="https://d585tldpucybw.cloudfront.net/sfimages/default-source/blogs/2023/2023-02/aspnetgrid-filtering-05-simple-strings.png?sfvrsn=f9756193_3" title="Simple Strings" alt="The filter menu is now just a list of values drawn from the column with a checkbox by each. Two of the values have been checked off. At the bottom of the list there is text that says “2 items selected” and a Filter button." /></p><p>Implementing that filtering UI just requires two steps. First, you need to update the filterable element on your grid to use menu (rather than row) filtering:</p><pre class=" language-markup"><code class="prism  language-markup"><span class="token tag"><span class="token tag"><span class="token punctuation">&lt;</span>filterable</span> <span class="token attr-name">enabled</span><span class="token attr-value"><span class="token punctuation">=</span><span class="token punctuation">"</span>true<span class="token punctuation">"</span></span> <span class="token attr-name">mode</span><span class="token attr-value"><span class="token punctuation">=</span><span class="token punctuation">"</span>menu<span class="token punctuation">"</span></span><span class="token punctuation">&gt;</span></span>
</code></pre><p>Second, you need to expand the column elements where you want to provide this simplified experience and give those columns their own filterable element. In those column&rsquo;s filterable elements, you just need to set the filterable element&rsquo;s multi
    property to true, like this:</p><pre class=" language-markup"><code class="prism  language-markup"><span class="token tag"><span class="token tag"><span class="token punctuation">&lt;</span>column</span> <span class="token attr-name">field</span><span class="token attr-value"><span class="token punctuation">=</span><span class="token punctuation">"</span>ProductName<span class="token punctuation">"</span></span> <span class="token attr-name">title</span><span class="token attr-value"><span class="token punctuation">=</span><span class="token punctuation">"</span>Name<span class="token punctuation">"</span></span> <span class="token attr-name">width</span><span class="token attr-value"><span class="token punctuation">=</span><span class="token punctuation">"</span>240<span class="token punctuation">"</span></span><span class="token punctuation">&gt;</span></span>
     <span class="token tag"><span class="token tag"><span class="token punctuation">&lt;</span>filterable</span> <span class="token attr-name">multi</span><span class="token attr-value"><span class="token punctuation">=</span><span class="token punctuation">"</span>true<span class="token punctuation">"</span></span><span class="token punctuation">/&gt;</span></span>
<span class="token tag"><span class="token tag"><span class="token punctuation">&lt;/</span>column</span><span class="token punctuation">&gt;</span></span>
</code></pre><p>Now, for most columns containing string data you&rsquo;ve probably given the user the filtering experience they want. This does assume the column has a reasonable number of unique values so the list of options doesn&rsquo;t, itself, become overwhelming.
    Making this change is also a good choice for Boolean column where the user will get, at most, a choice between three values (true, false, &ldquo;is empty&rdquo;) and will never have an overwhelming list of options.</p><h2 id="dealing-with-dates-and-numbers">Dealing with Dates and Numbers</h2><p>For date and numeric columns, however, users probably want more options&mdash;they&rsquo;ll want to not only filter by exact matches but also for rows with dates before or after some specific date, or for numbers greater than or less than some value.</p><p>You can configure the Grid to give this experience which is probably a better match to users&rsquo; needs:</p><p><img src="https://d585tldpucybw.cloudfront.net/sfimages/default-source/blogs/2023/2023-02/aspnetgrid-filtering-06-simple-numbers-booleans.png?sfvrsn=589f8ac1_3" title="Simple Numbers Booleans" alt="Two columns from the grid with their filter dialogs displayed. The Boolean column has two radio buttons labeled “Is true” and “Is false”; the numeric column has a dropdown list of comparison operators and a textbox with a numeric spinner." /></p><p>To do that globally, you just need to set the grid&rsquo;s filterable element&rsquo;s extra attribute to false:</p><pre class=" language-markup"><code class="prism  language-markup"><span class="token tag"><span class="token tag"><span class="token punctuation">&lt;</span>filterable</span> <span class="token attr-name">enabled</span><span class="token attr-value"><span class="token punctuation">=</span><span class="token punctuation">"</span>true<span class="token punctuation">"</span></span> <span class="token attr-name">extra</span><span class="token attr-value"><span class="token punctuation">=</span><span class="token punctuation">"</span>false<span class="token punctuation">"</span></span><span class="token punctuation">/&gt;</span></span>
</code></pre><p>If doing that globally seems a little extreme to you, you can use each column&rsquo;s filterable element to configure columns individually. This configuration, for example, turns back on the full, default filtering option for the LastDelivery column alone:</p><pre class=" language-markup"><code class="prism  language-markup"><span class="token tag"><span class="token tag"><span class="token punctuation">&lt;</span>column</span> <span class="token attr-name">field</span><span class="token attr-value"><span class="token punctuation">=</span><span class="token punctuation">"</span>LastDelivery<span class="token punctuation">"</span></span> <span class="token attr-name">format</span><span class="token attr-value"><span class="token punctuation">=</span><span class="token punctuation">"</span>{0:MMM-dd}<span class="token punctuation">"</span></span> <span class="token attr-name">title</span><span class="token attr-value"><span class="token punctuation">=</span><span class="token punctuation">"</span>Last Delivery<span class="token punctuation">"</span></span> <span class="token attr-name">width</span><span class="token attr-value"><span class="token punctuation">=</span><span class="token punctuation">"</span>150<span class="token punctuation">"</span></span> <span class="token punctuation">&gt;</span></span>
     <span class="token tag"><span class="token tag"><span class="token punctuation">&lt;</span>filterable</span> <span class="token attr-name">enabled</span><span class="token attr-value"><span class="token punctuation">=</span><span class="token punctuation">"</span>true<span class="token punctuation">"</span></span> <span class="token attr-name">extra</span><span class="token attr-value"><span class="token punctuation">=</span><span class="token punctuation">"</span>true<span class="token punctuation">"</span></span><span class="token punctuation">/&gt;</span></span>
<span class="token tag"><span class="token tag"><span class="token punctuation">&lt;/</span>column</span><span class="token punctuation">&gt;</span></span>    
</code></pre><p>There&rsquo;s a middle ground here, though, between the focused and the full filtering experience: By using the operators element, you can give the user just the comparison operators they need (and also configure the text displayed for each operator).</p><p>This example defines the LastDelivery date column as having three comparison operators&mdash;&ldquo;Deliveries on&rdquo; (equals), &ldquo;Deliveries before&rdquo; (less than) and &ldquo;Deliveries after&rdquo; (greater than):</p><pre class=" language-markup"><code class="prism  language-markup"><span class="token tag"><span class="token tag"><span class="token punctuation">&lt;</span>column</span> <span class="token attr-name">field</span><span class="token attr-value"><span class="token punctuation">=</span><span class="token punctuation">"</span>LastDelivery<span class="token punctuation">"</span></span> <span class="token attr-name">format</span><span class="token attr-value"><span class="token punctuation">=</span><span class="token punctuation">"</span>{0:MMM-dd}<span class="token punctuation">"</span></span> <span class="token attr-name">title</span><span class="token attr-value"><span class="token punctuation">=</span><span class="token punctuation">"</span>Last Delivery<span class="token punctuation">"</span></span> <span class="token attr-name">width</span><span class="token attr-value"><span class="token punctuation">=</span><span class="token punctuation">"</span>150<span class="token punctuation">"</span></span> <span class="token punctuation">&gt;</span></span>
            <span class="token tag"><span class="token tag"><span class="token punctuation">&lt;</span>filterable</span> <span class="token attr-name">extra</span><span class="token attr-value"><span class="token punctuation">=</span><span class="token punctuation">"</span>false<span class="token punctuation">"</span></span> <span class="token punctuation">&gt;</span></span>
                <span class="token tag"><span class="token tag"><span class="token punctuation">&lt;</span>operators</span><span class="token punctuation">&gt;</span></span>
                    <span class="token tag"><span class="token tag"><span class="token punctuation">&lt;</span>date</span> <span class="token attr-name">eq</span><span class="token attr-value"><span class="token punctuation">=</span><span class="token punctuation">"</span>Deliveries on<span class="token punctuation">"</span></span>
                                <span class="token attr-name">gt</span><span class="token attr-value"><span class="token punctuation">=</span><span class="token punctuation">"</span>Deliveries after<span class="token punctuation">"</span></span>
                                 <span class="token attr-name">lt</span><span class="token attr-value"><span class="token punctuation">=</span><span class="token punctuation">"</span>Deliveries before<span class="token punctuation">"</span></span> <span class="token punctuation">/&gt;</span></span>
                <span class="token tag"><span class="token tag"><span class="token punctuation">&lt;/</span>operators</span><span class="token punctuation">&gt;</span></span>
            <span class="token tag"><span class="token tag"><span class="token punctuation">&lt;/</span>filterable</span><span class="token punctuation">&gt;</span></span>
        <span class="token tag"><span class="token tag"><span class="token punctuation">&lt;/</span>column</span><span class="token punctuation">&gt;</span></span>
</code></pre><p>Now the user gets a focused set of filtering options that reflect their needs:</p><p><img src="https://d585tldpucybw.cloudfront.net/sfimages/default-source/blogs/2023/2023-02/aspnetgrid-filtering-07-delivery-dates.png?sfvrsn=ebd7c269_3" title="Delivery Dates" alt="The Last Delivery column with its filter dialog showing. The dropdown list of operators says “Deliveries on” rather than the generic “Is equal to”." /></p><p>You also can configure comparison operators globally using the Grid&rsquo;s filterable element instead of the column filterable element. This would allow you to configure the comparison operators for all your date columns, for example. You can also
        configure comparison operators for strings, numbers and enums using the corresponding elements inside the operators element. You could then use the column&rsquo;s filterable element to override those settings on individual columns where necessary.</p><h2 id="configuring-the-options-list">Configuring the Options List</h2><p>There&rsquo;s one more step available to you to provide a more focused experience for your users: You can provide a customized list of options for the user to compare to. For example, in the Total Quantity column, users are probably just interested
            in comparing the quantity on hand (QoH) to specific thresholds. The typical question is probably something like: &ldquo;Is the QoH greater than/less than 0, 100 or 200 items?&rdquo;</p><p>The first step in providing a list of comparison values is to add the filter-ui-handler attribute to the column&rsquo;s filterable element. This attribute needs to point to a JavaScript function in your page that will load your filter&rsquo;s
            options list with values.</p><p>This example, in addition to specifying just the two comparison operators the user needs, references a function named quantityOptions that will build the list of QoH thresholds:</p><pre class=" language-markup"><code class="prism  language-markup"><span class="token tag"><span class="token tag"><span class="token punctuation">&lt;</span>column</span> <span class="token attr-name">field</span><span class="token attr-value"><span class="token punctuation">=</span><span class="token punctuation">"</span>TotalQuantity<span class="token punctuation">"</span></span> <span class="token attr-name">title</span><span class="token attr-value"><span class="token punctuation">=</span><span class="token punctuation">"</span>Quantity on Hand<span class="token punctuation">"</span></span> <span class="token attr-name">width</span><span class="token attr-value"><span class="token punctuation">=</span><span class="token punctuation">"</span>150<span class="token punctuation">"</span></span><span class="token punctuation">&gt;</span></span> 
         <span class="token tag"><span class="token tag"><span class="token punctuation">&lt;</span>filterable</span> <span class="token attr-name">enabled</span><span class="token attr-value"><span class="token punctuation">=</span><span class="token punctuation">"</span>true<span class="token punctuation">"</span></span> <span class="token attr-name">extra</span><span class="token attr-value"><span class="token punctuation">=</span><span class="token punctuation">"</span>false<span class="token punctuation">"</span></span> <span class="token attr-name">filter-ui-handler</span><span class="token attr-value"><span class="token punctuation">=</span><span class="token punctuation">"</span>quantityOptions<span class="token punctuation">"</span></span><span class="token punctuation">&gt;</span></span>
                <span class="token tag"><span class="token tag"><span class="token punctuation">&lt;</span>operators</span><span class="token punctuation">&gt;</span></span>
                    <span class="token tag"><span class="token tag"><span class="token punctuation">&lt;</span>number</span> <span class="token attr-name">gt</span><span class="token attr-value"><span class="token punctuation">=</span><span class="token punctuation">"</span>QoH greater than<span class="token punctuation">"</span></span>
                                      <span class="token attr-name">lt</span><span class="token attr-value"><span class="token punctuation">=</span><span class="token punctuation">"</span>Qoh less than<span class="token punctuation">"</span></span> <span class="token punctuation">/&gt;</span></span>
                <span class="token tag"><span class="token tag"><span class="token punctuation">&lt;/</span>operators</span><span class="token punctuation">&gt;</span></span>
          <span class="token tag"><span class="token tag"><span class="token punctuation">&lt;/</span>filterable</span><span class="token punctuation">&gt;</span></span>
<span class="token tag"><span class="token tag"><span class="token punctuation">&lt;/</span>column</span><span class="token punctuation">&gt;</span></span>                
</code></pre><p>Your next step is to write that function. The function needs to accept a parameter (I&rsquo;ve called it columnFilter) and I&rsquo;ve added a Kendo UI dropdown list to that parameter. In that dropdown list&rsquo;s transport section, I&rsquo;ve
            set up a read operation, this time pointing at a handler method in my Razor Page named &ldquo;Quantity.&rdquo; Finally, using the dropdown lists&rsquo;s optionLabel, I&rsquo;ve specified an initial selection to display in the dropdown list:</p><pre class=" language-javascript"><code class="prism  language-javascript"><span class="token keyword">function</span> <span class="token function">quantityOptions</span><span class="token punctuation">(</span>columnFilter<span class="token punctuation">)</span> <span class="token punctuation">{</span>
        columnFilter<span class="token punctuation">.</span><span class="token function">kendoDropDownList</span><span class="token punctuation">(</span><span class="token punctuation">{</span>
            dataSource<span class="token punctuation">:</span> <span class="token punctuation">{</span>
                transport<span class="token punctuation">:</span> <span class="token punctuation">{</span>
                    read<span class="token punctuation">:</span> <span class="token string">"@Url.Page("</span><span class="token operator">/</span>Index<span class="token string">","</span>Quantity<span class="token string">")"</span>
                <span class="token punctuation">}</span>
            <span class="token punctuation">}</span><span class="token punctuation">,</span>
            optionLabel<span class="token punctuation">:</span> <span class="token string">"-- Select Threshold --"</span>
        <span class="token punctuation">}</span><span class="token punctuation">)</span><span class="token punctuation">;</span>
    <span class="token punctuation">}</span>
</code></pre><p>The last step is to create the corresponding method in my Razor Page&rsquo;s code-behind file. The dropdown list only issues GET requests so I need to set up a method named &ldquo;OnGet&rdquo; + the handler name (&ldquo;OnGetQuantity,&rdquo;
                in my case). In that method, I just need to return a JSON formatted list of values to populate the dropdown list. As a result, my code looks like this:</p><pre class=" language-csharp"><code class="prism  language-csharp"><span class="token keyword">public</span> JsonResult <span class="token function">OnGetQuantity</span><span class="token punctuation">(</span><span class="token punctuation">[</span>DataSourceRequest<span class="token punctuation">]</span> DataSourceRequest request<span class="token punctuation">)</span>
<span class="token punctuation">{</span>
   List<span class="token operator">&lt;</span><span class="token keyword">int</span><span class="token operator">&gt;</span> qtys <span class="token operator">=</span> <span class="token keyword">new</span> <span class="token class-name">List</span><span class="token operator">&lt;</span><span class="token keyword">int</span><span class="token operator">&gt;</span> <span class="token punctuation">{</span><span class="token number">0</span><span class="token punctuation">,</span> <span class="token number">100</span><span class="token punctuation">,</span> <span class="token number">200</span> <span class="token punctuation">}</span><span class="token punctuation">;</span>
   <span class="token keyword">return</span> <span class="token keyword">new</span> <span class="token class-name">JsonResult</span><span class="token punctuation">(</span>qtys<span class="token punctuation">.</span><span class="token function">Select</span><span class="token punctuation">(</span>e <span class="token operator">=</span><span class="token operator">&gt;</span> e<span class="token punctuation">)</span><span class="token punctuation">.</span><span class="token function">Distinct</span><span class="token punctuation">(</span><span class="token punctuation">)</span><span class="token punctuation">)</span><span class="token punctuation">;</span>
<span class="token punctuation">}</span>
</code></pre><p>And, now, the user gets this very customized (and focused) UI for filtering products based on their quantity on hand:</p><p><img src="https://d585tldpucybw.cloudfront.net/sfimages/default-source/blogs/2023/2023-02/aspnetgrid-filtering-08-qoh.png?sfvrsn=35f4e94d_3" title="Quantity on Hand" alt="The filter dialog for the Total Quantity  column. The dropdown list of comparison operators show “QoH greater than”; Below that is another dropdown list showing four items: Select Threshold, 0, 100, and 200." /></p><p>We measure a UI&rsquo;s effectiveness by how well it supports your users&rsquo; needs. The Telerik UI for ASP.NET MVC Grid gives you all the tools you need to create a UI that really does work for your users.</p><h2 id="try-telerik-ui-for-asp.-net-mvc-now">Try Telerik UI for ASP.NET MVC Now</h2><p>Deliver high-quality apps in the quickest timeframe using the 110+ ASP.NET MVC UI controls that cover any use-case scenario. Try it now free for 30 days.</p><p><a href="https://www.telerik.com/aspnet-mvc" class="Btn" target="_blank">Try Now</a></p><img src="https://feeds.telerik.com/link/23051/15977298.gif" height="1" width="1"/>]]></content>
  </entry>
  <entry>
    <id>urn:uuid:674c8663-470a-4333-b67d-69f47462872e</id>
    <title type="text">What’s New in R1 2023 with Telerik UI for Web</title>
    <summary type="text">R1 2023 brings a lot of helpful updates to Progress Telerik Web libraries for Blazor, ASP. NET Core, ASP. NET MVC and ASP. NET AJAX. Learn more!</summary>
    <published>2023-01-18T15:42:08Z</published>
    <updated>2026-04-08T02:12:37Z</updated>
    <author>
      <name>Maria Ivanova </name>
    </author>
    <link rel="alternate" href="https://feeds.telerik.com/link/23051/15911273/r1-2023-telerik-web-release"/>
    <content type="text"><![CDATA[<p><span class="featured">R1 2023 brings a lot of helpful updates to Progress Telerik Web libraries for Blazor, ASP.NET Core, ASP.NET MVC and ASP.NET AJAX. Learn more!</span></p><h2 id="common-release-items">Common Release Items</h2><h3 id="accessibility-improvements">Accessibility Improvements</h3><p>Ensuring the accessibility (A11Y) of all user interface components has been a priority for Telerik in recent years. The R1 2023 release of Telerik UI libraries includes enhancements to attributes and keyboard navigation to meet compliance standards such
    as WAI-ARIA, Section 508 and WCAG 2.1.</p><p>Additionally, the release includes updated documentation and demos focused on accessibility, as well as updated VPAT templates. To learn more about the specific A11Y improvements in each of the Telerik UI libraries (UI for Blazor, UI for ASP.NET Core,
    UI for ASP.NET MVC, UI for ASP.NET AJAX) please refer to the relevant product section below.</p><p><img src="https://d585tldpucybw.cloudfront.net/sfimages/default-source/blogs/2023/2023-01/accessibility_770.jpg?sfvrsn=7709ebc0_5" title="Accessibility" alt="Accessibility illustration" /></p><h3 id="csp-compliance">CSP Compliance</h3><p>Pursuing the goal to be Content Security Policy (CSP) compatible and ultimately ensure strict CSP compliance for all Telerik and Kendo UI products, we have taken the first step in R1 2023 by removing any &ldquo;eval&rdquo; and &ldquo;new Function&rdquo;
    usages within our Kendo UI for jQuery source code with dynamic functions that are CSP compatible. Additionally, we have rewritten internal usages within the Kendo UI Templates. To ensure your template and apps are CSP compatible, check out the updated
    articles:
</p><ul><li><a href="https://docs.telerik.com/kendo-ui/framework/templates/get-started-csp-templates" target="_blank">Kendo UI for jQuery CSP templates</a></li><li><a href="https://docs.telerik.com/aspnet-core/troubleshoot/troubleshooting-content-security-policy" target="_blank">Telerik UI for ASP.NET Core CSP Compliance</a></li><li><a href="https://docs.telerik.com/aspnet-mvc/troubleshoot/troubleshooting-content-security-policy" target="_blank">Telerik UI for ASP.NET MVC CSP Compliance</a></li></ul><p>Telerik UI for Blazor also remains CSP compliant with minor exceptions that will be improved in a future version. Read more details in the <a href="https://docs.telerik.com/blazor-ui/troubleshooting/csp" target="_blank">dedicated CSP compliance article.</a></p><p><img src="https://d585tldpucybw.cloudfront.net/sfimages/default-source/blogs/2023/2023-01/csp-compliance.png?sfvrsn=fdeae0bf_3" title="CSP Compliance" alt="Illustrated Kendoka with a green checkmark icon and CSP Compliant" /></p><h3 id="day-0-support-for-.net-7">Day 0 Support for .NET 7</h3><p>Earlier in November <a href="https://www.telerik.com/blogs/november-2022-telerik-kendo-ui-update" target="_blank">we announced Day-Zero support</a> for .NET 7 for Telerik UI for Blazor and UI for ASP.NET Core with the goal to let
    all our customers upgrade and take immediate advantage of the new features and performance improvements.
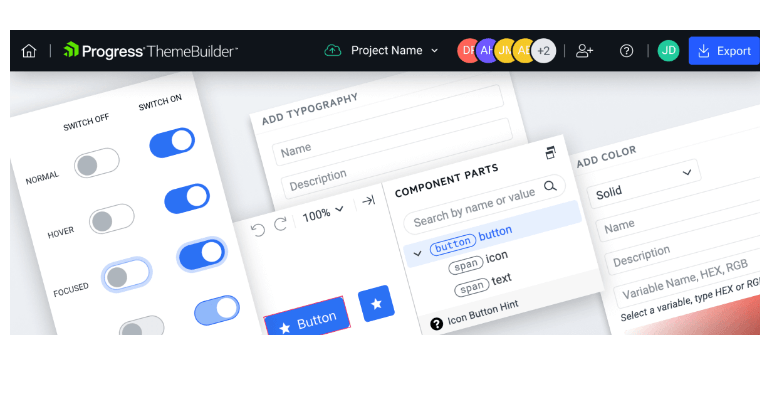
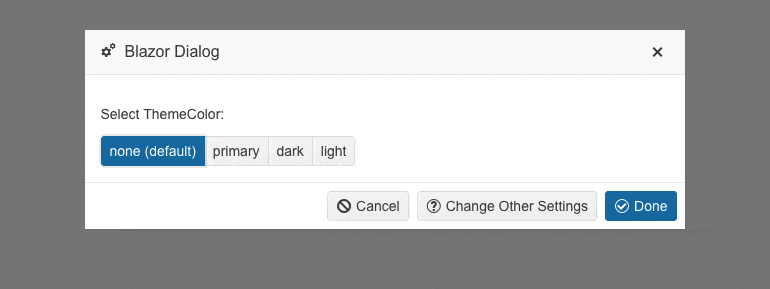
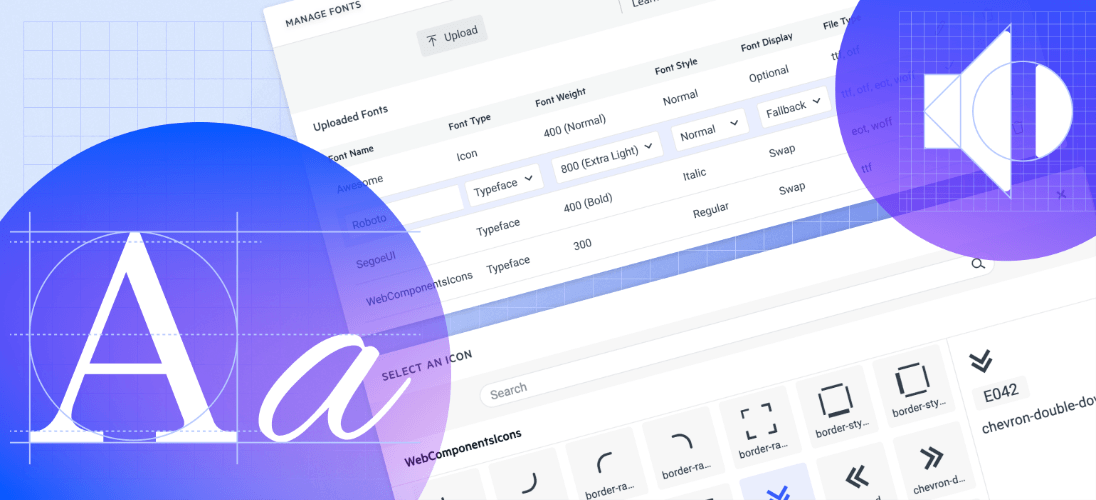
</p><p><img src="https://d585tldpucybw.cloudfront.net/sfimages/default-source/blogs/2023/2023-01/net-7.png?sfvrsn=cb3ff84d_3" alt="Progress Telerik Ninja with .NET 7" /></p><h3 id="themebuilder-pro">ThemeBuilder Pro</h3><h4 id="custom-fonts-support">Custom Fonts Support</h4><p>ThemeBuilder allows you to upload, use and manage custom fonts and font icons. You can use custom fonts to match your company style guide and create a unified experience across the application. Using custom font icons comes with a visual icon picker that
    enables you to screen faster over all available icons and pick the correct one instead of remembering each by name or code.</p><p><img src="https://d585tldpucybw.cloudfront.net/sfimages/default-source/blogs/2023/2023-01/fonts-support.png?sfvrsn=6ec4db8f_3" alt="Decorative fonts support imagery" /></p><h3 id="new-in-telerik-document-processing-library">New in Telerik Document Processing Library</h3><p>As we do with every release, we added new features to <a href="https://www.telerik.com/document-processing-libraries" target="_blank">Telerik Document Processing Library</a>,
 and customers of all Telerik UI libraries (web, desktop and mobile) can use them in their applications.</p><h4 id="new-search-api-in-the-radpdfprocessing-library">New Search API in the RadPdfProcessing Library</h4><p>The updated search API offers the capability to search for specific text within PDF files, utilizing various methods to tailor search criteria and even searching using regular expressions. The search results provide the page and location of the searched
    text. For more information on this feature, please refer to the <a href="https://docs.telerik.com/devtools/document-processing/libraries/radpdfprocessing/features/search" target="_blank">Document Processing Search section</a> in our documentation.</p><h4 id="table-of-contents-in-radwordsprocessing">Table of Contents in RadWordsProcessing</h4><p>The table of contents&mdash;TOC and TC&mdash;fields enable you to dynamically include a table of contents in your documents through the use of various switches. Additionally, the table of authorities&mdash;TOA and TA&mdash;fields now provide support for
    adding tables of authorities to your documents as well. All supported fields can be viewed in the <a href="https://docs.telerik.com/devtools/document-processing/libraries/radwordsprocessing/concepts/fields/fields" target="_blank">RadWordsProcessing Fields Overview</a> section of our documentation.</p><p><img src="https://d585tldpucybw.cloudfront.net/sfimages/default-source/blogs/2023/2023-01/telerik-document-processing-toc.png?sfvrsn=2334a885_3" title="Telerik Document Processing TOC" alt="Telerik Document Processing Table Of Contents" /></p><h4 id="new-encryption-mode-is-supported-in-the-radpdfprocessing-library">New Encryption Mode Is Supported in the RadPdfProcessing Library</h4><p>We have included support for Encryption Algorithm 5 with AES 256, which is a highly requested feature. Below is the list of encryption algorithms currently supported:</p><ul><li>For import: RC4 (V2), AES-128 (AESV2), AES-256 (AESV3)</li><li>For export: RC4 (V2), AES-256 (AESV3)</li></ul><p>The encryption algorithm can be managed using the EncryptionType property. For more information, please refer to the <a href="https://docs.telerik.com/devtools/document-processing/libraries/radpdfprocessing/formats-and-conversion/pdf/pdfformatprovider/settings#isencrypted" target="_blank">PDF Processing Export Settings</a>.</p><h2 id="telerik-ui-for-blazor">Telerik UI for Blazor</h2><h3 id="new-blazor-signature-ui-component">
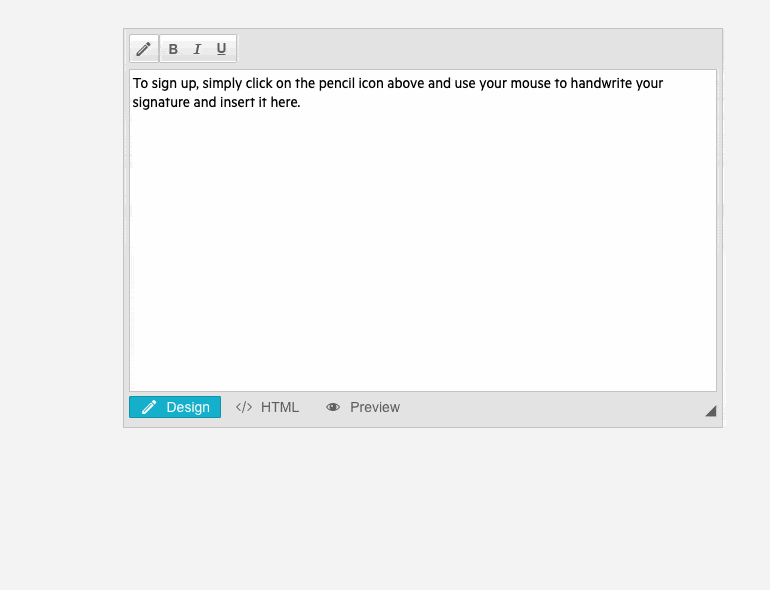
New Blazor Signature UI Component</h3><p>The new <a href="https://demos.telerik.com/blazor-ui/signature/overview" target="_blank">Signature component</a> in <a href="https://www.telerik.com/blazor-ui" target="_blank">Telerik UI for Blazor</a> enables end users to easily add signatures to forms or PDF documents in Blazor applications. Users can draw their signature using a mouse or touch device, and take advantage of built-in configuration
    options such as canvas options, stroke width, size, color, background configuration, and read-only state.</p><p>To see an <a href="https://demos.telerik.com/blazor-ui/signature/validation" target="_blank">example of how to place a signature in a Blazor form</a>, or to <a href="https://blazorrepl.telerik.com/wmFkleks01dsx7L733" target="_blank">try out the Signature component, check out Telerik REPL, our browser-based code runner</a>.</p><p><img src="https://d585tldpucybw.cloudfront.net/sfimages/default-source/blogs/2023/2023-01/blazor-signature-component---sign-form.png?sfvrsn=fd99a0a8_3" title="Blazor Signature" alt="Blazor Signature Component in an app with a form to sign" /></p><h3 id="new-blazor-avatar-ui-component">New Blazor Avatar UI Component</h3><p>The new <a href="https://demos.telerik.com/blazor-ui/avatar/overview" target="_blank">UI for Blazor Avatar component</a> is an ideal solution for displaying small photos, custom icons, avatars or initials for entities in your applications.
    It is widely used for building forms, profile pages, navbar menus and other similar scenarios.</p><p>With its exposed appearance configuration options, the Avatar component can be easily integrated and customized to fit any application design. You can change its size, roundness, fill mode and coloring to match the desired look and feel.</p><p>The component also provides built-in size options like small, medium and large and also allows custom width and height settings to accommodate any design requirements. The Rounded parameter gives flexibility to adjust the avatar shape from rectangular
    to a complete circle. Additionally, the ThemeColor parameter can be set to various options to match the color scheme of the page.</p><p><a href="https://demos.telerik.com/blazor-ui/avatar/overview" target="_blank">See the demo of the Telerik UI for Blazor Avatar component.</a></p><p><img src="https://d585tldpucybw.cloudfront.net/sfimages/default-source/blogs/2023/2023-01/avatar-appearance-(1).gif?sfvrsn=e82fd456_3" title="Blazor Avatars" alt="Three versions of avatars, initials, icon, and profile image, go through various shapes from square through two more rounded corners versions and finally a circle" /></p><h3 id="new-chip-and-chiplist-ui-components">New Chip and ChipList UI Components</h3><p>With this update, we are happy to introduce the UI for Blazor Chip and ChipList UI components.</p><p>The Chip component is a compact form of a complex piece of information, including text, avatars, images, letters and close icons that can be clicked or removed, and it offers various styling options.</p><p>The ChipList component is used to manage a collection of Blazor Chip components, with the ability to data bind and manipulate a list of Chip elements. These components are commonly used for tasks such as tagging contacts and mail inboxes, selecting single
    or multiple options, and providing input to an application.</p><p>Both components offer multiple appearance configuration options (FillMod, RemoveIcon, Rounded and Size) and built-in keyboard navigation support.</p><p>See example of <a href="https://demos.telerik.com/blazor-ui/chip/overview" target="_blank">UI for Blazor Chip</a> and <a href="https://demos.telerik.com/blazor-ui/chiplist/overview" target="_blank">ChipList components</a>.</p><p><img src="https://d585tldpucybw.cloudfront.net/sfimages/default-source/blogs/2023/2023-01/chip-overview-770.png?sfvrsn=6de0d638_3" title="Blazor Chip Component" alt="Contacts in an email form are presented as chips. Pedro Afonso has a personalized image. John Doe has an icon and is red. Both have an X icon for easy removal." /></p><h3 id="new-font-icon-component">New Font Icon Component</h3><p>The new <a href="https://demos.telerik.com/blazor-ui/fonticon/overview" target="_blank">Telerik UI for Blazor Font Icon component</a> allows for the display of either built-in Telerik Blazor font icons or custom font icons.</p><p>The configuration parameters include:</p><ul><li>The ability to set the flip direction of the icon</li><li>The option to select from the built-in Telerik Blazor font icons or to provide a custom CSS class for a third-party icon</li><li>The ability to set predefined icon sizes with the option to use raw strings or the properties of the static ThemeConstants.Icon.Size class</li><li>The option to set predefined icon colors with the default being the inheritance of the current CSS text color using the properties of the static ThemeConstants.Icon.ThemeColor class</li></ul><h3 id="new-svg-icon-component">New SVG Icon Component</h3><p>The Telerik UI for Blazor SvgIcon component allows the display of either built-in Telerik Blazor SVG icons or custom SVG icons.</p><p>The parameters available for customization include:</p><ul><li>The ability to set the flip direction of the icon</li><li>The option to use a built-in Telerik Blazor font icon by assigning a property of the SvgIcon static class or by implementing a custom SVG Icon class</li><li>The ability to set predefined icon sizes with the option to use raw strings or the properties of the static ThemeConstants.Icon.Size class</li><li>The ability to provide the HTML markup for a custom SVG icon</li><li>The option to set predefined icon colors using the properties of the static ThemeConstants.Icon.ThemeColor class.</li></ul><h3 id="compact-data-grid-and-sizing-options">
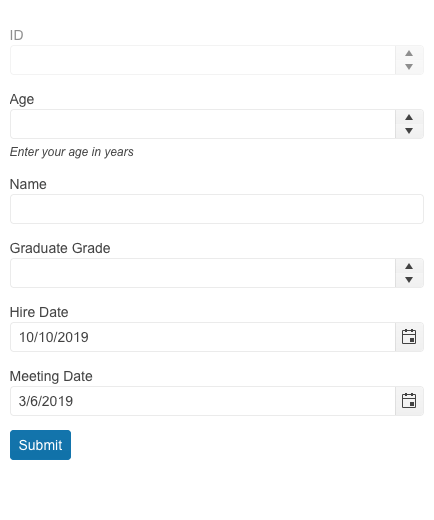
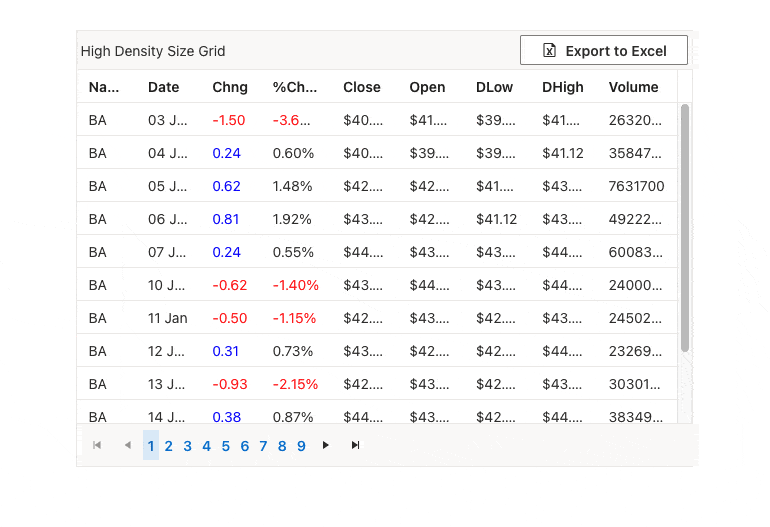
Compact Data Grid and Sizing Options</h3><p>The Data Grid in UI for Blazor allows for customization of its density to improve visibility on smaller devices or to show larger volume data via its new <strong>Size parameter</strong> which supports two values&mdash;Small and Medium.</p><p>To achieve a compact data grid appearance, you can change the Size parameter to Small. This will decrease the padding in cells and also affect the inner components such as the Toolbar, Pager and editors, making them smaller and consistent with the overall
    styling of the UI for Blazor Data Grid.</p><p><a href="https://demos.telerik.com/blazor-ui/grid/sizing" target="_blank">See an example of smaller size UI for Blazor (compact Data Grid).</a></p><p><img src="https://d585tldpucybw.cloudfront.net/sfimages/default-source/blogs/2023/2023-01/compact-vs-default-grid.png?sfvrsn=45b1b159_3" title="Blazor Compact Grid" alt="Side by side views of High Density Size Grid and Default Size Grid" /></p><h3 id="telerik-repl-for-blazor-saving-your-own-list-of-code-snippets">Telerik REPL for Blazor: Saving Your Own List of Code Snippets</h3><p>The browser-based code runner <a href="https://blazorrepl.telerik.com/" target="_blank">Telerik REPL for Blazor</a> has been enhanced with a very handy feature which allows you to save code snippets and easily reference them for
    future usage.</p><p><img src="https://d585tldpucybw.cloudfront.net/sfimages/default-source/blogs/2023/2023-01/telerikrepl-snippetbookmarks-(1).png?sfvrsn=359d56a7_3" title="Blazor REPL Snippets" alt="Progress Telerik REPL for Blazor list of User Snippets" /></p><p>In order to add a snippet to &ldquo;User Snippets&rdquo; list, you need to either login with your Telerik account (existing users) or register and create a new one. Saving a snippet to your list occurs automatically once you are finished creating it and
    hit the share button. You can then give it a meaningful name, search, sort or remove it from the list.</p><h3 id="adaptive-rendering-in-multiple-components">Adaptive Rendering in Multiple Components</h3><p>The adaptive and responsive UX of the UI for Blazor library has always been a focus and in the R1 2023 we ensured mobile-friendly rendering of all Date and Time picker and select-type components. The adaptive behavior can be provided via the new <strong>AdaptiveMode parameter</strong> which was added to the <a href="https://demos.telerik.com/blazor-ui/datepicker/adaptive" target="_blank">DatePicker</a>, <a href="https://demos.telerik.com/blazor-ui/datetimepicker/adaptive" target="_blank">DateTimePicker</a>,
 <a href="https://demos.telerik.com/blazor-ui/timepicker/adaptive" target="_blank">TimePicker</a>, <a href="https://demos.telerik.com/blazor-ui/daterangepicker/adaptive" target="_blank">DateRangePicker</a>,
 <a href="https://demos.telerik.com/blazor-ui/autocomplete/adaptive" target="_blank">AutoComplete</a>,
 <a href="https://demos.telerik.com/blazor-ui/combobox/adaptive" target="_blank">ComboBox</a>, <a href="https://demos.telerik.com/blazor-ui/dropdownlist/adaptive" target="_blank">DropDownList</a>,
 <a href="https://demos.telerik.com/blazor-ui/multicolumncombobox/adaptive" target="_blank">MultiColumnComboBox</a> and <a href="https://demos.telerik.com/blazor-ui/multiselect/adaptive" target="_blank">MultiSelect</a> components for Blazor.
</p><p>When set to Auto, the components will adjust their rendering based on the current screen size. Additionally, when in auto-adaptive mode, the DateTime pickers and select-type components will allow you to specify the title text that appears in the header
    of their pop-up window.</p><p><img src="https://d585tldpucybw.cloudfront.net/sfimages/default-source/blogs/2023/2023-01/adaptive-rendering.png?sfvrsn=cfd4928b_3" title="Blazor Adaptive Rendering" alt="A product list app has adjusted to fill the screen appropriately" /></p><h3 id="new-features-in-scheduler-component">
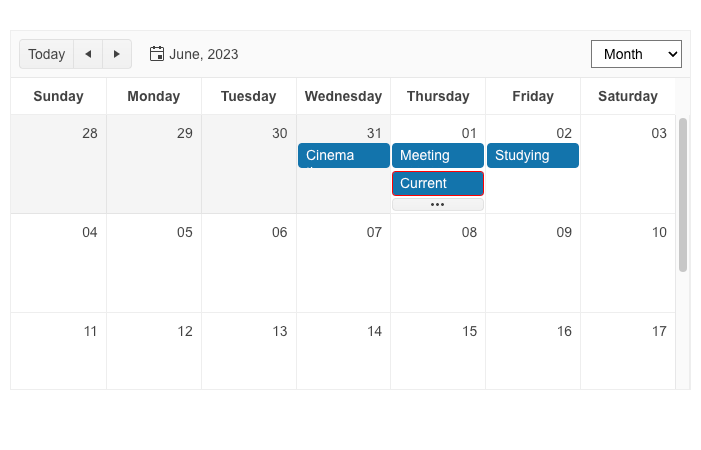
New Features in Scheduler Component</h3><h4>Scheduler OnCellRender Event</h4><p>The OnCellRender event in the Scheduler component allows you to dynamically customize the slot cells. It is activated when each cell is rendered, and it enables you to add a custom CSS class to specific slots based on the event arguments. You can use
    the OnCellRender event in all the Scheduler views, both in the horizontal and vertical orientation.</p><p><a href="https://demos.telerik.com/blazor-ui/scheduler/events" target="_blank">See an example of how to customize Scheduler component slots.</a></p><p><img src="https://d585tldpucybw.cloudfront.net/sfimages/default-source/blogs/2023/2023-01/blazor-scheduler-oncellrenderevent.png?sfvrsn=71d7ffc9_3" title="Blazor Scheduler-OnCellRenderEvent" alt="Blazor Scheduler OnCellRenderEvent" /></p><h4>Custom Scheduler Slots</h4><p>In addition to the customization capabilities of the OnCellRender event, we have also shipped a Scheduler SlotTemplate feature which allows you to add custom content including text and icons.</p><p><a href="https://demos.telerik.com/blazor-ui/scheduler/templates" target="_blank">See how to render arbitrary content in Scheduler appointments using the slot template feature.
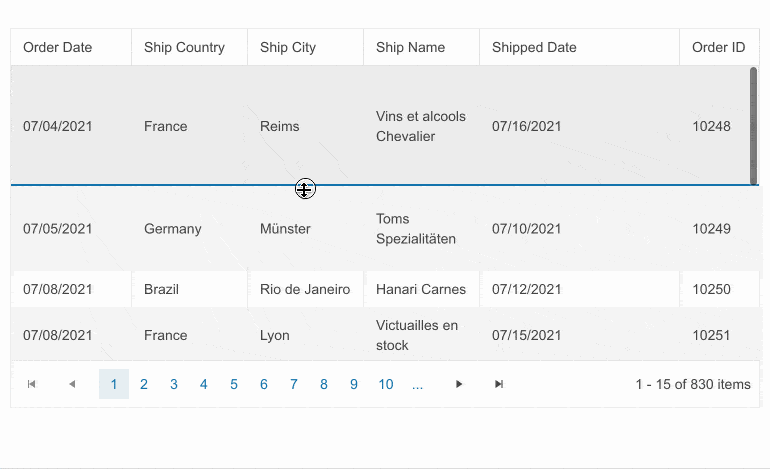
</a></p><p><img src="https://d585tldpucybw.cloudfront.net/sfimages/default-source/blogs/2023/2023-01/blazor-scheduler-slot-templates.png?sfvrsn=3b1884af_3" title="Blazor Scheduler Slot Templates" alt="Calendar events have different colors and icons" /></p><h3 id="pager-position-in-multiple-ui-components">Pager Position in Multiple UI Components</h3><p>The UI for Blazor <a href="https://demos.telerik.com/blazor-ui/grid/paging" target="_blank">Data Grid</a>, <a href="https://demos.telerik.com/blazor-ui/treelist/paging" target="_blank">TreeList</a> and
    <a href="https://demos.telerik.com/blazor-ui/listview/paging" target="_blank">ListView</a> components have been enhanced with a new <strong>PagerPosition parameter</strong> (e.g., <code>&lt;GridPagerSettings Position="@PagerPosition.Top"</code>),
 which allows you to easily configure the location of the Pager component within them to top or bottom. The Pager customization feature within the data-bound components is added to the already existing options to define page numbers, page size and
    page input type.
</p><p><img src="https://d585tldpucybw.cloudfront.net/sfimages/default-source/blogs/2023/2023-01/blazor-data-grid-pager-top-position.png?sfvrsn=f5a6607c_3" title="Blazor Data Grid Pager Top Position" alt="Blazor Data Grid has Pager along top. It includes buttons for first (icon), previous (icon), individual pages 1 through 10, next (icon), last (icon), and then shows 21-30 of 91 items" /></p><h3 id="sizing-options-for-multiple-components">Sizing Options for Multiple Components</h3><p>You can now customize the appearance of the UI for Blazor Toolbar, Pager and Form components using the new <strong>Size parameter</strong>. It allows you to configure the dimensions to &ldquo;Small,&rdquo; &ldquo;Medium&rdquo; or &ldquo;Large.&rdquo;</p><p><a href="https://demos.telerik.com/blazor-ui/toolbar/appearance" target="_blank">See example of UI for Blazor Toolbar Sizing options.</a></p><p><img src="https://d585tldpucybw.cloudfront.net/sfimages/default-source/blogs/2023/2023-01/blazor-toolbar-sizing.gif?sfvrsn=c58c0c96_3" title="Blazor Toolbar Sizing" alt="Blazor Toolbar Sizing cycles through small, medium, large" /></p><h3 id="enhanced-date-editing-ux">Enhanced Date Editing UX</h3><p>In R1 2023 we introduced multiple enhancements and features related to the date and time UI components for Blazor, namely the DateInput, DatePicker, DateRangePicker, DateTimePicker and TimePicker. In the section below we will review in detail what&rsquo;s
    new on a per feature basis.</p><h4 id="auto-tabbing-improvements">Auto-Tabbing Improvements</h4><p>As user preferences and behavior differ when working with dates, we implemented a configuration option that controls the auto-tab behavior when editing year, month and date values. The configuration can be achieved using the two new properties:</p><ul><li><strong>AutoSwitchParts</strong> &ndash; defines whether to switch to the next date segment when the current one is completed.</li><li><strong>AutoSwitchKeys</strong> &ndash; the default behavior for navigating with arrows remains, but the AutoSwitchKeys allows you to specify the keys/key codes which the end user should press in order to jump to the next date segment. The purpose
        of this property is mainly focused to allow users to type separators and dates with format &ldquo;1/31/2022&rdquo; instead of &ldquo;1312022.&rdquo;</li></ul><p>The auto-tabbing configuration properties are available for the following list of UI for Blazor components: DateInput, DatePicker, DateRangePicker, DateTimePicker and TimePicker.</p><h4 id="support-for-copy--paste-in-datetimepickers">Support for Copy &amp; Paste in DateTimePickers</h4><p>The UX of the DateTime pickers has been further enhanced with a handy option to copy and paste date format into the components. The feature is available for the following list of UI for Blazor components: DateInput, DatePicker, DateRangePicker, DateTimePicker
    and TimePicker.</p><p>A note on supported scenarios: The date input and pickers support pasting of values that match the format and pasting of date segments that match the date segments of the format, but content that does not match the format will not be processed.</p><h4 id="two-year-digit-format">Two-Year Digit Format</h4><p>The DateInput, DatePicker, DateRangePicker and DateTimePicker components have a new property called TwoDigitYearMax, which makes it easy for users to enter dates in two-digit year format. The value set for TwoDigitYearMax determines the highest year
    that will be assumed to be from the current century when a two-digit year is typed. The default setting is 68, meaning that any number less than 69 will be interpreted as 20xx, while numbers 69 or greater will be assumed to be from the 19xx century.</p><p><img src="https://d585tldpucybw.cloudfront.net/sfimages/default-source/blogs/2023/2023-01/daterangepicker-twodigityear.png?sfvrsn=7d6880b7_3" title="DateRangePicker" alt="DateRangePicker shows Two-Digit Year. Start date field has 22/Nov/26 and end field has 27/nov/23. Text below says The selected date start is: 11/22/1926. The selected date end is 11/27/2023." /></p><h4 id="auto-correction-of-invalid-dates">Auto-Correction of Invalid Dates</h4><p>Until recently, the default behavior was when a user types in a date like &ldquo;31/January/2023&rdquo; and then changes the month to February, the day would automatically switch to 28 (since February only has 28 days). However, we received feedback
    from you that there are cases when you need to disable this automatic correction so that the user can continue editing the date and manually change the day part of February.</p><p>The new property <strong>AutoCorrectParts</strong> gives you control over the date auto-correction UX. Its value specifies whether the date parts should be automatically corrected to show a valid date or not. The default value is &ldquo;true,&rdquo;
    meaning that the automatic correction will occur. By setting it to &ldquo;false,&rdquo; you will allow users to be able to see &ldquo;31/Feb/2023&rdquo; in the input field, but the component value can not be set to this and will be either null
    or default to the value for the DateTime.</p><p>The new AutoCorrectParts feature is available for the following list of UI for Blazor components: DateInput, DatePicker, DateRangePicker and DateTimePicker.</p><h4 id="caret-mode">Caret Mode</h4><p>We have introduced one more property called <strong>AllowCaretMode</strong> which gives users more flexibility when working with dates. The AllowCaretMode allows users to input date and time using a caret to move through separate date segments (instead
    of selecting) and this property controls whether this is an option or not. It also specifies if a caret can be displayed during input for certain date segments&mdash;for example, if months are represented as words instead of numbers, it can&rsquo;t
    be applied.</p><h3 id="no-data-template-in-multiple-components">No Data Template in Multiple Components</h3><p>Until now, if you needed to customize the content of an empty list in a select-type component you could only achieve change in the text via localization. With the new NoDataTemplate feature you can now display custom content in the Telerik UI for
    Blazor DropDownList, ComboBox, AutoComplete, MultiSelect and MultiColumnComboBox components.</p><p><img src="https://d585tldpucybw.cloudfront.net/sfimages/default-source/blogs/2023/2023-01/ui-for-blazor-no-date-template-combobox.png?sfvrsn=32b8104a_3" title="UI for Blazor No Data Template ComboBox" alt="For a Car Make dropdown, the user has typed &#39;demo&#39; and the component says &#39;No items to display&#39;" /></p><p><a href="https://demos.telerik.com/blazor-ui/combobox/templates" target="_blank">See an example of the UI for Blazor ComboBox no data template.</a></p><h3 id="blazor-treeview-onitemrender-event ">Blazor TreeView OnItemRender Event</h3><p>We exposed a new event called OnItemRender in the Blazor TreeView component, which is triggered when each of the cells are being rendered. The OnItemRender event allows you to have full control over what content and how you would like to be displayed
    in the tree view items including their read-only state.</p><p><a href="https://docs.telerik.com/blazor-ui/components/treeview/events" target="_blank">See the complete list of the available events in the UI for Blazor TreeView component.</a></p><h3 id="accessibility-improvements-1
                ">Accessibility Improvements</h3><p>We continue our efforts for ensuring the highest level of accessibility compliance of the Telerik UI for Blazor library. In the current release we improved the WAI-ARIA attributes and keyboard navigation in the Data Grid filter and column menus, as
    well as the TreeList filter menu. We have also added an AriaLabel parameter across all input-based components.</p><p>To raise the level of AY11 compliance even higher, we shipped a new color swatch called Ocean Blue A11Y (an enhanced version of the already existing Ocean Blue) which addresses corner cases for color contrast in several UI components.</p><p>In addition to the A11Y features, we also provided detailed documentation for the WAI-ARIA attributes of each UI for Blazor component allowing you to easily reference the available attributes.</p><p>See an example of <a href="https://docs.telerik.com/blazor-ui/components/autocomplete/accessibility/wai-aria-support" target="_blank">WAI-ARIA reference documentation article for the UI for Blazor AutoComplete component</a>.</p><h3 id="form-onupdate-event
                ">Form OnUpdate Event</h3><p>The <a href="https://demos.telerik.com/blazor-ui/form/overview" target="_blank">Blazor Form component</a> now exposes OnUpdate event, which is triggered after a change in any of the editors is initiated. The new event further
    expands the existing ones, OnSubmit, OnValidSubmit and OnInvalidSubmit, which allow you to respond to user actions and provide custom logic.</p><p><a href="https://docs.telerik.com/blazor-ui/components/form/events " target="_blank">Read more about the available events in the UI for Blazor Form component.</a></p><h3 id="week-number-in-datetimepickers ">Week Number in DateTimePickers</h3><p>The new property <strong>ShowWeekNumbers</strong> in the UI for Blazor Calendar, DatePicker and DateTimePicker components allows you to easily display to users the respective week number. By setting the ShowWeekNumbers property to true, a new
    column is added to the left-hand side of the calendar indicating the week number.</p><p><img src="https://d585tldpucybw.cloudfront.net/sfimages/default-source/blogs/2023/2023-01/ui-for-blazor-calendar-week-number.png?sfvrsn=1da109b0_3" title="UI for Blazor Calendar Week Number" alt="Beside January 2023 calendar are week numbers, so to the left of January 1st is 1, 8th is 2, 15th is 3, etc." /></p><p><a href="https://demos.telerik.com/blazor-ui/calendar/appearance " target="_blank">See how to add a week column in the UI for Blazor Calendar component.</a></p><h3 id="support-for-svg-icons ">Support for SVG icons</h3><p>As of R1 2023, the Telerik UI for Blazor library offers a wide selection of Scalable Vector Graphics (SVG) icons in addition to the previously available font icons, giving developers more options to choose from.</p><p>SVG icons are vector images defined in an XML format, which allows for easy scalability and customization. They can be used in webpages to display vector graphics and offer advantages such as sharp rendering at all resolutions, flexibility in
    controlling individual parts with CSS, and accessibility through semantic elements and attributes.</p><p><a href="https://docs.telerik.com/blazor-ui/common-features/icons ">Read the documentation article for more information about the available icon options in UI for Blazor.</a></p><p><img src="https://d585tldpucybw.cloudfront.net/sfimages/default-source/blogs/2023/2023-01/svg-icons.png?sfvrsn=569352d_3" data-sf-ec-immutable=" " alt="Telerik Ninja and two Kendokas hang out with an SVG " /></p><h3 id="radiogroup-new-item-template ">RadioGroup New Item Template</h3><p>Another component that now allows rendering of custom content instead of just text is the Telerik UI for Blazor RadioButtonGroup component. Using the new <a href="https://demos.telerik.com/blazor-ui/radiogroup/templates" data-sf-ec-immutable=" " target="_blank">radio group ItemTemplate</a> feature, you can add icons, styles and special formatting in the radio buttons of your Blazor apps.</p><p><img src="https://d585tldpucybw.cloudfront.net/sfimages/default-source/blogs/2023/2023-01/ui-for-blazor-radiogroup---template.png?sfvrsn=6523b576_3" data-sf-ec-immutable=" " title="UI for Blazor RadioGroup " alt="Radio buttions for Agree (in green), Disagree (in red), N/A (in black) " /></p><h2 id="telerik-ui-for-asp.-net-core-and-mvc">Telerik UI for ASP.NET Core and MVC</h2><h3 id="timedurationpicker-ui-component ">TimeDurationPicker UI Component</h3><p>The new Telerik UI TimeDurationPicker component for <a href="https://www.telerik.com/aspnet-core-ui" data-sf-ec-immutable=" " target="_blank">ASP.NET Core</a> and <a href="https://www.telerik.com/aspnet-mvc" data-sf-ec-immutable=" " target="_blank">ASP.NET MVC</a> enables users to select a duration period. As a developer, you can determine the number of columns,
    specify the format for each of them, constrain the allowed selectable values and add shortcut buttons for repetitive durations.
</p><p>The TimeDurationPicker component differs from the other time-based pickers that Telerik UI offers in that it does not care about what the current time is, and no date needs to be involved. Instead, the new ASP.NET Core/MVC TimeDurationPicker focuses
    just on a single time duration.</p><p>The Time Duration Picker comes also with built-in keyboard navigation support, multiple events that let you handle the business and UX logic, plus various appearance customization options such as size, fill mode and border radius.</p><p><a href="https://demos.telerik.com/aspnet-core/timedurationpicker " data-sf-ec-immutable=" ">See the UI for ASP.NET Core TimeDurationPicker component demo.<br /></a><a href="https://demos.telerik.com/aspnet-mvc/timedurationpicker" data-sf-ec-immutable=" " target="_blank">See the UI for ASP.NET MVC TimeDurationPicker component demo.</a></p><p><img src="https://d585tldpucybw.cloudfront.net/sfimages/default-source/blogs/2023/2023-01/timedurationpicker.png?sfvrsn=3f5385a6_3" title="TimeDurationPicker " alt="TimeDurationPicker allows for hours and minutes inputs by typing, scrolling, or presets" /></p><h3 id="gridlayout---stacklayout-ui-components ">GridLayout &amp; StackLayout UI Components</h3><p>The new GridLayout and StackLayout UI components will help you easily arrange HTML elements in a grid or a horizontal/vertical stack.</p><p>These components simplify the creation of layouts in web applications and help developers migrate from desktop to the web since they mimic the GridPanel and StackPanel components used in Windows development.</p><p>The GridLayout allows you to lay components out on a grid consisting of rows and columns. The columns and rows of the grid serve as coordinates that are used for laying out components on the grid. Typically a component only occupies a single cell
    of the grid.
</p><p><a href="https://demos.telerik.com/aspnet-core/gridlayout " data-sf-ec-immutable=" " target="_blank">See a demo of UI for ASP.NET Core GridLayout component.</a><br /><a href="https://demos.telerik.com/aspnet-mvc/gridlayout " target="_blank">See a demo of UI for ASP.NET MVC GridLayout component.</a></p><p><img src="https://d585tldpucybw.cloudfront.net/sfimages/default-source/blogs/2023/2023-01/gridlayout-component.png?sfvrsn=42433122_3" data-sf-ec-immutable=" " title="GridLayout Component " alt="GridLayout Component shows a dashboard with four trending articles with large number symbols, recommended for you posts with images, events this month calendar, and discover more tags" /></p><p>The Telerik StackLayout component allows you to easily align vertically or horizontally multiple elements in a stack. It includes different orientations, alignments, spacings and other handy options.</p><p><a href="https://demos.telerik.com/aspnet-core/stacklayout" target="_blank">See a demo of UI for ASP.NET Core StackLayout component.</a><br /><a href="https://demos.telerik.com/aspnet-mvc/stacklayout" target="_blank">See a demo of UI for ASP.NET MVC StackLayout component.</a></p><p><img src="https://d585tldpucybw.cloudfront.net/sfimages/default-source/blogs/2023/2023-01/stacklyaout-ui-component.png?sfvrsn=a20520ca_3" title="StackLayout UI Component" alt="Popular creator cards are stacked side by side, each with name and profile pic, number of followers, large image, image credit, and See more link. In the upper right are toggle buttons for horizontal (selected) or vertical " /></p><h3 id="chip-and-chiplist-ui-components">Chip and ChipList UI Components</h3><p>The Chip and ChipList UI components are more new additions to the Telerik UI for ASP.NET Core and ASP.NET MVC libraries. Commonly, Chip and ChipList components are used as tags when adding/removing contacts and mail inbox, selecting single or
    multiple choices from available options, and providing input to an application.</p><p>The Chip component enables user input and verifies that input by converting text into chips. The Chip provides a compact way to display complex information, including text, avatars, images, letters and close icons. It is clickable and removable,
    and offers various styling options.</p><p>The ChipList component is also included in this update. It is used to manage a collection of Chip components, providing data binding and manipulation options for a list of Chip elements.</p><p>See an example of the <a href="https://demos.telerik.com/aspnet-core/chip " target="_blank">Telerik UI for ASP.NET Core Chip</a> and <a href="https://demos.telerik.com/aspnet-core/chiplist " target="_blank">ChipList UI components</a>.<br />See an example of the <a href="https://demos.telerik.com/aspnet-mvc/chip " data-sf-ec-immutable=" " target="_blank">Telerik UI for ASP.NET MVC Chip</a> and <a href="https://demos.telerik.com/aspnet-mvc/chiplist" target="_blank" "=" " data-sf-ec-immutable=" ">ChipList UI components</a>.</p><p><img src="https://d585tldpucybw.cloudfront.net/sfimages/default-source/blogs/2023/2023-01/chiplist-overview.png?sfvrsn=fc58f6b1_3" data-sf-ec-immutable=" " title="ChipList " alt="Default ChipList has
                Maria, Thomas and Dan, each with a small personalized image and a light gray background. Outline ChipList shows Add, Edit, Remove, each with an icon and a white background with black border and text. ChipListwith no Chip items styles has One
                Two Three as simple outline boxes and no icons. " /></p><h3 id="floating-label-in-input-and-select-type-components ">Floating Label in Input and Select-Type Components</h3><p>In the current update, we enhanced multiple select and editor-type UI components with a shiny new <strong>floating label property</strong>. By setting it to true, the label will &ldquo;float&rdquo; above the component when it is focused. The new
    floating label feature is available in the following list of components:</p><p><strong>ASP.NET Core &amp; MVC Select-Type UI Components:</strong></p><ul><li><a href="https://demos.telerik.com/aspnet-core/dropdownlist/floating-label
                " data-sf-ec-immutable=" " target="_blank ">DropDownlist floating label demo</a></li><li><a href="https://demos.telerik.com/aspnet-core/combobox/floating-label " data-sf-ec-immutable=" " target="_blank ">ComboBox floating label demo</a></li><li><a href="https://demos.telerik.com/aspnet-core/multiselect/floating-label
                " data-sf-ec-immutable=" " target="_blank ">MultiSelect floating label demo</a></li><li><a href="https://demos.telerik.com/aspnet-core/autocomplete/floating-label " data-sf-ec-immutable=" " target="_blank ">AutoComplete floating label demo</a></li><li><a href="https://demos.telerik.com/aspnet-core/dropdowntree/index
                " target="_blank " data-sf-ec-immutable=" ">DropDownTree floating label demo</a></li><li><a href="https://demos.telerik.com/aspnet-core/multicolumncombobox/floating-label " data-sf-ec-immutable=" " target="_blank
                ">MultiColumnComboBox floating label demo</a></li></ul><p><strong>ASP.NET Core &amp; MVC Date Inputs &amp; Pickers</strong></p><ul><li><a href="https://demos.telerik.com/aspnet-core/dateinput/floating-label " data-sf-ec-immutable=" " target="_blank ">DateInput floating label demo</a></li><li><a href="https://demos.telerik.com/aspnet-core/datepicker/floating-label
                " data-sf-ec-immutable=" " target="_blank ">DatePicker floating label demo</a></li><li><a href="https://demos.telerik.com/aspnet-core/datetimepicker/floating-label " data-sf-ec-immutable=" " target="_blank
                ">DateTimePicker floating label demo</a></li></ul><p><img src="https://d585tldpucybw.cloudfront.net/sfimages/default-source/blogs/2023/2023-01/floating-label.gif?sfvrsn=f197fbe9_3" data-sf-ec-immutable=" " title="Floating Label " alt=" &#39;Remind me on&#39; field label moves from inside the field to
                above it when the field is clicked " /></p><h3 id="signing-pdf-file-with-signature-ui-component
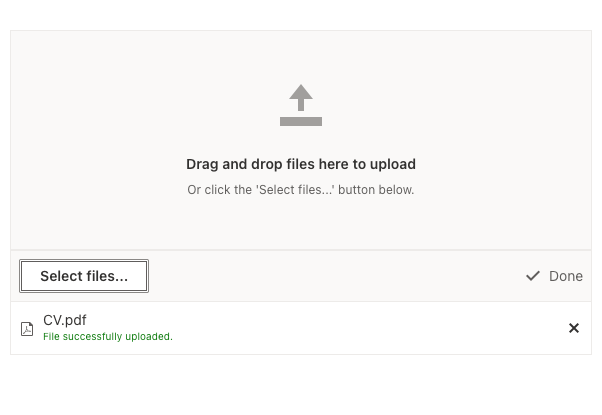
                ">Signing PDF File with Signature UI Component</h3><p>We improved the demos for the Signature component in UI for ASP.NET Core and MVC to include the popular use case of signing PDF documents within web applications. Using the Telerik Document Processing Libraries, you can extract the PDF file to
    memory, add the signature and create a new PDF document. The Telerik UI for ASP.NET Core PDFViewer component allows you to easily display the final document to the user, including options to download and save the document with the added signature.</p><p>See examples of how to place a signature in a PDF File using the <a href="https://demos.telerik.com/aspnet-core/signature/sign-pdf-document " target="_blank " data-sf-ec-immutable=" ">UI for ASP.NET Core Signature component</a> and the <a href="https://demos.telerik.com/aspnet-mvc/signature/sign-pdf-document
                " data-sf-ec-immutable=" ">UI for ASP.NET MVC Signature component</a>.</p><p><img src="https://d585tldpucybw.cloudfront.net/sfimages/default-source/blogs/2023/2023-01/sign-pdf-with-signature-ui-component.png?sfvrsn=bff63802_3" title="PDF Signature Component
                " data-sf-ec-immutable=" " alt="A certificate has a space for global partner &#39;s signature. The Signature component allows the user to add their signature to the PDF. " /></p><h3 id="ecmascript-modules-esm-support ">ECMAScript Modules (ESM) Support</h3><p>We transformed the source code from AMD to ECMAScript modules (ESM), bringing actual benefits from the ESM modules to Kendo UI for jQuery, Telerik UI for ASP.NET Core and MVC server wrappers as well.</p><p>If you are relying on the AMD modules, you can continue using them as we managed to come up with a solution that allows moving to the new ESM module system without breaking changes for anyone who might want to continue AMD/UMD modules with the
    Kendo UI bundles distributed.</p><p>You can <a href="https://www.telerik.com/blogs/kendo-ui-jquery-transformed-ecmascript-modules " data-sf-ec-immutable=" " target="_blank ">learn why we transformed our own source code from AMD to ECMAScript modules</a> and see how you can use dynamic script imports
    with modern browsers and get huge benefits in your applications.
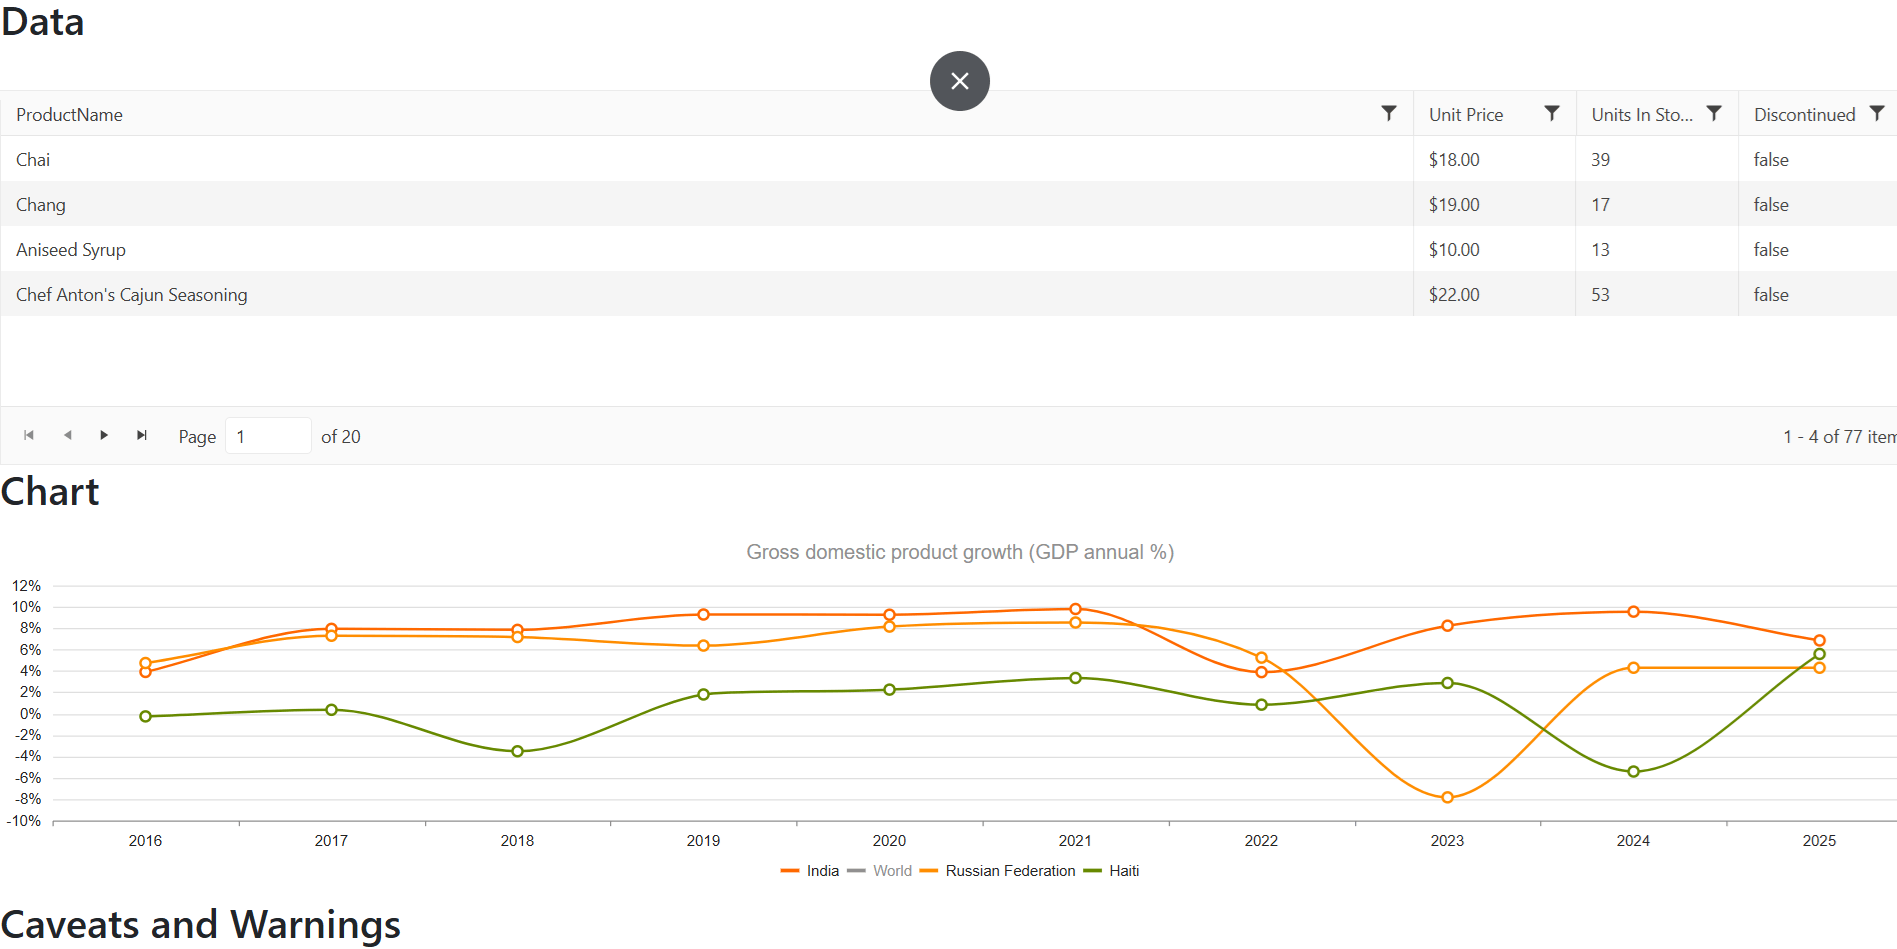
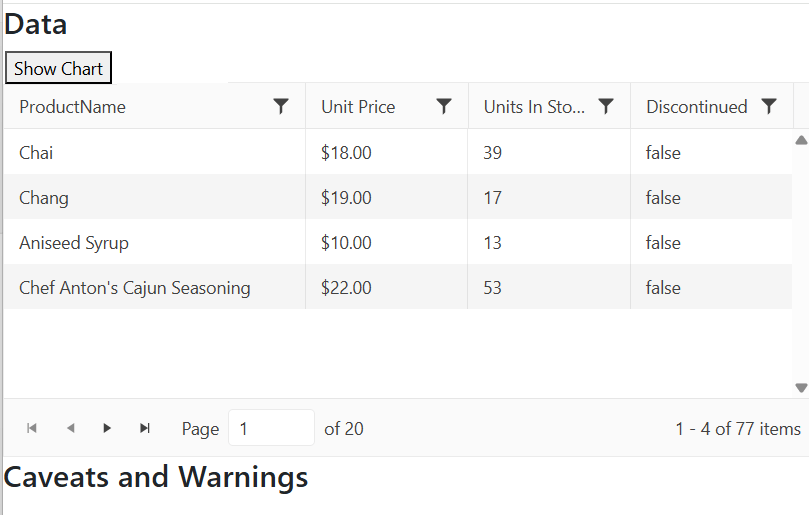
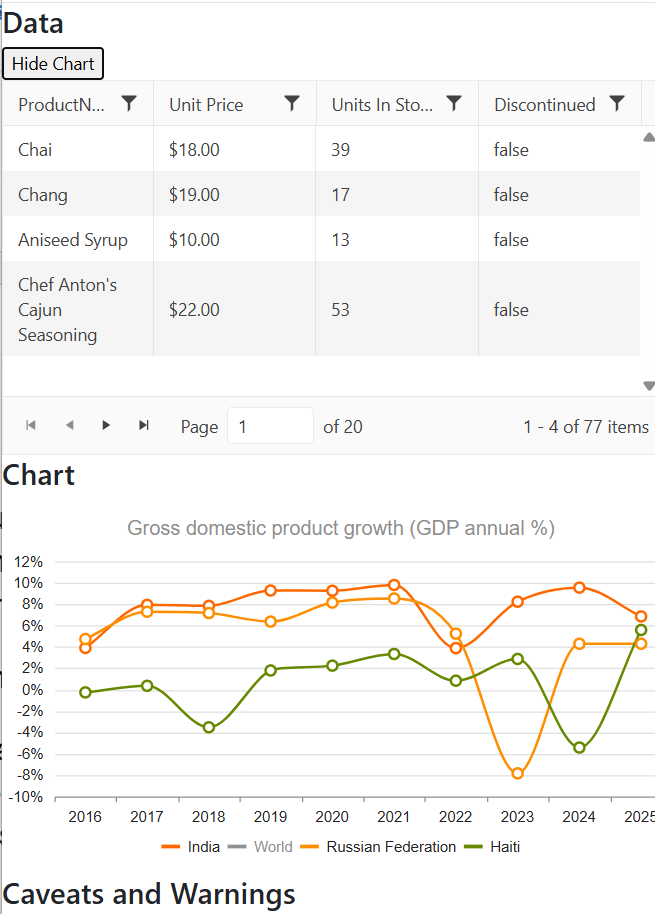
</p><h3 id="charts-enhancements ">Charts Enhancements</h3><h4 id="label-support-for-bullet-charts
                ">Label Support for Bullet Charts</h4><p>You can now easily add labels to each of the data series within the Bullet Chart UI component. Furthermore, you can configure its visibility, apply background formatting and even render custom content by using templates.</p><p><img src="https://d585tldpucybw.cloudfront.net/sfimages/default-source/blogs/2023/2023-01/support-for-subtitle-in-charts.png?sfvrsn=5db1a2b_3" data-sf-ec-immutable=" " title="Chart with subtitle " alt="Site Visitors Stats chart has a subtitle indicating
                results are in thousands " /></p><h4 id="subtitle-support-for-all-charts
                ">Subtitle Support for All Charts</h4><p>Another enhancement to the DataViz library is the ability to add an additional title (subtitle) below the chart title and apply individual style to it.</p><p><a href="https://docs.telerik.com/aspnet-core/html-helpers/charts/elements/title " data-sf-ec-immutable=" ">See how to configure the Chart Title and Subtitle properties.</a></p><p><img src="https://d585tldpucybw.cloudfront.net/sfimages/default-source/blogs/2023/2023-01/support-for-labels-in-bullet-charts.png?sfvrsn=8248ade1_3" title="Bullet Chart with Subtitles " data-sf-ec-immutable=" " alt="A weather app has four bullet apps, and each has a specific subtitle to make it easier to read a precise number " /></p><h3 id="accessibility-improvements-2 ">Accessibility Improvements</h3><p>The specific WAI-ARIA accessibility improvements in R1 2023 for Telerik UI for ASP.NET Core and MVC are numerous, so here are a few UI components: Menu, Context Menu, ListBox, Drawer, ScrollView,
    ListView and more.</p><h3 id="deprecation-of-less-themes
                ">Deprecation of LESS Themes</h3><p>Last year with R1 2022 we announced that Kendo UI for jQuery, Telerik UI for ASP.NET MVC and Telerik UI for ASP.NET Core would be moving completely to the <a href="https://www.telerik.com/blogs/future-plans-telerik-kendo-ui-less-themes " target="_blank " data-sf-ec-immutable=" ">Sass-based Default, Bootstrap, Material and Fluent themes</a>.
 This means that the LESS themes, created when LESS was the most popular CSS pre-compiler (this is no longer the case), are officially going to be deprecated.</p><p>Well, the day is here, and R1 2023 is the last version of Kendo UI for jQuery, Telerik UI for ASP.NET MVC and Telerik UI for ASP.NET Core will support the LESS-based themes.</p><p>Thanks to the hard work done over the last year or so, R1 2023 contains a lot of new features and components, and lots of improvements to the LESS themes. This should give teams that have been hesitant about the migration a stable release to hold
    out on until they can make the change to the Sass-based themes.</p><h2 id="telerik-ui-for-asp.-net-core-specific ">Telerik UI for ASP.NET Core Specific</h2><h3 id="new-e-shop-demo-app ">New E-Shop Demo App</h3><p>We have a brand-new e-shop demo app that illustrates the usage of Telerik UI components within a ASP.NET Core application. The app showcases the most common use cases related to e-shops&mdash;product list, product details, shopping basket, user
    profile, sophisticated product filters, and on top of that we have also included integration with <a href="https://www.telerik.com/products/reporting.aspx" data-sf-ec-immutable=" " target="_blank ">Telerik Reporting</a> to demonstrate how easy it is to generate order invoices or print product catalogs.</p><p>The application is built entirely with Telerik UI for <a href="https://www.telerik.com/aspnet-core-ui" target="_blank">ASP.NET Core components</a> such as Data Grid, Scroll View (also known as Carousel), Slider, Rating, Card, Checkbox Group, Buttons and more. The styling is powered by the new built-in Fluent theme
    which is available for all Telerik and Kendo UI components.</p><p><a href="https://demos.telerik.com/aspnet-core/eshop/account/login" target="_blank " data-sf-ec-immutable="
                ">See the new e-shop demo app with Telerik UI for ASP.NET Core components with Fluent theme.</a></p><p><img src="https://d585tldpucybw.cloudfront.net/sfimages/default-source/blogs/2023/2023-01/ui-for-asp.net-core-eshop-demo-app.jpeg?sfvrsn=763817f7_3/" data-sf-ec-immutable=" " title="UI for ASP.NET Core Eshop Demo App " alt="UI for ASP.NET Core Eshop
                Demo App " /></p><h3 id="localization-configuration-in-project-templates
                ">Localization Configuration in Project Templates</h3><p>As of the R3 2022 SP2 release, we have added localization capabilities to the Visual Studio Templates for Telerik UI for ASP.NET Core. This gives you an option to enable or disable the templates localization in the Telerik Visual Studio Extensions
    Project Wizard.
</p><p>By default, the UI for ASP.NET Core components display their messages in English. If the localization is enabled in the Project Wizard, a dropdown is rendered in the respective Visual Studio Templates startup page.</p><p>You can use it to select a different language, which will convert the messages in the components to the selected language. This way your users will be able to understand them, since they are translated to their native (or preferred) language.</p><h3 id="localization-resource-files ">Localization Resource Files</h3><p>This release includes translated messages for 96 cultures in the Telerik UI for ASP.NET Core and MVC libraries. These translations were taken from the Kendo UI for jQuery public localization repository and are now available as resource files.
    Users can use these translations as is or customize them to their liking.</p><p><a href="https://docs.telerik.com/aspnet-core/globalization/localization " data-sf-ec-immutable=" " target="_blank
                ">To learn more about the localization updates, check out the dedicated documentation article.</a></p><h3 id="ui-for-asp.-net-core-code-snippets-in-visual-studio-and-visual-studio-code ">UI for ASP.NET Core Code Snippets in Visual Studio and Visual Studio Code</h3><p>This release includes new code snippets for Telerik UI for ASP.NET Core components to improve productivity when developing web applications in Visual Studio or Visual Studio Code. The 110+ components now have code snippets for both HTML and
    TAG helper flavors that can be easily accessed. To use these code snippets, download and install the extensions from the Visual Studio Marketplace.</p><ul><li><a href="https://marketplace.visualstudio.com/items?itemName=TelerikInc.ProgressTelerikASPNETCoreVSExtensions
                " data-sf-ec-immutable=" " target="_blank ">Visual Studio Productivity Pack</a></li><li><a href="https://marketplace.visualstudio.com/items?itemName=TelerikInc.aspnetcoretemplatewizard " data-sf-ec-immutable=" " target="_blank
                ">Visual Studio Code Productivity Pack</a></li></ul><h2 id="telerik-ui-for-asp.-net-ajax ">Telerik UI for ASP.NET AJAX</h2><h3 id="new-webforms-signature-ui-component ">New WebForms Signature UI component</h3><p><a href="https://www.telerik.com/products/aspnet-ajax.aspx" data-sf-ec-immutable=" " target="_blank
                ">UI for ASP.NET AJAX</a> is another Telerik library that added the Signature UI component to its
    collection. The RadSignature allows users to easily add signatures to forms or even PDF documents (via integration Telerik Document Processing). They can use a mouse or touch device to create their signature and customize it using options
    like canvas settings, stroke width, size, color, background and read-only mode.</p><p><a href="https://demos.telerik.com/aspnet-ajax/signature/overview/defaultcs.aspx" data-sf-ec-immutable=" " target="_blank">See a demo of the UI for ASP.NET AJAX Signature UI control.</a></p><p><img src="https://d585tldpucybw.cloudfront.net/sfimages/default-source/blogs/2023/2023-01/ui-for-asp.net-ajax-signature.png?sfvrsn=24cd6e0e_3/" title="UI for ASP.NET AJAX Signature " data-sf-ec-immutable=" " alt="UI for ASP.NET AJAX Signature
                " /></p><h3 id="enhancements-to-ui-components ">Enhancements to UI Components</h3><p>Based on a <a href="https://feedback.telerik.com/aspnet-ajax/1375584-add-dropdownautowidth-property-in-raddropdownlist
                " data-sf-ec-immutable=" " target="_blank ">customer request</a> in the UI for ASP.NET AJAX Feedback Portal, we added a DropDownAutoWidth property in the RadDropDownList component.</p><p>Another <a href="https://feedback.telerik.com/aspnet-ajax/1374073-add-client-event-itemselect-for-the-searchcontext-in-radsearchbox
                " data-sf-ec-immutable=" " target="_blank ">Feedback Portal request</a> that was included in the release is the new client event
    ItemSelect for the SearchContex in the RadSearchBox. Using the ItemSelect event, you can easily change the DataSource for RadSearchBox according to which Item is selected.</p><p><img src="https://d585tldpucybw.cloudfront.net/sfimages/default-source/blogs/2023/2023-01/ajax-radsearchbox-itemselect.gif?sfvrsn=86dbb7a8_3" title="AJAX RadSearchBox ItemSelect " data-sf-ec-immutable=" " alt="From a dropdown inside the search tab that starts with All, user selects Shelley Burke. A few details about username, supplier ID, and Default are shown below the text bar. Then
                Yoshi Nagase is selected from the dropdown, and his details are listed below Shelley&#39;s " /></p><h3 id="accessibility-improvements-3
                ">Accessibility Improvements</h3><p>In Telerik R1 2023, we continued adding accessibility improvements (Calendar, TreeView, Grid HeaderContext to name a few) and as we did so, we made sure that the Voluntary Product Accessibility Template (VPAT) is updated.</p><h3 id="other-enhancements ">Other Enhancements</h3><p>In the latest release of <a href="https://www.telerik.com/products/aspnet-ajax.aspx" data-sf-ec-immutable=" " target="_blank ">UI for ASP.NET AJAX</a> you can also find improvements in the appearance
    of RadEditor and RadTreeView in the WebBlue, Windows 7 and Vista skins.</p><h2 id="join-us-for-the-webinar ">
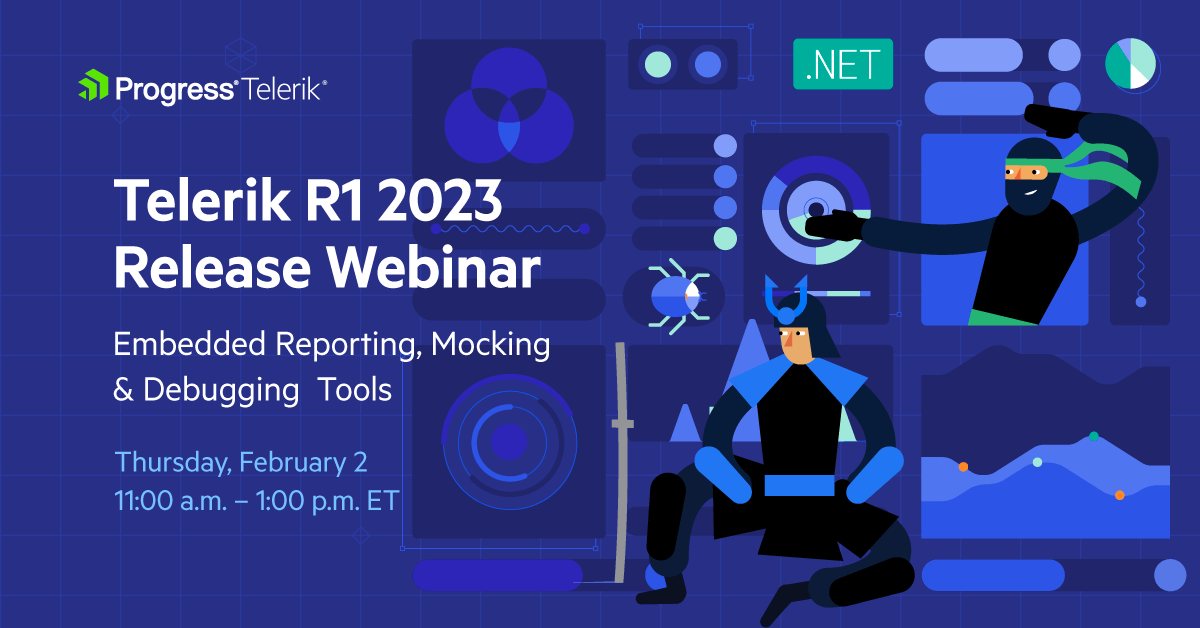
Join Us for the Webinar January 26 (Plus More)</h2><h3 id="sign-up-for-the-release-webinars-on-jan-26-31-feb-2
                ">Progress Telerik .NET Web, Desktop &amp; Mobile Products R1 2023 Release Webinar | January 26</h3><p><a href="https://www.telerik.com/campaigns/telerik-r1-2023-release-webinar-web-desktop-mobile-products" target="_blank "><img src="https://d585tldpucybw.cloudfront.net/sfimages/default-source/blogs/2023/2023-01/telerik_blog-inline_image_1200x628.png?sfvrsn=21e2eec7_3" data-sf-ec-immutable=" " alt=" " sf-size="39421 " /></a></p><p>Discover all updates across Telerik <a href="https://www.telerik.com/blazor-ui" data-sf-ec-immutable=" " target="_blank ">UI for Blazor</a>, <a href="https://www.telerik.com/aspnet-core-ui" data-sf-ec-immutable=" " target="_blank ">UI for ASP.NET Core</a>, <a href="https://www.telerik.com/aspnet-mvc" data-sf-ec-immutable=" " target="_blank
                ">UI for ASP.NET MVC</a>, <a href="https://www.telerik.com/products/aspnet-ajax.aspx" data-sf-ec-immutable=" " target="_blank ">UI for ASP.NET AJAX</a>, <a href="https://www.telerik.com/products/wpf/overview.aspx" data-sf-ec-immutable=" " target="_blank ">UI for WPF</a>, <a href="https://www.telerik.com/products/winforms.aspx" data-sf-ec-immutable="
                " target="_blank ">UI for WinForms</a>, <a href="https://www.telerik.com/winui" data-sf-ec-immutable=" " target="_blank ">UI for WinUI</a>, <a href="https://www.telerik.com/maui-ui" data-sf-ec-immutable=" " target="_blank ">UI for .NET MAUI</a> and <a href="https://www.telerik.com/xamarin-ui" data-sf-ec-immutable=" " target="_blank ">UI for Xamarin</a> and <a href="https://www.telerik.com/themebuilder" data-sf-ec-immutable=" " target="_blank ">ThemeBuilder</a>.</p><p><a href="https://www.telerik.com/campaigns/telerik-r1-2023-release-webinar-web-desktop-mobile-products" data-sf-ec-immutable=" " class="Btn" target="_blank ">Save Your Seat</a></p><h3 id="join-us-on-twitch ">Join Us on Twitch</h3><p><a href="https://www.telerik.com/codeitlive" target="_blank
                "><img src="https://d585tldpucybw.cloudfront.net/sfimages/default-source/blogs/2023/2023-01/fb_li_telerikfiddlerkendoui_1200x628a1cf29e1-b319-453f-9a32-164642ddc274.png?sfvrsn=675e050b_3" data-sf-ec-immutable=" " alt=" " sf-size="40757 " /></a></p><p>If you can&rsquo;t wait until the webinar to unpack the new release, join the <a href="https://www.telerik.com/codeitlive" data-sf-ec-immutable=" " target="_blank ">Livestream Release Party</a> on January 19, 10 a.m. &ndash; 11:30 a.m. ET to hear the release highlights across the entire Progress Developer Tools portfolio and hang out with friends.</p><h3 id="progress-kendo-ui-r1-2023-release-webinar--january-31 ">Progress Kendo UI R1 2023 Release Webinar | January 31</h3><p><a href="https://www.telerik.com/campaigns/kendo-ui-r1-2023-release-webinar" target="_blank "><img src="https://d585tldpucybw.cloudfront.net/sfimages/default-source/blogs/2023/2023-01/kendo-ui-kendoka_blog-inline_image_1200x628.png?sfvrsn=ad1e18e0_3" data-sf-ec-immutable=" " alt=" " sf-size="34452 " /></a></p><p>Discover all updates across <a href="https://www.telerik.com/kendo-react-ui" data-sf-ec-immutable=" " target="_blank ">KendoReact</a> and Kendo UI for <a href="https://www.telerik.com/kendo-angular-ui" data-sf-ec-immutable=" " target="_blank
                ">Angular</a>, <a href="https://www.telerik.com/kendo-vue-ui" data-sf-ec-immutable=" " target="_blank ">Vue</a> and <a href="https://www.telerik.com/kendo-jquery-ui" data-sf-ec-immutable=" " target="_blank ">jQuery</a>, as well as ThemeBuilder.</p><p><a href="https://www.telerik.com/campaigns/kendo-ui-r1-2023-release-webinar" data-sf-ec-immutable=" " class="Btn" target="_blank ">Save Your Seat</a></p><h3 id="progress-telerik-reporting-mocking-and-debugging-tools-r1-2023-release-webinar--february-2
                ">Progress Telerik Reporting, Mocking and Debugging Tools R1 2023 Release Webinar | February 2</h3><p><a href="https://www.telerik.com/campaigns/telerik-r1-2023-release-webinar-reporting-fiddler-and-justmock" target="_blank "><img src="https://d585tldpucybw.cloudfront.net/sfimages/default-source/blogs/2023/2023-01/telerik_fiddler_blog-inline_image_1200x628.png?sfvrsn=ffd9ae47_3" data-sf-ec-immutable=" " alt=" " sf-size="42920 " /></a></p><p>Discover all updates across Telerik <a href="https://www.telerik.com/products/reporting.aspx" data-sf-ec-immutable=" " target="_blank
                ">Reporting</a>, <a href="https://www.telerik.com/products/mocking.aspx" data-sf-ec-immutable=" " target="_blank ">JustMock</a>, <a href="https://www.telerik.com/fiddler/fiddler-everywhere" data-sf-ec-immutable=" " target="_blank ">Fiddler Everywhere</a> and <a href="https://www.telerik.com/fiddler-jam" data-sf-ec-immutable="
                " target="_blank ">Fiddler Jam</a>.</p><p><a href="https://www.telerik.com/campaigns/telerik-r1-2023-release-webinar-reporting-fiddler-and-justmock" data-sf-ec-immutable=" " class="Btn" target="_blank ">Save Your Seat</a></p><img src="https://feeds.telerik.com/link/23051/15911273.gif" height="1" width="1"/>]]></content>
  </entry>
  <entry>
    <id>urn:uuid:d853793b-eecf-45d7-999d-7f33a15a2f6d</id>
    <title type="text">Kendo UI for jQuery Is Transformed to ECMAScript Modules</title>
    <summary type="text">Learn why we transformed our source code from ADM to ESM and see how you can benefit from dynamic script imports with modern browsers in your applications.</summary>
    <published>2022-11-09T18:22:02Z</published>
    <updated>2026-04-08T02:12:37Z</updated>
    <author>
      <name>Yanko Dzhemerenov </name>
    </author>
    <link rel="alternate" href="https://feeds.telerik.com/link/23051/15770604/kendo-ui-jquery-transformed-ecmascript-modules"/>
    <content type="text"><![CDATA[<p><span class="featured">Learn why we transformed our source code from ADM to ESM and see how you can benefit from dynamic script imports with modern browsers in your applications.</span></p><p>With the <a href="https://www.telerik.com/blogs/november-2022-telerik-kendo-ui-update" target="_blank">November release</a> of Kendo UI for jQuery, our source code is transformed from AMD to ECMAScript modules (ESM). You can learn
    here why we transformed our own source code to ESM and see how you can use dynamic script imports with modern browsers and get huge benefits from this in your applications.</p><p>While the current blog post outlines the changes in Kendo UI, the actual benefits from the ESM modules will be available to Telerik UI for ASP.NET Core and MVC server wrappers as well.</p><blockquote><p>If you are relying on the AMD modules, don&rsquo;t be scared&mdash;they are still here and they are shipped in the same locations where they have always been.</p></blockquote><h2 id="why-did-we-move-to-esm">Why Did We Move to ESM?</h2><p>The team invested serious time and effort when rewriting the Kendo UI for jQuery source code to ESM to ensure proper completion and smooth distribution of our pipeline. With that, we managed to come up with a solution to both move to a new, more recent
    module system without breaking changes for anyone who might want to use the good old AMD/UMD modules with the Kendo UI bundles distributed.</p><p>You can also find some useful information about that in our documentation: <a href="https://docs.telerik.com/kendo-ui/intro/installation/using-license-code" target="_blank">ECMAScript Modules</a>.</p><p>Briefly, the benefits from moving to ESM are:</p><ul><li>Using modern module loaders and bundlers and support the modern bundling concept within Kendo UI for jQuery.</li><li>Compiling JavaScript modules so that you can let the browser take care of script dependencies and dynamically load them (check out more: <a href="https://www.telerik.com#the-javascript-modules" data-sf-ec-immutable="">The JavaScript Modules</a>).</li><li>Using the distributed Kendo UI bundles and utilizing dynamic script loading can lead to better performance for your applications (check out more: <a href="https://www.telerik.com#how-to-improve-performance" data-sf-ec-immutable="">How to Improve Performance</a>).</li><li>Updating the NPM packages with different types of module systems to match ES, CommonJS and AMD/UMD (check out more: <a href="https://www.telerik.com#updates-in-the-npm-packages" data-sf-ec-immutable="">Updates in the NPM packages</a>).</li><li>And the best part is that using ECMAScript opens the doors for more possible improvements in the Kendo UI for jQuery based products (check out more: <a href="https://www.telerik.com#the-future" data-sf-ec-immutable="">The Future</a>).</li></ul><h2 id="how-to-use-the-new-modules">How To Use the New Modules</h2><h3 id="the-javascript-modules">The JavaScript Modules</h3><p>The <a href="https://developer.mozilla.org/en-US/docs/Web/JavaScript/Guide/Modules" target="_blank">JavaScript modules</a> are scripts that the browser will address as ECMAScript modules and enable dynamic loading. Shortly, enable
    <code>import</code> and <code>export</code> statements so that the browser can load script dependencies on its own.</p><p>How is this so different from the good old JavaScript files? The difference is huge when using large libraries like Kendo UI for jQuery. If you want all the code from the library, you would need to load the <code>kendo.all.js</code> file which, honestly,
    is a large one. That causes the browser to load one tremendous file while you might need only a portion of it for your page to work.</p><p>If you had the requirement to optimize the page load&mdash;the <code>kendo.all.js</code> would be a pain. And you would need to go in and trim out dependencies according to the components you are using and their feature-sets you need. And you would refer
    to our documentation (<a href="https://docs.telerik.com/kendo-ui/intro/scripts/what-you-need" target="_blank">Creating Your Own Custom Bundles</a>) in order to either create a custom bundle, which would output again a large
    bundle. Or add only the specific pre-bundle scripts that you would need, which would end up to a list of more than 10 or 20 js files.</p><p>What JavaScript modules enable you is to have one single file as a script reference (e.g., <code>&lt;script src="https://www.telerik.com./js/index.js" type="module"&gt;&lt;/script&gt;</code>) and use <code>import</code> and <code>export</code> statements to dynamically load
    all other dependencies.</p><p>Let&rsquo;s take the Kendo UI Grid as an example. In order to load the Grid component with all the features, you would need to list 70ish js files (you can check the list here: <a href="https://docs.telerik.com/kendo-ui/intro/scripts/scripts-general" target="_blank">Data Management Components</a>). With the JavaScript modules, you are required to add a reference or import only one file&mdash;the main bundle: <code>&lt;script src="https://www.telerik.com./mjs/kendo.grid.js" type="module"&gt;&lt;/script&gt;</code>.
 And this will let the browser load all other dependencies by itself.</p><p><img src="https://d585tldpucybw.cloudfront.net/sfimages/default-source/blogs/2022/2022-11/kendo-grid-js-module-dependencies.jpg?sfvrsn=53e5e3ae_3" title="kendo.grid.js module dependencies" alt="List of kendo.grid.js module dependencies" /></p><p>And, yes, a module is loaded only once. That means that if you load another component that relies on an already loaded dependency it will not be fetched again&mdash;it is already loaded by the browser and it will be directly used.</p><p>All our major distributions (<a href="https://docs.telerik.com/kendo-ui/intro/installation/hosting-kendoui">zip bundles</a>, <a href="https://docs.telerik.com/kendo-ui/intro/installation/cdn-service" target="_blank">CDN</a> and so on) include compiled JavaScript modules.</p><p><strong>1. Using the JavaScript Modules from CDN</strong></p><p>In the CDN, the JavaScript Modules are located in the <strong>/mjs/</strong> folder.</p><p>You can use them like so:</p><pre class=" language-html"><code class="prism  language-html"><span class="token tag"><span class="token tag"><span class="token punctuation">&lt;</span>script</span> <span class="token attr-name">src</span><span class="token attr-value"><span class="token punctuation">=</span><span class="token punctuation">"</span>https://kendo.cdn.telerik.com/2022.3.1109/mjs/kendo.grid.js<span class="token punctuation">"</span></span> <span class="token attr-name">type</span><span class="token attr-value"><span class="token punctuation">=</span><span class="token punctuation">"</span>module<span class="token punctuation">"</span></span><span class="token punctuation">&gt;</span></span><span class="token script language-javascript"></span><span class="token tag"><span class="token tag"><span class="token punctuation">&lt;/</span>script</span><span class="token punctuation">&gt;</span></span>
 <span class="token tag"><span class="token tag"><span class="token punctuation">&lt;</span>script</span> <span class="token attr-name">type</span><span class="token attr-value"><span class="token punctuation">=</span><span class="token punctuation">"</span>module<span class="token punctuation">"</span></span><span class="token punctuation">&gt;</span></span><span class="token script language-javascript">
    <span class="token function">$</span><span class="token punctuation">(</span><span class="token string">"#grid"</span><span class="token punctuation">)</span><span class="token punctuation">.</span><span class="token function">kendoGrid</span><span class="token punctuation">(</span><span class="token punctuation">{</span>
        <span class="token operator">...</span>
    <span class="token punctuation">}</span><span class="token punctuation">)</span><span class="token punctuation">;</span>
</span><span class="token tag"><span class="token tag"><span class="token punctuation">&lt;/</span>script</span><span class="token punctuation">&gt;</span></span>
</code></pre><p>or</p><pre class=" language-js"><code class="prism  language-js"><span class="token keyword">import</span> <span class="token string">'https://kendo.cdn.telerik.com/2022.3.1109/mjs/kendo.grid.js'</span><span class="token punctuation">;</span>
 <span class="token function">$</span><span class="token punctuation">(</span><span class="token string">"#grid"</span><span class="token punctuation">)</span><span class="token punctuation">.</span><span class="token function">kendoGrid</span><span class="token punctuation">(</span><span class="token punctuation">{</span>
    <span class="token operator">...</span>
<span class="token punctuation">}</span><span class="token punctuation">)</span><span class="token punctuation">;</span>
</code></pre><p><strong>2. Using the JavaScript modules from a downloaded distribution</strong></p><p>You can download the distributed bundles from your Telerik account in the download section. In the <code>mjs</code> folder you will find the modules readily available for you to copy to your application and use them.</p><pre class=" language-html"><code class="prism  language-html"><span class="token tag"><span class="token tag"><span class="token punctuation">&lt;</span>script</span> <span class="token attr-name">src</span><span class="token attr-value"><span class="token punctuation">=</span><span class="token punctuation">"</span>./mjs/kendo.grid.js<span class="token punctuation">"</span></span> <span class="token attr-name">type</span><span class="token attr-value"><span class="token punctuation">=</span><span class="token punctuation">"</span>module<span class="token punctuation">"</span></span><span class="token punctuation">&gt;</span></span><span class="token script language-javascript"></span><span class="token tag"><span class="token tag"><span class="token punctuation">&lt;/</span>script</span><span class="token punctuation">&gt;</span></span>
 <span class="token tag"><span class="token tag"><span class="token punctuation">&lt;</span>script</span> <span class="token attr-name">type</span><span class="token attr-value"><span class="token punctuation">=</span><span class="token punctuation">"</span>module<span class="token punctuation">"</span></span><span class="token punctuation">&gt;</span></span><span class="token script language-javascript">
    <span class="token function">$</span><span class="token punctuation">(</span><span class="token string">"#grid"</span><span class="token punctuation">)</span><span class="token punctuation">.</span><span class="token function">kendoGrid</span><span class="token punctuation">(</span><span class="token punctuation">{</span>
        <span class="token operator">...</span>
    <span class="token punctuation">}</span><span class="token punctuation">)</span><span class="token punctuation">;</span>
</span><span class="token tag"><span class="token tag"><span class="token punctuation">&lt;/</span>script</span><span class="token punctuation">&gt;</span></span>
</code></pre><p>or</p><pre class=" language-js"><code class="prism  language-js"><span class="token keyword">import</span> <span class="token string">'./mjs/kendo.grid.js'</span><span class="token punctuation">;</span>
 <span class="token function">$</span><span class="token punctuation">(</span><span class="token string">"#grid"</span><span class="token punctuation">)</span><span class="token punctuation">.</span><span class="token function">kendoGrid</span><span class="token punctuation">(</span><span class="token punctuation">{</span>
    <span class="token operator">...</span>
<span class="token punctuation">}</span><span class="token punctuation">)</span><span class="token punctuation">;</span>
</code></pre><h3 id="how-to-improve-performance">How To Improve Performance</h3><p>I think we are all on the same page now&mdash;JavaScript modules are cool. But let&rsquo;s see how they can improve our applications and the loading performance.</p><p>Let&rsquo;s say we have a very simple application with a button that opens a dialog/window and loads a grid with a bunch of data in it. Using the Kendo UI for jQuery components and the plain JS files will look something like this:</p><p><strong>index.html</strong></p><pre class=" language-html"><code class="prism  language-html"><span class="token tag"><span class="token tag"><span class="token punctuation">&lt;</span>html</span><span class="token punctuation">&gt;</span></span>
    <span class="token tag"><span class="token tag"><span class="token punctuation">&lt;</span>head</span><span class="token punctuation">&gt;</span></span>
        <span class="token tag"><span class="token tag"><span class="token punctuation">&lt;</span>meta</span> <span class="token attr-name">content</span><span class="token attr-value"><span class="token punctuation">=</span><span class="token punctuation">"</span>initial-scale=1.0, maximum-scale=1.0, user-scalable=no<span class="token punctuation">"</span></span> <span class="token attr-name">name</span><span class="token attr-value"><span class="token punctuation">=</span><span class="token punctuation">"</span>viewport<span class="token punctuation">"</span></span><span class="token punctuation">&gt;</span></span>
    <span class="token tag"><span class="token tag"><span class="token punctuation">&lt;/</span>head</span><span class="token punctuation">&gt;</span></span>
    <span class="token tag"><span class="token tag"><span class="token punctuation">&lt;</span>body</span><span class="token punctuation">&gt;</span></span>
        <span class="token tag"><span class="token tag"><span class="token punctuation">&lt;</span>button</span> <span class="token attr-name">id</span><span class="token attr-value"><span class="token punctuation">=</span><span class="token punctuation">"</span>openBtn<span class="token punctuation">"</span></span><span class="token punctuation">&gt;</span></span>Open<span class="token tag"><span class="token tag"><span class="token punctuation">&lt;/</span>button</span><span class="token punctuation">&gt;</span></span>
        
        <span class="token tag"><span class="token tag"><span class="token punctuation">&lt;</span>div</span> <span class="token attr-name">id</span><span class="token attr-value"><span class="token punctuation">=</span><span class="token punctuation">"</span>gridDialog<span class="token punctuation">"</span></span><span class="token punctuation">&gt;</span></span>
        <span class="token tag"><span class="token tag"><span class="token punctuation">&lt;/</span>div</span><span class="token punctuation">&gt;</span></span>
        
        <span class="token tag"><span class="token tag"><span class="token punctuation">&lt;</span>link</span> <span class="token attr-name">async</span> <span class="token attr-name">href</span><span class="token attr-value"><span class="token punctuation">=</span><span class="token punctuation">"</span>./styles/kendo/web/kendo.default-ocean-blue.css<span class="token punctuation">"</span></span> <span class="token attr-name">rel</span><span class="token attr-value"><span class="token punctuation">=</span><span class="token punctuation">"</span>stylesheet<span class="token punctuation">"</span></span> <span class="token attr-name">media</span><span class="token attr-value"><span class="token punctuation">=</span><span class="token punctuation">"</span>screen<span class="token punctuation">"</span></span> <span class="token punctuation">/&gt;</span></span>
        <span class="token tag"><span class="token tag"><span class="token punctuation">&lt;</span>script</span> <span class="token attr-name">defer</span> <span class="token attr-name">src</span><span class="token attr-value"><span class="token punctuation">=</span><span class="token punctuation">"</span>./js/jquery/jquery.min.js<span class="token punctuation">"</span></span><span class="token punctuation">&gt;</span></span><span class="token script language-javascript"></span><span class="token tag"><span class="token tag"><span class="token punctuation">&lt;/</span>script</span><span class="token punctuation">&gt;</span></span>
        <span class="token tag"><span class="token tag"><span class="token punctuation">&lt;</span>script</span> <span class="token attr-name">defer</span> <span class="token attr-name">src</span><span class="token attr-value"><span class="token punctuation">=</span><span class="token punctuation">"</span>./js/kendo/js/kendo.all.min.js<span class="token punctuation">"</span></span><span class="token punctuation">&gt;</span></span><span class="token script language-javascript"></span><span class="token tag"><span class="token tag"><span class="token punctuation">&lt;/</span>script</span><span class="token punctuation">&gt;</span></span>
        <span class="token tag"><span class="token tag"><span class="token punctuation">&lt;</span>script</span> <span class="token attr-name">defer</span> <span class="token attr-name">src</span><span class="token attr-value"><span class="token punctuation">=</span><span class="token punctuation">"</span>./js/products.js<span class="token punctuation">"</span></span><span class="token punctuation">&gt;</span></span><span class="token script language-javascript"></span><span class="token tag"><span class="token tag"><span class="token punctuation">&lt;/</span>script</span><span class="token punctuation">&gt;</span></span> <span class="token comment">&lt;!-- The data for the grid --&gt;</span>
        <span class="token tag"><span class="token tag"><span class="token punctuation">&lt;</span>script</span> <span class="token attr-name">defer</span> <span class="token attr-name">src</span><span class="token attr-value"><span class="token punctuation">=</span><span class="token punctuation">"</span>./js/index.js<span class="token punctuation">"</span></span> <span class="token attr-name">type</span><span class="token attr-value"><span class="token punctuation">=</span><span class="token punctuation">"</span>module<span class="token punctuation">"</span></span><span class="token punctuation">&gt;</span></span><span class="token script language-javascript"></span><span class="token tag"><span class="token tag"><span class="token punctuation">&lt;/</span>script</span><span class="token punctuation">&gt;</span></span>
    <span class="token tag"><span class="token tag"><span class="token punctuation">&lt;/</span>body</span><span class="token punctuation">&gt;</span></span>
<span class="token tag"><span class="token tag"><span class="token punctuation">&lt;/</span>html</span><span class="token punctuation">&gt;</span></span>
</code></pre><p><strong>index.js</strong></p><pre class=" language-js"><code class="prism  language-js"><span class="token function">$</span><span class="token punctuation">(</span><span class="token string">'#openBtn'</span><span class="token punctuation">)</span><span class="token punctuation">.</span><span class="token function">kendoButton</span><span class="token punctuation">(</span><span class="token punctuation">{</span>
    click<span class="token punctuation">:</span> openDialog
<span class="token punctuation">}</span><span class="token punctuation">)</span><span class="token punctuation">;</span>

<span class="token keyword">function</span> <span class="token function">openDialog</span><span class="token punctuation">(</span><span class="token punctuation">)</span> <span class="token punctuation">{</span>
    <span class="token keyword">const</span> gridDialog <span class="token operator">=</span> <span class="token function">$</span><span class="token punctuation">(</span><span class="token string">"#gridDialog"</span><span class="token punctuation">)</span><span class="token punctuation">.</span><span class="token function">kendoDialog</span><span class="token punctuation">(</span><span class="token punctuation">{</span>
        width<span class="token punctuation">:</span> <span class="token number">400</span><span class="token punctuation">,</span>
        content<span class="token punctuation">:</span> <span class="token string">'&lt;div id="dialogContent"&gt;&lt;/div&gt;'</span>
    <span class="token punctuation">}</span><span class="token punctuation">)</span><span class="token punctuation">.</span><span class="token function">data</span><span class="token punctuation">(</span><span class="token string">"kendoDialog"</span><span class="token punctuation">)</span><span class="token punctuation">;</span>
    
    gridDialog<span class="token punctuation">.</span><span class="token function">one</span><span class="token punctuation">(</span><span class="token string">"show"</span><span class="token punctuation">,</span> <span class="token keyword">async</span> <span class="token punctuation">(</span><span class="token punctuation">)</span> <span class="token operator">=&gt;</span> <span class="token punctuation">{</span>
        <span class="token keyword">const</span> gridElm <span class="token operator">=</span> <span class="token function">$</span><span class="token punctuation">(</span><span class="token string">'&lt;div id="grid"&gt;&lt;/div&gt;'</span><span class="token punctuation">)</span><span class="token punctuation">.</span><span class="token function">appendTo</span><span class="token punctuation">(</span><span class="token string">"#dialogContent"</span><span class="token punctuation">)</span><span class="token punctuation">;</span>
        <span class="token function">initGrid</span><span class="token punctuation">(</span>gridElm<span class="token punctuation">)</span><span class="token punctuation">;</span>
    <span class="token punctuation">}</span><span class="token punctuation">)</span><span class="token punctuation">;</span>
    
    gridDialog<span class="token punctuation">.</span><span class="token function">open</span><span class="token punctuation">(</span><span class="token punctuation">)</span><span class="token punctuation">;</span>
<span class="token punctuation">}</span>

<span class="token keyword">function</span> <span class="token function">initGrid</span><span class="token punctuation">(</span>gridElm<span class="token punctuation">)</span> <span class="token punctuation">{</span>
    gridElm<span class="token punctuation">.</span><span class="token function">kendoGrid</span><span class="token punctuation">(</span><span class="token punctuation">{</span>
        dataSource<span class="token punctuation">:</span> <span class="token punctuation">{</span>
            data<span class="token punctuation">:</span> products<span class="token punctuation">,</span>
            schema<span class="token punctuation">:</span> <span class="token punctuation">{</span>
                model<span class="token punctuation">:</span> <span class="token punctuation">{</span>
                    fields<span class="token punctuation">:</span> <span class="token punctuation">{</span>
                        ProductName<span class="token punctuation">:</span> <span class="token punctuation">{</span> type<span class="token punctuation">:</span> <span class="token string">"string"</span> <span class="token punctuation">}</span><span class="token punctuation">,</span>
                        UnitPrice<span class="token punctuation">:</span> <span class="token punctuation">{</span> type<span class="token punctuation">:</span> <span class="token string">"number"</span> <span class="token punctuation">}</span><span class="token punctuation">,</span>
                        UnitsInStock<span class="token punctuation">:</span> <span class="token punctuation">{</span> type<span class="token punctuation">:</span> <span class="token string">"number"</span> <span class="token punctuation">}</span><span class="token punctuation">,</span>
                        Discontinued<span class="token punctuation">:</span> <span class="token punctuation">{</span> type<span class="token punctuation">:</span> <span class="token string">"boolean"</span> <span class="token punctuation">}</span>
                    <span class="token punctuation">}</span>
                <span class="token punctuation">}</span>
            <span class="token punctuation">}</span><span class="token punctuation">,</span>
            pageSize<span class="token punctuation">:</span> <span class="token number">20</span>
        <span class="token punctuation">}</span><span class="token punctuation">,</span>
        height<span class="token punctuation">:</span> <span class="token number">550</span><span class="token punctuation">,</span>
        scrollable<span class="token punctuation">:</span> <span class="token boolean">true</span><span class="token punctuation">,</span>
        sortable<span class="token punctuation">:</span> <span class="token boolean">true</span><span class="token punctuation">,</span>
        filterable<span class="token punctuation">:</span> <span class="token boolean">true</span><span class="token punctuation">,</span>
        pageable<span class="token punctuation">:</span> <span class="token punctuation">{</span>
            input<span class="token punctuation">:</span> <span class="token boolean">true</span><span class="token punctuation">,</span>
            numeric<span class="token punctuation">:</span> <span class="token boolean">false</span>
        <span class="token punctuation">}</span><span class="token punctuation">,</span>
        columns<span class="token punctuation">:</span> <span class="token punctuation">[</span>
            <span class="token string">"ProductName"</span><span class="token punctuation">,</span>
            <span class="token punctuation">{</span> field<span class="token punctuation">:</span> <span class="token string">"UnitPrice"</span><span class="token punctuation">,</span> title<span class="token punctuation">:</span> <span class="token string">"Unit Price"</span><span class="token punctuation">,</span> format<span class="token punctuation">:</span> <span class="token string">"{0:c}"</span><span class="token punctuation">,</span> width<span class="token punctuation">:</span> <span class="token string">"130px"</span> <span class="token punctuation">}</span><span class="token punctuation">,</span>
            <span class="token punctuation">{</span> field<span class="token punctuation">:</span> <span class="token string">"UnitsInStock"</span><span class="token punctuation">,</span> title<span class="token punctuation">:</span> <span class="token string">"Units In Stock"</span><span class="token punctuation">,</span> width<span class="token punctuation">:</span> <span class="token string">"130px"</span> <span class="token punctuation">}</span><span class="token punctuation">,</span>
            <span class="token punctuation">{</span> field<span class="token punctuation">:</span> <span class="token string">"Discontinued"</span><span class="token punctuation">,</span> width<span class="token punctuation">:</span> <span class="token string">"130px"</span> <span class="token punctuation">}</span>
        <span class="token punctuation">]</span>
    <span class="token punctuation">}</span><span class="token punctuation">)</span><span class="token punctuation">;</span>
<span class="token punctuation">}</span>
</code></pre><p>Quite a simple example that loads fast and everything works fine. Let&rsquo;s check the performance score by running a check with the <a href="https://developer.chrome.com/docs/lighthouse/overview/#devtools" target="_blank">Lighthouse tool</a> in Chrome&rsquo;s dev console.</p><p><img src="https://d585tldpucybw.cloudfront.net/sfimages/default-source/blogs/2022/2022-11/performance-check-1.jpg?sfvrsn=79e18167_3" title="Performance Check 1" alt="Performance check shows 68 in orange" /></p><p>At this point, if load performance is a thing for you, you should attempt to optimize the application. With the plain JS Kendo UI bundles, you could more or less save the day by listing only the script that you need, create a custom Kendo UI bundle with
    only the code you need, and come up with a score of 85-90. You could also apply dynamic loading by using third-party methods or some other magic and possibly get a bit higher than 90. But all this requires a lot of back and forth with the code. Not
    to mention that it makes it unreadable and unmaintainable (in most cases).</p><p>Now let&rsquo;s see how we can use the browser&rsquo;s module system to make things better. First, we will need to step back and separate all code into modules that rely on dependencies.</p><p><strong>index.html</strong></p><pre class=" language-html"><code class="prism  language-html"><span class="token tag"><span class="token tag"><span class="token punctuation">&lt;</span>html</span><span class="token punctuation">&gt;</span></span>
    <span class="token tag"><span class="token tag"><span class="token punctuation">&lt;</span>head</span><span class="token punctuation">&gt;</span></span>
        <span class="token tag"><span class="token tag"><span class="token punctuation">&lt;</span>meta</span> <span class="token attr-name">content</span><span class="token attr-value"><span class="token punctuation">=</span><span class="token punctuation">"</span>initial-scale=1.0, maximum-scale=1.0, user-scalable=no<span class="token punctuation">"</span></span> <span class="token attr-name">name</span><span class="token attr-value"><span class="token punctuation">=</span><span class="token punctuation">"</span>viewport<span class="token punctuation">"</span></span><span class="token punctuation">&gt;</span></span>
    <span class="token tag"><span class="token tag"><span class="token punctuation">&lt;/</span>head</span><span class="token punctuation">&gt;</span></span>
    <span class="token tag"><span class="token tag"><span class="token punctuation">&lt;</span>body</span><span class="token punctuation">&gt;</span></span>
        <span class="token tag"><span class="token tag"><span class="token punctuation">&lt;</span>button</span> <span class="token attr-name">id</span><span class="token attr-value"><span class="token punctuation">=</span><span class="token punctuation">"</span>openBtn<span class="token punctuation">"</span></span><span class="token punctuation">&gt;</span></span>Open<span class="token tag"><span class="token tag"><span class="token punctuation">&lt;/</span>button</span><span class="token punctuation">&gt;</span></span>
        
        <span class="token tag"><span class="token tag"><span class="token punctuation">&lt;</span>div</span> <span class="token attr-name">id</span><span class="token attr-value"><span class="token punctuation">=</span><span class="token punctuation">"</span>gridDialog<span class="token punctuation">"</span></span><span class="token punctuation">&gt;</span></span>
        <span class="token tag"><span class="token tag"><span class="token punctuation">&lt;/</span>div</span><span class="token punctuation">&gt;</span></span>
        
        <span class="token tag"><span class="token tag"><span class="token punctuation">&lt;</span>link</span> <span class="token attr-name">async</span> <span class="token attr-name">href</span><span class="token attr-value"><span class="token punctuation">=</span><span class="token punctuation">"</span>./styles/kendo/web/kendo.default-ocean-blue.css<span class="token punctuation">"</span></span> <span class="token attr-name">rel</span><span class="token attr-value"><span class="token punctuation">=</span><span class="token punctuation">"</span>stylesheet<span class="token punctuation">"</span></span> <span class="token attr-name">media</span><span class="token attr-value"><span class="token punctuation">=</span><span class="token punctuation">"</span>screen<span class="token punctuation">"</span></span> <span class="token punctuation">/&gt;</span></span>
        <span class="token tag"><span class="token tag"><span class="token punctuation">&lt;</span>script</span> <span class="token attr-name">async</span>  <span class="token attr-name">src</span><span class="token attr-value"><span class="token punctuation">=</span><span class="token punctuation">"</span>./js/index.js<span class="token punctuation">"</span></span> <span class="token attr-name">type</span><span class="token attr-value"><span class="token punctuation">=</span><span class="token punctuation">"</span>module<span class="token punctuation">"</span></span><span class="token punctuation">&gt;</span></span><span class="token script language-javascript"></span><span class="token tag"><span class="token tag"><span class="token punctuation">&lt;/</span>script</span><span class="token punctuation">&gt;</span></span>
    <span class="token tag"><span class="token tag"><span class="token punctuation">&lt;/</span>body</span><span class="token punctuation">&gt;</span></span>
<span class="token tag"><span class="token tag"><span class="token punctuation">&lt;/</span>html</span><span class="token punctuation">&gt;</span></span>
</code></pre><p><strong>index.js</strong></p><pre class=" language-js"><code class="prism  language-js"><span class="token keyword">import</span> <span class="token string">'./jquery/jquery.min.js'</span><span class="token punctuation">;</span>
<span class="token keyword">import</span> <span class="token string">'./kendo/mjs/kendo.button.js'</span><span class="token punctuation">;</span>

<span class="token function">$</span><span class="token punctuation">(</span><span class="token string">'#openBtn'</span><span class="token punctuation">)</span><span class="token punctuation">.</span><span class="token function">kendoButton</span><span class="token punctuation">(</span><span class="token punctuation">{</span>
    click<span class="token punctuation">:</span> <span class="token keyword">async</span> <span class="token punctuation">(</span><span class="token punctuation">)</span> <span class="token operator">=&gt;</span> <span class="token punctuation">{</span>
        <span class="token keyword">const</span> <span class="token punctuation">{</span> openDialog <span class="token punctuation">}</span> <span class="token operator">=</span> <span class="token keyword">await</span> <span class="token keyword">import</span><span class="token punctuation">(</span><span class="token string">"./dialog.js"</span><span class="token punctuation">)</span><span class="token punctuation">;</span>

        <span class="token function">openDialog</span><span class="token punctuation">(</span><span class="token punctuation">)</span><span class="token punctuation">;</span>
    <span class="token punctuation">}</span>
<span class="token punctuation">}</span><span class="token punctuation">)</span><span class="token punctuation">;</span>
</code></pre><p><strong>dialog.js</strong></p><pre class=" language-js"><code class="prism  language-js"><span class="token keyword">import</span> <span class="token string">'./kendo/mjs/kendo.dialog.js'</span><span class="token punctuation">;</span>

<span class="token keyword">export</span> <span class="token keyword">function</span> <span class="token function">openDialog</span><span class="token punctuation">(</span><span class="token punctuation">)</span> <span class="token punctuation">{</span>
    <span class="token keyword">const</span> gridDialog <span class="token operator">=</span> <span class="token function">$</span><span class="token punctuation">(</span><span class="token string">"#gridDialog"</span><span class="token punctuation">)</span><span class="token punctuation">.</span><span class="token function">kendoDialog</span><span class="token punctuation">(</span><span class="token punctuation">{</span>
        width<span class="token punctuation">:</span> <span class="token number">400</span><span class="token punctuation">,</span>
        content<span class="token punctuation">:</span> <span class="token string">'&lt;div id="dialogContent"&gt;&lt;/div&gt;'</span>
    <span class="token punctuation">}</span><span class="token punctuation">)</span><span class="token punctuation">.</span><span class="token function">data</span><span class="token punctuation">(</span><span class="token string">"kendoDialog"</span><span class="token punctuation">)</span><span class="token punctuation">;</span>

    gridDialog<span class="token punctuation">.</span><span class="token function">one</span><span class="token punctuation">(</span><span class="token string">"show"</span><span class="token punctuation">,</span> <span class="token keyword">async</span> <span class="token punctuation">(</span><span class="token punctuation">)</span> <span class="token operator">=&gt;</span> <span class="token punctuation">{</span>
        <span class="token keyword">const</span> <span class="token punctuation">{</span> initGrid <span class="token punctuation">}</span> <span class="token operator">=</span> <span class="token keyword">await</span> <span class="token keyword">import</span><span class="token punctuation">(</span><span class="token string">"./grid.js"</span><span class="token punctuation">)</span><span class="token punctuation">;</span>
        <span class="token keyword">const</span> gridElm <span class="token operator">=</span> <span class="token function">$</span><span class="token punctuation">(</span><span class="token string">'&lt;div id="grid"&gt;&lt;/div&gt;'</span><span class="token punctuation">)</span><span class="token punctuation">.</span><span class="token function">appendTo</span><span class="token punctuation">(</span><span class="token string">"#dialogContent"</span><span class="token punctuation">)</span><span class="token punctuation">;</span>

        <span class="token function">initGrid</span><span class="token punctuation">(</span>gridElm<span class="token punctuation">)</span><span class="token punctuation">;</span>
    <span class="token punctuation">}</span><span class="token punctuation">)</span><span class="token punctuation">;</span>

    gridDialog<span class="token punctuation">.</span><span class="token function">open</span><span class="token punctuation">(</span><span class="token punctuation">)</span><span class="token punctuation">;</span>
<span class="token punctuation">}</span>
</code></pre><p><strong>grid.js</strong></p><pre class=" language-js"><code class="prism  language-js"><span class="token keyword">import</span> <span class="token string">'./kendo/mjs/kendo.grid.js'</span><span class="token punctuation">;</span>

<span class="token keyword">export</span> <span class="token keyword">async</span> <span class="token keyword">function</span> <span class="token function">initGrid</span><span class="token punctuation">(</span>gridElm<span class="token punctuation">)</span> <span class="token punctuation">{</span>
    <span class="token keyword">const</span> <span class="token punctuation">{</span> products <span class="token punctuation">}</span> <span class="token operator">=</span> <span class="token keyword">await</span> <span class="token keyword">import</span><span class="token punctuation">(</span><span class="token string">"./products.js"</span><span class="token punctuation">)</span><span class="token punctuation">;</span>

    gridElm<span class="token punctuation">.</span><span class="token function">kendoGrid</span><span class="token punctuation">(</span><span class="token punctuation">{</span>
        dataSource<span class="token punctuation">:</span> <span class="token punctuation">{</span>
            data<span class="token punctuation">:</span> products<span class="token punctuation">,</span>
            schema<span class="token punctuation">:</span> <span class="token punctuation">{</span>
                model<span class="token punctuation">:</span> <span class="token punctuation">{</span>
                    fields<span class="token punctuation">:</span> <span class="token punctuation">{</span>
                        ProductName<span class="token punctuation">:</span> <span class="token punctuation">{</span> type<span class="token punctuation">:</span> <span class="token string">"string"</span> <span class="token punctuation">}</span><span class="token punctuation">,</span>
                        UnitPrice<span class="token punctuation">:</span> <span class="token punctuation">{</span> type<span class="token punctuation">:</span> <span class="token string">"number"</span> <span class="token punctuation">}</span><span class="token punctuation">,</span>
                        UnitsInStock<span class="token punctuation">:</span> <span class="token punctuation">{</span> type<span class="token punctuation">:</span> <span class="token string">"number"</span> <span class="token punctuation">}</span><span class="token punctuation">,</span>
                        Discontinued<span class="token punctuation">:</span> <span class="token punctuation">{</span> type<span class="token punctuation">:</span> <span class="token string">"boolean"</span> <span class="token punctuation">}</span>
                    <span class="token punctuation">}</span>
                <span class="token punctuation">}</span>
            <span class="token punctuation">}</span><span class="token punctuation">,</span>
            pageSize<span class="token punctuation">:</span> <span class="token number">20</span>
        <span class="token punctuation">}</span><span class="token punctuation">,</span>
        height<span class="token punctuation">:</span> <span class="token number">550</span><span class="token punctuation">,</span>
        scrollable<span class="token punctuation">:</span> <span class="token boolean">true</span><span class="token punctuation">,</span>
        sortable<span class="token punctuation">:</span> <span class="token boolean">true</span><span class="token punctuation">,</span>
        filterable<span class="token punctuation">:</span> <span class="token boolean">true</span><span class="token punctuation">,</span>
        pageable<span class="token punctuation">:</span> <span class="token punctuation">{</span>
            input<span class="token punctuation">:</span> <span class="token boolean">true</span><span class="token punctuation">,</span>
            numeric<span class="token punctuation">:</span> <span class="token boolean">false</span>
        <span class="token punctuation">}</span><span class="token punctuation">,</span>
        columns<span class="token punctuation">:</span> <span class="token punctuation">[</span>
            <span class="token string">"ProductName"</span><span class="token punctuation">,</span>
            <span class="token punctuation">{</span> field<span class="token punctuation">:</span> <span class="token string">"UnitPrice"</span><span class="token punctuation">,</span> title<span class="token punctuation">:</span> <span class="token string">"Unit Price"</span><span class="token punctuation">,</span> format<span class="token punctuation">:</span> <span class="token string">"{0:c}"</span><span class="token punctuation">,</span> width<span class="token punctuation">:</span> <span class="token string">"130px"</span> <span class="token punctuation">}</span><span class="token punctuation">,</span>
            <span class="token punctuation">{</span> field<span class="token punctuation">:</span> <span class="token string">"UnitsInStock"</span><span class="token punctuation">,</span> title<span class="token punctuation">:</span> <span class="token string">"Units In Stock"</span><span class="token punctuation">,</span> width<span class="token punctuation">:</span> <span class="token string">"130px"</span> <span class="token punctuation">}</span><span class="token punctuation">,</span>
            <span class="token punctuation">{</span> field<span class="token punctuation">:</span> <span class="token string">"Discontinued"</span><span class="token punctuation">,</span> width<span class="token punctuation">:</span> <span class="token string">"130px"</span> <span class="token punctuation">}</span>
        <span class="token punctuation">]</span>
    <span class="token punctuation">}</span><span class="token punctuation">)</span><span class="token punctuation">;</span>
<span class="token punctuation">}</span>
</code></pre><p><strong>products.js</strong></p><pre class=" language-js"><code class="prism  language-js"><span class="token keyword">export</span> <span class="token keyword">const</span> products <span class="token operator">=</span> <span class="token punctuation">[</span><span class="token punctuation">{</span>
    ProductID <span class="token punctuation">:</span> <span class="token number">1</span><span class="token punctuation">,</span>
    ProductName <span class="token punctuation">:</span> <span class="token string">"Chai"</span><span class="token punctuation">,</span>
    SupplierID <span class="token punctuation">:</span> <span class="token number">1</span><span class="token punctuation">,</span>
    CategoryID <span class="token punctuation">:</span> <span class="token number">1</span><span class="token punctuation">,</span>
    QuantityPerUnit <span class="token punctuation">:</span> <span class="token string">"10 boxes x 20 bags"</span><span class="token punctuation">,</span>
    UnitPrice <span class="token punctuation">:</span> <span class="token number">18.0000</span><span class="token punctuation">,</span>
    UnitsInStock <span class="token punctuation">:</span> <span class="token number">39</span><span class="token punctuation">,</span>
    UnitsOnOrder <span class="token punctuation">:</span> <span class="token number">0</span><span class="token punctuation">,</span>
    ReorderLevel <span class="token punctuation">:</span> <span class="token number">10</span><span class="token punctuation">,</span>
    Discontinued <span class="token punctuation">:</span> <span class="token boolean">false</span><span class="token punctuation">,</span>
    Category <span class="token punctuation">:</span> <span class="token punctuation">{</span>
        CategoryID <span class="token punctuation">:</span> <span class="token number">1</span><span class="token punctuation">,</span>
        CategoryName <span class="token punctuation">:</span> <span class="token string">"Beverages"</span><span class="token punctuation">,</span>
        Description <span class="token punctuation">:</span> <span class="token string">"Soft drinks, coffees, teas, beers, and ales"</span>
    <span class="token punctuation">}</span>
<span class="token punctuation">}</span><span class="token punctuation">,</span>
    <span class="token operator">...</span><span class="token punctuation">.</span>
</code></pre><p>Now let&rsquo;s run a performance check once more.</p><p><img src="https://d585tldpucybw.cloudfront.net/sfimages/default-source/blogs/2022/2022-11/performance-check-2.jpg?sfvrsn=844a48f3_3" title="Performance Check 2" alt="Performance check shows 97 in green" /></p><p>This score is more satisfactory. And now we have more readable code with good separation, which makes it better than before. Plus, we can take advantage and reuse parts of the code we write in our applications.</p><p>A bit more drilling down will explain more why using dynamic loading and modules save the day. In the example above, we see that none of the huge scripts (<code>kendo.dialog.js</code> and <code>kendo.grid.js</code>) are loaded until the button is clicked.
    Therefore, scripts are loaded only when the end user requires a specific functionality in your application. In short, with initial load, only the CSS and the scripts for the Button are loaded. The rest is handled by the browser.</p><h3 id="using-javascript-modules-in-telerik-ui-for-asp.-net-mvc-and-core">Using JavaScript Modules in Telerik UI for ASP.NET MVC and Core</h3><p>The new modules are available in the Telerik UI for ASP.NET MVC and Core bundles as well. You can find them in the <code>mjs</code> folder. Using them requires <a href="https://docs.telerik.com/aspnet-core/html-helpers/helper-basics/fundamentals#deferred-initialization" target="_blank">deferred initialization</a>.</p><p>This is an example how to use a Telerik UI for ASP.NET Core Grid component with the module system:</p><pre class=" language-csharp"><code class="prism  language-csharp"><span class="token punctuation">(</span>Html<span class="token punctuation">.</span><span class="token function">Kendo</span><span class="token punctuation">(</span><span class="token punctuation">)</span><span class="token punctuation">.</span><span class="token generic-method function">Grid<span class="token punctuation">&lt;</span>My_App<span class="token punctuation">.</span>Models<span class="token punctuation">.</span>ProductViewModel<span class="token punctuation">&gt;</span></span><span class="token punctuation">(</span><span class="token punctuation">)</span>
    <span class="token punctuation">.</span><span class="token function">Name</span><span class="token punctuation">(</span><span class="token string">"Grid"</span><span class="token punctuation">)</span>
    <span class="token punctuation">.</span><span class="token function">Columns</span><span class="token punctuation">(</span>columns <span class="token operator">=</span><span class="token operator">&gt;</span>
    <span class="token punctuation">{</span>
        columns<span class="token punctuation">.</span><span class="token function">Bound</span><span class="token punctuation">(</span><span class="token string">"productName"</span><span class="token punctuation">)</span><span class="token punctuation">;</span>
        columns<span class="token punctuation">.</span><span class="token function">Bound</span><span class="token punctuation">(</span><span class="token string">"unitPrice"</span><span class="token punctuation">)</span><span class="token punctuation">;</span>
    <span class="token punctuation">}</span><span class="token punctuation">)</span>
    <span class="token punctuation">.</span><span class="token function">DataSource</span><span class="token punctuation">(</span>dataSource <span class="token operator">=</span><span class="token operator">&gt;</span> dataSource
        <span class="token punctuation">.</span><span class="token function">Custom</span><span class="token punctuation">(</span><span class="token punctuation">)</span>
        <span class="token punctuation">.</span><span class="token function">Transport</span><span class="token punctuation">(</span>tr <span class="token operator">=</span><span class="token operator">&gt;</span> tr<span class="token punctuation">.</span><span class="token function">Read</span><span class="token punctuation">(</span><span class="token string">"Products_Read"</span><span class="token punctuation">,</span> <span class="token string">"Grid"</span><span class="token punctuation">)</span><span class="token punctuation">)</span>
        <span class="token punctuation">.</span><span class="token function">Schema</span><span class="token punctuation">(</span>sc <span class="token operator">=</span><span class="token operator">&gt;</span> sc<span class="token punctuation">.</span><span class="token function">Data</span><span class="token punctuation">(</span><span class="token string">"data"</span><span class="token punctuation">)</span><span class="token punctuation">)</span>
    <span class="token punctuation">)</span>
    <span class="token punctuation">.</span><span class="token function">Deferred</span><span class="token punctuation">(</span><span class="token punctuation">)</span>
<span class="token punctuation">)</span>

@section Scripts <span class="token punctuation">{</span> 
<span class="token operator">&lt;</span>script type<span class="token operator">=</span><span class="token string">"module"</span><span class="token operator">&gt;</span>
    import <span class="token string">'@Url.Content("/js/mjs/kendo.grid.js")'</span><span class="token punctuation">;</span>
    import <span class="token string">'@Url.Content("/js/mjs/kendo.aspnetmvc.js")'</span><span class="token punctuation">;</span>

    @Html<span class="token punctuation">.</span><span class="token function">Kendo</span><span class="token punctuation">(</span><span class="token punctuation">)</span><span class="token punctuation">.</span><span class="token function">DeferredScripts</span><span class="token punctuation">(</span><span class="token keyword">false</span><span class="token punctuation">)</span>
<span class="token operator">&lt;</span><span class="token operator">/</span>script<span class="token operator">&gt;</span>
<span class="token punctuation">}</span>
</code></pre><h2 id="updates-in-the-npm-packages">Updates in the NPM Packages</h2><p>The NPM packages (<code>@progress/kendo-ui</code> and <code>kendo-ui-core</code>) are extended with <code>module</code> and <code>browser</code> fields so that you can include scripts according to the module system of your project.</p><p>That means that now you can instruct the module loader/bundler (according to its specific configuration) to get the specific module system from the NPM package so that you do not need to alter the preferred compiler/transpiler.</p><blockquote><p>Note that WebPack uses the <code>browser</code> field with priority. You can check that from here as well: <a href="https://webpack.js.org/configuration/resolve/#resolvemainfields" target="_blank">WebPack docs</a>.</p></blockquote><p>For example, using WebPack with ECMAScript-based application, you can set up the mainFields option to get the module field:</p><pre class=" language-js"><code class="prism  language-js"><span class="token operator">...</span>
  resolve<span class="token punctuation">:</span> <span class="token punctuation">{</span>
    mainFields<span class="token punctuation">:</span> <span class="token punctuation">[</span> <span class="token string">'module'</span><span class="token punctuation">,</span> <span class="token string">'browser'</span><span class="token punctuation">,</span> <span class="token string">'main'</span> <span class="token punctuation">]</span>
  <span class="token punctuation">}</span><span class="token punctuation">,</span>
<span class="token operator">...</span>
</code></pre><p>or make an alias:</p><pre class=" language-js"><code class="prism  language-js">  resolve<span class="token punctuation">:</span> <span class="token punctuation">{</span>
    alias<span class="token punctuation">:</span> <span class="token punctuation">{</span>
      <span class="token string">'@progress/kendo-ui'</span><span class="token punctuation">:</span> path<span class="token punctuation">.</span><span class="token function">resolve</span><span class="token punctuation">(</span>__dirname<span class="token punctuation">,</span> <span class="token string">'node_modules/@progress/kendo-ui/esm/kendo.all.js'</span><span class="token punctuation">)</span> 
    <span class="token punctuation">}</span><span class="token punctuation">,</span>
  <span class="token punctuation">}</span><span class="token punctuation">,</span>
</code></pre><p>Or you can configure it to use CommonJS modules:</p><pre class=" language-js"><code class="prism  language-js"><span class="token operator">...</span>
  resolve<span class="token punctuation">:</span> <span class="token punctuation">{</span>
    mainFields<span class="token punctuation">:</span> <span class="token punctuation">[</span> <span class="token string">'main'</span><span class="token punctuation">,</span> <span class="token string">'browser'</span><span class="token punctuation">,</span> <span class="token string">'module'</span> <span class="token punctuation">]</span>
  <span class="token punctuation">}</span><span class="token punctuation">,</span>
<span class="token operator">...</span>
</code></pre><p>or make an alias:</p><pre class=" language-js"><code class="prism  language-js">  resolve<span class="token punctuation">:</span> <span class="token punctuation">{</span>
    alias<span class="token punctuation">:</span> <span class="token punctuation">{</span>
      <span class="token string">'@progress/kendo-ui'</span><span class="token punctuation">:</span> path<span class="token punctuation">.</span><span class="token function">resolve</span><span class="token punctuation">(</span>__dirname<span class="token punctuation">,</span> <span class="token string">'node_modules/@progress/kendo-ui/js/kendo.all.js'</span><span class="token punctuation">)</span> 
    <span class="token punctuation">}</span><span class="token punctuation">,</span>
  <span class="token punctuation">}</span><span class="token punctuation">,</span>
</code></pre><p>Every module loader is different, and you should check the documentation to see how you can set it up according to your needs.</p><h2 id="the-future">The Future</h2><p>With this effort, we are looking into new ways to improve the Kendo UI for jQuery and Telerik UI for ASP.NET MVC and Core products. And this step opens new ways to tackle features, functionalities and provide better support.</p><p>For example, a small disclosure on what we are working on after releasing the module system is towards better CSP support and an alternative template mechanism.</p><p>As always, we are open to feedback. So if you happen to have a suggestion or idea that would make your life better with our products do not hesitate to contact us through our <a href="https://www.telerik.com/account/support-tickets" target="_blank">support channels</a>,
 <a href="https://www.telerik.com/support/feedback" target="_blank">Feedback Portal</a>, <a href="https://www.telerik.com437A71CA-B016-415D-AC02-E8794533591F" target="_blank">forums</a> or comments.</p><img src="https://feeds.telerik.com/link/23051/15770604.gif" height="1" width="1"/>]]></content>
  </entry>
  <entry>
    <id>urn:uuid:dc4e52ae-f5f4-4645-846c-199109637ce8</id>
    <title type="text">What’s New in R3 2022 With Telerik UI Web Components</title>
    <summary type="text">R3 2022 brings exciting updates to your favorite Telerik web components, including a new Fluent theme, support for the latest .NET 7 preview and accessibility enhancements.</summary>
    <published>2022-09-14T14:58:13Z</published>
    <updated>2026-04-08T02:12:37Z</updated>
    <author>
      <name>Maria Ivanova </name>
    </author>
    <link rel="alternate" href="https://feeds.telerik.com/link/23051/15640778/r3-2022-telerik-web-release"/>
    <content type="text"><![CDATA[<p><span class="featured">R3 2022 brings exciting updates to your favorite Telerik web components, including a new Fluent theme, support for the latest .NET 7 preview and accessibility enhancements.</span></p><ul><li><a href="https://www.telerik.com#common-telerik-web-r3-2022-release-items" data-sf-ec-immutable="">Common Telerik Web R2 2022 Release Items</a></li><li><a href="https://www.telerik.com#telerik-ui-for-blazor" data-sf-ec-immutable="">Telerik UI for Blazor</a></li><li><a href="https://www.telerik.com#telerik-ui-for-aspnet-core-and-telerik-ui-for-aspnet-mvc" data-sf-ec-immutable="">Telerik UI for ASP.NET Core and Telerik UI for ASP.NET MVC</a></li><li><a href="https://www.telerik.com#telerik-ui-for-aspnet-ajax" data-sf-ec-immutable="">Telerik UI for ASP.NET AJAX</a></li></ul><h2 id="common-telerik-web-r3-2022-release-items">Common Telerik Web R3 2022 Release Items</h2><h3 id="new-fluent-theme-across-telerik-and-kendo-ui">New Fluent Theme Across Telerik and Kendo UI</h3><p>With R3 2022 we are excited to announce that the new Fluent theme is officially available for Telerik and Kendo UI libraries and their web UI components! Just like our other themes, the new Fluent theme follows the guidelines of the official Fluent Design
    System to let all ASP.NET MVC, ASP.NET Core, Blazor, jQuery, Angular, React and Vue UI components immediately be styled with the Fluent Design System just by including the new theme.</p><p>If you are already using Fluent-themed components in your web applications today, with the Fluent theme added, any of the Telerik and Kendo UI components will seamlessly fit in.</p><p><img src="https://d585tldpucybw.cloudfront.net/sfimages/default-source/blogs/2022/2022-09/telerik-and-kendo-ui-fluent-theme.png?sfvrsn=9754341_3" title="Telerik and Kendo UI Fluent Theme" alt="Telerik and Kendo UI Fluent Theme" /></p><h3 id="compatibility-with-.net-7-latest-preview-release">Compatibility With .NET 7 Latest Preview Release</h3><p>For those of you eager to try out the latest and greatest by Microsoft, we are happy to announce that the Telerik UI for Blazor and Telerik UI for ASP.NET Core libraries are compatible with the latest .NET 7 Preview 7. Our goal is to provide full support
    for .NET 7 as soon as Microsoft releases it this November.</p><p><img src="https://d585tldpucybw.cloudfront.net/sfimages/default-source/blogs/2022/2022-09/compatibility-.net-7-preview.png?sfvrsn=76247b27_3" title="Compatibility-.NET-7-Preview" alt="Illustration of Telerik Ninja with .NET 7 Preview" /></p><h3 id="accessibility-enhancements">Accessibility Enhancements</h3><p>A major focus in R3 2022 for all Telerik Web UI components was further improving the accessibility compliance level and available documentation and demos that can be used for reference points or direct A11Y testing. For each of the Telerik UI products,
    we have added a dedicated section below which outlines the specific items in the release.</p><p><img src="https://d585tldpucybw.cloudfront.net/sfimages/default-source/blogs/2022/2022-09/accessibility.png?sfvrsn=d19e8928_5" alt="Accessibility illustration" /></p><h3 id="new-telerik-document-processing-features">New Telerik Document Processing Features</h3><p>With R3 2022, we&rsquo;ve released new features across all <a href="https://www.telerik.com/document-processing-libraries" target="_blank">Telerik Document Processing libraries</a> to help you better navigate your document formats. The new features include:</p><p><strong>Updates in WordProcessing Library</strong></p><ul><li><strong>Page Numbering fields:</strong> In addition to the filed codes support, we have now added a functionality that allows you to update the PAGE, PAGEREF, NUMPAGES and SECTIONPAGES fields and easily calculate their result.</li><li><strong>Shapes support:</strong> The shapes feature allows you to easily insert, style and interact with existing shapes like circles, boxes, arrows and many others directly in your documents.</li></ul><p><strong>Updates in SpreadProcessing Library</strong></p><ul><li><strong>Repeat specific rows or columns on every printed page:</strong> You can easily specify a row or a column that will be repeated on every printed page.</li></ul><p><strong>Updates in SpreadStreamProcessing Library</strong></p><ul><li><strong>SpreadStreamProcessing import:</strong> You can now read large XLSX or CSV files without loading the entire document in memory.</li></ul><p><strong>Updates in PdfProcessing Library:</strong></p><ul><li><strong>PdfProcessing Signature flags support:</strong> With this new functionality, you can specify that there is a signature, even if the signature itself does not have a visual representation.</li><li><strong>Export PDF pages to images:</strong> We have added the ability to convert the pages of a .pdf document to images. This feature will work with the .NET Standard version and does not depend on any Windows libraries.</li></ul><p><img src="https://d585tldpucybw.cloudfront.net/sfimages/default-source/blogs/2022/2022-09/telerik-document-processing---pdfprocessing-770-px.png?sfvrsn=c5943f80_3" title="Telerik Document Processing - PDFProcessing" alt="Telerik Document Processing - PDFProcessing" /></p><h2 id="telerik-ui-for-blazor">Telerik UI for Blazor</h2><p>Telerik UI for Blazor continues to grow and improve, and we are happy to share that we now offer 100 native Blazor components! The new additions in R3 2022 include PDFViewer, MultuColumnComboBox and Skeleton components; accessibility improvements; new
    scaffolding and code snippets and Visual Studio&mdash;plus dozens of advanced features across all UI for Blazor components.</p><h3 id="new-blazor-pdfviewer-component">New Blazor PDFViewer Component</h3><p>The new UI for Blazor PDFViewer component is certainly one of the highlights of R3 2022 release. It allows users to view and interact with PDF files directly in the browser without the need to download the file or use third-party tools or browser extensions.
</p><p>The PDF Viewer for Blazor comes with a toolbar with built-in features to open, view, and download PDF files, paging, PDF search options, zoom in/out, printing and more. You can further customize the built-in toolbar commands and add your own, such as
    including a watermark or sending via email.</p><p>See the <a href="https://demos.telerik.com/blazor-ui/pdfviewer/overview" target="_blank">UI for Blazor PDFViewer component demo</a>.</p><p><img src="https://d585tldpucybw.cloudfront.net/sfimages/default-source/blogs/2022/2022-09/ui-for-blazor-pdfviewer---search.png?sfvrsn=2f9501d0_3" title="UI for Blazor PDFViewer - Search" alt="UI for Blazor PDFViewer - Search" /></p><h3 id="new-blazor-multicolumncombobox-component">New Blazor MultiColumnComboBox Component</h3><p>The new UI for Blazor MultiColumnComboBox component comes with a rich set of built-in features and options to customize its look and feel, including data binding, filtering, grouping, rendering of custom content through templates, appearance configuration,
    input of custom values, validation, built-in localization of messages, accessibility and keyboard navigation. With the help of the MultiColumn ComboBox, users can easily choose values from a predefined list in a table-like structure and type input
    in it.</p><p><a href="https://demos.telerik.com/blazor-ui/multicolumncombobox/overview" target="_blank">See the UI for Blazor MultiColumnComboBox component demo</a> or <a href="https://blazorrepl.telerik.com/ccYVvpaq40u8UlwZ48" target="_blank">try out the component in the Telerik Blazor REPL browser-based code runner</a>.</p><p><img src="https://d585tldpucybw.cloudfront.net/sfimages/default-source/blogs/2022/2022-09/telerik-blazor-multicolumncombobox-theming.gif?sfvrsn=5a250903_3" title="Blazor MultiColumnComboBox Component" alt="Blazor MultiColumnComboBox Component" /></p><h3 id="new-blazor-skeleton-component">New Blazor Skeleton Component</h3><p>Skeletons are widely used as hints to the users that the page content is being loaded. With the Telerik UI for Blazor Skeleton component you can easily achieve such behavior and render a placeholder for each of the underlying HTML elements in a component
    or page. It includes customization options for its shape (text, circle or rectangle), height, width, animation type (pulse or wave), visibility and CSS class.</p><p>The UI for Blazor Skeleton allows seamless integration with other Blazor UI components, such as Data Grid. This allows you to easily mimic grid with rows while data loading takes place.</p><p><a href="https://demos.telerik.com/blazor-ui/skeleton/overview" target="_blank">See a demo of the UI for Blazor Skeleton component</a> or <a href="https://blazorrepl.telerik.com/GmOqkrvm007I7HH831" target="_blank">try it out in Telerik REPL for Blazor</a>.</p><p><img src="https://d585tldpucybw.cloudfront.net/sfimages/default-source/blogs/2022/2022-09/telerik-blazor-skeleton-overview.gif?sfvrsn=730cbf89_3" title="Telerik Blazor Skeleton" alt="Telerik Blazor Skeleton" /></p><h3 id="accessibility-improvements-in-telerik-ui-for-blazor">Accessibility Improvements in Telerik UI for Blazor</h3><p>In Telerik UI for Blazor, we specifically addressed the <a href="https://www.w3.org/TR/wai-aria-practices/" target="_blank">WAI-ARIA best practices</a> for implementing keyboard navigation for multiple components, tested against
    the popular screen readers, implemented the recommended rendering related to various WAI-ARIA attributes, and worked toward aligning with <a href="https://www.w3.org/TR/WCAG21/" target="_blank">WCAG 2.1 AAA</a> and <a href="http://www.section508.gov/" target="_blank">Section 508</a> compliance standards.</p><p>The UI for Blazor components that received accessibility boost in R3 2022 include Blazor Data Grid, TreeList, TreeView, PanelBar, Stepper, Wizard, Pager, DateInput, Calendar, DateRangePicker, DatePicker, TimePicker, DateTimePicker, Drawer and Breadcrumb.
</p><h3 id="new-accessibility-focused-demos--docs">Accessibility-Focused Demos &amp; Docs</h3><p>In addition to updating our UI for Blazor components, with R3 2022 the Telerik Blazor team has created accessibility-specific demos that can be used to test any of our Blazor UI components with screen readers and other software used to test accessibility.</p><p>Previously, whenever teams needed to run accessibility tests on Telerik UI for Blazor components, they would have to do so locally, which required dedicated developers to set up the perfect configuration. Now, any team member who needs to run tests with
    screen readers or other software for accessibility testing can do so by visiting the respective online demo. Additionally, we have added a WAI-ARIA Support article for each of the components that lists the respective attributes and usage.</p><h3 id="enhancements-to-blazor-datagrid-and-treelist-components">Enhancements to Blazor DataGrid and TreeList Components</h3><p>The Blazor Grid and TreeList UI components come with the following new features:</p><p><strong>Drag &amp; drop between Data Grid, TreeList and TreeView</strong><br />This allows users to drag items from any of these components to any other of them plus Gantt and Scheduler. That is&mdash;in addition to the option drag and drop of items between
    instances of the same component, which has been available for quite some time. </p><p>The existing Drop event will be triggered as the current one but with two additional event parameters (DestinationIndex(string) and DestinationComponentId(string)) and a new method called GetTimeSlotFromDropIndex. These updates will allow users to determine
    the drop destination inside any of the receiving components and ensure the corresponding item in the destination component can be returned.</p><p><strong>HeaderClass parameter</strong><br />This allows you to <a href="https://demos.telerik.com/blazor-ui/grid/cell-formatting" target="_blank">define custom CSS classes for the column header cells</a> and easily bold their text,
    change their alignment or style them to make them stand out.</p><p><img src="https://d585tldpucybw.cloudfront.net/sfimages/default-source/blogs/2022/2022-09/telerik-blazor-treelist-header-css-custom.png?sfvrsn=67d323a6_3" title="Telerik Blazor TreeList - HeaderClass CSS Custom" alt="Telerik Blazor TreeList - HeaderClass CSS Custom" /></p><p><strong>FilterOperators parameter</strong><br />This parameter can be applied on a per column basis and lets you customize the list of filter operators within the filter row and menus.</p><p><strong>FilterEditorFormat parameter</strong><br />This one allows control over the format of the default filter and align the formatting of values in the column display and filter editor.</p><h3 id="enhancements-to-blazor-gantt-component">Enhancements to Blazor Gantt Component</h3><p>Based on your feedback, we expanded the UI for Blazor Gantt component to give you greater flexibility and more customization options.</p><h3 id="blazor-gantt-state-management">Blazor Gantt State Management</h3><p>The Telerik UI for Blazor Gantt component now allows persisting its state between browsing sessions. You can save and load the Gantt layout so your users can continue where they left off. That includes all types of changes in the TreeList part of the
    Gantt component: extended items, edited items, column size and order, TreeList size (controlling the splitter position between the tree list and timeline parts), sorting and filtering. You can also control these elements programmatically by setting
    the desired state of the Gantt in your own code.</p><p><a href="https://demos.telerik.com/blazor-ui/gantt/persist-state" target="_blank">See how to save and load Blazor Gantt UI component state.</a></p><p><img src="https://d585tldpucybw.cloudfront.net/sfimages/default-source/blogs/2022/2022-09/telerik-blazor-gantt-statemanagement.png?sfvrsn=77174966_3" title="Blazor Gantt State Management" alt="Blazor Gantt State Management" /></p><h3 id="blazor-gantt-rebind-method">Blazor Gantt Rebind Method</h3><p>The new Rebind method in the Telerik Blazor Gantt component allows you to easily trigger data processing logic in the TreeList and Timeline parts so that the UI reflects changes made in the data collection.</p><h3 id="blazor-gantt-tooltip-template-customization">Blazor Gantt ToolTip Template Customization</h3><p>The Blazor Gantt component tooltip template now includes StartDate and EndDate fields that include all relevant parts of a task&rsquo;s date (year, month, day, hours, minutes, etc.). The new date parameters are formatted according to the ISO 8601 standard
    and can be easily parsed as C# DateTime objects. This will help you transform and format the task dates to any format that is required in your Blazor applications</p><h3 id="blazor-gantt-new-parameters">Blazor Gantt New Parameters</h3><p>The <strong>FilterEditorFormat</strong> parameter of the Blazor Gantt component allows control over the format of the default filter. That way you can align the formatting of values in the column display and filter editor.</p><p>With the <strong>FilterOperators parameter</strong> you can customize the list of filter operators within the filter row and menus of the TreeList part in the Gantt component.</p><h3 id="header-template-in-multiple-blazor-components">Header Template in Multiple Blazor Components</h3><p>Using the new header templating feature, you can customize the content rendered in the <a href="https://demos.telerik.com/blazor-ui/calendar/templates" target="_blank">Blazor Calendar</a>, <a href="https://demos.telerik.com/blazor-ui/datepicker/templates" target="_blank">DatePicker</a> and <a href="https://demos.telerik.com/blazor-ui/daterangepicker/templates" target="_blank">DateRangePicker</a> component&rsquo;s header. Within the <code>&lt;HeaderTemplate&gt;</code> tag, you add render buttons, images or apply custom styling.</p><p><img src="https://d585tldpucybw.cloudfront.net/sfimages/default-source/blogs/2022/2022-09/telerik-blazor-calendar-header-template.png?sfvrsn=4210237a_3" title="Telerik Blazor Calendar-Header-Template" alt="Telerik Blazor Calendar-Header-Template" /></p><h3 id="customization-of-the-filter-default-operator">Customization of the Filter Default Operator</h3><p>The new <strong>DefaultOperator parameter</strong> of the <a href="https://demos.telerik.com/blazor-ui/filter/overview" target="_blank">Blazor Filter component</a> allows you to customize the default filter operator on a per-field
    basis (the filter that is preselected each time you add a new field). If it is left unassigned, the default operator will be set based on the data type.</p><h3 id="visual-studio-productivity-tools">Visual Studio Productivity Tools</h3><p>R3 2022 brings a large set of developer productivity features for working within Visual Studio. You can now speed development, configuration and upgrades in applications built with UI for Blazor components. The latest release of <a href="https://marketplace.visualstudio.com/items?itemName=TelerikInc.ProgressTelerikBlazorVSExtensions" target="_blank">Visual Studio Productivity Tools for Telerik UI for Blazor</a> includes the following list of enhancements:</p><ul><li><strong>UI for Blazor Visual Studio Scaffolder</strong> &ndash; brings quick scaffolding and data mocking for the most used data-bound components: the Data Grid, TreeList, Scheduler, Chart, ListView, Gantt, Form, Drawer, Menu, DropDownList, Upload,
        ComboBox and more.</li></ul><p><img src="https://d585tldpucybw.cloudfront.net/sfimages/default-source/blogs/2022/2022-09/ui-for-blazor-scaffolder.png?sfvrsn=81150b1d_3" title="UI-for-Blazor-Scaffolder" alt="UI-for-Blazor-Scaffolder" /></p><ul><li><p><strong>UI for Blazor Code Snippets Pack</strong> &ndash; boosts coding speed by allowing fast reference to UI components. You can type a shortcut (e.g., &ldquo;tb&rdquo; for Telerik Blazor) or directly the name of the component you need to plug.
            For example, typing &ldquo;grid&rdquo; or just &ldquo;gr&rdquo; will conveniently show a dropdown with the available snippet templates you can insert into your code.</p></li><li><p><strong>Visual Studio Upgrade Wizard</strong> &ndash; simplifies Telerik UI for Blazor version upgrades, includes updates to theme versions, and smooths transition from a trial to a license version of the product.</p></li></ul><p><img src="https://d585tldpucybw.cloudfront.net/sfimages/default-source/blogs/2022/2022-09/ui-for-blazor-upgrade-wizard-1---resized.png?sfvrsn=1f9d9e88_3" title="UI for Blazor Upgrade Wizard" alt="UI for Blazor Upgrade Wizard" /></p><ul><li><strong>Visual Studio Configuration of Projects</strong> &ndash; helps with the configuration of already existing Telerik UI for Blazor applications via a wizard, and includes settings like visual theme, use of CDN and localization.</li></ul><h3 id="new-themebuilder-and-themebuilder-pro">New ThemeBuilder and ThemeBuilder Pro</h3><p>Progress <a href="https://www.telerik.com/themebuilder" target="_blank">ThemeBuilder</a> has long been a popular tool for developers using Telerik and Kendo UI to customize the style of their components without having to write CSS. It has now been rebuilt for better performance and other productivity features such as the
    ability to save work and reuse it for multiple projects. For those who want to take customization of the Telerik UI for Blazor components to the next level, we are also introducing ThemeBuilder Pro!</p><p>For a full breakdown in what&rsquo;s new with the ThemeBuilder and what ThemeBuilder Pro includes, <a href="https://www.telerik.com/blogs/evolution-telerik-kendo-ui-themebuilder-tool" target="_blank">read the ThemeBuilder announcement blog post</a>.</p><p><img src="https://d585tldpucybw.cloudfront.net/sfimages/default-source/blogs/2022/2022-09/new-themebuilder.png?sfvrsn=81f96229_3" title="New ThemeBuilder" alt="New ThemeBuilder" /></p><h3 id="native-blazor-report-viewer">Native Blazor Report Viewer</h3><p>We are happy to announce that those of you who use Telerik UI for Blazor and need to implement reporting in your Blazor applications, our friends from the Telerik Reporting team have just shipped a brand-new native Blazor Report Viewer control.</p><p>The native version of the report viewer component brings a fluent user experience that blends with the rest of your Blazor application by using the same input controls and styling mechanism.</p><p>The first version of the <a href="https://docs.telerik.com/reporting/embedding-reports/display-reports-in-applications/web-application/native-blazor-report-viewer/overview" target="_blank">Telerik Blazor Report Viewer component</a> includes all the core functionalities for previewing interactive reports which will be further developed to include features such as Search and navigating back from a drill-through action.</p><p><img src="https://d585tldpucybw.cloudfront.net/sfimages/default-source/blogs/2022/2022-09/native-blazor-report-viewer-740.png?sfvrsn=3180cb97_3" title="Native Blazor Report Viewer" alt="Native Blazor Report Viewer" /></p><h3 id="telerik-repl-for-blazor-updates">Telerik REPL for Blazor Updates</h3><p>The Telerik REPL for Blazor received multiple updates and improvements&mdash;it now includes a new playful loading animation, adaptive layout and support for different version of Telerik UI for Blazor.</p><p><img src="https://d585tldpucybw.cloudfront.net/sfimages/default-source/blogs/2022/2022-09/blazor-repl-ninja-animation65eaefa0-2c14-445c-a6ae-c6bafe96162e.gif?sfvrsn=bca63fd9_3" style="display:block;margin-left:auto;margin-right:auto;" width="400" alt="Animated Telerik Ninja with a box catching icons as they drop" sf-size="135010" /></p><p>We ensured the REPL is responsive&mdash;you can now adapt, run and share code snippets seamlessly from smaller screen devices.</p><p><img src="https://d585tldpucybw.cloudfront.net/sfimages/default-source/blogs/2022/2022-09/telerik-blazor-repl-responsive-layout.gif?sfvrsn=dc8fed20_3" title="Telerik-Blazor-REPL-Responsive-Layout" alt="Telerik-Blazor-REPL-Responsive-Layout" /></p><p>Users are now able to change the underlying version of Telerik UI for Blazor when using the REPL and compile and render code using the selected version. Each Telerik UI for Blazor version comes with its package and static asset dependencies, allowing
    the user to use currently available swatches for each of the versions.</p><p><img src="https://d585tldpucybw.cloudfront.net/sfimages/default-source/blogs/2022/2022-09/repl-for-blazor---telerik-ui-versions.png?sfvrsn=8159b4a7_3" title="REPL for Blazor - Telerik UI versions" alt="REPL for Blazor - Telerik UI versions" /></p><p>Check out the latest updates in the <a href="https://blazorrepl.telerik.com" target="_blank">Telerik REPL for Blazor</a> now!</p><h3 id="multiple-new-parameters-in-fileselect-and-upload-components">Multiple New Parameters in FileSelect and Upload Components</h3><p>We exposed multiple parameters to enable further flexibility when working with the <a href="https://docs.telerik.com/blazor-ui/components/fileselect/overview" target="_blank">FileSelect</a> and <a href="https://docs.telerik.com/blazor-ui/components/upload/overview" target="_blank">Upload</a> components in Blazor applications. The new parameters include:</p><ul><li><strong>Id</strong> &ndash; allows you to associate the component with <code>&lt;label&gt;</code> tags and perform further references and checks</li><li><strong>Accept</strong> &ndash; easily configure which files should be visible in the browser&rsquo;s file select dialog</li><li><strong>Capture</strong> &ndash; renders as a capture HTML attribute of the <code>&lt;input type="file" /&gt;</code> and enables direct usage of the device camera instead of the file system</li></ul><h3 id="onopen-and-onclose-events-in-multiple-blazor-components">OnOpen and OnClose Events in Multiple Blazor Components</h3><p>The following list of UI for Blazor components are expanded with OnOpen and OnClose events: AutoComplete, ColorPicker, ComboBox, DatePicker, DateRangePicker, DateTimePicker, DropDownList, MultiSelect and TimePicker.</p><p>The OnOpen/OnClose events are triggered right before the underlying popup component is shown or hidden regardless of how the open/close is initiated&mdash;keyboard, mouse click or value change.</p><h3 id="responsiveness-and-adaptive-blazor-layout">Responsiveness and Adaptive Blazor Layout</h3><p>Throughout 2022 we have added multiple responsive features to the components (responsive Pager, Toolbar and scrollable TabStrip) and added some additional resources to demonstrate how you can easily make Blazor components and apps responsive to different
    screen sizes using the <a href="https://demos.telerik.com/blazor-ui/mediaquery/overview" target="_blank">UI for Blazor MediaQuery component</a>:</p><ul><li><a href="https://demos.telerik.com/blazor-ui/menu/adaptive" target="_blank">How to make responsive Menu components in Blazor Applications</a></li><li><a href="https://demos.telerik.com/blazor-ui/form/adaptive" target="_blank">How to make responsive Forms in Blazor Applications</a></li><li><a href="https://demos.telerik.com/blazor-ui/gridlayout/adaptive" target="_blank">How to make responsive Grid Layout in Blazor Applications</a></li></ul><p>You can also review a dedicated blog post on the topic of <a href="https://www.telerik.com/blogs/telerik-ui-blazor-heading-responsive-journey" target="_blank">Responsive Blazor Layouts</a>, and in R1 2023 we further plan to develop
    more adaptiveness and updated design for UI for Blazor DatePicker and select UI components.</p><p><img src="https://d585tldpucybw.cloudfront.net/sfimages/default-source/blogs/2022/2022-09/ui-for-blazor-gridlayout-responsive.gif?sfvrsn=d01cf462_3" title="UI for Blazor GridLayout-Responsive" alt="UI for Blazor GridLayout-Responsive" /></p><h3 id="updated-blazor-coffee-demo-app">Updated Blazor Coffee Demo App</h3><p>If you are in the beginning of your journey with Blazor and Telerik UI for Blazor, check out for ideas and inspiration the updated <a href="https://demos.telerik.com/blazor-coffee/" target="_blank">demo app Blazor Coffee Warehouse</a>.
 We updated the already existing application and have included examples of some of the most popular UI for Blazor components such as the Data Grid, Drawer, Charts, Inputs, Form and more. The app also demonstrates how users can easily change the theming
    and apply localization in Blazor apps.</p><p><img src="https://d585tldpucybw.cloudfront.net/sfimages/default-source/blogs/2022/2022-09/blazor-coffee-warehouse---grid.png?sfvrsn=cc90b66e_3" title="Blazor Coffee Warehouse - Grid" alt="Blazor Coffee Warehouse - Grid" /></p><h2 id="telerik-ui-for-aspnet-core-and-telerik-ui-for-aspnet-mvc">Telerik UI for ASP.NET Core and Telerik UI for ASP.NET MVC</h2><h3 id="cdn-licensing">CDN Licensing</h3><p>The way Telerik UI for ASP.NET Core and UI for ASP.NET MVC are licensed undergoes an important change in this release. R3 2022 introduces the requirement to add a license key whenever using the CDN to reference any Kendo UI for jQuery JavaScript and CSS
    files. Although the license key mechanism will not break any builds, it serves as a verification step, acknowledging that you are a licensed user. Applying a license key will be as simple as adding a single line of code to your project(s) and you
    can reference the dedicated resources on how to quickly set it up in your code:</p><p><a href="https://docs.telerik.com/aspnet-core/installation/adding-client-side-resources/using-license-code" target="_blank">Adding license code in UI for ASP.NET Core</a><br /><a href="https://docs.telerik.com/aspnet-mvc/installation/adding-client-side-resources/using-license-code" target="_blank">Adding license code in UI for ASP.NET MVC</a></p><h3 id="signature-ui-component">Signature UI Component</h3><p><img src="https://d585tldpucybw.cloudfront.net/sfimages/default-source/blogs/2022/2022-09/aspnet-signature.png?sfvrsn=ae7b4b53_3" title="ASP.NET Signature component" alt="ASP.NET Signature component" /></p><p>The new Signature component in Telerik UI for ASP.NET Core and MVC enables end users to draw a signature using a mouse or touch device. The key features that users can take advantage of to customize their signatures and adapt them to their needs include
    different canvas options, stroke width, size, color, background configuration, read-only state and more. </p><p>As an alternative to drawing, the Signature component also allows uploading of existing image format. For completeness of the use case of placing a signature in web applications, we have also included handy &ldquo;Save As&rdquo; and &ldquo;Clear&rdquo;
    buttons.
</p><p><a href="https://demos.telerik.com/aspnet-core/signature" target="_blank">See UI for ASP.NET Core Signature component demo.</a><br /><a href="https://demos.telerik.com/aspnet-mvc/signature" target="_blank">See UI for ASP.NET MVC Signature component demo.</a></p><h3 id="dropdownbutton-ui-component">DropDownButton UI Component</h3><p>The new DropDownButton component in Telerik UI for ASP.NET Core and MVC renders as a button that opens a popup list of action items. The DropDownButton component supports icons, images, data binding, keyboard navigation, accessibility and multiple
        appearance customization options.</p><p><img src="https://d585tldpucybw.cloudfront.net/sfimages/default-source/blogs/2022/2022-09/dropdownbutton-theming.gif?sfvrsn=35ad7d2a_3" title="DropDownButton-Theming" alt="DropDownButton-Theming" /></p><p><a href="https://demos.telerik.com/aspnet-core/dropdownbutton" target="_blank">See the UI for ASP.NET Core DropDownButton component demo.</a><br /><a href="https://demos.telerik.com/aspnet-mvc/dropdownbutton" target="_blank">See the UI for ASP.NET MVC DropDownButton UI component demo.</a></p><h3 id="splitbutton-ui-component">SplitButton UI Component</h3><p>The new SplitButton in Telerik UI for ASP.NET Core and MVC gives users a choice to execute the default button action or choose a secondary command from a related dropdown list. The SplitButton eliminates the need for multiple adjacent buttons, simplifies
        the application UI and saves screen real estate. It comes with built-in support for icons, multiple sizes, fill mode, theme color, disabling items, RTL support, keyboard navigation, accessibility and multiple UI customization options.</p><p><img src="https://d585tldpucybw.cloudfront.net/sfimages/default-source/blogs/2022/2022-09/splitbutton-theming.gif?sfvrsn=86cae2cf_3" title="SplitButton-Theming" alt="SplitButton-Theming" /></p><p><a href="https://demos.telerik.com/aspnet-core/splitbutton" target="_blank">See the UI for ASP.NET Core SplitButton component demo.</a><br /><a href="https://demos.telerik.com/aspnet-mvc/splitbutton" target="_blank">See the UI for ASP.NET MVC SplitButton UI component demo.</a></p><h3 id="accessibility-improvements">Accessibility Improvements</h3><p>The list of the UI components that we enhanced in Telerik UI for ASP.NET Core and MVC is long so here we will mention just the highlights: Drawer, Breadcrumb, TabStrip, TreeView, Pager, Editor, Toolbar, DateTimePickers and more.</p><p>Beyond updating our UI components to comply with Section 508, WCAG 2.1, and WAI-ARIA standards, R3 2022 introduces accessibility-specific demos that can be used to test any of our ASP.NET Core &amp; MVC components with screen readers and other software
        used to test accessibility. Anyone who needs to run accessibility tests on Telerik UI for <a href="https://www.telerik.com/aspnet-core-ui">ASP.NET Core components</a> can do so by <a href="https://demos.telerik.com/aspnet-core/accessibility" target="_blank">visiting a public URL</a>.
 The same option is also available for <a href="https://demos.telerik.com/aspnet-mvc/accessibility" target="_blank">MVC flavor of Telerik UI components</a>.</p><h3 id="datagrid-features-and-enhancements">DataGrid Features and Enhancements</h3><p>R3 2022 includes several Data Grid UX improvements such as adding a configuration option for enabling/disabling column menu as well as grouping and sorting enhancements.</p><p><strong>Enable/Disable Column Menu on a Per-Column Basis</strong><br />Enabling and disabling the Data Grid&rsquo;s column menu is now available out of the box on a per-column basis. With this new configuration option, developers have full control
        over which columns should display a column menu.</p><p><a href="https://demos.telerik.com/aspnet-core/grid/column-menu" target="_blank">See how to configure the UI for ASP.NET Core Grid column menu.</a><br /><a href="https://demos.telerik.com/aspnet-mvc/grid/column-menu" target="_blank">See how to configure the UI for ASP.NET MVC Grid column menu.</a></p><p><strong>Hide Currently Grouped Column</strong><br />Another Data Grid feature added in R3 2022 is the option to hide the column or field which is currently being grouped. Previously, every time a column was grouped, the column would always be displayed,
        which was not ideal for all the Grid use cases. The new option to hide columns/fields that are being used for grouping ensures flexibility for the .NET developers and smoother experience for the end user.</p><p><a href="https://demos.telerik.com/aspnet-core/grid/aggregates" target="_blank">See how to hide the currently grouped column in UI for ASP.NET Core Grid.</a><br /><a href="https://demos.telerik.com/aspnet-mvc/grid/aggregates" target="_blank">See how to hide the currently grouped column in UI for ASP.NET MVC Grid.</a></p><h3 id="fire-change-event-only-when-row-select-and-deselect-are-performed-within-multiple-asp.-net-core-components">Fire Change Event Only When Row Select and Deselect Are Performed Within Multiple ASP.NET Core Components</h3><p>In this release, we ship another improvement to anyone dealing with the <code>onChange</code> event when using the select functionality of the Telerik UI components. Previously, this event could be triggered when interacting with rows even when selecting
        or deselection did not occur. Now <code>onChange</code> event will only fire when a row is selected and deselected</p><p>The new behavior and change apply to following ASP.NET Core and MVC UI components&mdash;Grid, Calendar, MultiViewCalendar, Listbox, ListView, TreeList, FileManager, Gantt.</p><h3 id="pivotgrid-v2-local-data-binding">PivotGrid v2 Local Data Binding</h3><p>The local binding feature allows you to populate the Telerik PivotGrid v2 for ASP.NET Core and MVC with local flat data. When the component is configured for local binding, it will serialize the data as part of its data source and perform all data
        operations on the client. Now you can choose the preferred way to bind data to the PivotGrid: data located on a server somewhere (remote using OLAP) or through local binding.</p><p>For those unfamiliar, earlier this year the Telerik UI team released the new and revamped PivotGrid v2 component with a better user experience and design, overall improved performance, and more. Since the new PivotGrid component is being built from
        the ground up and PivotGrids are quite complex, we wanted to offer both editions of the PivotGrid (old and new) while we build out features in the new PivotGrid v2.</p><p><a href="https://demos.telerik.com/aspnet-core/pivotgridv2/local-flat-data-binding" target="_blank">See how to use local binding in the ASP.NET Core PivotGrid UI component.</a><br /><a href="https://demos.telerik.com/aspnet-mvc/pivotgridv2/local-flat-data-binding" target="_blank">See how to use local binding in the ASP.NET MVC PivotGrid UI component.</a></p><p><img src="https://d585tldpucybw.cloudfront.net/sfimages/default-source/blogs/2022/2022-09/pivotgridv2.png?sfvrsn=109ea8e_3" title="PivotGridv2" alt="PivotGridv2" /></p><h3 id="telerik-ui-for-asp.-net-mvc--core-api-improvements">Telerik UI for ASP.NET MVC &amp; Core API Improvements</h3><p>We are undertaking the effort to make improvements to the product&rsquo;s API in the next several releases. The goal is to address feedback we received regarding the level of details, descriptions and examples included in the API. With the current
        release, we have implemented improvements to several of the most used components&mdash;DataGrid, DropDownList, DatePicker, DateRangePicker, Data Source and Window. We will continue with the UI for ASP.NET Core and MVC API improvements throughout
        2023.
    </p><p><img src="https://d585tldpucybw.cloudfront.net/sfimages/default-source/blogs/2022/2022-09/api.png?sfvrsn=674a40eb_3" title="API improvements" alt="API illustration" /></p><h3 id="ui-for-asp.-net-core-visual-studio-productivity-tools">UI for ASP.NET Core Visual Studio Productivity Tools</h3><p><img src="https://d585tldpucybw.cloudfront.net/sfimages/default-source/blogs/2022/2022-09/asp-net-core-scaffolder-770x300-.png?sfvrsn=6095efdb_3" title="ASP-NET Core Scaffolder" alt="ASP-NET Core Scaffolder" /></p><p>The latest release of <a href="https://marketplace.visualstudio.com/items?itemName=TelerikInc.ProgressTelerikASPNETCoreVSExtensions" target="_blank">Visual Studio Productivity Tools for Telerik UI for ASP.NET Core</a> includes
        the following list of new productivity features:</p><ul><li><strong>UI for ASP.NET Core Visual Studio Scaffolder</strong> &ndash; allows quick scaffolding and mocking of data for some the most used data-bound components, such as the ASP.NET Core Data Grid, TreeList, Scheduler, ListView, Gantt, Chart, Form
            and Editor.</li><li><strong>UI for ASP.NET Core Code Snippets Pack</strong> &ndash; boosts coding speed by allowing fast reference to UI components. By typing a shortcut (e.g., &ldquo;tc&rdquo; for Telerik ASP.NET Core) or directly the name of the component you need
            to plug. For example, typing &ldquo;grid&rdquo; or just &ldquo;gr&rdquo; will conveniently show a dropdown with the available snippet templates for both HTML and TagHelpers which you can insert into your code.
        </li></ul><p><img src="https://d585tldpucybw.cloudfront.net/sfimages/default-source/blogs/2022/2022-09/vs-telerik-asp.net-core-code-snippets---grid---resized.png?sfvrsn=fad2a87e_3" title="VS Telerik ASP.NET Core Code Snippets" alt="VS Telerik ASP.NET Core Code Snippets" /></p><h3 id="ui-for-asp.-net-core-taghelper-snippets">UI for ASP.NET Core TagHelper Snippets</h3><p><a href="https://demos.telerik.com/aspnet-core/" target="_blank">Telerik UI for ASP.NET Core</a> offers HTML and TAG helpers options for initializing and configuring the UI components. Based on your feedback regarding the need
        for more TAG Helper demos and documentation, we made sure that there is a complete parity between all examples of the HTML and TAG Helpers, and you can now easily switch the component demos and documentation between HTML and TAG Helper View.</p><p><img src="https://d585tldpucybw.cloudfront.net/sfimages/default-source/blogs/2022/2022-09/telerikui-asp.net-core-html-tag-helper.gif?sfvrsn=e26bc730_3" title="TelerikUI-ASP.NET Core-HTML-Tag-Helper" alt="TelerikUI-ASP.NET Core-HTML-Tag-Helper" /></p><h2 id="telerik-ui-for-aspnet-ajax">Telerik UI for ASP.NET AJAX</h2><h3 id="floating-action-button">Floating Action Button</h3><p>UI for ASP.NET AJAX continues to grow, and in this release we included a brand-new Floating Action Button component (FAB). The FAB appears on top of all page content and presents the user with the primary action. When clicked, it either executes that
        action or shows additional action items. The UI for ASP.NET AJAX FloatingActionButton includes multiple configuration options for alignment, color, size and shape, plus the option to customize its content via templates.</p><p><a href="https://demos.telerik.com/aspnet-ajax/FloatingActionButton/overview/defaultcs.aspx" target="_blank">See the UI for ASP.NET AJAX Floating Action Button Component.</a></p><p><img src="https://d585tldpucybw.cloudfront.net/sfimages/default-source/blogs/2022/2022-09/floating-action-button---overview---templates.png?sfvrsn=7882f227_3" title="Floating Action Button - Overview - Templates" alt="Floating Action Button - Overview - Templates" /></p><h3 id="accessibility-improvements-1">Accessibility Improvements</h3><p>With R3 2022, we&rsquo;ve focused on further improving the components accessibility compliance. The release includes more than 30 accessibility fixes and improvements in multiple components&mdash; Calendar, Scheduler, ComboBox, DropDownList, Editor,
        FileExplorer, Input, DatePicker, DateRangePicker, Prompt, SearchBox, Spell, TabStrip, Window, Wizard, RadGrid, Filter, Splitter and more.</p><p>See the <a href="https://docs.telerik.com/devtools/aspnet-ajax/accessibility/accessibility-compliance" target="_blank">UI for ASP.NET AJAX Accessibility Compliance page</a> for more details.</p><h3 id="updated-vpat-document">Updated VPAT Document</h3><p>Along with the accessibility fixes and improvements, we have updated the existing Voluntary Product Accessibility Template (VPAT) for Telerik UI for ASP.NET AJAX. Now the document follows the latest version and include the latest accessibility improvements
        that have been made to our UI components. The latest version of the VPAT document is available <a href="https://docs.telerik.com/devtools/aspnet-ajax/accessibility/accessibility-overview#voluntary-product-accessibility-template" target="_blank">here</a>.</p><p><img src="https://d585tldpucybw.cloudfront.net/sfimages/default-source/blogs/2022/2022-09/vap---accessibility-770.png?sfvrsn=f65fab28_5" title="VPAT - Accessibility" alt="VPAT - Accessibility illustration" /></p><h2>Release Webinar &amp; Twitch Session</h2><h3 id="telerik-.net-web-desktop--mobile-products-webinar">Telerik .NET Web, Desktop &amp; Mobile Products Webinar</h3><p><a href="https://www.telerik.com/campaigns/telerik-r3-2022-release-webinar-web-desktop-mobile-products" target="_blank"><img src="https://d585tldpucybw.cloudfront.net/sfimages/default-source/blogs/2022/2022-09/telerik_blog-inline_image_1200x628.png?sfvrsn=9214f6db_3" alt="Telerik .NET Web, Desktop & Mobile Products R3 2022 Webinar" /></a></p><p><strong>Wednesday, September 21, 2022  | 11:00 a.m. &ndash; 1:00 p.m. ET</strong><br />
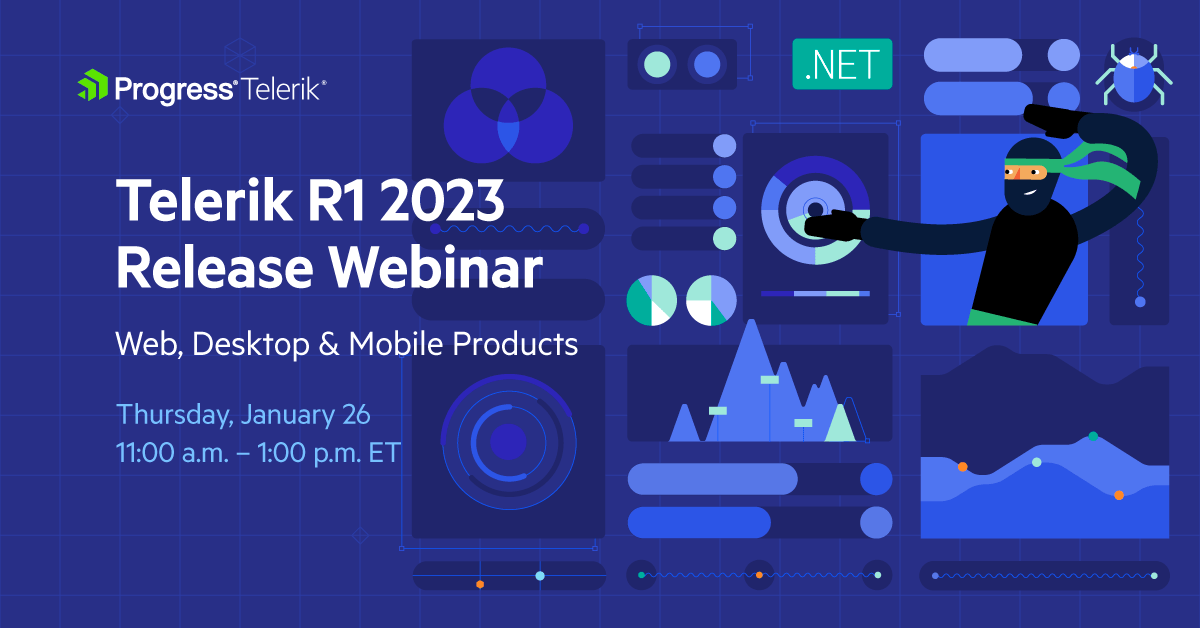
Discover all updates across Telerik UI for Blazor, UI for ASP.NET Core, UI for ASP.NET MVC, UI for ASP.NET AJAX, UI for WPF, UI for WinForms, UI for WinUI, UI for
        Xamarin and UI for .NET MAUI.</p><p><a href="https://www.telerik.com/campaigns/telerik-r3-2022-release-webinar-web-desktop-mobile-products" class="Btn" target="_blank">Save Your Seat</a></p><h3 id="join-us-on-twitch-today">Join Us on Twitch Today</h3><p><img src="https://d585tldpucybw.cloudfront.net/sfimages/default-source/blogs/2022/2022-06/devreach-2022-1200x303.png?sfvrsn=7223715e_3" alt="DevReach" /></p><p><strong>Live from Devreach&rsquo;22 @ Progress360</strong>: Join the <a href="https://twitch.tv/codeitlive" target="_blank"><strong>live community session</strong></a> from the Progress360 Streaming Studio on <strong>September 14 from  10 a.m. &ndash; 11:30 a.m. ET</strong> to hear the release highlights and celebrate the DevReach spirit with us at our Livestream Release Party.</p><h3 id="and-the-best-part-about-the-release-webinars">And the Best Part About the Release Webinars?</h3><p>The live webinars and Twitch sessions are a great opportunity for you to ask questions before and during the webinars. We&rsquo;ll be waiting to hear from you on Twitter&mdash;just use the <strong>#heyTelerik</strong> and <strong>#heyKendoUI</strong> hashtags.
 Another great option is the live chat during our release session on <a href="https://www.twitch.tv/codeitlive%22%20/t%20%22_blank" target="_blank"><strong>CodeItLive</strong></a><strong>, our Twitch channel</strong>.</p><img src="https://feeds.telerik.com/link/23051/15640778.gif" height="1" width="1"/>]]></content>
  </entry>
  <entry>
    <id>urn:uuid:211a6e98-b56b-4ac5-af3e-9a024b918411</id>
    <title type="text">Connecting a Web API With an ASP.NET Core MVC Application</title>
    <summary type="text">The Web API subject is very common in the world of software development, mainly in the context of .NET. But a question that many developers have is how the endpoints of an API are consumed—that is, how is a Web API integrated with another application? In this article,  we will do this integration in a simple way.</summary>
    <published>2022-08-15T07:15:04Z</published>
    <updated>2026-04-08T02:12:37Z</updated>
    <author>
      <name>Assis Zang </name>
    </author>
    <link rel="alternate" href="https://feeds.telerik.com/link/23051/15571639/connecting-web-api-aspnet-core-mvc-application"/>
    <content type="text"><![CDATA[<p><span class="featured">Web APIs are common especially in .NET development. But a question many developers have is how the endpoints of an API are consumed&mdash;that is, how is a Web API integrated with another application? In this article,  we will do this integration in a simple way.</span></p><p>Web APIs are present in most modern systems due to their high performance and ease of integration between different systems. In this context, there is a lot of content available related to APIs, but a very common question, especially for ASP.NET Core
    beginners, is how to integrate with an API and consume its endpoints. In this article, we will create from scratch a simple Web API and an application in ASP.NET Core and integrate it with this API in a simple way.</p><h2 id="useful-information">Useful Information</h2><p>The focus of this article will be the integration between a Web API and an ASP.NET Core application, so some subjects will not be covered in detail, such as &ldquo;What is a Web API&rdquo; for example. Feel free to browse the blog and deepen your knowledge
    of these subjects, if that is your objective.</p><p>Instead, we will take a hands-on approach and focus on the details of the integration between these technologies.</p><p>You can access the complete <a href="https://github.com/zangassis/weather-forecast-app" target="_blank">source code of the final project at this link</a>.</p><h2 id="creating-the-solution-and-web-api-project">Creating the Solution and Web API Project</h2><p>First, we will create the solution project, then we will create the Web API project&mdash;in this case, a minimal API available in .NET 6&mdash;and add it to the solution. So, in the terminal run the following commands:</p><pre><code>dotnet new sln --name WeatherForecast
dotnet new web --name WeatherForecast.Web.Api
dotnet sln add WeatherForecast.Web.Api/
</code></pre><p>Then you can open the file &ldquo;WeatherForecast.sln&rdquo; with your favorite IDE. In this article, I&rsquo;ll use Visual Studio 2022.</p><aside data-sf-ec-immutable=""><hr /><div class="row"><div class="col-4 u-normal-full u-small-mb0"><h4 class="u-fs20 u-fw5 u-lh125 u-mb0">Low Ceremony, High Value: A Tour of Minimal APIs in .NET 6</h4></div><div class="col-8"><p class="u-fs16 u-mb0">Minimal APIs allow you to build APIs without the overhead of the complicated MVC solution. <a href="https://www.telerik.com/blogs/low-ceremony-high-value-tour-minimal-apis-dotnet-6" target="_blank">Read more to understand how it all works, and what it means for building APIs in ASP.NET Core.</a>
 </p></div></div><hr class="u-mb3" /></aside><h3 id="creating-the-solution-entity">Creating the Solution Entity</h3><p>Our API will provide dummy weather data. Bellow, we will create an entity that will receive the properties, which will be displayed by the ASP.NET application that we will create later. So, inside the API project create a folder called &ldquo;Models&rdquo;
    and inside it create a class called &ldquo;WeatherForecastModel.&rdquo; Replace the generated code with the code below:</p><pre class=" language-csharp"><code class="prism  language-csharp"><span class="token keyword">namespace</span> WeatherForecast<span class="token punctuation">.</span>Web<span class="token punctuation">.</span>Api<span class="token punctuation">.</span>Models
<span class="token punctuation">{</span>
    <span class="token keyword">public</span> <span class="token keyword">class</span> <span class="token class-name">WeatherForecastModel</span>
    <span class="token punctuation">{</span>
        <span class="token keyword">public</span> DateTime Date <span class="token punctuation">{</span> <span class="token keyword">get</span><span class="token punctuation">;</span> <span class="token keyword">set</span><span class="token punctuation">;</span> <span class="token punctuation">}</span>
        <span class="token keyword">public</span> <span class="token keyword">int</span> TemperatureC <span class="token punctuation">{</span> <span class="token keyword">get</span><span class="token punctuation">;</span> <span class="token keyword">set</span><span class="token punctuation">;</span> <span class="token punctuation">}</span>
        <span class="token keyword">public</span> <span class="token keyword">int</span> TemperatureF <span class="token operator">=</span><span class="token operator">&gt;</span> <span class="token number">32</span> <span class="token operator">+</span> <span class="token punctuation">(</span><span class="token keyword">int</span><span class="token punctuation">)</span><span class="token punctuation">(</span>TemperatureC <span class="token operator">/</span> <span class="token number">0.5556</span><span class="token punctuation">)</span><span class="token punctuation">;</span>
        <span class="token keyword">public</span> <span class="token keyword">string</span> Summary <span class="token punctuation">{</span> <span class="token keyword">get</span><span class="token punctuation">;</span> <span class="token keyword">set</span><span class="token punctuation">;</span> <span class="token punctuation">}</span>
    <span class="token punctuation">}</span>
<span class="token punctuation">}</span>
</code></pre><h3 id="creating-the-endpoints">Creating the Endpoints</h3><p>Minimal APIs allow us to place the endpoints directly in the Program class; however, to make the code more organized, we will create them in a separate class. So, create a folder called &ldquo;Endpoints.&rdquo; Inside that, create a new class called &ldquo;LocationEndpointsConfig&rdquo;
    and replace the code with the below:</p><pre class=" language-csharp"><code class="prism  language-csharp"><span class="token keyword">using</span> WeatherForecast<span class="token punctuation">.</span>Web<span class="token punctuation">.</span>Api<span class="token punctuation">.</span>Models<span class="token punctuation">;</span>

<span class="token keyword">namespace</span> WeatherForecast<span class="token punctuation">.</span>Web<span class="token punctuation">.</span>Api<span class="token punctuation">.</span>Endpoints
<span class="token punctuation">{</span>
    <span class="token keyword">public</span> <span class="token keyword">class</span> <span class="token class-name">LocationEndpointsConfig</span>
    <span class="token punctuation">{</span>
        <span class="token keyword">private</span> <span class="token keyword">static</span> <span class="token keyword">readonly</span> <span class="token keyword">string</span><span class="token punctuation">[</span><span class="token punctuation">]</span> Summaries <span class="token operator">=</span> <span class="token keyword">new</span><span class="token punctuation">[</span><span class="token punctuation">]</span>
        <span class="token punctuation">{</span>
            <span class="token string">"Freezing"</span><span class="token punctuation">,</span> <span class="token string">"Bracing"</span><span class="token punctuation">,</span> <span class="token string">"Chilly"</span><span class="token punctuation">,</span> <span class="token string">"Cool"</span><span class="token punctuation">,</span> <span class="token string">"Mild"</span><span class="token punctuation">,</span> <span class="token string">"Warm"</span><span class="token punctuation">,</span> <span class="token string">"Balmy"</span><span class="token punctuation">,</span> <span class="token string">"Hot"</span><span class="token punctuation">,</span> <span class="token string">"Sweltering"</span><span class="token punctuation">,</span> <span class="token string">"Scorching"</span>
        <span class="token punctuation">}</span><span class="token punctuation">;</span>

        <span class="token keyword">public</span> <span class="token keyword">static</span> <span class="token keyword">void</span> <span class="token function">AddEndpoints</span><span class="token punctuation">(</span>WebApplication app<span class="token punctuation">)</span>
        <span class="token punctuation">{</span>
            app<span class="token punctuation">.</span><span class="token function">MapGet</span><span class="token punctuation">(</span><span class="token string">"api/find"</span><span class="token punctuation">,</span> <span class="token punctuation">(</span><span class="token punctuation">)</span> <span class="token operator">=</span><span class="token operator">&gt;</span>
            <span class="token punctuation">{</span>
                <span class="token keyword">var</span> rng <span class="token operator">=</span> <span class="token keyword">new</span> <span class="token class-name">Random</span><span class="token punctuation">(</span><span class="token punctuation">)</span><span class="token punctuation">;</span>
                <span class="token keyword">var</span> weatherForecast <span class="token operator">=</span> Enumerable<span class="token punctuation">.</span><span class="token function">Range</span><span class="token punctuation">(</span><span class="token number">1</span><span class="token punctuation">,</span> <span class="token number">5</span><span class="token punctuation">)</span><span class="token punctuation">.</span><span class="token function">Select</span><span class="token punctuation">(</span>index <span class="token operator">=</span><span class="token operator">&gt;</span> <span class="token keyword">new</span> <span class="token class-name">WeatherForecastModel</span>
                <span class="token punctuation">{</span>
                    Date <span class="token operator">=</span> DateTime<span class="token punctuation">.</span>Now<span class="token punctuation">.</span><span class="token function">AddDays</span><span class="token punctuation">(</span>index<span class="token punctuation">)</span><span class="token punctuation">,</span>
                    TemperatureC <span class="token operator">=</span> rng<span class="token punctuation">.</span><span class="token function">Next</span><span class="token punctuation">(</span><span class="token operator">-</span><span class="token number">20</span><span class="token punctuation">,</span> <span class="token number">55</span><span class="token punctuation">)</span><span class="token punctuation">,</span>
                    Summary <span class="token operator">=</span> Summaries<span class="token punctuation">[</span>rng<span class="token punctuation">.</span><span class="token function">Next</span><span class="token punctuation">(</span>Summaries<span class="token punctuation">.</span>Length<span class="token punctuation">)</span><span class="token punctuation">]</span>
                <span class="token punctuation">}</span><span class="token punctuation">)</span>
                <span class="token punctuation">.</span><span class="token function">ToArray</span><span class="token punctuation">(</span><span class="token punctuation">)</span><span class="token punctuation">;</span>

                <span class="token keyword">return</span> Results<span class="token punctuation">.</span><span class="token function">Ok</span><span class="token punctuation">(</span>weatherForecast<span class="token punctuation">)</span><span class="token punctuation">;</span>
            <span class="token punctuation">}</span><span class="token punctuation">)</span><span class="token punctuation">;</span>
        <span class="token punctuation">}</span>
    <span class="token punctuation">}</span>
<span class="token punctuation">}</span>
</code></pre><p>In this class, we are creating a GET endpoint that will generate some random data and return a &ldquo;WeatherForecastModel&rdquo; array filled with the generated data.</p><h3 id="configuring-the-endpoints">Configuring the Endpoints</h3><p>Now that we&rsquo;ve created the endpoint needed to return the data, we&rsquo;ll add the configuration of the class that has the endpoints. So replace the code of the &ldquo;Program&rdquo; class with the code below:</p><pre class=" language-csharp"><code class="prism  language-csharp"><span class="token keyword">using</span> WeatherForecast<span class="token punctuation">.</span>Web<span class="token punctuation">.</span>Api<span class="token punctuation">.</span>Endpoints<span class="token punctuation">;</span>

<span class="token keyword">var</span> builder <span class="token operator">=</span> WebApplication<span class="token punctuation">.</span><span class="token function">CreateBuilder</span><span class="token punctuation">(</span>args<span class="token punctuation">)</span><span class="token punctuation">;</span>
builder<span class="token punctuation">.</span>Services<span class="token punctuation">.</span><span class="token function">AddEndpointsApiExplorer</span><span class="token punctuation">(</span><span class="token punctuation">)</span><span class="token punctuation">;</span>

<span class="token keyword">var</span> app <span class="token operator">=</span> builder<span class="token punctuation">.</span><span class="token function">Build</span><span class="token punctuation">(</span><span class="token punctuation">)</span><span class="token punctuation">;</span>

LocationEndpointsConfig<span class="token punctuation">.</span><span class="token function">AddEndpoints</span><span class="token punctuation">(</span>app<span class="token punctuation">)</span><span class="token punctuation">;</span>

app<span class="token punctuation">.</span><span class="token function">Run</span><span class="token punctuation">(</span><span class="token punctuation">)</span><span class="token punctuation">;</span>
</code></pre><p>And then we can run the project. If we access the address &ldquo;https://localhost:&lt;PORT NUMBER&gt;/api/find,&rdquo; we will have the result below. In this article, Fiddler Everywhere will be used to consume the endpoint.</p><p>(As the data is random, it will probably be different on your machine.)</p><p><a href="https://d585tldpucybw.cloudfront.net/sfimages/default-source/blogs/2022/2022-02/find-data-by-fiddler.png?sfvrsn=a9e0c95e_2"><img src="https://d585tldpucybw.cloudfront.net/sfimages/default-source/blogs/2022/2022-02/find-data-by-fiddler.png?sfvrsn=a9e0c95e_2" title="find-data-by-fiddler" data-openoriginalimageonclick="true" data-displaymode="Original" alt="find-data-by-fiddler" /></a></p><p>With that, our Web API is ready and working. Now we need to create the application that will consume the endpoint we created.</p><h2 id="creating-the-web-app-project">Creating the Web App Project</h2><p>To consume the endpoint created earlier, we will create a simple application in ASP.NET Core MVC, which will make a request to the API and display the returned data. So, in the same directory where you created the API project, run the commands below,
    which will create the application project and add it to the solution.</p><pre><code>dotnet new mvc --name WeatherForecast.Web

dotnet sln add WeatherForecast.Web/
</code></pre><h3 id="creating-the-web-app-entity">Creating the Web App Entity</h3><p>In the &ldquo;WeatherForecast.Web&rdquo; project inside the &ldquo;Models&rdquo; folder create a new class called &ldquo;WeatherForecastModel,&rdquo; and replace the generated code with the code below:</p><pre class=" language-csharp"><code class="prism  language-csharp"><span class="token keyword">namespace</span> WeatherForecast<span class="token punctuation">.</span>Web<span class="token punctuation">.</span>Models
<span class="token punctuation">{</span>
    <span class="token keyword">public</span> <span class="token keyword">class</span> <span class="token class-name">WeatherForecastModel</span>
    <span class="token punctuation">{</span>
        <span class="token keyword">public</span> DateTime Date <span class="token punctuation">{</span> <span class="token keyword">get</span><span class="token punctuation">;</span> <span class="token keyword">set</span><span class="token punctuation">;</span> <span class="token punctuation">}</span>
        <span class="token keyword">public</span> <span class="token keyword">int</span> TemperatureC <span class="token punctuation">{</span> <span class="token keyword">get</span><span class="token punctuation">;</span> <span class="token keyword">set</span><span class="token punctuation">;</span> <span class="token punctuation">}</span>
        <span class="token keyword">public</span> <span class="token keyword">int</span> TemperatureF <span class="token punctuation">{</span> <span class="token keyword">get</span><span class="token punctuation">;</span> <span class="token keyword">set</span><span class="token punctuation">;</span> <span class="token punctuation">}</span>
        <span class="token keyword">public</span> <span class="token keyword">string</span> Summary <span class="token punctuation">{</span> <span class="token keyword">get</span><span class="token punctuation">;</span> <span class="token keyword">set</span><span class="token punctuation">;</span> <span class="token punctuation">}</span>
    <span class="token punctuation">}</span>
<span class="token punctuation">}</span>
</code></pre><h3 id="creating-the-client">Creating the Client</h3><p>The client will be responsible for direct communication with the API. It will contain a static method responsible for deserializing the API response and formatting it.</p><p>So, create a new folder called &ldquo;Helpers&rdquo; and add in it a new class called &ldquo;HttpClientExtensions,&rdquo; where you can replace the generated code with the code below:</p><pre class=" language-csharp"><code class="prism  language-csharp"><span class="token keyword">using</span> System<span class="token punctuation">.</span>Text<span class="token punctuation">.</span>Json<span class="token punctuation">;</span>

<span class="token keyword">namespace</span> WeatherForecast<span class="token punctuation">.</span>Web<span class="token punctuation">.</span>Helpers
<span class="token punctuation">{</span>
    <span class="token keyword">public</span> <span class="token keyword">static</span> <span class="token keyword">class</span> <span class="token class-name">HttpClientExtensions</span>
    <span class="token punctuation">{</span>
        <span class="token keyword">public</span> <span class="token keyword">static</span> <span class="token keyword">async</span> Task<span class="token operator">&lt;</span>T<span class="token operator">&gt;</span> <span class="token generic-method function">ReadContentAsync<span class="token punctuation">&lt;</span>T<span class="token punctuation">&gt;</span></span><span class="token punctuation">(</span><span class="token keyword">this</span> HttpResponseMessage response<span class="token punctuation">)</span>
        <span class="token punctuation">{</span>
            <span class="token keyword">if</span> <span class="token punctuation">(</span>response<span class="token punctuation">.</span>IsSuccessStatusCode <span class="token operator">==</span> <span class="token keyword">false</span><span class="token punctuation">)</span>
                <span class="token keyword">throw</span> <span class="token keyword">new</span> <span class="token class-name">ApplicationException</span><span class="token punctuation">(</span>$<span class="token string">"Something went wrong calling the API: {response.ReasonPhrase}"</span><span class="token punctuation">)</span><span class="token punctuation">;</span>

            <span class="token keyword">var</span> dataAsString <span class="token operator">=</span> <span class="token keyword">await</span> response<span class="token punctuation">.</span>Content<span class="token punctuation">.</span><span class="token function">ReadAsStringAsync</span><span class="token punctuation">(</span><span class="token punctuation">)</span><span class="token punctuation">.</span><span class="token function">ConfigureAwait</span><span class="token punctuation">(</span><span class="token keyword">false</span><span class="token punctuation">)</span><span class="token punctuation">;</span>

            <span class="token keyword">var</span> result <span class="token operator">=</span> JsonSerializer<span class="token punctuation">.</span><span class="token generic-method function">Deserialize<span class="token punctuation">&lt;</span>T<span class="token punctuation">&gt;</span></span><span class="token punctuation">(</span>
                dataAsString<span class="token punctuation">,</span> <span class="token keyword">new</span> <span class="token class-name">JsonSerializerOptions</span>
                <span class="token punctuation">{</span>
                    PropertyNameCaseInsensitive <span class="token operator">=</span> <span class="token keyword">true</span>
                <span class="token punctuation">}</span><span class="token punctuation">)</span><span class="token punctuation">;</span>

            <span class="token keyword">return</span> result<span class="token punctuation">;</span>
        <span class="token punctuation">}</span>
    <span class="token punctuation">}</span>
<span class="token punctuation">}</span>
</code></pre><h3 id="creating-the-service">Creating the Service</h3><p>The service class will be responsible for implementing the methods available in the client we just created&mdash;in this case, fetching the data through the API.</p><p>So, create a new folder called &ldquo;Services&rdquo; and inside it, a folder called &ldquo;Interfaces.&rdquo; Inside that folder, create a new interface called &ldquo;IWeatherForecastService&rdquo; and replace the generated code with the code below:</p><pre class=" language-csharp"><code class="prism  language-csharp"><span class="token keyword">using</span> WeatherForecast<span class="token punctuation">.</span>Web<span class="token punctuation">.</span>Models<span class="token punctuation">;</span>

<span class="token keyword">namespace</span> WeatherForecast<span class="token punctuation">.</span>Web<span class="token punctuation">.</span>Services<span class="token punctuation">.</span>Interfaces
<span class="token punctuation">{</span>
    <span class="token keyword">public</span> <span class="token keyword">interface</span> <span class="token class-name">IWeatherForecastService</span>
    <span class="token punctuation">{</span>
        Task<span class="token operator">&lt;</span>IEnumerable<span class="token operator">&lt;</span>WeatherForecastModel<span class="token operator">&gt;</span><span class="token operator">&gt;</span> <span class="token function">Find</span><span class="token punctuation">(</span><span class="token punctuation">)</span><span class="token punctuation">;</span>
    <span class="token punctuation">}</span>
<span class="token punctuation">}</span>
</code></pre><p>Now we will create the class that will implement the previous Interface. It will also consume the API endpoint through the route represented by the &ldquo;BasePath&rdquo; variable.</p><p>Inside the &ldquo;Services&rdquo; folder, create a class called &ldquo;WeatherForecastService&rdquo; and replace the generated code with the one below:</p><pre class=" language-csharp"><code class="prism  language-csharp"><span class="token keyword">using</span> WeatherForecast<span class="token punctuation">.</span>Web<span class="token punctuation">.</span>Models<span class="token punctuation">;</span>
<span class="token keyword">using</span> WeatherForecast<span class="token punctuation">.</span>Web<span class="token punctuation">.</span>Helpers<span class="token punctuation">;</span>
<span class="token keyword">using</span> WeatherForecast<span class="token punctuation">.</span>Web<span class="token punctuation">.</span>Services<span class="token punctuation">.</span>Interfaces<span class="token punctuation">;</span>

<span class="token keyword">namespace</span> WeatherForecast<span class="token punctuation">.</span>Web<span class="token punctuation">.</span>Services
<span class="token punctuation">{</span>
    <span class="token keyword">public</span> <span class="token keyword">class</span> <span class="token class-name">WeatherForecastService</span> <span class="token punctuation">:</span> IWeatherForecastService
    <span class="token punctuation">{</span>
        <span class="token keyword">private</span> <span class="token keyword">readonly</span> HttpClient _client<span class="token punctuation">;</span>
        <span class="token keyword">public</span> <span class="token keyword">const</span> <span class="token keyword">string</span> BasePath <span class="token operator">=</span> <span class="token string">"/api/find"</span><span class="token punctuation">;</span>

        <span class="token keyword">public</span> <span class="token function">WeatherForecastService</span><span class="token punctuation">(</span>HttpClient client<span class="token punctuation">)</span>
        <span class="token punctuation">{</span>
            _client <span class="token operator">=</span> client <span class="token operator">?</span><span class="token operator">?</span> <span class="token keyword">throw</span> <span class="token keyword">new</span> <span class="token class-name">ArgumentNullException</span><span class="token punctuation">(</span><span class="token function">nameof</span><span class="token punctuation">(</span>client<span class="token punctuation">)</span><span class="token punctuation">)</span><span class="token punctuation">;</span>
        <span class="token punctuation">}</span>

        <span class="token keyword">public</span> <span class="token keyword">async</span> Task<span class="token operator">&lt;</span>IEnumerable<span class="token operator">&lt;</span>WeatherForecastModel<span class="token operator">&gt;</span><span class="token operator">&gt;</span> <span class="token function">Find</span><span class="token punctuation">(</span><span class="token punctuation">)</span>
        <span class="token punctuation">{</span>
            <span class="token keyword">var</span> response <span class="token operator">=</span> <span class="token keyword">await</span> _client<span class="token punctuation">.</span><span class="token function">GetAsync</span><span class="token punctuation">(</span>BasePath<span class="token punctuation">)</span><span class="token punctuation">;</span>

            <span class="token keyword">return</span> <span class="token keyword">await</span> response<span class="token punctuation">.</span>ReadContentAsync<span class="token operator">&lt;</span>List<span class="token operator">&lt;</span>WeatherForecastModel<span class="token operator">&gt;</span><span class="token operator">&gt;</span><span class="token punctuation">(</span><span class="token punctuation">)</span><span class="token punctuation">;</span>
        <span class="token punctuation">}</span>
    <span class="token punctuation">}</span>
<span class="token punctuation">}</span>
</code></pre><h3 id="creating-the-controller">Creating the Controller</h3><p>The new controller will use the service method we just created and return the data to the frontend. So, inside the Controllers folder, create a new controller called &ldquo;WeatherForecastController,&rdquo; and replace your code with the lines below:</p><pre class=" language-csharp"><code class="prism  language-csharp"><span class="token keyword">using</span> Microsoft<span class="token punctuation">.</span>AspNetCore<span class="token punctuation">.</span>Mvc<span class="token punctuation">;</span>
<span class="token keyword">using</span> WeatherForecast<span class="token punctuation">.</span>Web<span class="token punctuation">.</span>Services<span class="token punctuation">.</span>Interfaces<span class="token punctuation">;</span>

<span class="token keyword">namespace</span> WeatherForecast<span class="token punctuation">.</span>Web<span class="token punctuation">.</span>Controllers
<span class="token punctuation">{</span>
    <span class="token keyword">public</span> <span class="token keyword">class</span> <span class="token class-name">WeatherForecastController</span> <span class="token punctuation">:</span> Controller
    <span class="token punctuation">{</span>
        <span class="token keyword">private</span> <span class="token keyword">readonly</span> IWeatherForecastService _service<span class="token punctuation">;</span>

        <span class="token keyword">public</span> <span class="token function">WeatherForecastController</span><span class="token punctuation">(</span>IWeatherForecastService service<span class="token punctuation">)</span>
        <span class="token punctuation">{</span>
            _service <span class="token operator">=</span> service <span class="token operator">?</span><span class="token operator">?</span> <span class="token keyword">throw</span> <span class="token keyword">new</span> <span class="token class-name">ArgumentNullException</span><span class="token punctuation">(</span><span class="token function">nameof</span><span class="token punctuation">(</span>service<span class="token punctuation">)</span><span class="token punctuation">)</span><span class="token punctuation">;</span>
        <span class="token punctuation">}</span>

        <span class="token keyword">public</span> <span class="token keyword">async</span> Task<span class="token operator">&lt;</span>IActionResult<span class="token operator">&gt;</span> <span class="token function">WeatherForecastIndex</span><span class="token punctuation">(</span><span class="token punctuation">)</span>
        <span class="token punctuation">{</span>
            <span class="token keyword">var</span> products <span class="token operator">=</span> <span class="token keyword">await</span> _service<span class="token punctuation">.</span><span class="token function">Find</span><span class="token punctuation">(</span><span class="token punctuation">)</span><span class="token punctuation">;</span>
            <span class="token keyword">return</span> <span class="token function">View</span><span class="token punctuation">(</span>products<span class="token punctuation">)</span><span class="token punctuation">;</span>
        <span class="token punctuation">}</span>
    <span class="token punctuation">}</span>
<span class="token punctuation">}</span>
</code></pre><h3 id="adding-service-settings">Adding Service Settings</h3><p>Now that we&rsquo;ve created the client, service and controller, we need to add their settings to the Program class. So, replace the code of the Program class with the block below. (Replace &ldquo;<code>&lt;PORT NUMBER&gt;</code>&rdquo; with
            the local API port.)</p><pre class=" language-csharp"><code class="prism  language-csharp"><span class="token keyword">using</span> WeatherForecast<span class="token punctuation">.</span>Web<span class="token punctuation">.</span>Services<span class="token punctuation">;</span>
<span class="token keyword">using</span> WeatherForecast<span class="token punctuation">.</span>Web<span class="token punctuation">.</span>Services<span class="token punctuation">.</span>Interfaces<span class="token punctuation">;</span>

<span class="token keyword">var</span> builder <span class="token operator">=</span> WebApplication<span class="token punctuation">.</span><span class="token function">CreateBuilder</span><span class="token punctuation">(</span>args<span class="token punctuation">)</span><span class="token punctuation">;</span>

<span class="token comment">// Add services to the container.</span>
builder<span class="token punctuation">.</span>Services<span class="token punctuation">.</span><span class="token function">AddControllersWithViews</span><span class="token punctuation">(</span><span class="token punctuation">)</span><span class="token punctuation">;</span>
builder<span class="token punctuation">.</span>Services<span class="token punctuation">.</span><span class="token generic-method function">AddHttpClient<span class="token punctuation">&lt;</span>IWeatherForecastService<span class="token punctuation">,</span> WeatherForecastService<span class="token punctuation">&gt;</span></span><span class="token punctuation">(</span>c <span class="token operator">=</span><span class="token operator">&gt;</span>
c<span class="token punctuation">.</span>BaseAddress <span class="token operator">=</span> <span class="token keyword">new</span> <span class="token class-name">Uri</span><span class="token punctuation">(</span><span class="token string">"https://localhost:&lt;PORT NUMBER&gt;/"</span><span class="token punctuation">)</span><span class="token punctuation">)</span><span class="token punctuation">;</span>

<span class="token keyword">var</span> app <span class="token operator">=</span> builder<span class="token punctuation">.</span><span class="token function">Build</span><span class="token punctuation">(</span><span class="token punctuation">)</span><span class="token punctuation">;</span>

<span class="token comment">// Configure the HTTP request pipeline.</span>
<span class="token keyword">if</span> <span class="token punctuation">(</span><span class="token operator">!</span>app<span class="token punctuation">.</span>Environment<span class="token punctuation">.</span><span class="token function">IsDevelopment</span><span class="token punctuation">(</span><span class="token punctuation">)</span><span class="token punctuation">)</span>
<span class="token punctuation">{</span>
    app<span class="token punctuation">.</span><span class="token function">UseExceptionHandler</span><span class="token punctuation">(</span><span class="token string">"/Home/Error"</span><span class="token punctuation">)</span><span class="token punctuation">;</span>
<span class="token punctuation">}</span>
app<span class="token punctuation">.</span><span class="token function">UseStaticFiles</span><span class="token punctuation">(</span><span class="token punctuation">)</span><span class="token punctuation">;</span>

app<span class="token punctuation">.</span><span class="token function">UseRouting</span><span class="token punctuation">(</span><span class="token punctuation">)</span><span class="token punctuation">;</span>

app<span class="token punctuation">.</span><span class="token function">UseAuthorization</span><span class="token punctuation">(</span><span class="token punctuation">)</span><span class="token punctuation">;</span>

app<span class="token punctuation">.</span><span class="token function">MapControllerRoute</span><span class="token punctuation">(</span>
    name<span class="token punctuation">:</span> <span class="token string">"default"</span><span class="token punctuation">,</span>
    pattern<span class="token punctuation">:</span> <span class="token string">"{controller=Home}/{action=Index}/{id?}"</span><span class="token punctuation">)</span><span class="token punctuation">;</span>

app<span class="token punctuation">.</span><span class="token function">Run</span><span class="token punctuation">(</span><span class="token punctuation">)</span><span class="token punctuation">;</span>
</code></pre><h3 id="configuring-the-frontend">Configuring the Frontend</h3><p>Our application is almost ready&mdash;we just need to configure the data display. For that, inside the &ldquo;Views&rdquo; folder, create a folder called &ldquo;WeatherForecast&rdquo; and inside it, a new view called &ldquo;WeatherForecastIndex.cshtml,&rdquo;
            where you can put the code below:</p><pre class=" language-csharp"><code class="prism  language-csharp">@model IEnumerable<span class="token operator">&lt;</span>WeatherForecast<span class="token punctuation">.</span>Web<span class="token punctuation">.</span>Models<span class="token punctuation">.</span>WeatherForecastModel<span class="token operator">&gt;</span>

<span class="token operator">&lt;</span>br<span class="token operator">/</span><span class="token operator">&gt;</span>
<span class="token operator">&lt;</span>table <span class="token keyword">class</span><span class="token operator">=</span><span class="token string">"table"</span><span class="token operator">&gt;</span>
        <span class="token operator">&lt;</span>tdead<span class="token operator">&gt;</span>
            <span class="token operator">&lt;</span>tr<span class="token operator">&gt;</span>
                <span class="token operator">&lt;</span>th<span class="token operator">&gt;</span>Date<span class="token operator">&lt;</span><span class="token operator">/</span>th<span class="token operator">&gt;</span>
                <span class="token operator">&lt;</span>th<span class="token operator">&gt;</span>Temperature C<span class="token operator">&lt;</span><span class="token operator">/</span>th<span class="token operator">&gt;</span>
                <span class="token operator">&lt;</span>th<span class="token operator">&gt;</span>Temperature F<span class="token operator">&lt;</span><span class="token operator">/</span>th<span class="token operator">&gt;</span>
                <span class="token operator">&lt;</span>th<span class="token operator">&gt;</span>Summary<span class="token operator">&lt;</span><span class="token operator">/</span>th<span class="token operator">&gt;</span>
            <span class="token operator">&lt;</span><span class="token operator">/</span>tr<span class="token operator">&gt;</span>
        <span class="token operator">&lt;</span><span class="token operator">/</span>tdead<span class="token operator">&gt;</span>
            <span class="token operator">&lt;</span>tbody<span class="token operator">&gt;</span>
                @<span class="token keyword">foreach</span> <span class="token punctuation">(</span><span class="token keyword">var</span> item <span class="token keyword">in</span> Model<span class="token punctuation">)</span>
               <span class="token punctuation">{</span>
                    <span class="token operator">&lt;</span>tr<span class="token operator">&gt;</span>
                        <span class="token operator">&lt;</span>td<span class="token operator">&gt;</span>@item<span class="token punctuation">.</span>Date<span class="token operator">&lt;</span><span class="token operator">/</span>td<span class="token operator">&gt;</span>
                        <span class="token operator">&lt;</span>td<span class="token operator">&gt;</span>@item<span class="token punctuation">.</span>TemperatureC<span class="token operator">&lt;</span><span class="token operator">/</span>td<span class="token operator">&gt;</span>
                        <span class="token operator">&lt;</span>td<span class="token operator">&gt;</span>@item<span class="token punctuation">.</span>TemperatureF<span class="token operator">&lt;</span><span class="token operator">/</span>td<span class="token operator">&gt;</span>
                        <span class="token operator">&lt;</span>td<span class="token operator">&gt;</span>@item<span class="token punctuation">.</span>Summary<span class="token operator">&lt;</span><span class="token operator">/</span>td<span class="token operator">&gt;</span>
                    <span class="token operator">&lt;</span><span class="token operator">/</span>tr<span class="token operator">&gt;</span>
               <span class="token punctuation">}</span>
            <span class="token operator">&lt;</span><span class="token operator">/</span>tbody<span class="token operator">&gt;</span>
    <span class="token operator">&lt;</span><span class="token operator">/</span>table<span class="token operator">&gt;</span>
<span class="token operator">&lt;</span><span class="token operator">/</span>div<span class="token operator">&gt;</span>
</code></pre><p>And in the file Views &gt; Shared &gt; _Layout.cshtml add the following code below the Privacy tag:</p><pre class=" language-html"><code class="prism  language-html"><span class="token tag"><span class="token tag"><span class="token punctuation">&lt;</span>li</span> <span class="token attr-name">class</span><span class="token attr-value"><span class="token punctuation">=</span><span class="token punctuation">"</span>nav-item<span class="token punctuation">"</span></span><span class="token punctuation">&gt;</span></span>
    <span class="token tag"><span class="token tag"><span class="token punctuation">&lt;</span>a</span> <span class="token attr-name">class</span><span class="token attr-value"><span class="token punctuation">=</span><span class="token punctuation">"</span>nav-link text-dark<span class="token punctuation">"</span></span> <span class="token attr-name">asp-area</span><span class="token attr-value"><span class="token punctuation">=</span><span class="token punctuation">"</span><span class="token punctuation">"</span></span> <span class="token attr-name">asp-controller</span><span class="token attr-value"><span class="token punctuation">=</span><span class="token punctuation">"</span>WeatherForecast<span class="token punctuation">"</span></span> <span class="token attr-name">asp-action</span><span class="token attr-value"><span class="token punctuation">=</span><span class="token punctuation">"</span>WeatherForecastIndex<span class="token punctuation">"</span></span><span class="token punctuation">&gt;</span></span>Weather Forecast<span class="token tag"><span class="token tag"><span class="token punctuation">&lt;/</span>a</span><span class="token punctuation">&gt;</span></span>
<span class="token tag"><span class="token tag"><span class="token punctuation">&lt;/</span>li</span><span class="token punctuation">&gt;</span></span>
</code></pre><h3 id="running-both-projects">Running Both Projects</h3><p>To run the API project at the same time as the application project, we need to configure it, as you can see in the image below:</p><p><a href="https://d585tldpucybw.cloudfront.net/sfimages/default-source/blogs/2022/2022-02/vs-settings.png?sfvrsn=2d6c6846_2"><img src="https://d585tldpucybw.cloudfront.net/sfimages/default-source/blogs/2022/2022-02/vs-settings.png?sfvrsn=2d6c6846_2" title="vs-settings" data-displaymode="Original" alt="vs-settings" data-openoriginalimageonclick="true" /></a></p><p>Finally, we can start the application&mdash;both the API project and the application project will be started. By clicking on the &ldquo;Weather Forecast&rdquo; menu, we will be redirected to another page where the API data will be displayed as
            in the GIF below:</p><p><img src="https://d585tldpucybw.cloudfront.net/sfimages/default-source/blogs/2022/2022-02/app-run.gif?sfvrsn=5b4bde00_2" title="app run" alt="App run" /></p><h2 id="conclusion">Conclusion</h2><p>In this article, we created a simple Web API and provided an endpoint to return random data. Next, we created an ASP.NET Core application that consumes this endpoint and displays the data in the browser.</p><p>There are many ways to do this communication, but the one taught in the article is certainly one of the simplest.</p><img src="https://feeds.telerik.com/link/23051/15571639.gif" height="1" width="1"/>]]></content>
  </entry>
</feed>
