
Implementing Email Confirmation from a Dialog in Telerik UI for ASP.NET Core

In this post, we’ll look at a feature often unnoticed: the ability to send emails immediately from a confirmation dialog.
Today I’ll teach you how to design a confirmation dialog that asks for user approval and sends an email upon confirmation—all inside your ASP.NET Core app. This seamless connection of user interaction and backend processing improves the user experience and streamlines your program’s operation.
To implement this functionality, we will use the Telerik UI for ASP.NET Core Dialog component.
What Is Telerik UI for ASP.NET Core?
Progress Telerik UI for ASP.NET Core is a professional-grade UI library suite of more than 110 performance-optimized components that allow you to deliver high-quality applications faster. Its components include the Grid, Scheduler, Chart, Editor and many others, all of which may be customized to visualize and manage your data. It also includes pre-installed but changeable themes for a professional appearance and feel.
These components are HTML and Tag helpers that wrap the HTML/JavaScript Kendo UI widgets and transport them to .NET Core. It addresses all app needs for data management, performance, UX, design and accessibility, among other things.
Telerik UI for ASP.NET Core has excellent support and award-winning documentation, code examples and training. You can start quickly and generate real results in hours rather than months.
If you want to give it a shot, it comes with a free 30-day trial. It’s a terrific approach to assess if it meets your requirements and can help you deliver projects more quickly and efficiently. Whether you’re already using it or learning about it for the first time, Telerik UI for ASP.NET Core is worth a look!
Starting the Solution
Let’s learn how to use Telerik UI to add a sophisticated email-sending dialog to make your ASP.NET Core applications more engaging and efficient!
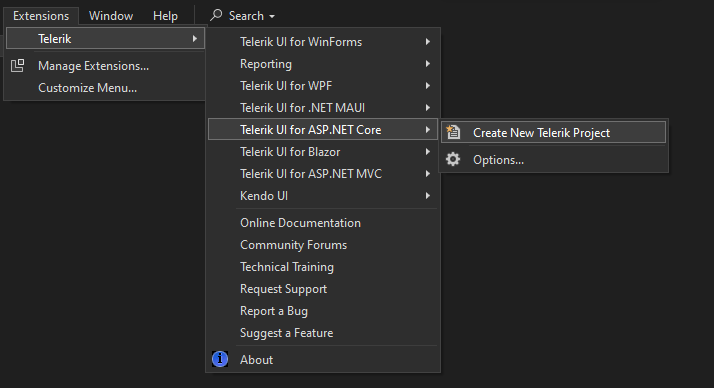
- Create your empty ASP.NET Core project following the Visual Studio Extensions menu after installing your trial or license:
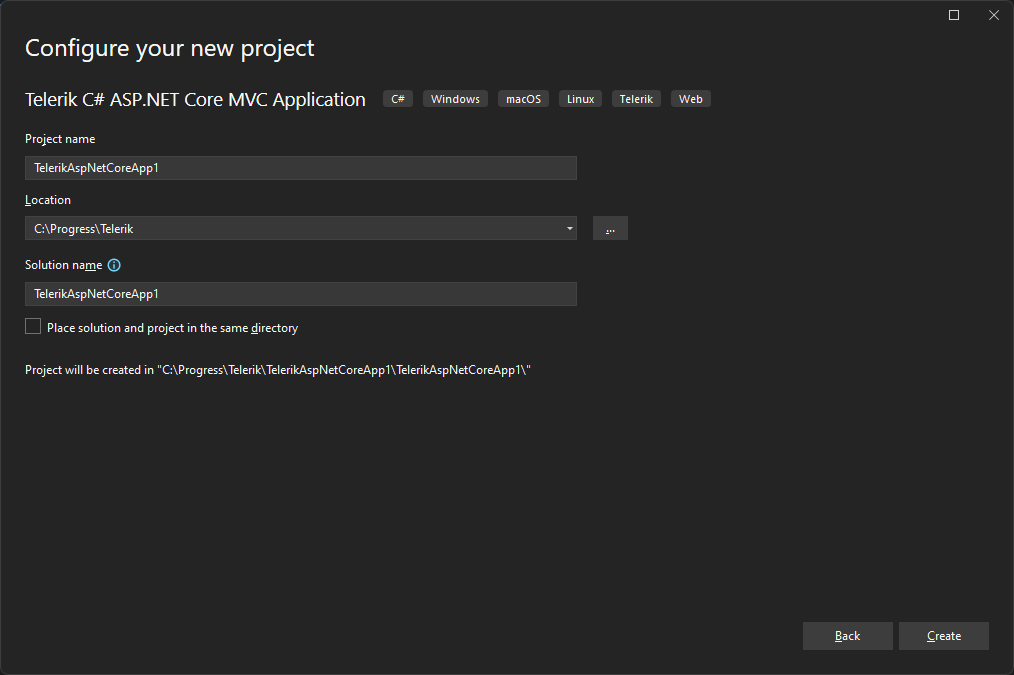
- Select the destination folder:
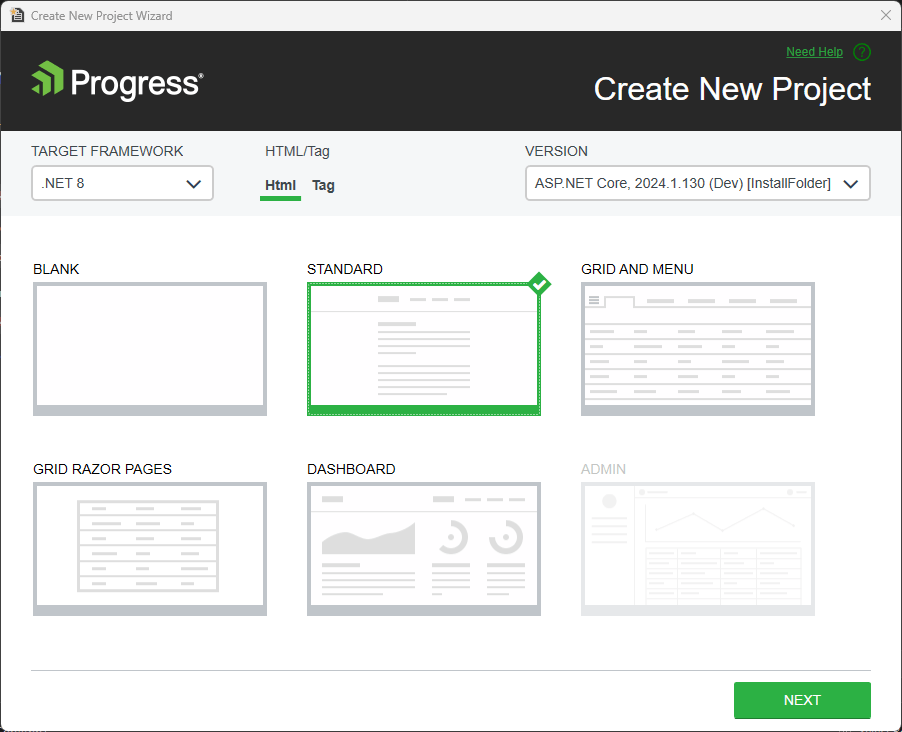
- Choose target framework and one of the available templates. In this post, I’m using the standard template:
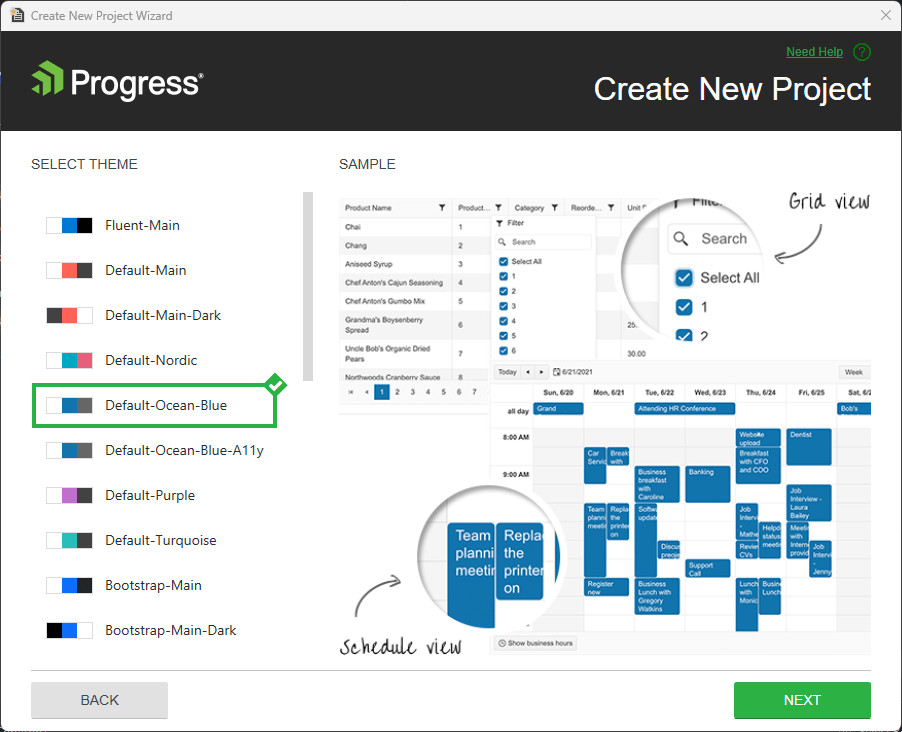
- Follow the steps and finish the wizard:
Editing the Code
Creating the Controller
We started creating the interface in the Home controller and adding it to the main menu.
At the HomeController, we add the action for the SendEmailConfirmation:
1.	    public IActionResult SendEmailConfirmation()
2.	    {
3.	        ViewData["Message"] = "Choose your plan";
4.
5.	        return View();
6.	    }
In the folder Shared, at the file _Layout.cshtml, we add the option menu for SendEmailConfirmation:
1.	  <kendo-responsivepanel name="responsive-panel" auto-close="false" breakpoint="768" orientation="top">
2.	      @(Html.Kendo().Menu()
3.	          .Name("Menu")
4.	          .Items(items =>
5.	          {
6.	              items.Add().Text("Home").Action("Index", "Home", new { area = "" });
7.	              items.Add().Text("Contact").Action("Contact", "Home", new { area = "" });
8.	              items.Add().Text("Confirmation").Action("SendEmailConfirmation", "Home", new { area = "" });
9.	          })
10.	      )
11.	  </kendo-responsivepanel>
Creating the file view SendEmailConfirmation.cshtml in the View folder:
1. @{
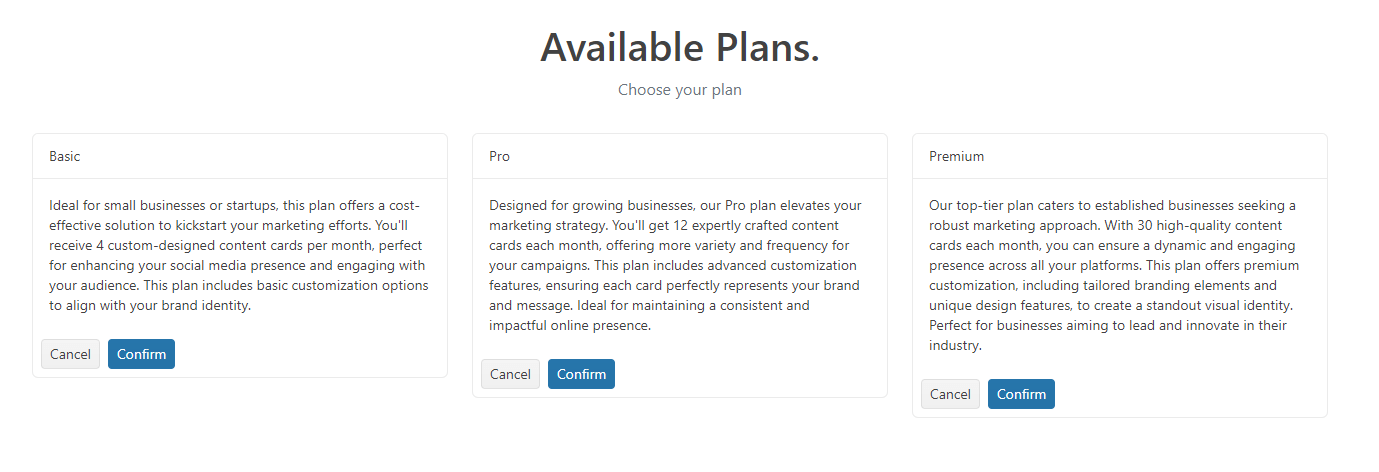
2. ViewData["Title"] = "Available Plans";
3. }
4.
5. <section class= “jumbotron text-center”>
6. <div class="container">
7. <h1 class="jumbotron-heading">@ViewBag.Title.</h1>
8. <p class="lead-text text-muted">@ViewBag.Message</p>
9. </div>
10. </section>
11.
12. <div class="row mb-3">
13. <div class="col-md mt-3 mb-3">
14. <div class="k-card">
15. <div class="k-card-header">
16. Basic
17. </div>
18. <div class="k-card-body">
19. <p>Ideal for small businesses or startups, this plan offers a cost-effective solution to kickstart your marketing efforts. You’ll receive 4 custom-designed monthly content cards, perfect for enhancing your social media presence and engaging with your audience. This plan includes basic customization options to align with your brand identity.</p>
20. </div>
21. <div class="k-card-actions">
22.
23. </div>
24. </div>
25. </div>
26.
27.
28. ...
Creating the Option Buttons
We need to add the options to the end user’s selection plan. For convenience, I’ll add only the basic plan code:
At the div <div class="k-card-actions"> we add the buttons Cancel and Confirm:
1.	    @(Html.Kendo().Button()
2.	        .Name("cancelBasic")
3.	        .Content("Cancel")
4.	        .Events(ev => { ev.Click("closePage"); }))
5.
6.	    @(Html.Kendo().Button()
7.	        .Name("confirmBasic")
8.	        .Content("Confirm")
9.	        .ThemeColor(ThemeColor.Primary)
10.	        .HtmlAttributes(new { type = "button", param = "BASIC" })
11.	        .Events(ev => {  ev.Click("sendConfirmation"); }))
The confirmBasic button adds the plan type string in the param attribute using the HtmlAttributes() method.
The primary color depends on the theme that is used. Add it to the button using the method ThemeColor(), with the property ThemeColor.Primary.
We repeat the process for the pro and premium plans.
Creating the DialogBox
Let’s create the Dialog:
1.	@(Html.Kendo().Dialog()
2.	            .Name("dialog")
3.	            .Title("Plan confirmation")
4.	            .Width(400)
5.	            .Modal(true)
6.	            .Visible(false)
7.	            .Actions(actions =>
8.	            {
9.	                actions.Add().Text("Cancel").Action("closePage");
10.	                actions.Add().Text("Send").Action("sendEmail").Primary(true);
11.	           }))
In this code, we added the Visible(false) option that will prevent the Dialog from showing up on page load.
We also configured our action buttons. We have the Cancel and the Send buttons in this sample. The actions specified for the buttons are defined in the JavaScript functions below:
1. <script>
2. let typePlan = "";
3.
4. function sendEmail() {
5.
6. var TypePlan = typePlan;
7.
8. $.ajax({
9. url: '/SendEmail/SendEmail',
10. type: ‘POST’,
11. data: { TypePlan: TypePlan },
12. success: function (response) {
13. $('#dialogSuccess').data("kendoDialog").open();
14. },
15. error: function (error) {
16. $('#dialogError').data("kendoDialog").open();
17. }
18. });
19. }
20. function sendConfirmation() {
21. typePlan = this.element.attr("param");
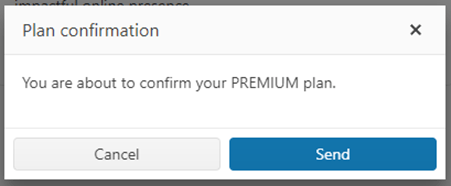
22. $('#dialog').html("<p>You are about to confirm your " + typePlan + " plan.</p>");
23. $('#dialog').data("kendoDialog").open();
24. }
25.
26. function closePage() {
27. window.location.href = '@Url.Action("Index", "Home")';
28. }
29. </script>
In the sendConfirmation() function, we read the type plan from the param attribute, add to the Dialog the HTML content for the message with the plan’s name and call the open() method to show the dialog.
Adding extra dialogs for success and error while sending the email confirmation:
1. @(Html.Kendo().Dialog()
2. .Name("dialogSuccess")
3. .Title("Success")
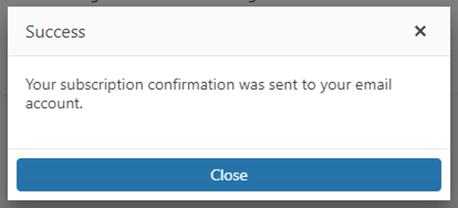
4. .Content("<p>Your subscription confirmation was send to your email account.<p>")
5. .Width(400)
6. .Modal(true)
7. .Visible(false)
8. .Actions(actions =>
9. {
10. actions.Add().Text("Close").Action("closePage").Primary(true);
11. }))
12.
13. @(Html.Kendo().Dialog()
14. .Name("dialogError")
15. .Title("Error")
16. .Content("<p>Occured an error sending your subscription to your email account. Please, try again later.<p>")
17. .Width(400)
18. .Modal(true)
19. .Visible(false)
20. .Actions(actions =>
21. {
22. actions.Add().Text("Close").Action("closePage").Primary(true);
23. }))
Code Behind
In this case, we create a specific Controller SendEmailController.cs that is called from JavaScript ajax:
1.	$.ajax({
2.	            url: '/SendEmail/SendEmail',
Source code for SendEmailController.cs:
1.	using Microsoft.AspNetCore.Mvc;
2.	using System.Net.Mail;
3.	using TelerikAspNetCoreApp1.CodeCS;
4.
5.	namespace TelerikAspNetCoreApp1.Controllers;
6.	public class SendEmailController : Controller
7.	{
8.	    public IActionResult SendEmail(string typePlan)
9.	    {
10.	        try
11.	        {
12.	            var email = new EmailSender(new SmtpClient());
13.
14.	            email.SendEmail("customer@email.com", "Confirmation " + typePlan, "This is the confirmation for your plan " + typePlan);
15.
16.	            return StatusCode(StatusCodes.Status200OK);
17.	        }
18.	        catch
19.	        {
20.	#if (DEBUG)
21.	            return StatusCode(StatusCodes.Status200OK);
22.	#else
23.	            return StatusCode(StatusCodes.Status500InternalServerError);
24.	#endif
25.	        }
26.	    }
27.	}
We can create a folder called CodeCS and add the EmailSender class:
1.	namespace TelerikAspNetCoreApp1.CodeCS;
2.
3.	using System.Net.Mail;
4.
5.	public class EmailSender
6.	{
7.	    private SmtpClient _smtpClient;
8.
9.	    public EmailSender(SmtpClient smtpClient)
10.	    {
11.	        _smtpClient = smtpClient;
12.	    }
13.
14.	    public void SendEmail(string emailTo, string subject, string message)
15.	    {
16.	        var mailMessage = new MailMessage("noreply@progress.com", emailTo, subject, message);
17.	        _smtpClient.Send(mailMessage);
18.	    }
19.	}
To make this code work, add your SmtpClient() parameters, adjust the MailMessage, and get the emailTo from your current logged user.
Result
This is the main page for choosing the plan:
Pressing Confirm on the Premium box raises the dialog confirmation:
Pressing Send raises the success message:
Check out the source code on my GitHub, and you can fork it anytime.
Conclusion
With Telerik UI for ASP.NET Core, it’s easy for dialogs to send events to actions. Users can get more done in less time because they can access many different tasks right away.
Sign up for a free trial on the Telerik website to start making valuable data solutions immediately. Even during your free trial, you’ll get help from the Telerik team—the best in the business.

Jefferson S. Motta
Jefferson S. Motta is a senior software developer, IT consultant and system analyst from Brazil, developing in the .NET platform since 2011. Creator of www.Advocati.NET, since 1997, a CRM for Brazilian Law Firms. He enjoys being with family and petting his cats in his free time. You can follow him on LinkedIn and GitHub.
Related Posts
Comments
All articles
Topics

Latest Stories
in Your Inbox
Subscribe to be the first to get our expert-written articles and tutorials for developers!
All fields are required